
Brazing, Soldering and Riveting, Pt. 1
This Time We’ll Look at Brazing and Some Aspects of Soldering. Use Them for Bonding & Repairs Without Welding.
In this two-part series I will discuss three non-welding fastening processes that are commonly used in the restoration of antique automobiles. Brazing and soldering rely on heat, of course, but they are different from welding in that the base metal is not melted and fused together. Instead, a filler metal forms a bond between two metals through surface adhesion. Riveting, on the other hand, is typically done cold, but you need to bring in a torch to install steel rivets successfully.
Brazing and Soldering
Brazing is useful for repairing cast iron, for joining dissimilar metals, and for building up worn gear teeth and other surfaces. One of the purported benefits for brazing is less heat distortion due to the lower temperatures involved compared with torch-welding. Although there is no disputing the temperature difference involved between torch-welding and brazing, I am dubious of the distortion claim. The metal still must be brought to a red heat to braze and the metal is heated more slowly than in torch-welding. In addition, brazing requires an overlapped joint, so there are two thicknesses of metal to heat. As a result, I believe that more total heat ends up in the panel than with welding. Also, an overlapped joint is thick and hard to finish compared with a welded butt joint. I would never choose brazing over welding when dealing with thin sheet metal, but brazing is still useful for the other purposes previously cited.
Brazing rods are made of brass, an alloy of zinc and copper, and must be used with a flux, which facilitates the flow of the molten filler rod and promotes good adhesion by dissolving oxides and preventing atmospheric contamination. Fluxes are available in a powdered form that you dip the hot filler rod into, or you can buy pre-coated filler rod. The pre-coated rod is convenient, but the flux cannot be mistreated or it will break off, and the rods need to be carefully stored to prevent the coating from absorbing moisture. Always match your fluxes to your processes; fluxes are not interchangeable.
During brazing, the base metal is heated red hot (for steel), and the filler metal is touched to the surface. If the rod and base metal do not get hot enough, the braze tends to form a clump on the surface. On the other hand, if the brazing material gets too hot, it swims across the surface, boils angrily, and gives off white smoke as the zinc is boiled away. The fumes given off by brazing fluxes and overheated brazing rod are bad for you, so always use adequate ventilation and keep your head out of the smoke. Because brazing relies on surface adhesion, you need joints with plenty of surface area, such as lap and strap joints, rather than butt joints. If you are building up material on a surface, as we will do in the demonstration piece (shown in accompanying photos), you won’t need an overlap, however.
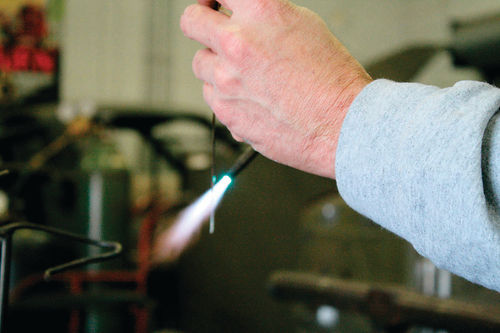
For brazing I usually use the same tip I use for sheet metal welding—a Victor 00, 0, or 1—unless the piece is really large, adjusted to a neutral flame. Because you are not trying to puddle the base metal, keep the torch tip back with the cone at least an inch or an inch and a half from the piece; you will be heating with the flame’s envelope. With the metal very clean, play the torch over the surface to heat it up. As soon as the surface gets dull red, play the torch over the end of the rod, dip it in the flux, and apply it to the work piece. For a brazed joint, you will want to make a series of tacks just as if you were welding and then travel down the seam. For building up an area, heat it, apply the rod, allow the rod to solidify by cooling slightly, and repeat the process. Don’t forget to keep applying flux to the rod as the rod is consumed.
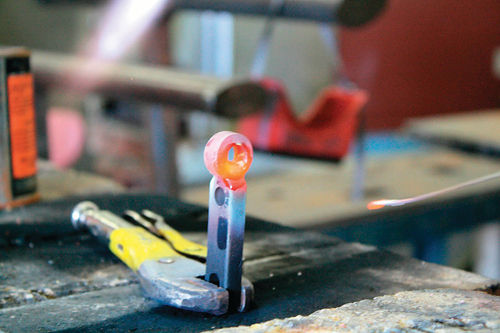
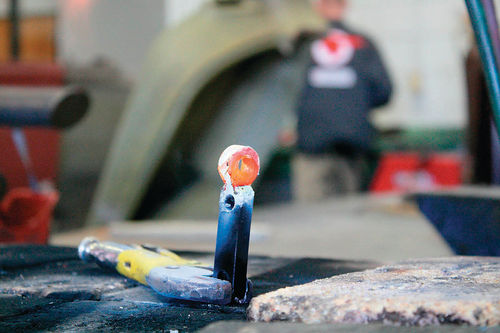
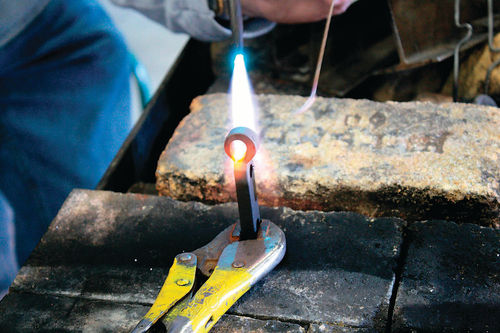
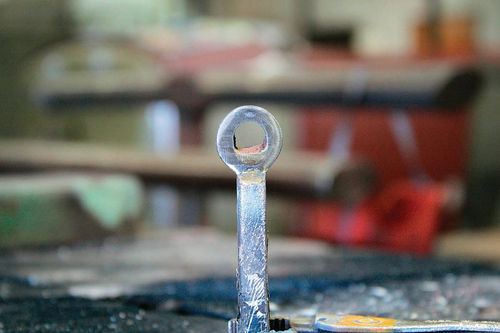
Part of the steering linkage on our 1908 Holsman project had a worn oblong hole that needed to be restored. Brazing seemed like an expedient technique for making the repair. We heated the piece red hot, heated the tip of the brazing rod, and dipped it into the flux. Because the hole was oblong by about ¼ inch on one side, several applications of brazing rod were needed to build up the inside of the opening. When we felt that we had added enough material, we allowed the piece to cool and scrubbed off the flux residue with a wire brush and water.
Silver and Soft Solders
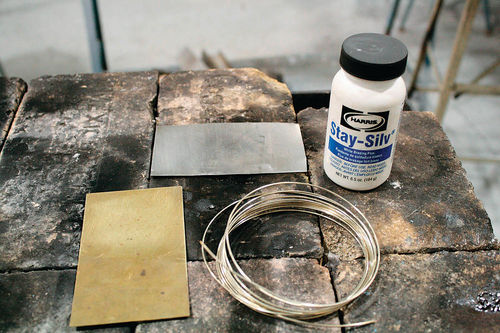
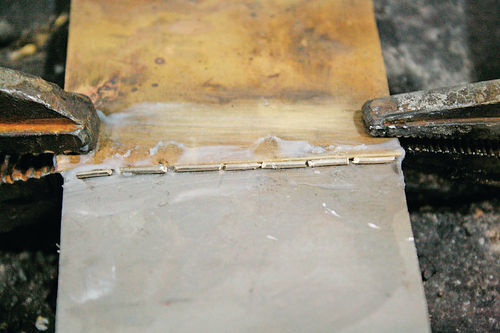
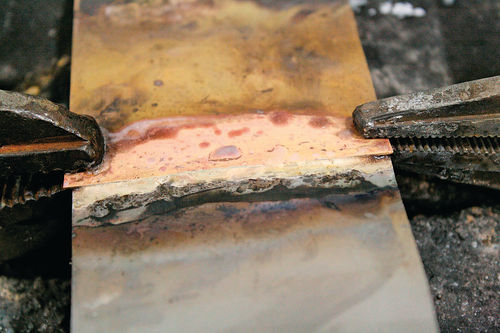
Like conventional brazing, silver soldering takes place at temperatures above 840 degrees Fahrenheit. We use silver solder occasionally in the restoration of antique cars to repair brightwork on brass-era cars. Silver solder is an alloy of silver, zinc and copper and requires a flux for successful application. Silver solder can join copper, brass, stainless steel, and mild steel. For the demonstration (shown here), we silver soldered a piece of brass to a piece of steel. We started with clean metal. We applied liquid silver soldering flux and added small snippets of silver solder. The solder can be applied directly from the wire, but it is easier to avoid applying too much solder by using the small pieces. The flux helps hold the pieces in position while the work is being heated. Gradual heating helps keep the flux from jumping off and disturbing the solder. With brazing and soldering generally, maintain a little clearance between the pieces to allow the solder to climb between them by capillary action. If the work pieces are clamped too tightly, the filler metal cannot get into the joint. Heat the work, not the solder, just enough to make the silver solder become liquid and flow, and then remove the torch.
Unlike silver solder, traditional soft solders melt below 840 degrees Fahrenheit. Two soft solders we use frequently are acid-core tin/lead solders and tin/ lead automotive body solder. Acid-core solder contains an acidic flux to clean the base metal to which it is applied to promote solder adhesion. We use acid-core in reattaching old soldered hard lines and for repairing containers. We use lead auto body solder to seal factory body seams and for repairs that will be subjected to vibration or high stress. I will discuss body solder momentarily.
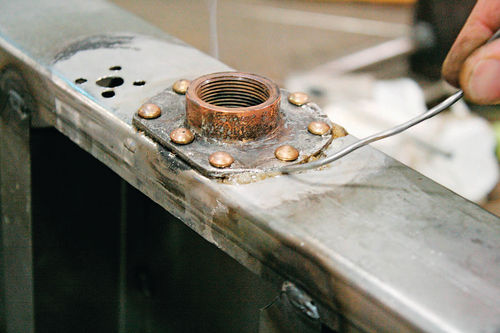
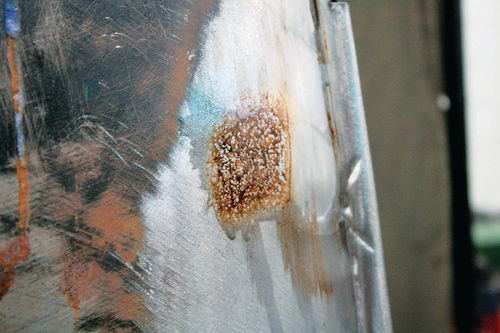
The acid-core solder demonstration piece is a new fuel tank that Brian Zale built for our 1908 Holsman. Brian removed all of the fittings from the original tank, cleaned them thoroughly, and tinned all of the surfaces that need to seal against the tank with Eastwood’s Tinning Butter. This product makes applying lead solder a breeze. The Tinning Butter acts as a flux and a tinning agent; it cleans the surface to which it is applied and lays down a thin layer of tin to which lead will happily adhere. Paint the Tinning Butter on with an acid brush, heat it until it turns dark brown, and lightly wipe it off with a cotton cloth. When applied correctly, a shiny layer of molten tin will be left behind the Tinning Butter. Brian also tinned the areas on the tank where the fittings attach. After riveting the fittings in place, Brian played a torch over the fittings and allowed acid-core solder to be pulled into the joints to seal the fittings against the tank. When he finished soldering, he brushed soapy water on the fittings and blew shop air against their back sides to check for leaks. When the tank was deemed leak-free, the soldered areas were scrubbed with a mixture of baking soda and water to neutralize the acids left by the acid-core solder.
Old-Fashioned Lead Body Solder
Automotive body solder, otherwise referred to as lead, was the precursor of the plastic body filler of today. Body solder is actually composed of mostly tin and lead. The numbers you see printed on sticks or spools of solder refer to the tin and lead content specifically and always in that order—tin/lead. Nowadays there are all kinds of permutations of solder that omit lead, but for auto body repair, you will most likely see 30/70 or 20/80, meaning that the solder is 30 percent tin and 70 percent lead and so forth. Actually, traces of other metals, like antimony, are in there, but the amount is small enough to disregard for labeling purposes. The presence of tin cuts the 620-degree melting point of pure lead in half and allows melting to take place over a range, rather than at a single fixed temperature. As a result, body solder has a gloriously wide temperature range—its pasty range—in which it can be paddled about like soft butter without becoming liquid. The presence of tin also improves the adhesion of the solder to the panel. Lead does not want to attach itself to automotive sheet metal otherwise. Increasing the amount of tin makes the solder harder and less flexible, and it narrows the solder’s pasty range. Therefore, 60/40 solder has a low melting point and almost no pasty range, both of which are desirable characteristics for electrical solder. As a side note, 63/37 solder is eutectic—it melts at a single temperature—so it works even better for electrical connections that need to be made instantaneously for good connectivity.
Lead is absolutely ideal for many auto body repairs because it is as tough as nails, it’s flexible, it can be hammered and shaped like the rest of a panel, and it doesn’t absorb moisture. Lead is not good for skim coating or covering large areas because of the amount of heat that would have to be applied, but it is the filler of choice around door and trunk openings, over factory welds along C-pillars, and anywhere else where vibration or stress would cause plastic filler to crack off in a heinous scab. We purchase our 30/70 body solder from Victory White Metals in Cleveland, Ohio, 50 pounds at a time for exactly half the cost of what you can expect to pay from one of the typical automotive restoration supply vendors.
Working With Lead
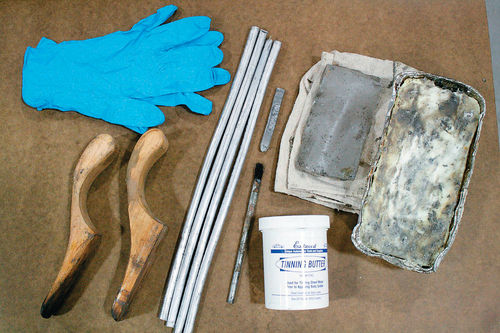
To apply lead, assemble the following supplies: Eastwood’s Tinning Butter with an acid brush, a clean cotton cloth (best) or paper towels, more lead sticks than you think you will need, maple paddles, tallow, a torch (oxy/acetylene, propane, or MAPP gas), eye protection, rubber gloves, and possibly a full-coverage respirator.
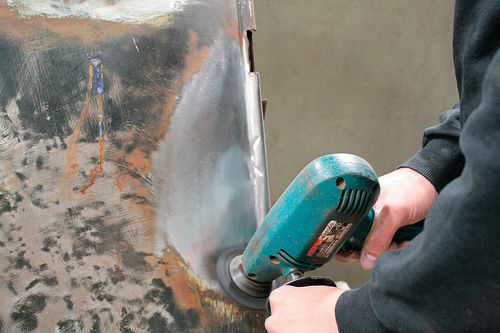
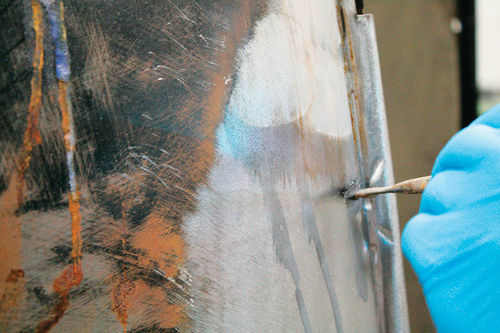
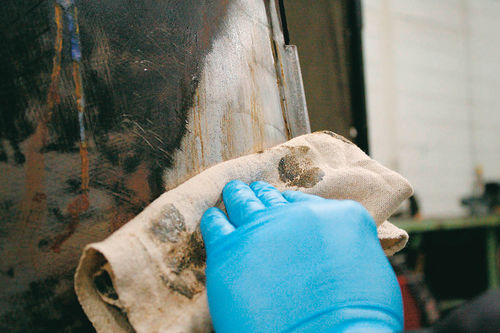
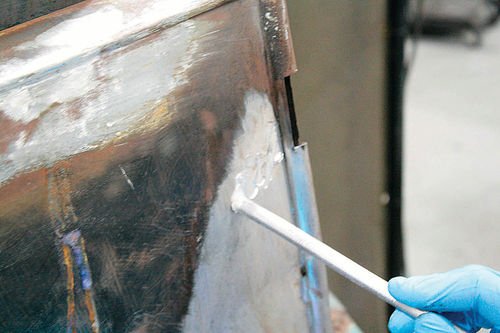
Thoroughly clean the surface of all dirt, oil, rust, paint, etc. The steel needs to be silvery clean. I like 3M’s cleaning discs, but Scotch-Brite discs or sandpaper will also work. If there is any remnant of rust, paint or dirt, the lead will not stick. Paint on Tinning Butter in small amounts—about a 2-inch-diameter circle at a time. As noted previously, heat the Tinning Butter until it turns dark brown, and gently wipe it with a cotton cloth. Do not overheat the Tinning Butter and cook it onto the panel or you will have to sand it off. Correctly applied, Tinning Butter facilitates the creation of a bond between the body solder and the steel panel that plastic filler cannot rival. The metal should be silver and super shiny where you’ve tinned and wiped. Wiping too hard removes the tin, so redo any areas where you are unsure because they look dull. Always tin a larger area than you think you will need. After tinning, wipe the panel off with white vinegar to neutralize acids left over from the Tinning Butter. (If you forget until after the lead has been applied, clean the metal with a metal conditioner after you have filed it.)
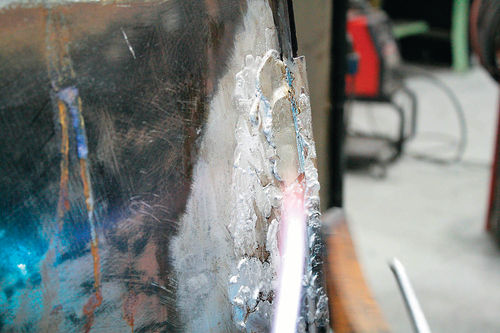
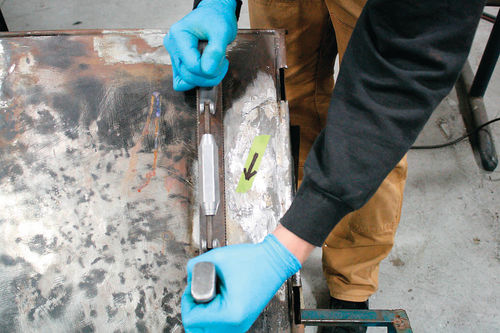
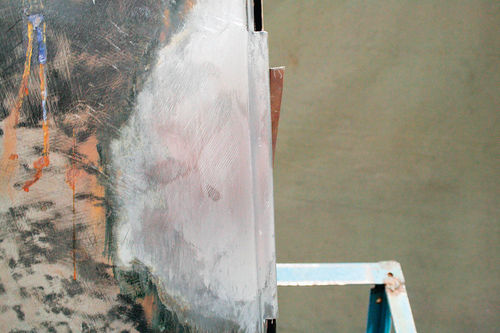
Heat the panel and scribble on it with a stick of solder as if it were a crayon. Scribble over the whole area you’ve tinned to lay down a thin layer of lead over the entire repair area. Now, working quickly, keep feeding in lead and paddling it out over the surface. File the lead to shape. Do not power sand because you do not want lead dust in the air. Collect your lead filings, seal them in a plastic container, and take them to a recycler. Never throw lead filings in the trash because they will eventually find their way into the groundwater.
Some Things to Avoid When Leading
Don’t overwork your lead. If you get greedy and try to craft a beautiful sculpture that needs no filing or finishing, your lead will get a strange surface as its constituent parts start to separate. For the same reason, don’t overheat your lead by dripping it onto the panel. Put on more lead than you think you’ll need. It is difficult to go back into a lead repair. Just as with old relationships, you can’t go back and recapture the magic. In the words of B. B. King, “The thrill is gone.” Revisiting a lead repair that has cooled is difficult because you will have a hard time reheating everything equally as it was when the repair was first made.
Furthermore, it is a good idea to wear rubber gloves any time you are dealing with lead. Lead can be absorbed through the skin, and its effects are cumulative over time. The worst things you can do are eat or smoke without washing your hands after leading. Overheating your Tinning Butter or your lead greatly increases the likelihood of noxious oxides being released into the air. Wash your hands thoroughly after you’ve even thought about lead or handled this page about lead.
According to T. N. Cowan, who has written the excellent book “Automotive Body Solder,” wearing a respirator is not necessary while leading as long as proper procedures are followed, but it can’t hurt to be overcautious.
Next, we’ll take a look at lead-free solder and riveting.
Editor’s note: This section is excerpted from the book “Professional Sheet Metal Fabrication” by Ed Barr and is part of the Motorbooks Workshop series. Barr originally received a BA degree from the University of the South in Sewanee, Tennessee, and an MA from the University of Kansas, and from 1999 to 2005 pursued a career in art museum administration. Then he made quite a career change and in 2007 earned a BS degree in automotive restoration technology from McPherson College in McPherson, Kansas. He went to work as a restoration professional and in 2010 joined the McPherson faculty where he teaches sheet metal restoration and the history of automotive design.
His 304-page book, with 559 colorphotos, is available for $39.99 from Motorbooks (motorbooks.com)


