Working With Water-Borne Paints
They’re Safer to Use and Allow More Time Between Coats. Clean-Up Is Easier & They Can Be Dried In Minutes.
TO DATE MYSELF, my introduction to water-borne paints came way back in the 1980s. GM attempted to make the switch from solvent-based colors to water-borne colors on some of their more economical vehicles. The dealers got on board, the paint manufacturers got on board, but the guys in the paint shops didn’t. Without the painters’ involvement, the switch was an absolute failure and before long we were back to spraying solvent-based colors.
I can’t speak to the quality of the water-borne colors back then, they may have been great. The problem with making the switch, in my opinion, was mostly due to a failure to properly educate the painters working in the GM dealership body shops. Painters simply won’t spray what they don’t understand.
The dealership painters preferred using the solvent-based colors they were already accustomed to working with and didn’t want to try paints they neither understood nor liked. That was understandable. Compared to solvent-based colors, water-borne colors sprayed differently, dried differently and laid on the surface differently.
They’re Back…
So what’s new and improved about the water-borne colors of today? Waterborne colors still have to be sprayed differently, they still dry differently, and they still lay differently. So nothing has changed in that department. The big difference is environmental-related. Waterborne colors aren’t packed with VOCs (volatile organic compounds) like their counterpart solvent-based colors, so that makes them safer to work around and less costly to use.
Need more? Water-borne colors are brilliant. I have to make the comparison between analog TV and high definition TV. Yellows are yellow and reds are red. If that’s hard to picture, think about your kids’ watercolors compared to the oil based paints at the home center. The watercolors are brilliant, not muddy, bland or off-color like oil-based paints.
Another difference is coverage. Auto Air Colors, the brand of water-borne paints I’ll be using for this test, makes the claim that an average-sized ride can be painted completely with about two quarts of color. Compare that to the eight quarts of solvent-based color I applied to Project ’46.
There also is no time window between coats when spraying water-borne colors. That means I can spray one color and wait three days if desired before applying additional colors or clear coating the finish. Cars like the ’46 Ford I just completed—with three different finish colors—will be a lot easier to paint.
Then there is the product compatibility issue. With water-borne paint, that problem doesn’t exist.
Auto-Air Colors can be used with any brand of urethane primer, paint or clear coat. You also can spray Auto-Air Colors over enamel, lacquer, urethane and epoxy
Stir, Don’t Shake
That’s what’s good about water-borne colors. Now for what’s different.
To start with, when you purchase your first can of water-borne color, do not place the can on a paint shaker. Doing so will cause the latex within the color to become aerated and foam up. The foam will not go away and you cannot spray aerated paint-foam. If you try to spray the foamed paint, the finish will have a strange mottled look to it. Instead of shaking the can I recommend opening the can and gently stirring the color to thoroughly mix the pigments.
Once properly stirred and mixed with reducer, water-borne colors must be sprayed with a wide open fan setting on the gun. Open the fan adjustment knob fully to provide as wide a fan pattern as possible. In my test the fan pattern was an oval about eight inches long.
Next the gun must be held a minimum of 12 inches from the surface being sprayed, as opposed to six to eight inches from the surface when spraying solvent based colors. Backing out 14 to 16 inches works even better, especially when spraying solid colors.
Next, the actual spray pass must be sped up. With the recent improvements made to clear coat products, I’ve had to learn to speed up my spray passes to help reduce orange peel—something like moving at a foot per second. But even that pass is not fast enough for spraying Auto-Air water-borne colors.
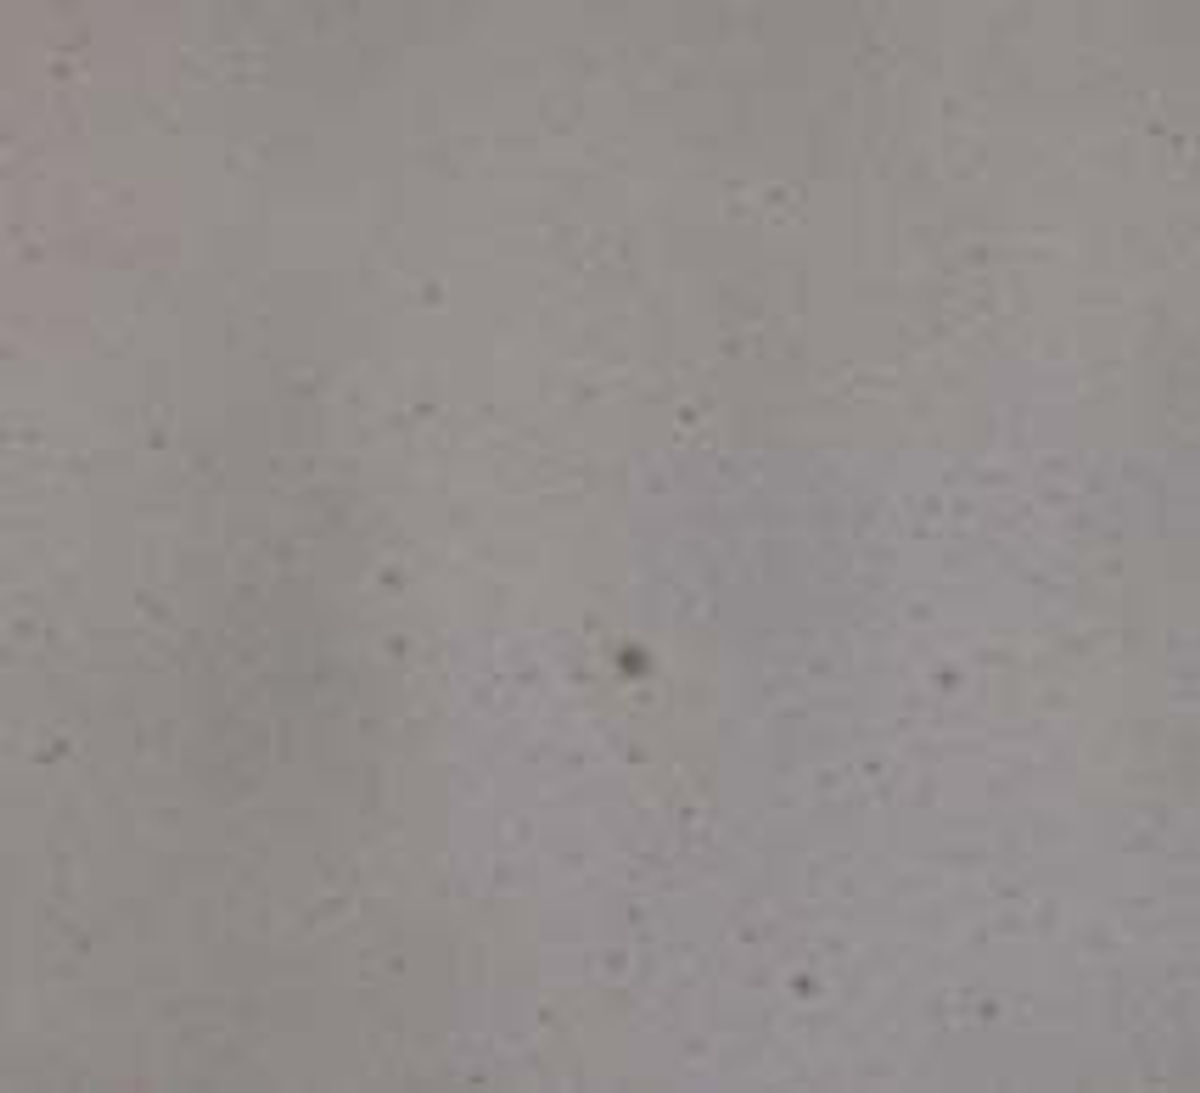
Exactly how fast is fast enough and how far away from the panel is far enough? Glad you asked. The best way to make that determination is to load the spray gun and spray a test panel. Check out the fish eye in Photo 1. What caused it? Holding the gun too close to the panel and not moving fast enough across the panel while spraying the water-borne color. If your water-borne colors grow fish eye, that is why. You do not have a contamination problem; your spray pass was much too wet. You need to speed up your pass and move the gun farther from the panel.
Working With a Mechanical Bond
What else is different is that waterborne colors use a mechanical bond to adhere the layers of paint together as opposed to using a chemical bond.
What’s the difference between a mechanical bond and a chemical bond? To avoid getting technical, I’ll stick with the simple explanation.
A chemical bond means that the layers of finish must flow together and bond on a molecular level in order to become a single layer of finish. It also means that you must observe the correct time windows with each coat sprayed for the chemical bonding to occur.
For example, if you spray three coats of solvent-based color on a panel you must cover those coats with a clear coat within 24 hours or the clear will not chemically bond with the color coats and the result will be a peeling clear coat because it did not stick, or bond, to the color coats.

Mechanical bonding means that the layers of paint adhere to each other much in the same way that two pieces of Velcro stick together. They haven’t flowed together, they have locked together. That means you can spray three coats of waterborne colors and wait three weeks before applying the clear coat and not have to worry about the clear adhering to the color coat. It will stick.
Now think about spraying a very intricate color scheme on a high-end ride using four or five different colors. It might take you three days to lay out and apply all of the colors. If the colors are solvent based you will have to stop somewhere in mid process and apply some clear to lock down the initial color coats. That clear will have to cure and be sanded before you can continue applying the remaining colors. But if you are spraying waterborne colors you can take all the time you want applying the multiple colors and never have to worry about the clear sticking or the need to sand that extra clear coat before continuing.
Meet the New Gun & Accessories
These are good things to know, but the real questions concerning the use of water-borne colors can only be answered by loading a spray gun and going to work.
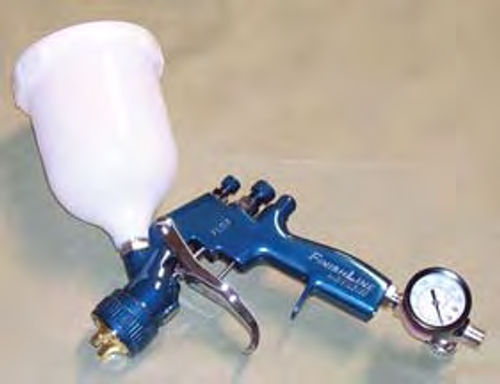
The spray gun of choice is a DeVilbiss FLG 647 WB spray gun (Photo 2). This gun is from Eastwood (#50998; $200) and comes with a gauged regulator, a 20 oz. plastic cup, a 1.3mm spray tip, a 1.5mm spray tip, a 1.8mm spray tip, and requires 16 cfm at 29 psi at the inlet.
This spray gun is from the DeVilbiss Finish Line series and the WB part stands for Water Base, which means this DeVilbiss spray gun is specifically designed and constructed for use with water-borne paints. All of the parts are either made of plastic, aluminum or stainless steel. No rust with this gun.
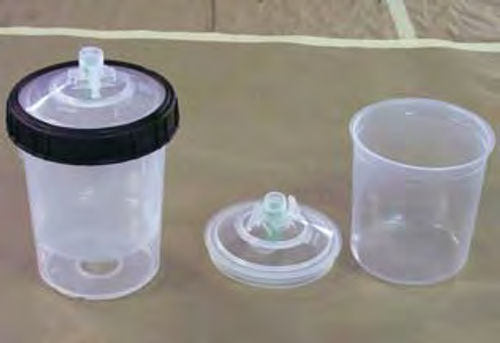
While this is an excellent spray gun as it comes straight out of the box, I’m going to make a modification that will improve on the shop use and environmentally friendly aspect of the gun by removing the plastic cup that came with the gun and convert the gun to use with 3M PPS (Paint Preparation System) disposable cups (Photo 3).
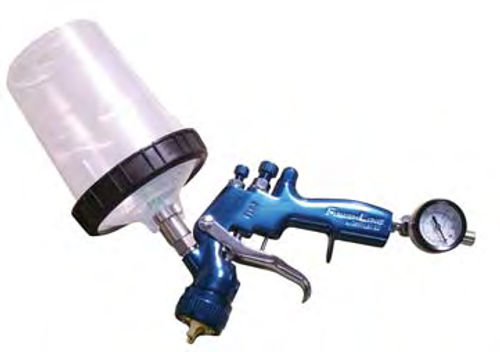
The change requires the addition of an adapter that will let me snap on and off the disposable cup system (Photo 4). That means I can load the disposable cup, spray until it is empty, snap off that cup and snap on another full disposable cup and go right back to spraying. I can even change colors in mid-stream if needed and not have to stop and clean the cup. This quick change system means less waste material generated and ultimately less clean-up time and less cost for me.
To install the adapter, I removed the plastic paint cup from the gun and screwed the adapter onto the gun in its place. The disposable cups then snap onto the adapter (Photo 5).
A tip: 3M carries PPS adapters to fit just about any spray gun out there. Check with your local paint supplier for the appropriate adapter for your spray gun.
The 3M PPS disposable cups are available in three sizes, the standard 20 oz. cup #16000, a large 32 oz. cup #16023, and a smaller 6 oz. cup #16115.
For my use I’ll go with the standard size cups, which will give me plenty of range for spraying large projects, and the mini cups, which will let me quickly move from color to color when spraying those more intricate paint schemes.
I know what you are thinking, and yes, I can clean out the spray gun between colors by running tap water into the adapter and through the gun to flush out the color residue.
Some Other Useful Products
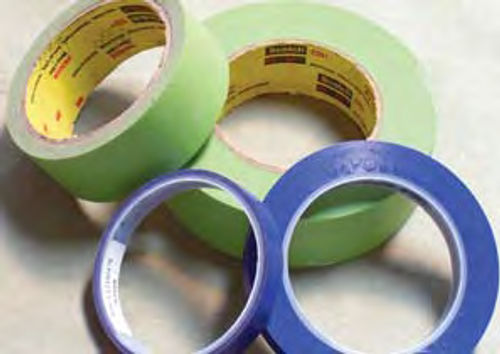
Making the switch to water-borne paint products also means upgrading the sanding, taping and masking products used. To that end, 3M recommends the use of Scotch Automotive Refinishing Masking Tape #26334 and #26338. In the shop we simply refer to these tapes as “3M green” because they are green in color. The #26334 tape is 3/4-inch wide and the #26338 tape is 11 ⁄2-inch wide. These are the most commonly used sizes (Photo 6).
3M also recommends using Scotch Block Masking Paper, which is gold in color, Scotch Fine Line Tape #417, referred to in the shop as “purple fine line tape,” shown in Photo 6 and for use when laying out two-tones, and 3M Purple Clean Sanding Disk #1811 (400 grit) and #1810 (500 grit).
The Purple Clean Sanding Disks were designed to meet the sand scratch filling requirements of water-borne paint products (water-borne paint will hide 400-grit sand scratches in urethane primer) and can be used either wet or dry.
Be aware that once the Auto-Air colors are sprayed on a panel, they recommend dry sanding should the panel finish require any sanding.
Use This & Watch the Paint Dry
The last piece of equipment needed for the conversion to water-borne paint products is an air gun. Water-borne paints must dry thoroughly before being recoated, two-toned or clear coated. Water-borne paints eventually will dry if left alone, but the best way to ensure that the paint dries completely and in a timely manner is to move air over the surface of the paint. You don’t need heated air, just moving air.

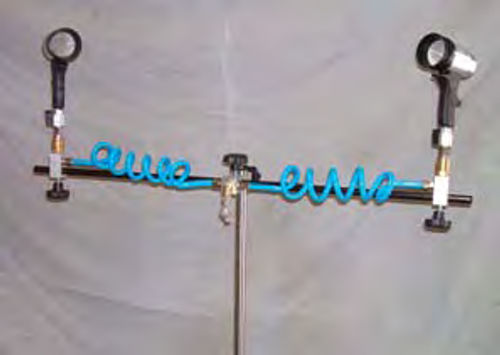
To move that air I opted for the Eastwood Waterborne 2-Gun and Stand kit #21151 (Photo 7; $170).
This is a stand-alone unit that can be moved anywhere in the shop and has twin air guns to get the air moving over the surface being painted. Just attach an air line, regulate the air pressure to about 40 psi at the inlet, turn it on and you can actually watch the paint flatten out and dull down as it dries. If you live in a humid climate the air gun kit is a must have to get the water-borne paints to dry.
So why is it so important to force dry the panel or panels being painted? It comes back to that mechanical bond thing. For the mechanical bond to work properly, the paint must dry thoroughly before the next coat is applied.
Now for the Real World
My test panel is a fiberglass fender. I’ve sanded the fender with 3M #1811, 400- grit, and it’s now ready for a coat of primer. I’ll spray on some Eastwood #50240 ZP urethane primer and give the panel three coats. Once the primer has cured overnight, I’ll sand it using 3M #1811 400- grit sandpaper and I’m ready for sealer.
Recall that I said water borne paint products are compatible with just about everything? Had I been working on a frame, for example, I would have coated the frame with Eastwood #50242 ZP epoxy primer, because epoxy is a little more rust resistant than urethane, then sanded the cured surface with 3M #1811, 400-grit, sand paper and followed that with a coat of Auto-Air sealer.
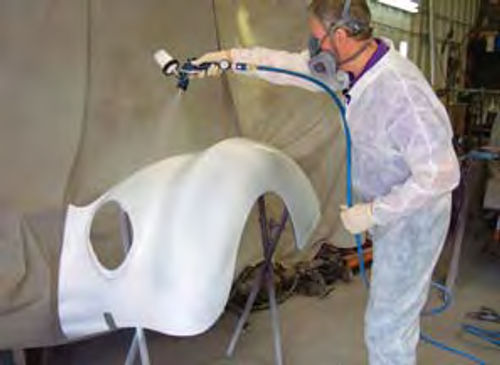
The sealer I’ve selected for my fender is Auto-Air Sealer White #4001. This is a low build sealer that will stick to just about any surface. Mixed at a 9 to 1 ratio, nine parts sealer to one part #4011 Reducer, I applied two coats using the DeVilbiss FLG 647 WB set to 29 psi at the inlet with an eight-inch wide oval spray pattern. I’ll also use the 1.3mm spray tip and hold the gun at least 12 inches from the surface (Photo 8).
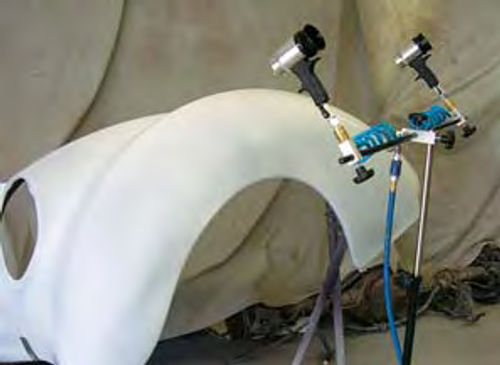
To be sure the first coat of sealer is dry, I use the 2-Gun unit to dry the sealer before the next coat is applied (Photo 9).
The color I selected is a very bright yellow, Auto-Air #4201-04, Series 4200 Semi-Opaque Lemon Yellow. Thus the reason for applying the white seal coat. I want the yellow to stay bright, and the white seal coat will help in that area.
A tip: Auto-Air also makes a dark sealer #4002 that works great for spraying darker colors and Auto-Air high pearl content Sparklescent Colors.
The Tale of the Tape
The Lemon Yellow color coat mixes the same as the sealer, 9 to 1, nine parts color to one part #4011 Reducer, and is sprayed using the DeVilbiss FLG 647 WB with the 1.3mm spray tip. I maintained the same wide spray pattern as I used for the seal coat, the same 12-inch distance from the panel, and the same recommended 29 psi at the gun inlet.
Notice in Photo 10 that the yellow appears to be going on very wet and shiny. I think this is more due to the color drying slower than did the seal coat than to anything else. I still applied this coat very light and fast. Also notice the distance between the gun and the surface. There is a full 12 inches between the two.
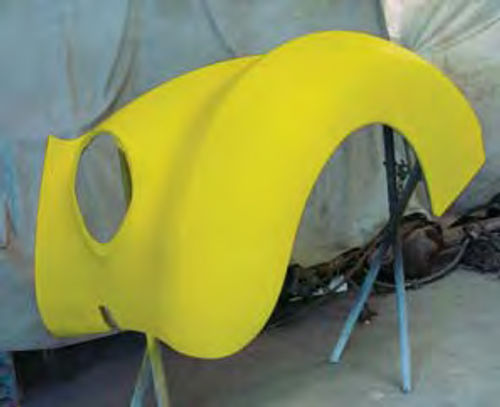
Now look at the fender after force drying it for five minutes (Photo 11).
The yellow has dried completely and the wet, shiny look is gone. The surface looks almost soft to the touch, but I can assure you that the finish is very durable. How durable?
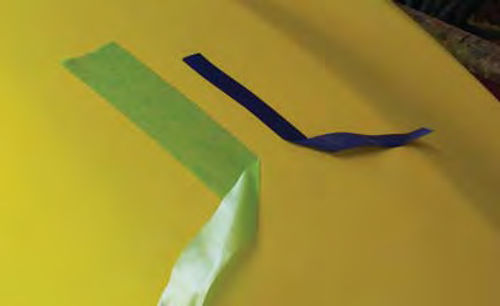
Take a look at Photo 12. I gave the panel the tape test with both 3M Green masking tape and 3M Purple Fine Line tape. As you can see, when I pulled the tapes back neither lifted any of the paint. The surface is completely bonded and dry. You won’t even find any “tape tracks” common to solvent-based colors after they are taped for two-tones or stripes. Try this trick with solvent-based paints and you’ll be spending some quality time with a sanding block trying to fix your mess.
At this point I can either tape off the surface to do a two-tone, add some flames or complete this panel with a couple of coats of clear. I think I’ll forgo doing any of the above as this was a test of water-borne paints, not two-toning or clear coating.
What I learned from this is that water-borne paints are very easy to work with. I especially like the idea of being able to recoat the finish at any point in the repair without having to first sand the finish. That’s going to make life in the paint shop much easier. I also like the idea of being able to clean the spray gun with tap water instead of lacquer thinner. I can purchase pure water at the local megamart for less than a buck a gallon and use that to clean my spray guns if desired. Or I can stick with the solvent based colors and spend 15 bucks a gallon for lacquer thinner to clean my spray guns. Fifteen vs. one? Yeah, I’m starting to like water-borne paints.
What’s Their Track Record?
Of course the important question is, will water-borne paints hold up in the long run? I contacted Auto Air and learned they have been in the water borne paint business for more than 20 years and have had very few problems. I also talked to my PPG rep, who is now kicking himself for not getting to me earlier concerning water borne paints. He tells me PPG has also entered into the world of water-borne colors and that they have been thoroughly tested and should be as bulletproof as their solvent-based colors, just easier to work with. PPG will also offer a full warranty on any water-borne finish applied by a qualified shop.
Resources
LPL Body Works, LLC
5815Contented Lane
Amarillo, TX 79109
Paint and body repair DVDs
Auto-Air Colors
14 Airport Park Road
East Granby, CT 06026
Eastwood Company
263 Shoemaker Road
Pottstown, PA 19464
DeVilbiss
3M
St. Paul, MN 55144-1000


