How -to Air Brushes Revisited
Yes, They’re Good for Adding Bright Graphics to Your Ride. But They’re Also Useful for Making Small Repairs.
FOR MANY CAR guys the mention of air brush work conjures up thoughts of flames across the front of a ’50s hot rod or intricate designs laid out over the hood of a very expensive street rod.
On the other hand, air brushing rarely brings to mind a method to make a small paint repair on a panel that might otherwise require complete refinishing. That is where I want to go, to a place where even extreme air brush novices like myself can put one of these tools to work and save a bundle of money in the refinishing repair department.
A Few Choice Air Brushes
We start with a look at a few air brushes
(Photo 1). The first two pictured, left to right, are from Eastwood, the Eastwood Concours AirBrush #12795 and the Eastwood Gravity Feed Trigger Style AirBrush #11612. Both of these brushes are considered professional grade and will give you excellent results. The third air brush is a suction feedIwataRevolutionBCRair brush, also a professional-grade air brush.
Determining Which One Works Best For You
Of the three air brushes I showed you, the Eastwood Concours #12795 and the Iwata Revolution BCR are the two most common types of air brushes out there. The difference between the two is that the Eastwood Concours air brush has a gravity feed side-mounted cup that can be rotated to keep the cup perpendicular to your work. This air brush comes with a .3mm spray nozzle. If I’m making a small repair or working in a confined area this is the air brush of choice.

The Iwata Revolution BCR uses a much larger suction feed cup mounted underneath the gun and comes with a larger .5mm spray nozzle. This is the air brush I prefer to use when spraying clear coats.
Both of these air brushes have top mounted, two-function triggers for better control over the amount of paint leaving the nozzle.
Two functions? Yes, the first function allows you to pull the trigger straight back and control the amount of air traveling through the brush. The second function allows you to press the trigger as you pull it back and control the amount of paint flowing through the brush.
An example of how this type of trigger can work for you is that you can pull the trigger back and ever so carefully press the trigger and flow a lot of air through the brush and only a small amount of paint. People who are good with an air brush refer to this technique as “blowing smoke,” or laying down a very slight haze of paint to create shadowing.
The third type of air brush, the Eastwood Gravity Feed #11612 air brush is geared more toward us old school painters in that it uses a trigger mounted underneath the gun instead of a top mounted two-function trigger. This air brush comes with a .2mm spray nozzle and uses the same type of gravity feed side-mounted cup that the Concours air brush uses. Something to understand about this brush is that unlike air brushes that use the top mounted two-function trigger to control the air and paint flow, once you squeeze the trigger, paint begins to flow through the gun. The only air and paint flow control you have depends upon how lightly or how firmly you squeeze the trigger.
Perhaps because it is old school, I prefer to use this air brush when blending solid colors.
Getting the Mix Right
The first thing to understand about using an air brush is that you cannot mix the paint being sprayed according to the P Sheets for that product. It will be too thick to go through the air brush. To get the mix right you will need to over reduce it by as much as 50%.
So how do I know over reducing a mix by 50% is the correct mix when using an air brush? I don’t. Truthfully, mixes vary slightly from paint brand to paint brand and from air brush to air brush. Over mixing by 50% may be perfect, then again it may not. It’s just a good place to start.
Let me explain about over reducing by 50%. Start by mixing the paint or clear coat product exactly according to the P Sheets. Note: To mix very small amounts of refinishing product I use a small metal mixing cup. The one I use was requisitioned from my wife’s kitchen.
If the ratio calls for one part paint and one part reducer I first mix the product one to one (one ounce to one ounce) then add another half ounce of reducer. This gives me a mix that has been over reduced by 50%.
However, like I said above, over reducing by 50% isn’t written in stone. What you are looking for is a mix that will give you a clean spray through the air brush. Think of this as using a full size gun only much smaller. If the mix is too thick it either won’t spray through the gun (air brush) or it sprays thick and rough. If the mix is too thin you will get runs and very little coverage. Get the mix right and the result is a mini version of the smooth and even coat you would get using a full-sized spray gun.
Time to Load the Brush
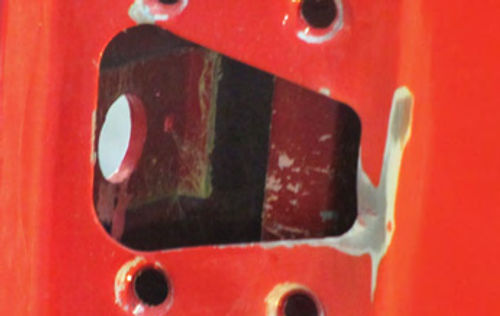
Here is a typical type of repair that can be made using an air brush where the original finish has been sprayed using a single-stage urethane finish (Photo 2). The paint along the edge of this door was chipped while attempting to install the latch assembly. The first step was to remove the latch assembly and sand the chipped area to smooth the rough edges. After that I lightly sanded the area around the chip using 1000-grit wet sandpaper. To be sure I had plenty of room to work I sanded a two-inch radius around the chip.
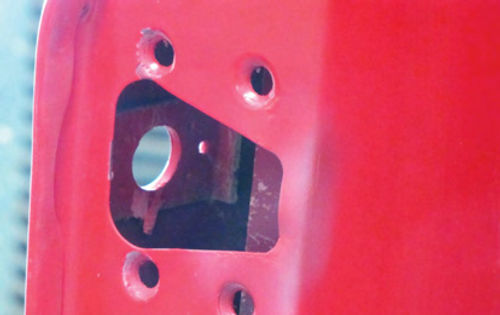
The next step is to seal coat the area of bare metal (Photo 3). Because I had bare metal showing I elected to use PPG DP40LF Epoxy as my sealer (since it bonds well to bare metal). The P Sheets called for adding an additional 1/2 part of reducer to the mix when using this epoxy as a sealer. That mix still wasn’t thin enough to spray through my air brush so I added another 1/2 part of reducer to give me a smooth finish. Which air brush did I use? I’m going to use the Eastwood Gravity Feed Trigger Air Brush #11612 to spray both the epoxy and the single stage color I’ll use to paint this repair.
The paint I’m using is PPG DCC Concept Single Stage. This, by the way, is the same paint that’s being used to restore the project truck that wears this door. So making the repair using that paint will ensure a good match.
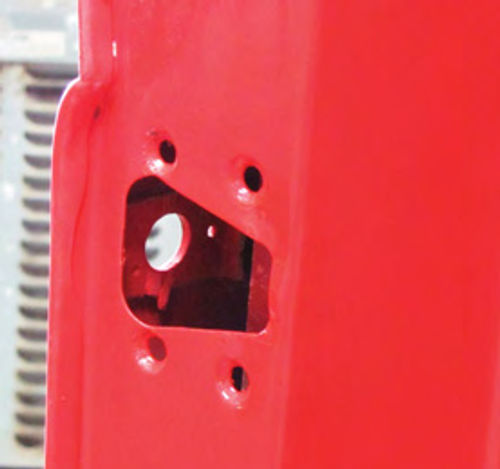
The mixing ratio is 4:1:2, four parts Concept, one part DCX61 hardener, and two parts reducer. I ended up adding another part of reducer to get the mix thin enough to spray through my air brush (Photo 4).
Notice that this first coat is very thin. This is typical for making this type of repair. The mix has to be thin in order for it to flow out and lay smooth. I gave this first coat 15 minutes to dry before applying the next coat. I eventually laid down a total of five coats over the repair area before I achieved good coverage.
Here is something that is not obvious in the photographs. Each coat of paint was expanded in coverage by about a half-inch until the final coat covered the entire two-inch ring I had sanded out around the repair. This is important to understand for a couple of reasons. First, the paint being applied now will not stick to any old paint that has not been sanded. Second, any paint applied now must cover all of the area that was sanded in preparation for making this repair.
So, in the end I have fresh paint butting up to old paint, which might leave a telltale line. But not to worry, there is a PPG product called D853 Fade Out Thinner that is basically a blending solvent. When it’s applied around the edges of the repair immediately after the last coat of paint has been applied, it will smooth out the transition between new and old paint and help make the repair invisible (Photo 5).
Another Type of Paint Repair
Then there is the world of spot repairing metallic base coat/clear coat finishes using an air brush. I’ll tell you straight up right now that sometimes you can match an existing color when spraying metallic base coat colors through an air brush and sometimes it simply doesn’t work. The metallic paint comes out of the air brush far too light in color to achieve a good match. How come? The excessive amount of reducer used in the mix doesn’t allow the metallics in the color to correctly orient within the coat. If the metallics can’t orient themselves they give off a silvery appearance.
How can you know if the metallic base coat color is going to match? You can’t. You just have to try it and see. If it matches, that’s good. If not, correcting that problem is a subject for another article. I’ll start with a color that matches then show you one that didn’t.
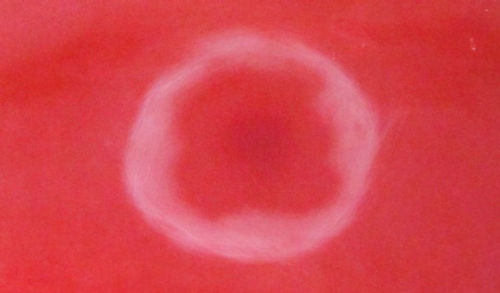
One Repair That Worked…
I started by sanding a ring about six inches in diameter using 1000-grit sandpaper wet (Photo 6). The six-inch ring gives me plenty of space to air brush my repair near the center of the ring, which I did next using the Eastwood Concours air brush. Notice that after applying four coats of color and blending each coat outward just a little I only had about an inch of sanded material left. That’s OK as all I need is enough room to apply my clear coats.
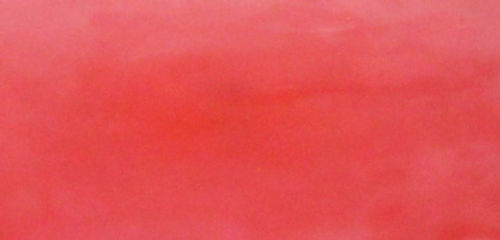
Here’s the end result (Photo 7). I started by clear coating only that area of the repair where I applied color. I put down three coats using the Iwata Revolution BCR air brush, because the larger .5mm tip works better for spraying clear coats, and allowed each coat to cure for 10 minutes before applying the next coat.
After that I applied two more coats extending both of them all the way out to the edge of the sanded ring then immediately dusted the edges of the final coat with PPG D853 Fade Out Thinner.
Once cured, a repair like this will tolerate some minor hand compounding if needed but will not tolerate any machine compounding. A machine buffer will cut right through the clear and expose the ring where new clear meets old clear.
…And One That Didn’t
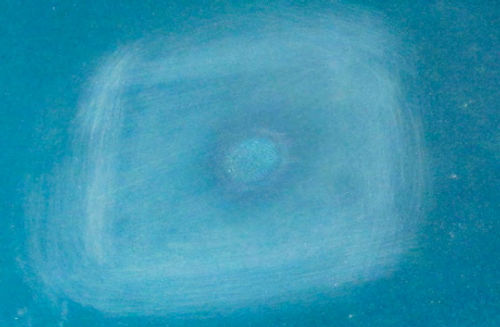
To answer the question concerning metallic base colors that don’t match, take a look at Photo 8.
I tried to blend a small repair on this metallic blue test panel, and if you look closely you can see the light-colored dot near the center of the panel. What happened here, and it is more common than you might think, is that the metallics in the paint could not orient themselves within the layer of paint and caused the color to be much lighter.
What do you do when this happens? I’ll give you a hint: You can forget the air brush. The only cure is to expand on the repair area to give you more room to work then switch to a mini spray gun such as the DeVilbiss Sri Pro. AmI going to show you how to make this repair? Later, when I have more time.
Some Old School Flames
Guys who are really good at this can take a roll of 3M #6301—1/4-inch wide— Scotch Fine Line Tape and a roll of 3M #6306—1⁄16-inch wide—Scotch Fine Line Tape and lay out flame patterns that are perfectly symmetrical on both sides of a vehicle. I can’t. I have to rely on flame stencils to help shape the individual flames and even then it takes me a few hours to measure and get things right. But once that is done the fun part starts and the fun always includes the use of an air brush.
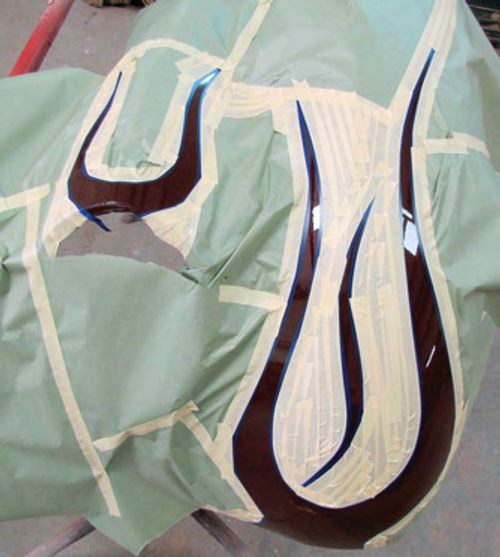
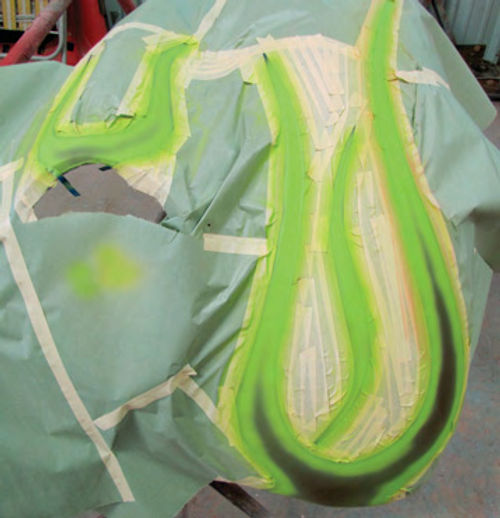
Here the flames are laid out and ready to be filled in with base coat paints(Photo 9). The colors I’ve opted to go with are green for the pinstripe, yellow for the field, and red for the accents. These are about as traditional as flame colors get.
I’m going to start by air brushing the green contrasting pinstripe color around the outer edges of the flames using the Eastwood Concours air brush.
This is a lime green color that creates a good contrast between the deep maroon color already on the fender and the red accent of the flames. Once the green dries, at least 30 minutes at 70° F, I’ll lay a 1/16-inch-wide tape line (3M #6306 Scotch Fine Line) along the edges of the flames to cover a thin line of the green (Photo 10).
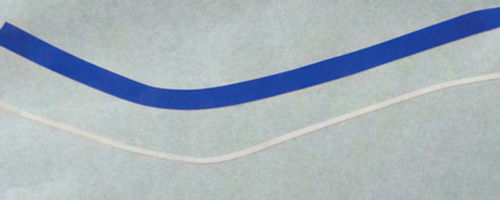
To give you an idea of how thin this pinstripe will be, check out the difference between the blue 1/4-inch tape laid next to the white 1/16-inch-wide tape in Photo 11.
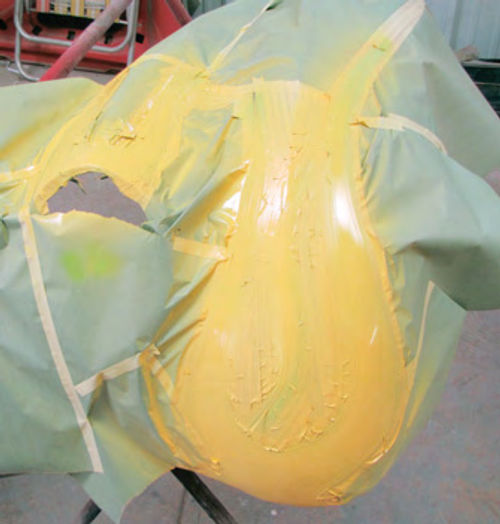
Next I applied the body color (Photo 12). This is a pure yellow with no pearl or metallic. Since yellows can be somewhat transparent and the area of yellow is quite large I’ll lay down four coats using my DeVilbiss Sri Pro (#635G10) mini spray gun to speed things up a little
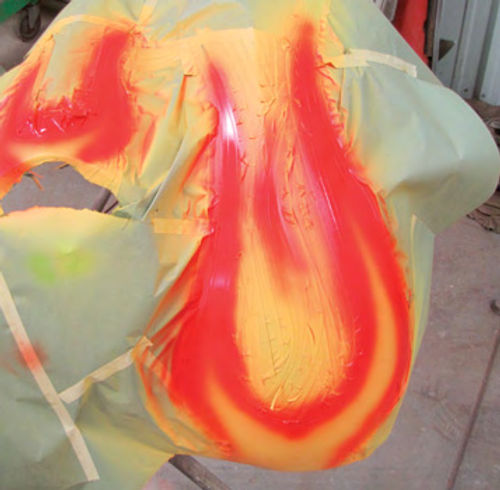
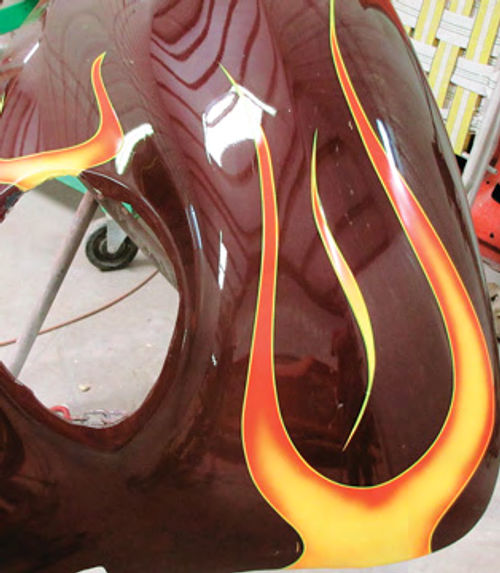
Finally, the red goes on (Photo 13). I’m going to switch air brushes again and go with the Iwata with its larger cup. The trick here is to end up with full coverage all around the edges of my flames then fade the red into the yellow body of the flames.
This is done by making the first pass right at the edges of the flames then working each subsequent pass out wider into the field of yellow as I go. How does it look? You tell me (Photo 14).
Then there is the issue of applying clear over the flames. To clear coat the flames you have two choices. You can clear coat the entire panel, which I prefer to do, or leave the masking around the flames and clear just the flames. The difference is in how you prepare the panel being flamed. If the plan is to clear the entire panel you need to wet sand the entire panel using 800-grit before laying out the flames. If you plan to apply clear to the flames only, you don’t need to sand the panel until the flames have been laid out and you have a defined area in which to sand. Got a question? Send it along.
Resources
Eastwood Company
263 Shoemaker Rd. Pottstown, PA 19464
English Paint and Supply
419 Fannin St. Amarillo, TX 79106
Paint and body supplies
LPL Body Works, LLC
5815 Contented Lane, Amarillo, TX 79109
lplbodyworks.com Producers of body and paint repair DVDs