
MORE LESSONS FROM DAD’S HOMEMADE FORKLIFT
Some Uncommon Shafts and Seals Needed Attention and It’s Time for Some Cleanup and Paint as Well. After That, Well, We’ll See…
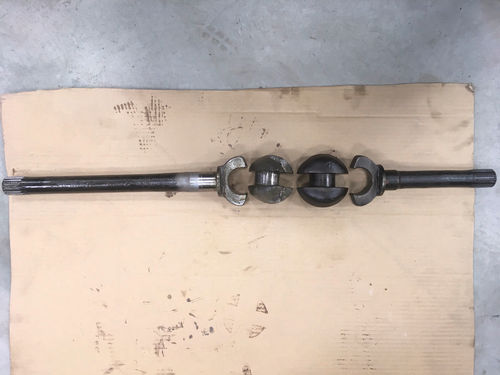
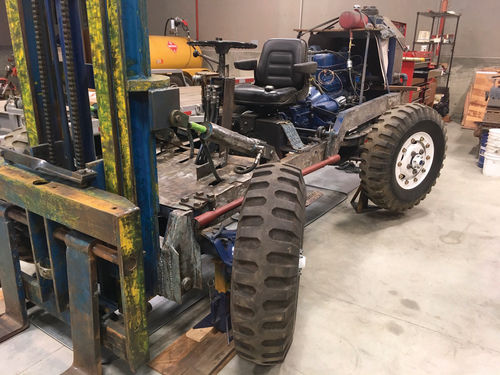
This is the third installment on the restoration of Big Jim, a homemade 4-wheeldrive, 4-wheel-steer forklift, made in 1955 from Army surplus parts. As mentioned in installment No. 2 (April), the lack of movement in either front wheel as the differential was turned, was diagnosed as a broken right-hand-side axle. Both axles in this newer-style Dodge military ¾-ton front axle are in two pieces. One comes from the differential and it joins the second axle with an articulated claw-like joint that allows the wheel to be driven as it receives steering input.
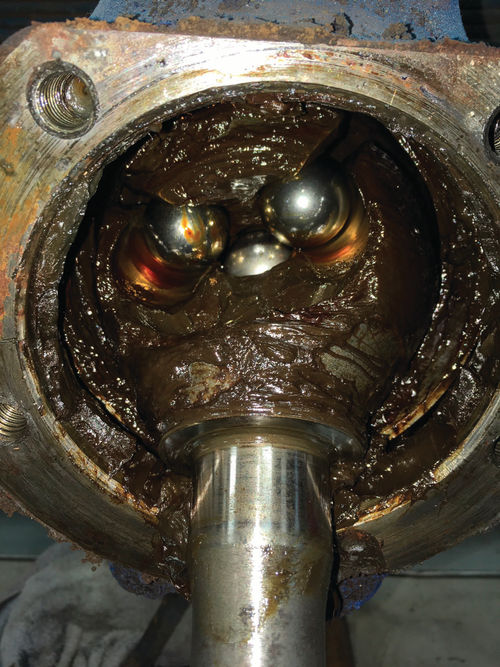
The older style, WWII weapons carrier’s version of this axle uses steel balls in this joint to give it the ability to turn. Big Jim has the older style on the rear differential unit.
I failed to find an axle locally but after an Internet search I found Midwest Military in Prior Lake, Minnesota, (midwestmilitary.com). I was surprised to learn that they had an NOS supply of parts for these front/ rear ends. That’s right, new original replacement parts in their original containers. They also had seals and the needed brass bushings. The seals had 1975 expiration dates. I had to buy both halves of the right side axle for $160. My old bushings had about .100 wear so I was happy to pay $25 each for the 4 bushings needed to change both sides.
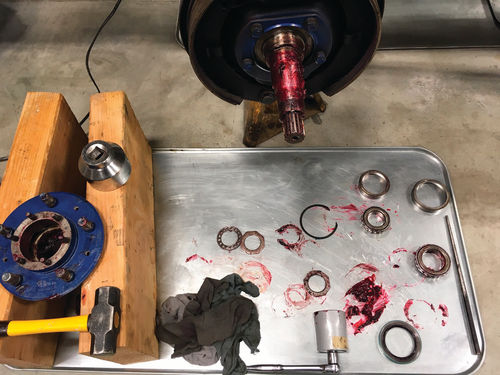
Those Bearings Cost How Much?
Each wheel bearing assembly was taken apart, cleaned and then repacked. Upon re-assembly, I found one wheel that felt rough and actually noisy. Closer inspection of both bearings showed some damage that I had not noticed on disassembly. The races also showed signs of getting hot. I called my friends at Motion Industries, , who specialize in bearings and seals, and got new bearings and races. I had a little bit of sticker shock as the two bearings and two races and the seal totaled $200. I was expecting a $70 total; apparently I am still living in the 1970s as my wife keeps telling me.
Fixing Oil Leaks Here and There
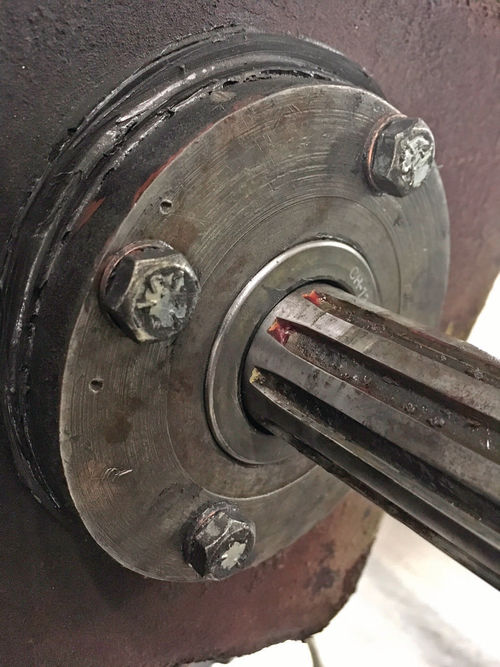
The two output shafts on the homemade transfer box showed big oil leaks once I got the engine running and the transfer box spinning. The oil seals are contained by a press fit in a collar that is bolted to the box.
After removing the drivelines, it was easy to unbolt the collars and remove the old seals. Their sealing lips had been worn smooth by many years of the shaft spinning. The old seals had a usable number and the first replacement seals were a direct cross from a different brand I picked up at NAPA. I could not get these seals to fit in the collar as they had an OD that was .014 inches bigger than the collar ID. Hmmm? I called Motion Industry again and they found the seals in the original C/R, Chicago Rawhide, brand. These were still .010 inches bigger and still bigger than the .005 oversized I was looking for. I cleaned off the outer sealant coating and reduced them another .001. I put the seals in the freezer and lost another .001. Now at .008 oversize, I was able to press them in with the help of a large socket to evenly apply pressure.
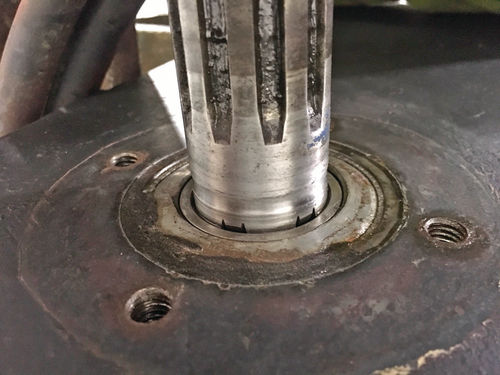
Before the collars were installed, I needed a simple fix for the wear on the shafts. Putting a new seal on a worn shaft probably would not solve the leaks and there was a concave wear area on the 1.375-inch shaft. In this spot, the shafts measured 1.355. Since there was an unworn area right next to the undersize old seal track, moving the seal into this full-size area was accomplished by using a thicker gasket material. Actually I made two gaskets out of neoprene, one 1 ⁄8-inch and the other 1 ⁄16-inch thick. The thick gaskets did move the seal into a better area on the shaft.
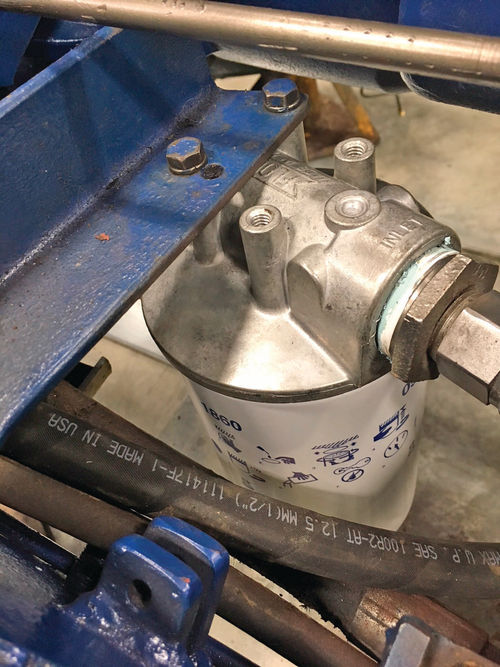
Continuing on fixing the oil leaks, I had to replace the canister-style hydraulic filter with a more modern spin-on version. The replacement element for the old canister-style filter did not come with all the necessary gaskets. Even after making one gasket, it continued to leak. The new style spin-on filter and base were an easy fix for that leak.
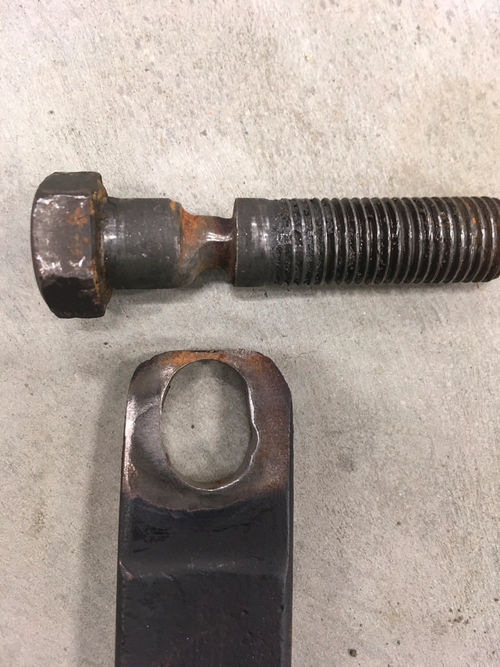
It is safe to say that Big Jim had a long and productive life. One of the most obvious places of wear that I found was the forward/reverse shifting linkage from the transfer box to the steering column. If you do some conservative math, this linkage was probably shifted at least a million times. As a result, portions of it end up oblong and almost cut in half.
When Does the Project End…
I am not experienced with paint removal so I used what I had in my shop for that portion of the project. Pearl stripping discs on a 4-inch grinder made quick work of two layers of paint. They are really good on open flat surfaces. I could get about an hour of grinding with them and they cost $8 each. In tighter quarters, I used a circular wire brush on the 4-inch grinder. The problem with these wire brushes is that they self-destruct as you use them. In fact, the individual wire strands become mini wire missiles. I found them scattered all over my shop including imbedded in my pants. I am still trying to figure out how the one I pulled out of my big toe got through my work boot!
This brings us to one of the dilemmas faced while doing a restoration—where does one draw the line on fixing, refreshing and painting. Seems like one fix-up leads to another.
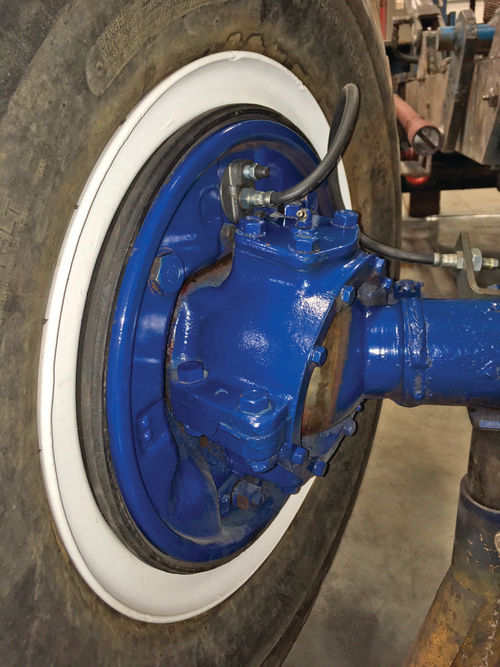
I keep telling myself this is a forklift; it is going to be seen by virtually no one. I have experienced this dilemma many times during this process. One example occurred when I went to put the lug nuts back on the wheels. My nice powder coated wheels screamed at me to clean up the crusty lug nuts. So I made a jig out of a 2x4 and drilled five 7 ⁄8-inch holes to fit the extra studs I had. This gave me a way to secure the nuts while I media blasted them. I ended up with a nice matt metal finish but the dilemma popped up again. I could fairly quickly buff the face of the nuts to look close to a chrome finish. So I did. Then I coated them with clear acrylic enamel to keep them from oxidizing. The process never ends.
I did draw the line on the cleanup and paint process on the front underside. This area will have to wait until I get really motivated and want to work on my back for a long time. That will be our secret… and I hope my dad understands.


