WORKING WITH VINTAGE SPARKPLUG WIRES
With a Newer Vehicle, a Wire Set Comes Ready to Install. But With an Older Model, Even a Set Takes More Planning and Work.
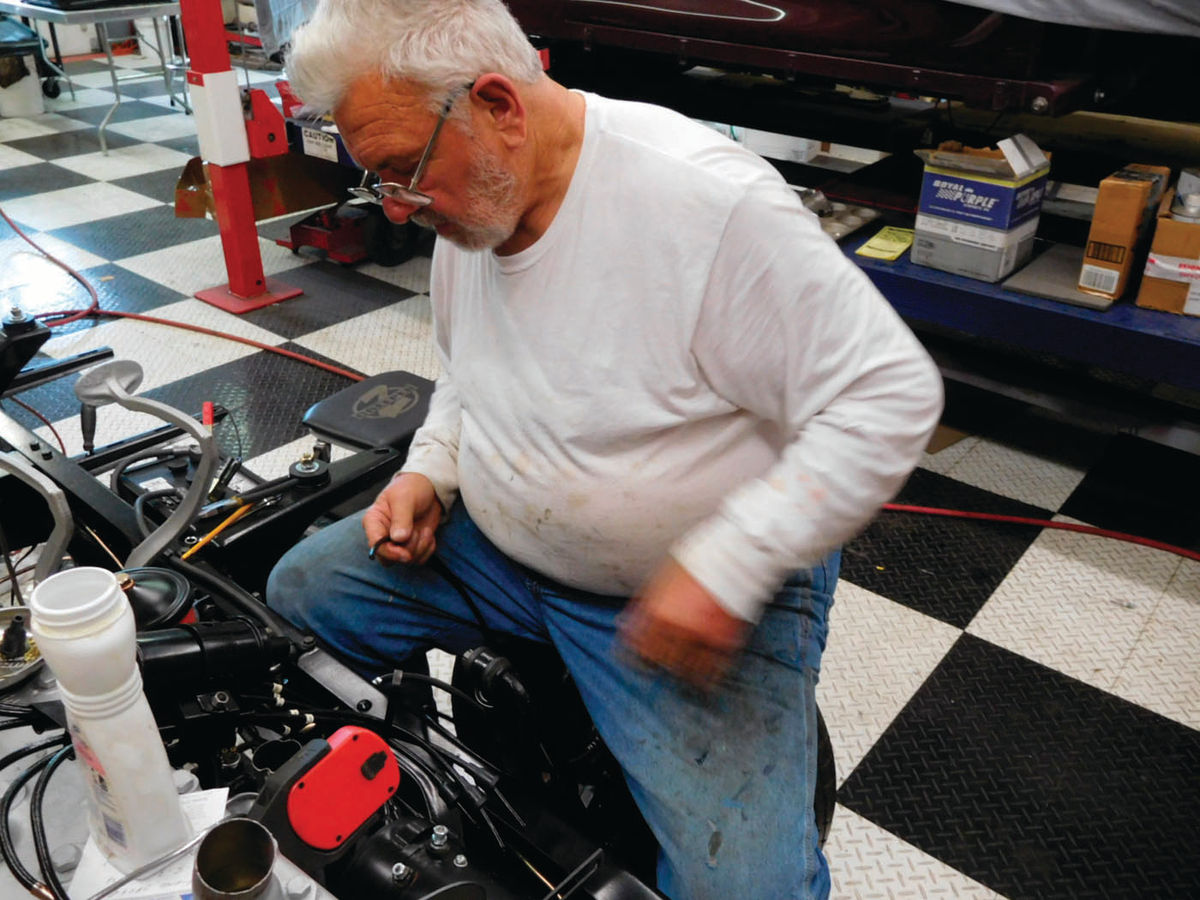
How the heck do I get these rubber nipples onto those sparkplug wires?” asked Larry Obiala, after he had made several attempts to slide the hole in the bottom of one nipple over the black sparkplug wire. “Soapy water,” we suggested. We had heard that soapy water worked pretty well for making rubber parts slippery.
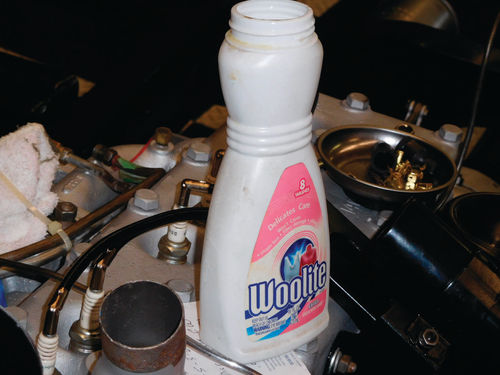
It turned out that the only soap we had in the shop was a bar of Lava HeavyDuty Hand Cleaner which works great for getting grease off your hands, but doesn’t make a lot of suds. However, we did have a container of Woolite Liquid Laundry Detergent and it worked perfectly. After putting a little of it on the end of the wire, the nipple slid right on.
We Found a Parts Source
Obiala was trying to get his 1953 Dodge Pickup truck assembled to the point where it could be moved to a body shop in another town to have the cab and sheet metal installed on the alreadyrestored frame and running gear. He had built both the front and rear suspensions, replaced the seals and bearings in the rear axle, rebuilt the brakes, rebuilt and installed the flathead six-cylinder inline engine and manual transmission, refurbished and installed the gasoline tank and plumbed the fuel and brake lines.
A former mechanic and school system maintenance professional, Obiala is a perfectionist when it comes to putting things together and perfection is often hard to achieve when you’re relying on refurbished original or reproduction antique vehicle parts. Don’t get us wrong—we prefer nicely rebuilt original parts to reproductions and appreciate good reproductions, but 65-year-old parts and poor reproductions can be trouble.
Suffice it to say that some of the assemblies on the Dodge Pickup had to be done two or three times before everything fit together correctly and worked properly. As the process was carried out, Obiala ran across a company named DCM (Dodge Central Michigan) Classics LLC, in Zeeland, Michigan, that specializes in vintage Dodge truck parts.
Steve and Todd Flokstra, who own Classics LLC, are a father and son team with an interest in old Mopar trucks. They started restoring a 1946 Dodge Pickup and found parts hard to find, so they started to buy trucks for parts and created DCM Classics. Today, they stock complete project trucks, used parts and new reproduction parts for model years 1930- 80. Their Website (www.DCMClassics. com) lists the reproduction parts. DCM also reconditions parts such as gas tanks, speedometers, gauges, stainless trim and more. We have had pretty good luck dealing with them.
Modern Wire Sets Are Easier
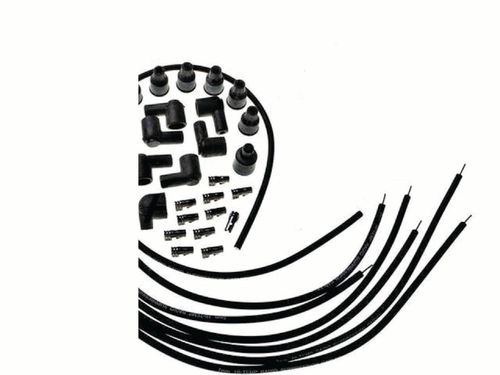
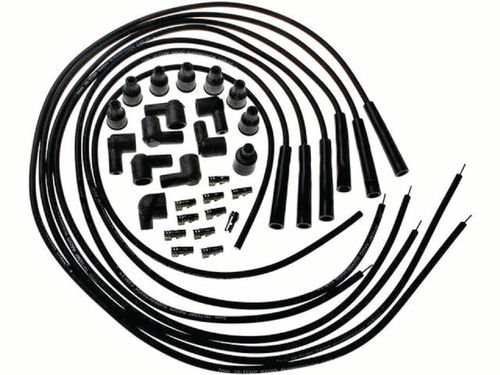
Obiala bought his sparkplug wire set from DCM and it was just like the original wire sets that Mopar sold in 1953. These had many individual pieces including metal core sparkplug wires, the wire that runs from the coil to the center tower on the distributor cap, straight metal terminals to crimp onto the ends of the wires before snapping them into the distributor cap towers, 90-degree bent metal terminals for the sparkplug ends and rubber nipples for the ends that snap into the distributor terminals.
Sets like these are a little more difficult to install than the “custom” sets you buy for modern cars, which have all the wires cut to length and all the contacts, boots and nipples either molded in or pre-installed. Like many other things in modern life, the custom sparkplug wire sets are designed for “plug-and-play” installation, which is nice, but they are not reproductions of OEM sparkplug cable sets that car show judges will accept as original.
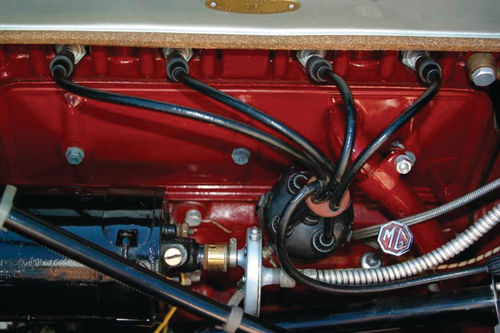
We should point out here that custom sparkplug wire sets are made for some older vehicles. You can probably get them for popular collector cars such as a ’55 Chevy, a ’57 T-Bird, a ’65 Mustang or a ’69 Camaro (to name a few), so it becomes a question of how original you want to keep your car or truck. We know that we can get a modern distributor cap and custom wire set for our MG TD, but we prefer the original setup where the wires go through a round disc, the ends have to be spread out over a metal disc and where, at the distributor end, the wires go into threaded plastic caps that screw into the distributor.
Larry Obiala’s wire set was of the OEM type and after he used the soapy Woolite to slide the rubber nipples onto the sparkplug cables, he had to work carefully putting the rest of the set together. There were 29 separate parts to deal with.
Sparkplug Cable Basics
But before we get into the nitty-gritty of his Dodge truck installation, let’s talk about some sparkplug cable facts in general. It’s important to understand how sparkplug cables do their job before you can understand how important it is to install them slowly and carefully so they work properly.
What most people call “sparkplug wires” are high-tension electric cables and their job is to get the voltage generated by the ignition system to the sparkplugs that ignite the air-and-fuel mixture inside your engine. The hotter the spark, the more complete the ignition will be.
When the first cars were built, their sparkplug cables were ordinary wires with extra-heavy rubber insulation. Heat, gas and oil quickly ruined the insulation.
To combat the effects of gas and oil, the rubber insulation was next covered with braised cotton that was coated with lacquer. This was an improvement, although the lacquer eventually would crack. Until about 1951, the lacquercoated fabric type of insulation remained in common use. Restorers who want originality can still get this type of wires from companies such as Kanter Auto Parts (www.kanter.com), The Hot Rod Company (www.thehotrodcompany. com) or The Brillman Company (www.brillman.com).
A look at the Kanter Auto Products catalog suggests that 1950 was the last year Dodge used braided fabric sparkplug wires. A development that reshaped ignition system technology was actually the television set. Metal core sparkplug wires caused interference with TV sets and this problem was so huge that the Federal Communications Commission FCC) passed laws requiring the use of radio resistance cables.

One early type of resistance cable had a core with a plastic tube filled with carbon granules. These worked well until engine vibrations caused the granules to settle, leaving gaps in the spark path. Another type of resistance cable used a solid piece of graphite impregnated Nylon as its core. This worked fine until the wires were pulled on or bent, which would cause the Nylon to crack. The best resistance cable was the Belden 7300, which had a tubeshaped core that was both flexible and elastic. Another solution made by Essex Cable was Magwire, a cable that used a Monel metal conductor.
Resistance in an ignition system cuts down the current flow to prolong sparkplug life. This is called secondary resistance and many sparkplug cable sets are designed for specific resistance values. Unfortunately, secondary resistance can increase as an ignition system ages. An ohmmeter can be used to check for proper resistance values.
The specifications published by automakers for different vehicles vary quite a bit and sometimes seem confusing. You may find the specs for your vehicle in its factory shop manual, but you’re not going to find a resistance value for a 1917 Oakland in the original Owner’s Handbook. A typical resistance value should be between 3000 and 20,000 ohms, unless factory literature says differently. Resistance values for coil wires are different than those for sparkplug cables. A bad cable will test very high for its length.
In 1980, Distributed Resistance sparkplug cables became standard equipment on about 95 percent of Americanmade cars. These are constructed of fiberglassimpregnated carbon to reduce radio frequency interference (RFI) that could also interfere with the engine management sensors and computers. If your collector vehicle came equipped with distributed resistance wires, they should be replaced with the same type.
A swing to inductance or magnetic resistance wires took place as Asian vehicles gained popularity. These use a spiral wound core of a copper nickel alloy that has less resistance to electrical flow, meaning less current is needed to generate the spark. At the same time, the winding pattern and materials used help prevent any RFI from escaping. Today, there are also fixed resistor wires. These are used on European vehicles and feature steel or copper wire and a resistor inside the plug boot to control interference.
When Obiala’s truck was new, its sparkplug wires had a real metal wire core covered by insulation.
By 1951, most if not all automakers had switched to using a thick layer of black neoprene rubber insulation over the metal wire core.
As they aged, these “black rubber” wires were affected by engine compartment heat. In addition, the inner insulation was prone to getting spongy with age. So, the next advance was the use of silicone rubber insulation, which lasted even longer than the neoprene rubber type.
In addition to cable insulation, the rubber-like voltage shields at the ends of the cables are important parts of your ignition. The shields that cover sparkplug terminals are called boots. The shields that cover the ends of the cables that snap into the distributor cap towers are called nipples. DCM’s OEM-style 1953 Dodge set does not include boots. The sparkplug terminal attachments in this set are metal clips with a 90-degree bend.
Experts recommend that you avoid using sparkplug boots made of cheap rubber, because they can become brittle and crack, thus allowing voltage leaks. Sparkplug boots made of silicone rubber are best. Distributor tower nipples actually have different problems, usually caused by gas or oil vapors that show up near the distributor. Neoprene rubber nipples are the best ones to use. If you buy a sparkplug cable set at an auto parts store, take your distributor cap along when you pick it up and test fit the boots and nipples.
Experts also recommend buying name brand sparkplug cable sets to make sure the parts are not made of cheap rubber. When purchasing reproduction cable sets for an antique vehicle, name brand sets will be hard to find unless you own a very popular car like a Mustang or a Corvette. You may want to ask your hobby supplier who manufactures the sets they sell or you may want to buy bulk cable and parts and make your own set.
When it comes to the clips that are used to make your terminal attachments, many production cars have a wire clip that presses into the end and side of modern resistance-type cables. Poor contact between the terminal attachments and the cable’s resistance core are one of the main causes of sparkplug cable burnouts.
There are two relatively trouble-free cable attachments that have been around since the early 1970s. The first employs a small gland screw on the terminal end that threads directly into the end of the cable. This was commonly seen on Volkswagens. The second is a simple U-shaped prong. One side pushes into the center of the sparkplug cable, while the other lies flat along the outside of the cable. A brass outer terminal can be inserted into the metal sockets inside the distributor cap towers for a tight connection.
Time to Install the Wire Set
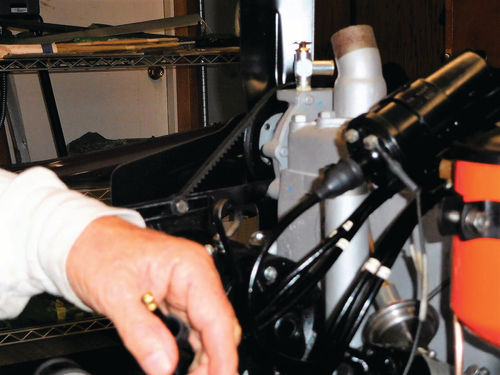
As we said, Larry Obiala’s sparkplug wire set (yes it used a metal wire core) had 29 parts that had to be assembled. He laid out the wires and looked in his shop manual to get the direction of distributor rotation and the firing order. He set the number 1 cylinder at Top Dead Center (a TDC whistle can be used to do this). He determined where the notch was on the rim of the distributor cap and snapped it in place. This told him which was the Number 1 tower and then he followed the firing order to determine which wire was supposed to go to each tower. This told him the length he needed for each wire and he put white collars on the wires indicating each wire’s sparkplug location.
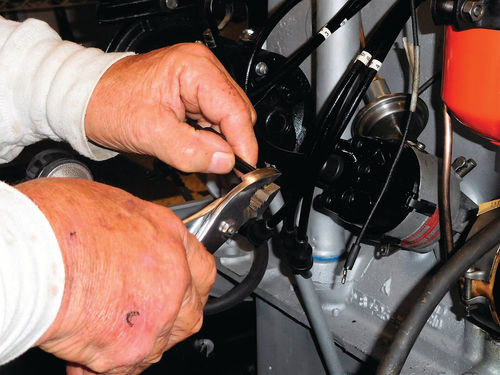
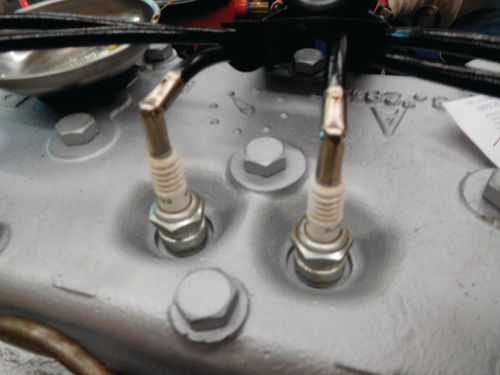
Since the sparkplug wire set had no boots at the plug end, Obiala attached the metal clips with the 90-degree bends to each of the wires by slipping the U-shaped section over the end of one wire and using pliers to crimp the prong into the wire. The prong made contact with the wire core to achieve a good electrical connection. Obiala then snapped the tube-shaped end of the 90-degree metal clip onto the first sparkplug terminal. He then did the same operation for all five of the other wires and sparkplugs.
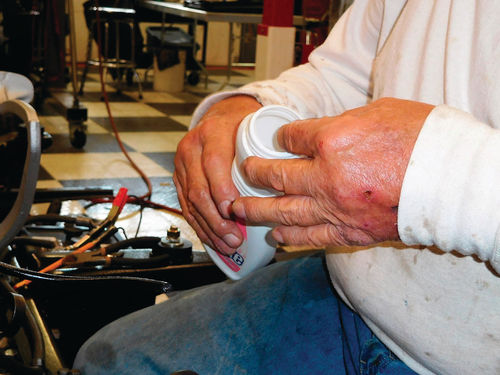
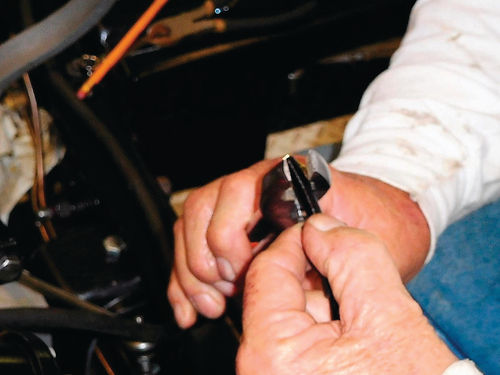
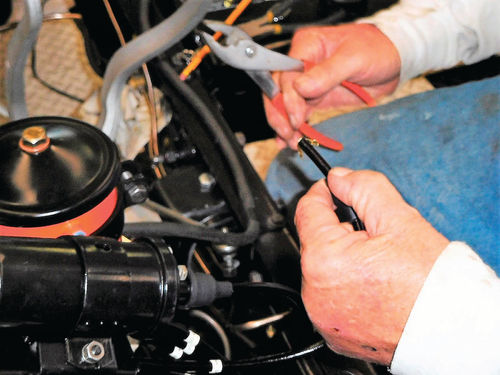
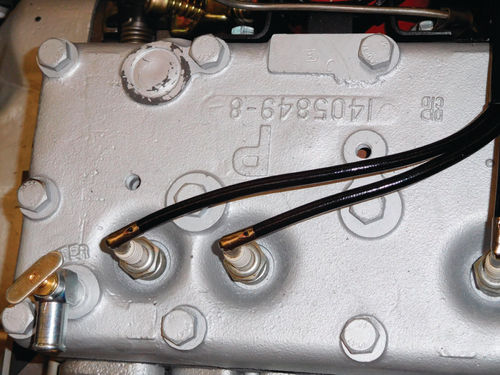
Next, he moved to the ends of the wires that snap into the distributor towers. This is when he used a little bit of Woolite to lube the wires so the rubberlike nipples could be pushed on them. It took a back-and-forth motion and a little pressure from the palm of his hand to install the six nipples on the six wires, but it was fairly simple to do. Naturally, the ends with the small holes were pushed over the sparkplug wires first so that the open ends, which seal onto the distributor cap towers, were facing downward.
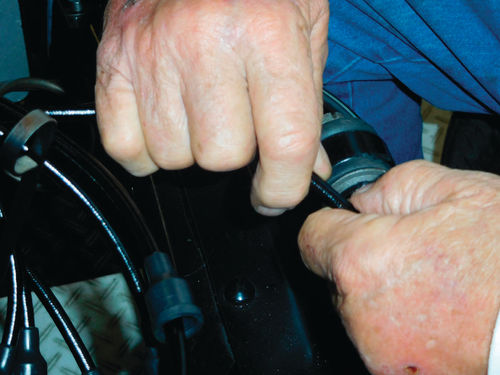
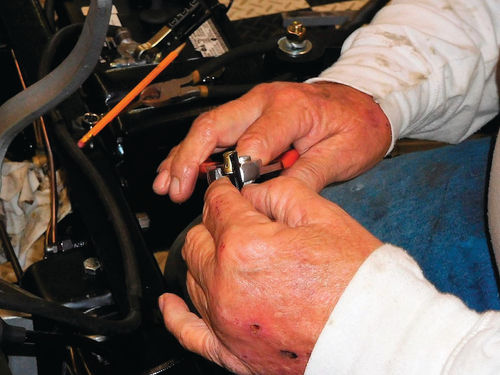
Obiala pushed all six nipples an inch or so up the wires so he could install the attachment clips on the end of each wire. The tops of these clips had a prong that pushed into the metal core of the wire. Then, the flap-like “legs” have prongs that press into the sides of the wires. Larry used a regular pliers to carefully crimp the clips onto the ends of the wires. The idea, then, is to snap the clips into each distributor tower (in proper firing order sequence) and slide each nipple over the top of the tower to seal in the voltage.
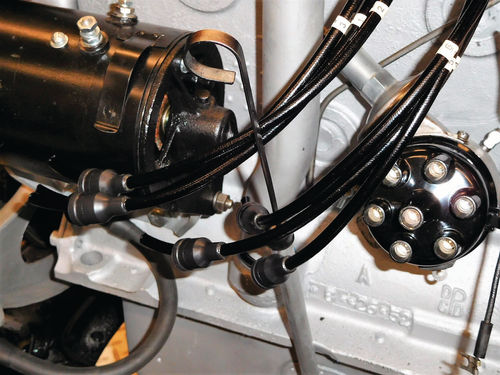
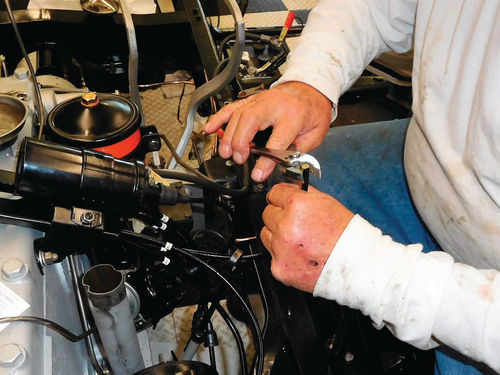
As is often the case with older vehicle parts, snapping the clips into the distributor towers was easier said than done. When everything is just right, these clips make an audible snapping noise that tells you that you have a tight connection and that the sparkplug wire won’t shake loose. At first, Obiala was not hearing the reassuring “click” at all towers, so he had to play with his crimps until the clips were shaped just right to snap in.
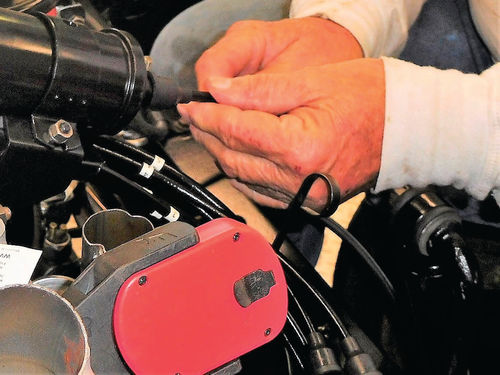
With all of the sparkplug wires tightly attached to the distributor cap towers, installing the coil wire came next. This required the use of a nipple and flap-style clip on each end of the coil wire. Obiala also decided to shorten the coil wire for a neater fit. He measured very carefully, so that he didn’t cut too long a piece off the wire.
Although installing a set of sparkplug wires on a body-less inline Dodge flathead six is a relatively simple job, it took well over three hours to complete all the tasks outlined in this article when taking a slow, careful “perfectionist” approach to the job. We’re certain it can be done faster, but it’s nice to feel that once it’s done, you won’t have to do it again.


