Try This If You’re Having Bubble Trouble
If The Bubble On Your Tire Balancer Has Grown and May Be Unreliable, There Is An Inexpensive Fix That Can Be Tested for Accuracy.
Editor’s note: After John Armstrong’s two-part series “Working With a Bubble Balancer,” ran in the November and December 2013 issues, we received the following inquiry from reader John Henry.
“I enjoy your magazine and read from cover to cover monthly. The mag is then filed for future reference. The articles are extremely helpful.
“I have a Model M-60 Micro precision balancer and am losing my bubble. Enclosed is a picture of the part (shown above). Is there a person or firm available to repair these units?”
We then turned the question over to John Armstrong and here’s his report.
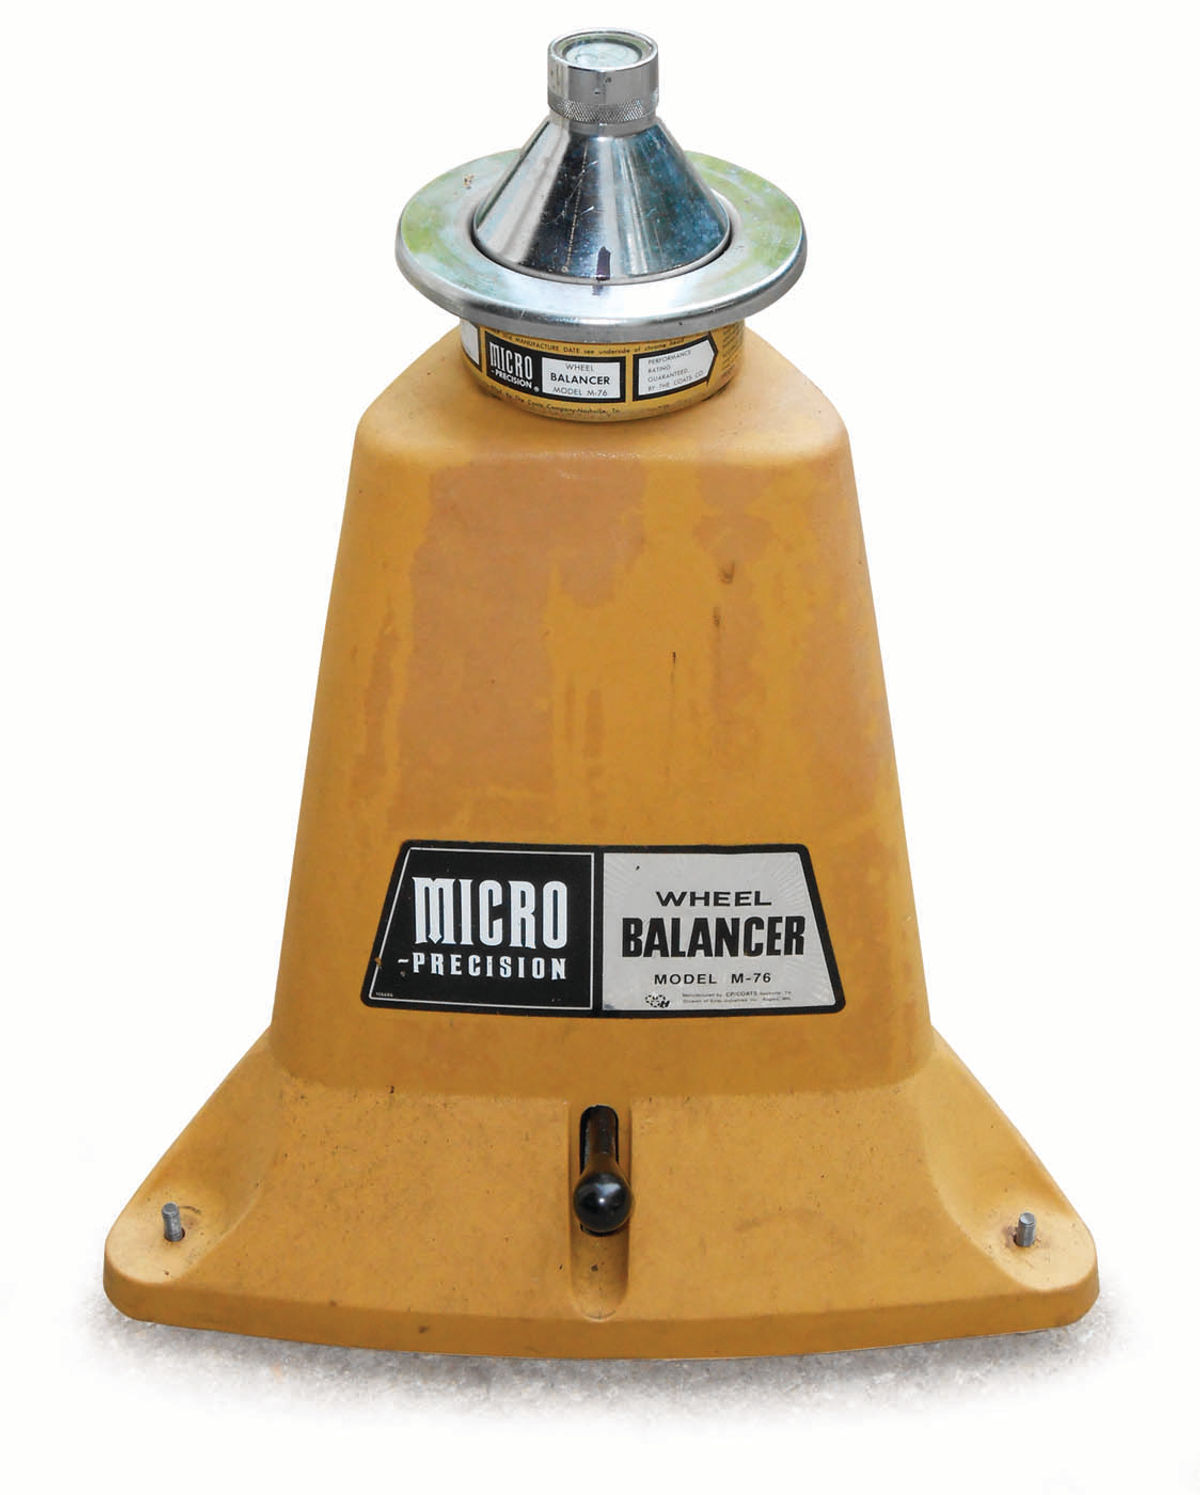
A question recently came up about how to fix a vanishing level bubble on a Coats M-60 Micro Precision (bubble type) tire balancer. This usually is one of the biggest concerns when purchasing an older used tire balancer.
The bubble should be 1 ⁄4" – 5 ⁄16" in diameter for both the M-60 and M-76 Coats balancers, and if the bubble has become enlarged, the unit likely has leaked over the years. This will naturally diminish the accuracy of the balancer, and depending on how large the bubble has become, may make it impossible to even use the equipment at all. As I stated in the series, “someone may have managed to find a way to refill these levels, but I don’t know how.” Neither am I aware of anyone who does. Furthermore, looking through the Coats manual for this tire balancer revealed nothing in regard to this issue.
Are There Hidden Answers Inside the Device?
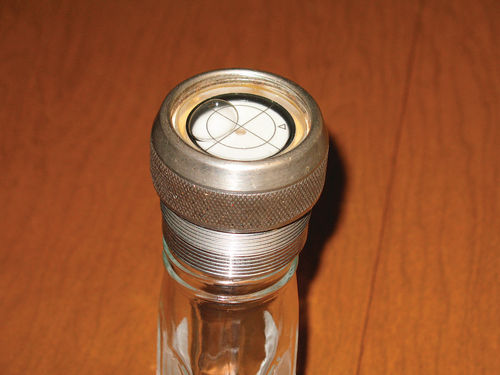
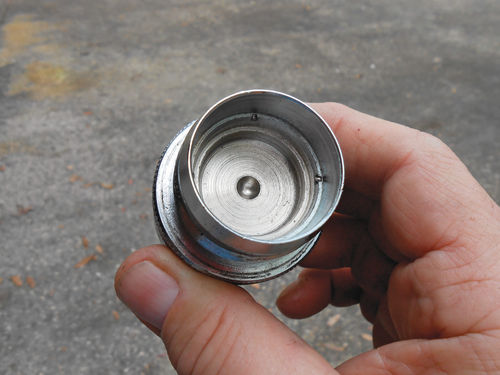
On both of these model balancers the bubble assembly easily threads off. Once removed, a look at the bottom of the assembly in Photo 1a shows no obvious means of access to refill the level.
It would be nice to see a small port and the words “add oil here,” but that’s not the case. If, however, you look closely you will see there are a couple of notches on a perimeter collar that are likely the key to getting into it deeper. It could most likely be threaded off with a spanner tool, and the lower end of this assembly could be taken apart, but who knows what might lie ahead. There is no information at hand with regard to servicing the balancing head, and seeing as this one is in good working order, I would rather not experiment.
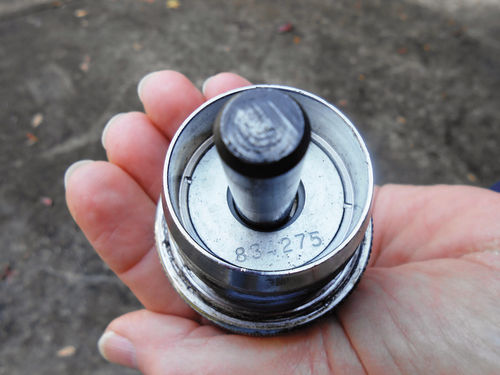
Shortly after writing the previous paragraphs, however, I purchased another M-76 bubble balancer that had this lower part of the bubble assembly removed. As it turns out that’s not a retaining collar that threads out, but instead four stake marks that hold it together. Photo 1b shows what lies hidden…absolutely nothing. Those “steps” you see inside are all one piece of metal. There is no point of access to refill the level bubble, so evidently it was somehow filled and sealed from the top.
An Approach to the Situation
So, here is a solution that seems to work. It’s probably not the answer most of us would like, but there is no risk of damaging the balancing head, and it’s inexpensive.
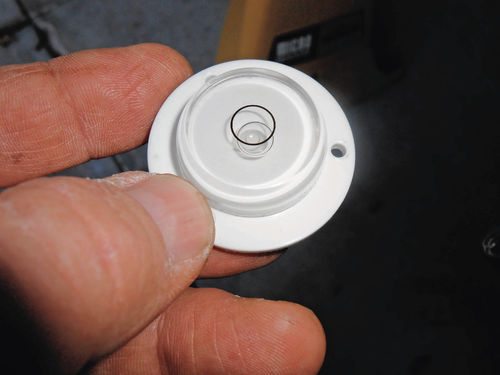
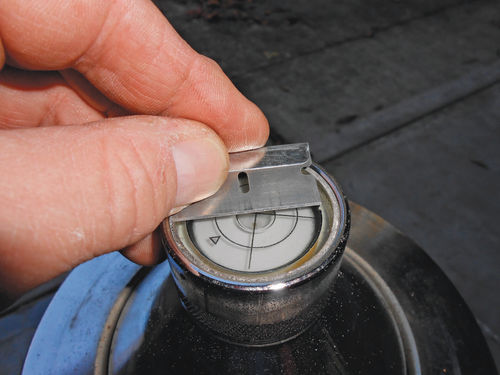
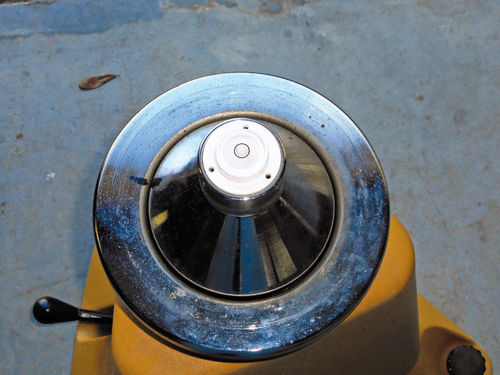
Take a look at Photo 2. This is a simple “Bullseye Level” purchased at Camping World for $3.19 (campingworld.com). It measures 1.69" in diameter, and is made by Prime Products, item #28-0201 (primeproducts.com). It can be placed on top of the flat glass of the existing bubble and used in its place. First make sure the glass surface is clean and level itself by scraping it with a razor blade as seen in Photo 3. Coincidentally this level bubble fit the diameter of my balancer head perfectly, and rests completely on the glass of the original level. Photo 4 shows it in position. This should return the tire balancer back to service. If your application is slightly smaller, the diameter of the level can easily be reduced with the aid of a lathe or even a belt sander. If you do that, just make certain that no burr has been created on the perimeter (where it was machined) that would keep it from sitting perfectly flat. Sandpaper or a razor blade can be used to smooth it as necessary.
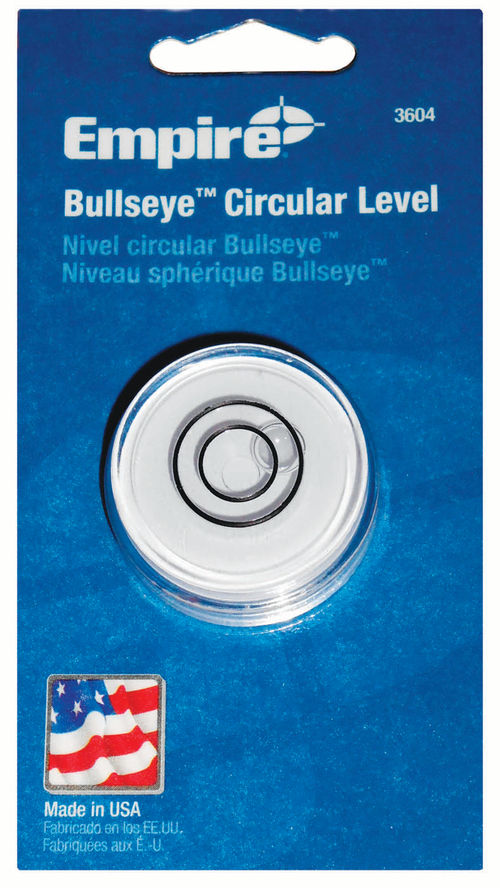
Of course there are also smaller level bubbles out there. Photo 5 shows an Empire #3604, bullseye circular level (empirelevel.com; .). It’s smaller at 1.375" diameter. This was located and purchased through the Home Depot online for $2.97 plus shipping. Their Internet reference is #100147382; and product UPC #015812036048. Some stores do stock it, but not in my part of the world. The larger and small diameter concentric centering circles seemed to be more helpful when balancing, and as a side bonus, it’s made in the U.S.
Camco (makers of RV accessories) offers a #25573 bullseye level for $2.89 at amazon.com. It also looks promising with three centering circles, but it may be too large a diameter to be of use. I found conflicting information with regard to its size. One source indicated a 3.63" diameter, while another was showing it as even larger.
Searching online for “bullseye level” and “bull’s eye level” will show you a good selection, most very reasonably priced. Keep in mind it doesn’t need to fit perfectly edge to edge. If the choice is either larger or smaller, go with the smaller option. If it’s smaller, just centering it up by eye is fine, as long as it’s all resting on the original level bubble glass. Even if it’s off center, it won’t be enough to have any effect on tire balancing.
The weight of these add-on level bubbles is minimal. The larger bubble in Photo 2 is 1 ⁄4 ounce while the one in Photo 5 is a bit more, 1 ⁄3 ounce. Being placed over the center of the balancer head, even if it’s off 1 ⁄4" to one side won’t affect the outcome. If you’re curious about accuracy and how sensitive these balancers are, here are some specifications found in a 1984 Coats M-76 tire balancer manual.
Sensitivity: “1⁄5 oz. weight at 8-inch radius. Sensitivity is defined as the smallest amount of weight which will cause visible movement of the balance indicator.”
Accuracy: “1⁄4 oz. weight at 8-inch radius. Accuracy is defined as the maximum average weight variation from perfect balance.”
Testing the New Addition
Sitting flat on the original bubble glass should assure that the newly added bubble will reflect the correct readings, but as a means of verifying it, use this method described in the Coats manual for leveling and verifying the balancer.
“(1) Place a tire and wheel assembly on the balancer (make sure that the foot pedal is in the “Off” position).
(2) Using the leveling legs, center the bubble on the cross hairs.
(3) Turn the balancer on, using the foot pedal.
(4) Balance the tire and wheel assembly.
(5) Rotate the tire and wheel assembly 1 ⁄2 turn WITHOUT LIFTING IT FROM THE BALANCER (to ensure that the head remains engaged).
(6) If the bubble has moved from dead center, use the leveling legs to bring it HALF-WAY back from dead center. The unit is now ready for use.”
I decided to test their method using the Empire bubble purchased from the Home Depot, and see how accurate it was. Coats’ directions were followed, and the tire was balanced. This was only for test purposes, so it made no difference where or how the weight was applied, as long as the tire was balanced.
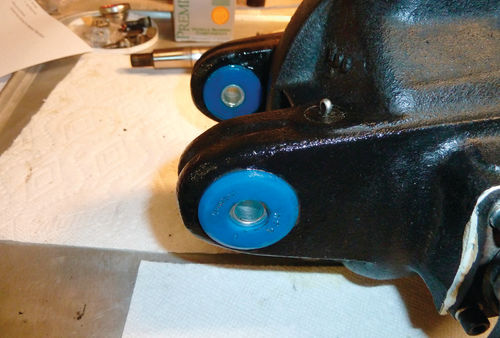
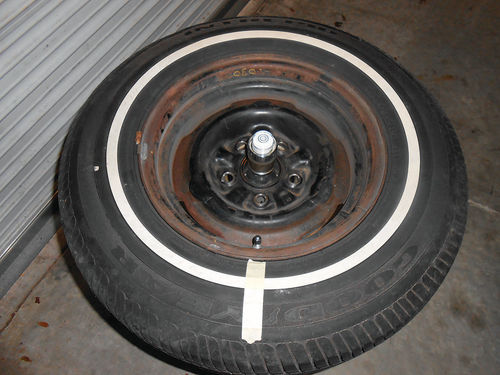
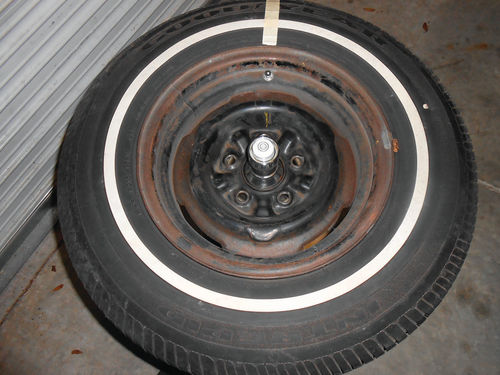
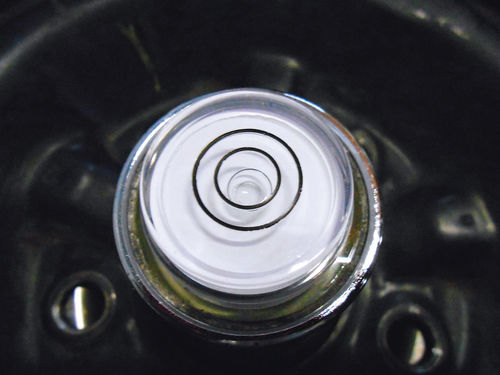
A piece of masking tape was applied as a reference mark that would be easy to spot, seen here in Photo 6, and then the wheel was rotated 180° with the head free floating (lever down) as shown in Photo 7. The level bubble was indeed off a bit as you see in Photo 8, so the leveling feet were adjusted to bring it half the distance back to dead center. It took several adjustments, and rotating the wheel back and forth until the bubble location was finally correct. Once satisfied, the add-on level was removed for the first time to get a look at the original level bubble, and it appeared to be level.
Finally, with the wheel removed and the release lever held down freeing the head, the original bubble indicated perfectly level. This final check is the test method I have used for years, and is described in my article on working with a bubble balancer in the December 2013 AR.
If Your Bubble Is In Worse Condition…
Should you have a more severe problem like the glass of your tire balancer bubble being broken out, your option would be to locate a bubble large enough to bridge over the top of the existing one, extending from edge to edge of the bubble tower. As long as it can be leveled successfully using the above-described Coats method, then it should work OK. In this situation I would consider using a couple of dots of epoxy to secure the add-on bubble to the tower. For most situations where it’s sitting on the smooth glass, I wouldn’t worry about securing the bubble. But if you prefer, doing so with thin two-sided tape would probably work well.
While this is directed toward the Coats M-60 and M-76 tire balancers, it could be applied to other similar balancers as well.
So will working with an “add-on level” be the same as the original one? No, but you can adapt. For one thing you are missing the crosshairs, so you will no longer be using them as a guide. You will need to adjust to whatever the add-on bubble has to offer.
This is the best answer I can come up with, but if someone has successfully opened one of these assemblies and found a way to refill the bubble, please share your results with Auto Restorer readers.