Replacing Window Felts
After Years of Use, These “Fuzzies” Often Are Worn Down. That Can Lead to Loose—or Broken—Windows.
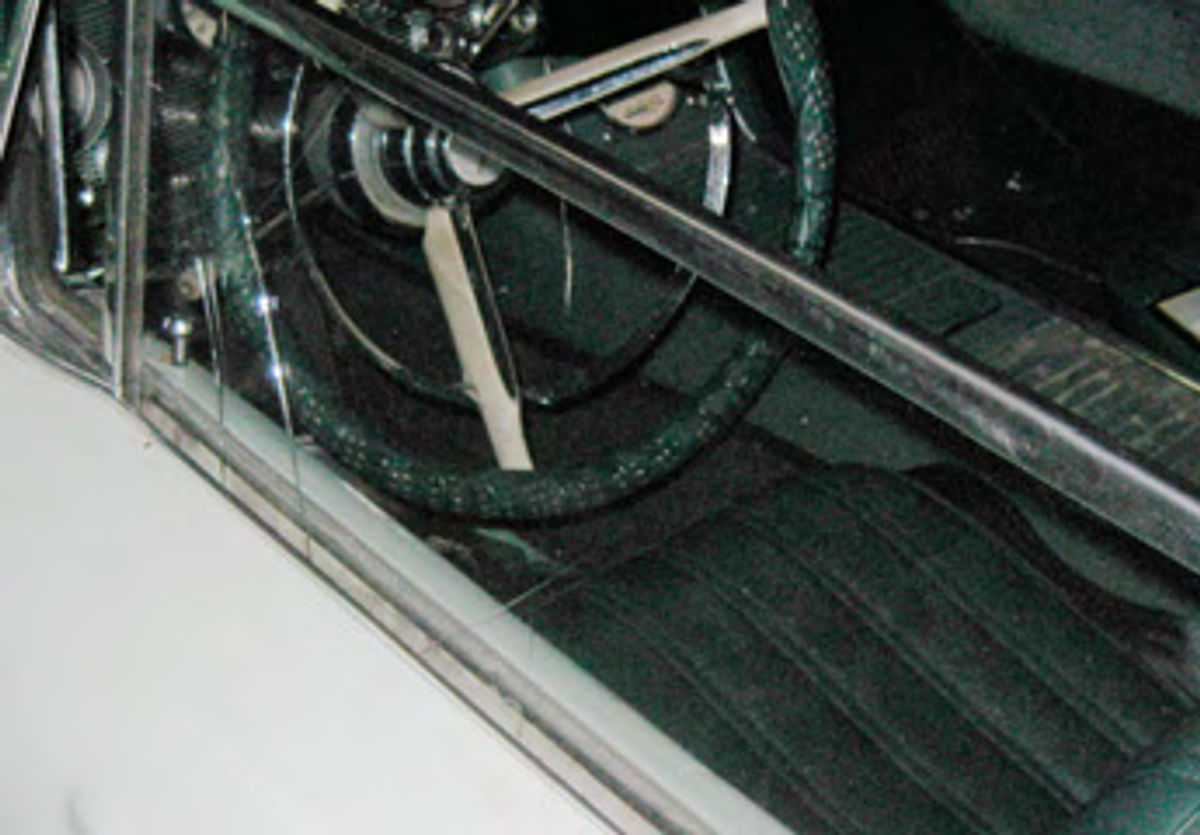
A 1960 THUNDERBIRD came into my shop recently with a cracked driver side window in need of replacement. The owner was unsure of the actual cause of the damage but after a very short investigation the root problem became pretty apparent. The window had excessive play in and out of the center of the body, a direct result of deteriorated felts or “fuzzies” as they are often called. After 50-plus years the originals had nothing more than the thin metal backing left and the added space was allowing the door glass to slap right up against the hard door shell, causing the broken window.
Worn window felts are a common problem on our classics but a day’s worth of work, paired up with a few hundred dollars can go a long way in correcting the issues associated with their deterioration. Usually I will install all new felts after a fresh paint job, however this particular car won’t be seeing fresh paint for quite a while so repair was necessary now. The fact that this Thunderbird model has front vent windows makes the process a bit more complicated but with some patience and the right tools anyone can perform this restoration.
Some Disassembly Required
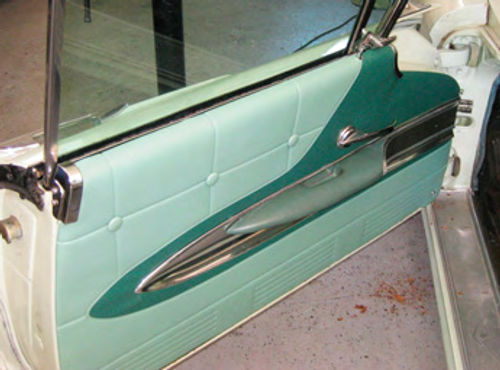
To begin the job you will need to remove your inner door panels both front and rear which obviously means taking off any cranks, knobs, locks, etc. Next, the watershield should be removed to allow access to the door. Now we’ll begin the process of removing the door glass and quarter window assemblies. As I’ve Mentioned in previous articles like to use a little bit of spray paint to mark the current position of any hardware I’ll be taking out to aid in realignment when it all goes back together. Obviously this may not be an option if your car was just painted but with the help of a service manual for your specific vehicle and some patience you can still get everything back into alignment without these marks.
Pulling the windows out of the Thunderbird meant removing two upper window stops on each door and then popping the window roller pins out of the spring-loaded rollers on the lower window tracks. There are two pins on each window and if you’re careful you can remove the spring-loaded clip just far enough to disengage the pin from the roller without allowing the entire roller assembly to come apart. It’s then just a simple matter of pushing the window up the track and guiding it out of the door from the top.
Removing the quarter window assemblies is an even easier task. There are four bolts/nuts holding them into the door on each side, again marked for future realignment. Once the nuts and bolts are removed you can pull the assembly up and out of the door…slightly rotating it to allow the bottom mount post to fit through the opening in the top of the door.
Installing the New Horizontal Felts
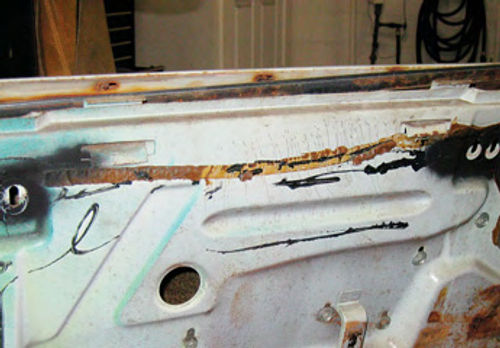
There’s a total of four felts on each of the doors—two that run horizontal and two that are vertical. The horizontal pieces are fairly simple to get to and change out. The first is attached to the car’s door skin itself, usually with a series of clips or screws. If it is clipped into place be very careful while prying the old piece out. I suggest using a plastic trim removal tool to prevent scratching or chipping your door paint. You also can put a piece of masking tape on your door just outside the felt in case you slip. Installing the new piece is as easy as lining it up and either screwing or clipping it back into place. If you have the screw in type and the pre-drilled holes don’t match up to your factory ones you can carefully hold the felt in place and drill new holes into the door panel.
The inner horizontal felt is attached to your interior door panel and is next in line for replacement. On our Thunderbird the inner felt is retained with staples. If you’re using your original door panels you need to pry the staples open and pull them out to remove the old piece. The owner of this particular car opted to add some new door panels while the car was here so removal wasn’t necessary. I’ve found that the pre-drilled holes for the new felt rarely, if ever, line up with the originals on the inner panels so whether you’re using your old or new door panels this part will be the same. I like to flip the door panels upside down on a table or stand and then use some plastic clamps to hold the new felt in place with the proper alignment. Then you can take a drill and using the holes already in your feet as pilots drill new holes into the back upper lip of the door panel. Once the holes are drilled you can use the supplied new staples to attach the felt permanently. Push them through the holes and then use a pair of pliers to pinch them closed. Be careful not to damage your new felt with the pliers and do your best to close the staples as tightly as possible to prevent any play.

There are two horizontal felts on each rear quarter window as well. If you have the clip-in type you usually can get away with not removing the window glass. Pry the outer felt out of the window pocket and pop the new one in. The inner felt replacement is the same as the front’s with the installation of new staples.
Moving From Horizontal To Vertical
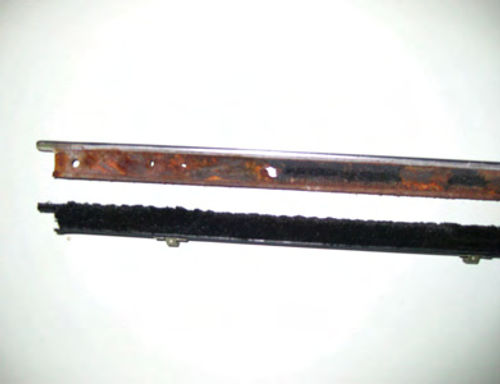
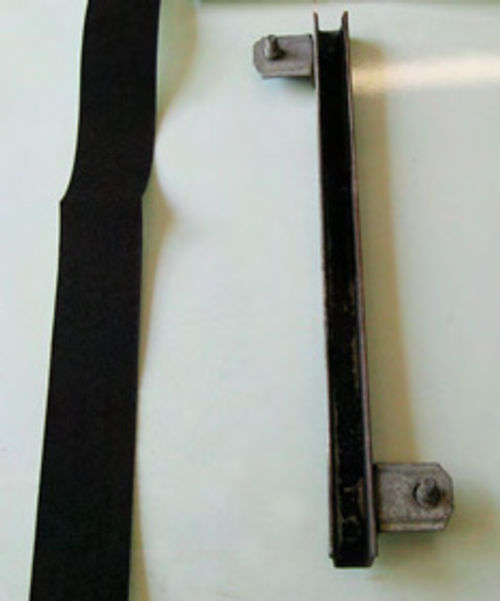
Now that the horizontal pieces have been replaced, it’s time to address the vertical felts that help guide the window up and down. The channel containing the rear felt is bolted inside of the door panel with two bolts accessed from the door jamb area. Again you should mark their alignment, if possible, before removing them. The felts in these channels are usually glued in place from the factory and after many years the glue has either ceased to hold or the material has turned to dust. Once the channel is removed from the door you can use a scraper to remove as much of the old material as possible. I also like to run a wire wheel through the piece to get any last bits out and leave it as clean as I can. Follow this up with a quick shot of Brakleen or degreaser. The replacement felt comes with adhesive already applied to the back and the backing paper is split into three pieces to help with alignment during installation. Cut the felt to the proper length and remove the center paper backing strip. This allows you to get the new piece all the way down into the channel and adhere it for its full length. Once you’ve finished this step, remove each of the outer paper strips and adhere the sides. The rear window channel is now ready to be bolted back onto the door.
If You Have a Vent Window…
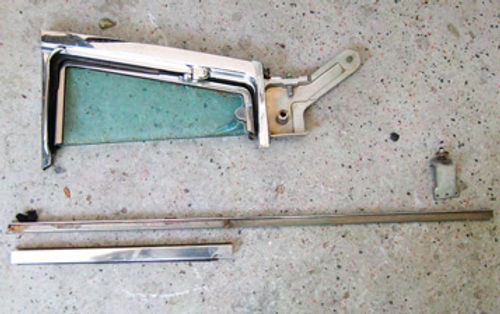

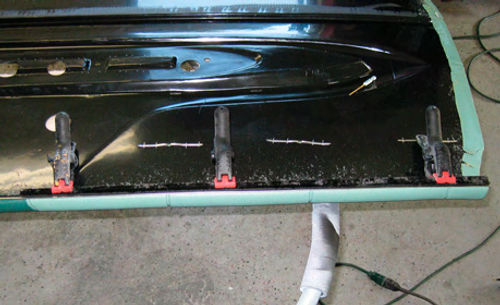
Should you have a car without front vent windows there will be a similar track in the front of the door as in the rear. However, the process for replacing the front vertical felt on a vent window car is a bit more involved. There is a solid channel with felt inside that runs up to the top of the vent window that is attached to the rest of the vent window frame with either screws or, more likely, rivets. This entire channel will be replaced with a new one so we must remove it. On the Thunderbird the window frame is held together with four rivets. I located them inside the channel and carefully drilled them out making sure the window was in the open position in case the drill bit passed through too far.

You also can remove the glass altogether. Once the rivets are out you can pull the back off of the vent window frame. Note that the rear chrome portion will still be attached to the felt channel as well as the lower mounting stud. The next step is to drill out the rivets holding these pieces on and separate all three.
If your quarter window seals are in need of replacement this would be the ideal time to do them as the rivets that hold the rear seal in place are only accessible when the channel and chrome portion are separated.
It is now time to transfer the rear chrome strip and lower mount over to your new felt channel piece and reassemble the vent window assembly. I usually like to hold my old channel up to the new one and use either a punch or marker to precisely mark where the holes should be drilled into the new piece to accommodate the rivets. Once the holes were marked, I used a 1/8” drill bit to open them up. Now using some 1/8” rivets, the lower mounting stud and upper chrome strip can be attached to the new channel.
After a quick test fit the channel can be riveted back onto the rest of the vent window frame. Make sure your vent window still opens and closes properly without being too tight or having too large of a gap at the rear seal.
Putting the Glass Back In Place
Finally, you can begin reinstalling the glass into the door. The vent window assembly must go in first. Bolt it back into place and check your alignment with the windshield post as well as your line above the top of the door. After you’re satisfied with the vent window you can drop the door glass back in, pop the roller pins back into place, and reinstall your upper window stops for proper fit. Follow this up with your interior door panel and associated hardware.
You should now have little or no play in the door glass, eliminating any rattles…or the potential for another broken window.


