Repairing a Century-Old Cone Clutch
The Leather Facing Had Worn on His Antique Clutch. So He Installed a Temporary Replacement and Gave the Original Clutch a Modern Repair Treatment.
The engine in an old car cannot be started under load, which makes it necessary to provide a means of applying the load after the engine is started and reaches its normal speed. This is accomplished through the use of a clutch. Over the years, automakers have used different types of clutches to connect/disconnect engines and transmissions.
Recently we readied my 1917 Oakland for a trip that was detailed in the December-February issues of AR. After re-shimming the rod bearings, we took a test drive. The car was running OK even though the engine sounded a little noisy. However, the transmission didn’t shift easily into third gear. We immediately determined that we had some kind of clutch problem going on.
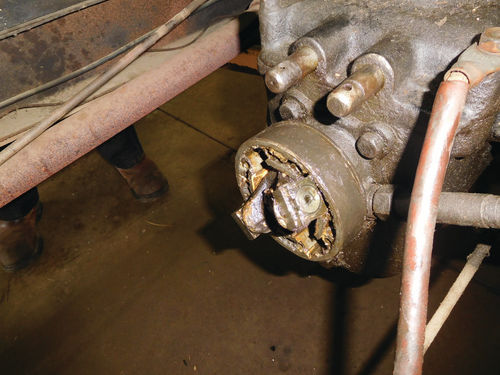
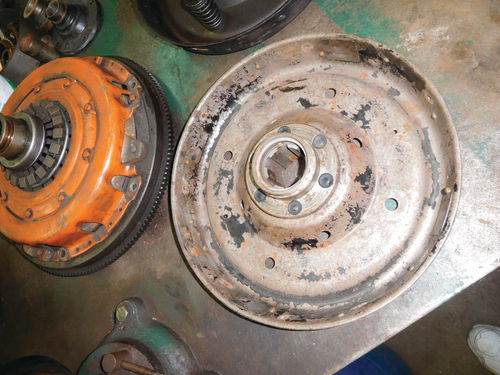
Oakland expert Wayne Koffel told us to remove an inspection plate on the bottom of the clutch housing behind the flywheel. When we did this, pieces of leather fell out.
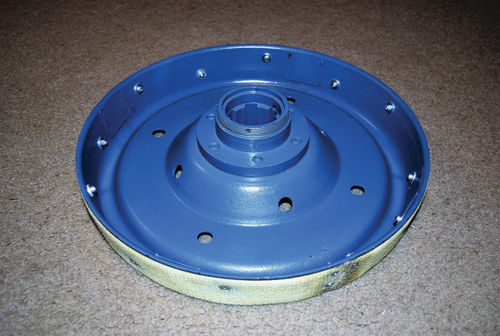
The 1917 Oakland used a leatherfaced cone clutch that operated against a conical surface in the flywheel. This was a common type of clutch used by automakers in the early days of motoring. As with other manual transmissions, the operation of the clutch is controlled by the clutch pedal in the driver’s compartment. The original Oakland clutch facing resembles a leather belt, except that the holes in the leather (for rivets, not a buckle) are punched with the rivets alternately offset, rather than in a straight line.

An Interim Application of Foot Oil
Wayne Koffel suggested treating the remaining clutch facing with Neatsfoot Oil. This was the factory recommendation for servicing a clutch facing if the leather became too hard. A few drops of Neatsfoot Oil applied at frequent intervals will make the leather soften up and hold better. So we treated the clutch facing remnants with Neatsfoot Oil.
(Editor’s note: Neatsfoot oil is a yellow product derived from the shin bones and feet of cattle. In this instance, the “neat” part of the term comes from an old English word for cattle. It’s available online in various sizes. We found a 32 oz. size for about $15.)
For a little while, the transmission seemed to shift slightly better. Then the transmission was placed in reverse to back out of a garage and the rest of the clutch facing flew out of the bottom of the car! Now we had a real problem, because the trip in the Oakland was supposed to begin in just two days and we had no clutch action at all.

Time To Contact an Expert
A phone call was placed to Andy Wise at . Wise specializes in restoring pre-1950 vehicles. He also restraps Gabriel snubber shock absorbers (and other shock absorbers) for early cars. Another specialty—that we were most interested in at this point—is the relining of cone clutches with Kevlar.
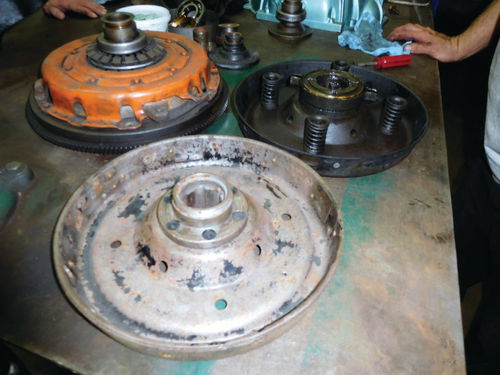
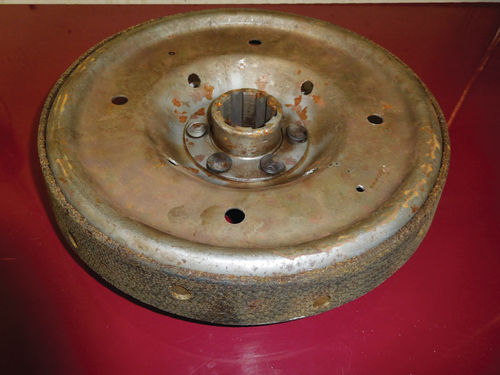
Wise was at the Hershey swap meet when we reached him. He had a number of cone clutches that he repaired with Kevlar at the show, but, unfortunately, none had the propersize center hole for an Oakland. He did have a good, used Oakland clutch that had been repaired by a friend with brake lining material. Wise said he used this clutch as a demonstration model to illustrate the superiority of Kevlar linings.
To help us make our trip, Wise agreed to loan us the demo clutch if we could pick it up at Hershey.
Fortunately, we had a friend at Hershey who was returning home the next day. He picked it up at Andy Wise’s swap meet space and brought it home.
About Our Temporary Part
Once we got the demo clutch, we made plans to meet at Paige’s Auto Repair in Manawa, Wisconsin, to install it. Ron Paige has a fully-equipped shop and we would have the use of a hydraulic transmission jack and other tools and equipment not available in our own nearby shop.
We took the transmission out, removed the old cone clutch and installed the demo clutch. While the demo clutch we installed did not have the Kevlar lining, the installation process was the same as for any cone clutch and the demo clutch worked just fine during our trip.
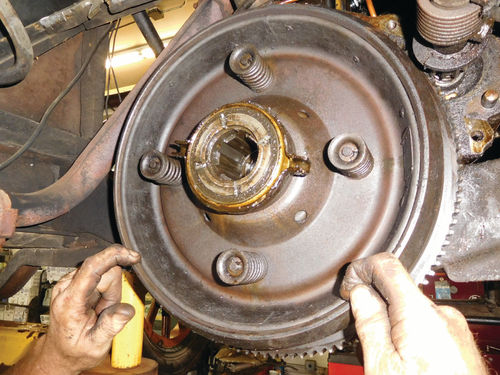
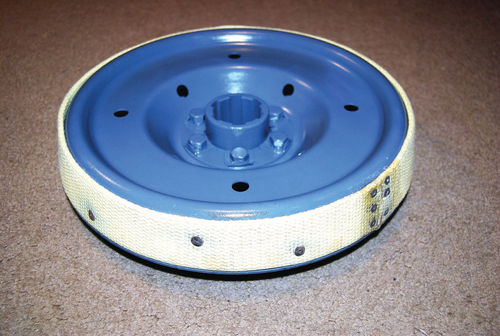
The clutch itself consists of a steel cone with the outer edge, which is tapered, lined with a durable, longlasting material that will “grab” on the conical surface in the flywheel. It appeared that the original leather material had lasted a century. We don’t know how long the brake lining material would last, but the Kevlar should outlast them all. Small springs placed at points around the face of the cone press the clutch lining out slightly at these points. Several coil springs force the clutch into contact with the flywheel.

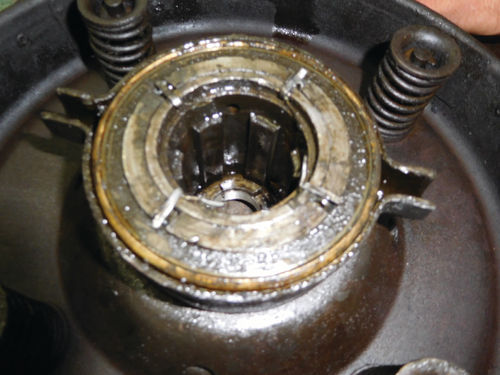
A ball bearing is fitted around the hub of the clutch. This “throw-out”’ bearing is connected to both the clutch and the actuating fork or lever. The operation of this entire assembly is controlled by the driver letting off or pressing down on the clutch pedal.
The clutch is always engaged with the flywheel, unless the clutch pedal is pushed down. The driver pressing the clutch pedal down will cause several clutch springs to compress and this, in turn, releases the control between the flywheel and the clutch. In this mode, the engine is free to run at speed, without any load being placed on it.
Whenever they are in full engagement, the clutch and flywheel turn as a single unit with the clutch transmitting engine power, through gear changes, to the rear axle and road wheels. When the engine is just picking up the load, while the car is starting, the clutch will slip a bit, before it grabs. This is normal, but under all other driving conditions, the driver should avoid “slipping the clutch,” since it causes unnecessary lining wear.
As is the case with all manual transmission cars, “riding the clutch” should be avoided with a cone clutch, except when driving in heavy traffic or maneuvering a car in close quarters. The best advice is for a driver to keep his foot off the clutch pedal since pressure creates a tendency to slip the clutch, which will cause abnormal lining wear.
It was preferable with early cars to learn how to operate the car with the throttle lever on the steering wheel and accelerator on the floor, but to keep a foot near the clutch pedal in case it was necessary to quickly engage the clutch in an emergency.
Installation Details

The inspection plate we mentioned earlier came in handy for looking over the condition of the clutch facing material, for applying Neatsfoot Oil if the leather lining was hard and for applying some finely ground Fuller’s Earth to the leather facing if grease or oil happened to get on it by mistake. Grease or oil would cause the clutch to slip.
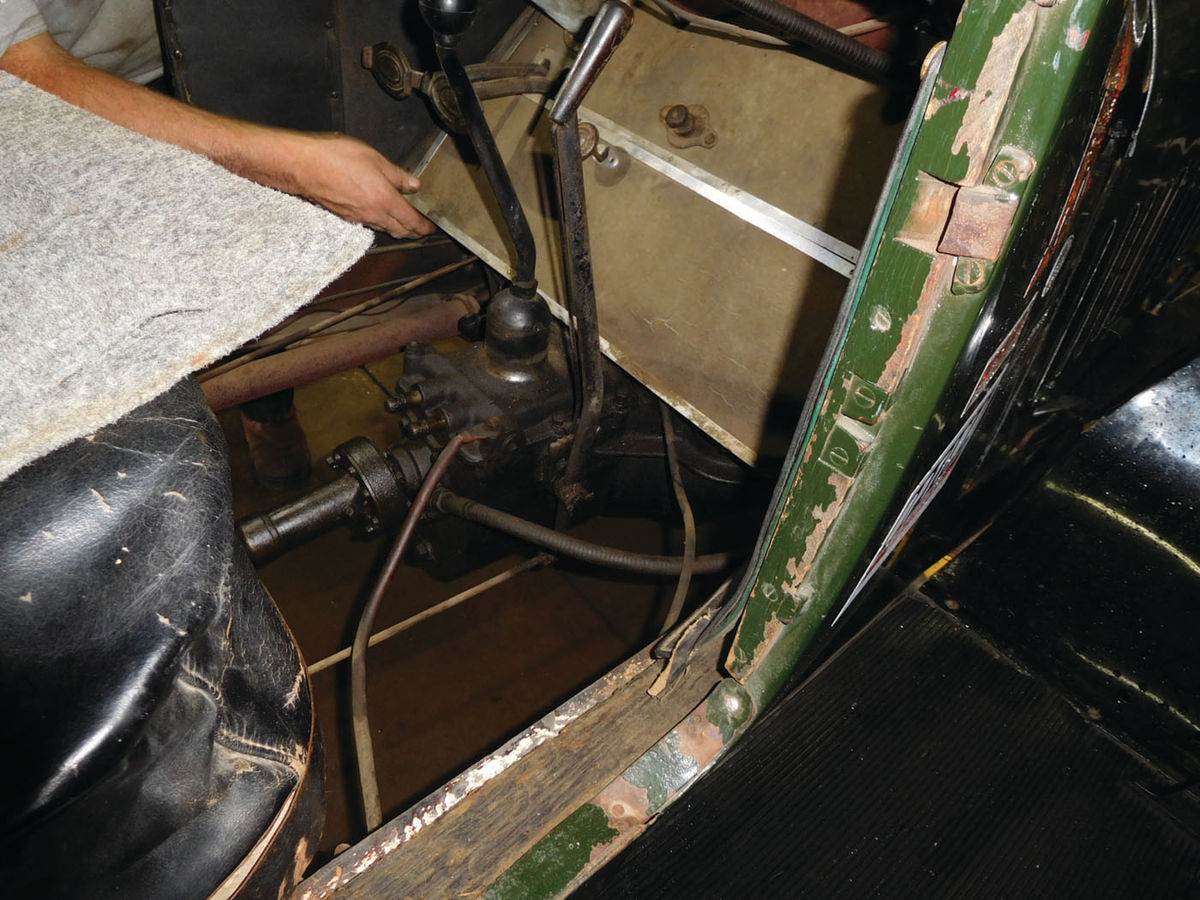
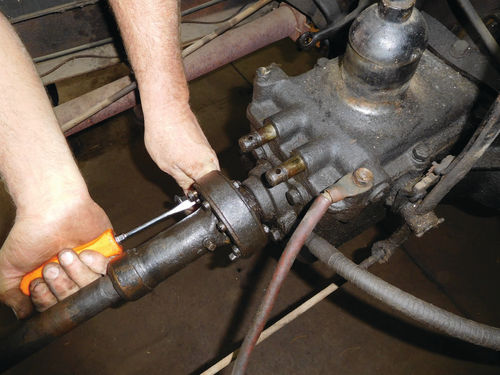
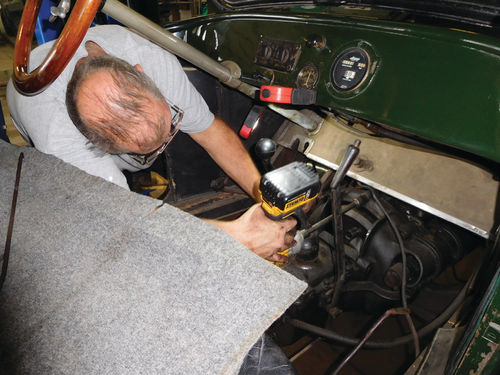
To make repairs to the clutch or any clutch parts in our Oakland, it is necessary to disconnect the transmission from the engine and propeller shaft and remove the transmission from the car. The first step in doing this is to remove all the floorboards to get access to the transmission. The front universal joint sits in a housing behind the engine and has to be disassembled to disconnect the propeller shaft. A long battery cable is also grounded to the transmission and has to be removed by undoing its attaching bolt.
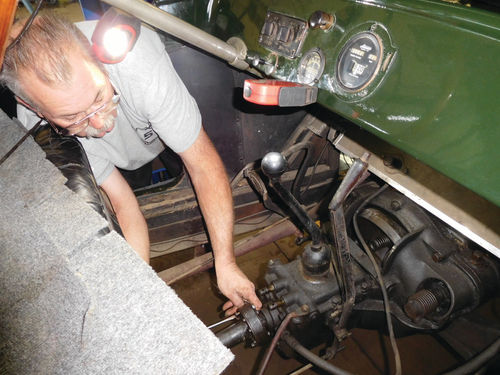
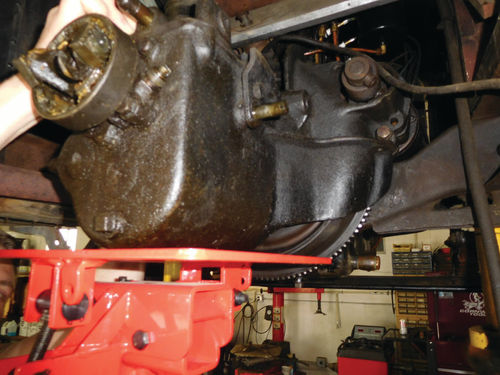
The large bolts holding the transmission to the engine have to be removed next. Some are just a little hard to get to, but it is amazing how easily the 100-year-old Oakland came apart once we figured how to get access to the bolts. The hydraulic transmission jack was a major help for all this work.
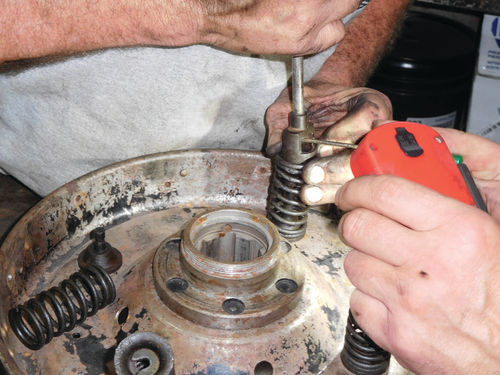
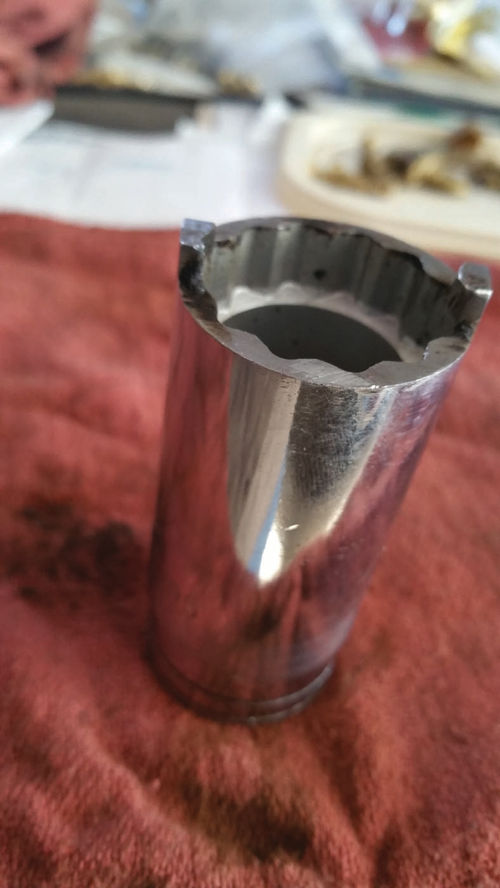
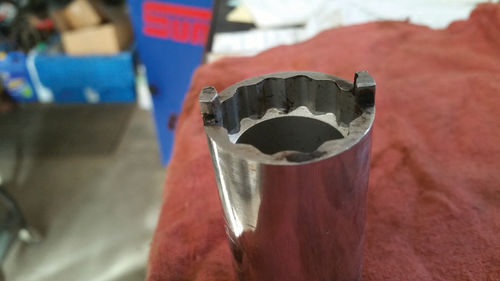
The clutch itself was a little difficult to remove. Andy Wise had also loaned us a modified socket that was ground down at the top except in two spots. This created “tangs” that stood up opposite each other. Getting these tangs to grab where they were designed to grab took more than a couple of attempts.
With the bad clutch out, the throwout bearing had to be transferred to the demo clutch we were temporarily installing (the one lined with brake material). A special flat pliers was used to remove four fasteners so that this could be accomplished. Once we had the throw-out bearing removed, we looked it over and it seemed to be in good reusable shape. Note that there are practically no new parts available for the 1917 Oakland Model 34, so “good enough” is often the best you can hope for. It’s doubtful this will ever change.
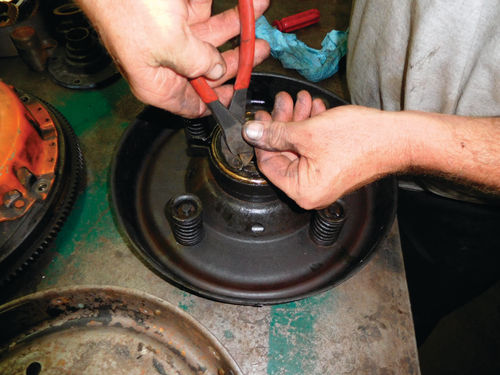
Our next chore was to remove the four coil springs that force the clutch into contact with the flywheel. We took these off the old clutch and transferred them to the demo clutch. These coil springs are attached to the clutch with pins and keepers that look like the ones that hold brake shoes on drum brake cars. However, the clutch springs are much heftier than a brake spring and don’t compress nearly as easy. Nevertheless, Ron Paige used a standard brake compressing tool and years of experience as an auto mechanic to compress the springs and slide the “arrowhead” tips of the pins through the slots in the keepers. It was definitely a two person job, but soon all four springs were installed.
Put It Together, Then Take It Apart Again
As they famously say in shop manuals, “assembly was the reverse of disassembly.” In our case, this seemed to be the truth and everything went back together fairly easily.
The only clutch problem we have now is that Andy Wise’s demonstration clutch, which we put in for the trip, has to be removed and replaced in the spring.
We had Wise reline the original clutch with Kevlar…and he wants his demonstration model back in time to take it to upcoming swap meets.


