Readers Speak Out
Topics Range from Headlight Malfunctions and Working With Bubble Balancers to Driving a Top-Down Convertible In a Snowstorm.
More Vintage American Cars Spotted Abroad
Greetings! I just saw the March issue with the picture of the Mustang in Greece. We’ve had a few similar encounters over the years:
In 2005, from a cruise ship, we saw a 1959 Cadillac driving into the dock area at the port in Copenhagen.
While waiting for a bus in the Italian part of Switzerland in 2009, we saw a big black Mopar 4-door post sedan with big fins go by. We’re not sure of the year, but we’re pretty sure it was from the late ’50s.
Unfortunately, we don’t have good pictures of these.
Thanks for a good magazine!
Jim Graves Mills River, North Carolina
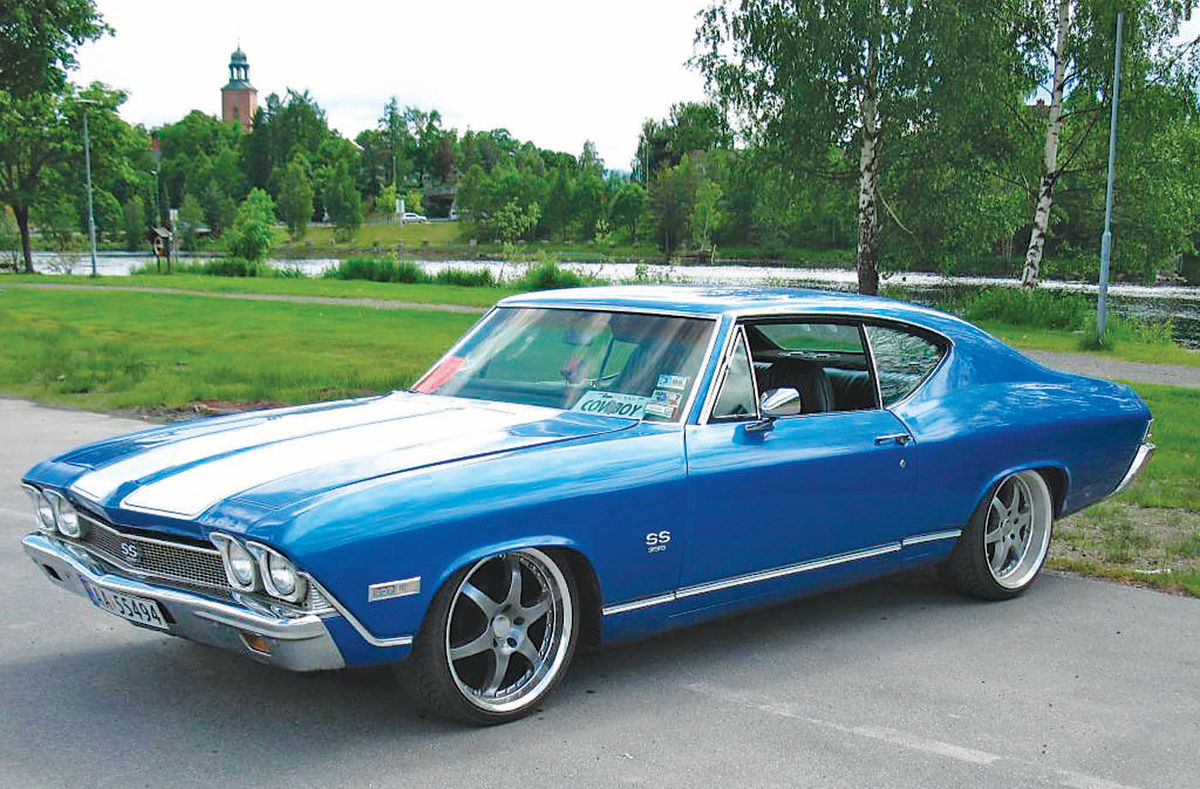
We saw a number of American cars abroad, specifically in Kongsberg, Norway, in June of 2009. There was a ’70s Chevy wagon with “wood” siding, a ’90s Pontiac Trans Sport and a Chevelle (seen on this page). I saw three or four more interesting examples on the road between Oslo and Kongsberg but didn’t make any attempt to take a photo while driving.
Curtis Loew Spring, Texas
Help Me Modify My Truck for a Travel Trailer
Hi Ted:
This will be kinda long, so edit at will if it makes the pages of AR that I have been enjoying for years. I have reached the age where I have the time and resources to do a little traveling around the U.S. Yes, I’m retired. I’d like to get a smallish travel trailer, 20’ or under, and tow it behind my ’54 Chevy short bed truck. It is stock now and that brings me to my questions.
I want to swap in a more powerful engine and make some running gear changes in order to allow my old truck to become an adequate and comfortable towing vehicle. I’m not building a hot rod, and I’ve gone back and forth between a larger 6 (292, 302) or a V-8 like a 327 or the newer LS engines, like an LS1. I’d like to maximize torque with the engine swap.
In any case, I’ll add an independent front suspension with disc brakes, an automatic tranny with O/D and a gear ratio in the rear that’s a reasonable compromise between towing and mileage. I’ll add air conditioning and upgrade the interior with seat belts, a shoulder belt and a decent sound system. I’ll do whatever I need to do to beef up the rear of the truck for towing purposes, i.e. springs, tow ball, etc.
In any case, I’ll add an independent front suspension with disc brakes, an automatic tranny with O/D and a gear ratio in the rear that’s a reasonable compromise between towing and mileage. I’ll add air conditioning and upgrade the interior with seat belts, a shoulder belt and a decent sound system. I’ll do whatever I need to do to beef up the rear of the truck for towing purposes, i.e. springs, tow ball, etc.
What kind of mileage can I expect with a properly modified (built for torque) engine (6 or V-8) assuming a properly geared tranny and rear end?
I’m a conservative driver. I’m kinda leaning toward the 6. What kind of work would I need to have done regarding compression, cam, carburetion, bore, stroke, etc.? Is it silly to consider the 6 and instead just go with the V-8?
If I had the engine specifications (torque at RPM) is there a formula or a resource I can access that would provide the proper gearing for the tranny and rear end to maximize mileage given a known payload weight?
Anyone facing a similar situation that can give me some advice? Do any of your readers know what the towing capacity of these old trucks is?
I have looked everywhere it seems for this information and so far have come up empty-handed. Thanks so much for such a great resource to those of us trying to keep these old cars/trucks alive.
Carl Samuelson Santa Maria, California
So, do any readers have some advice for Carl?
Top-Down Driving In a Snowstorm
Hi Ted,
Hope you can stand one more story about driving a convertible with the top down and windows up (in response to the April Review Mirror column which questioned why some people drive that way).
Back in 1960 I was fresh out of the Navy, just married, and living in Port Chester, New York. I was also the proud owner of a 1954 Chevy Bel Air convertible. My wife and I were in the process of having a house built upstate, near Poughkeepsie, and we decided to take a Sunday drive to see what progress was being made on the construction.
It was December and it was decidedly cold but we decided to try some top down driving anyway. As reader Tim Knepshield noted in the July Letters section, there is a definite difference having the windows up as you drive. We also had the heater on full blast and were dressed warmly.
As we were driving up the Taconic State Parkway it began to snow. Not much at first but after about 15 minutes it was really coming down. People in hard topped cars were looking at us like we were crazy but the snow was passing over the car without hitting us and we were fairly warm.
After a few miles my wife happened to look in the back seat and told me we’d better get under a bridge and put the top up as the back was filling up with snow! I pulled under a bridge and stopped. When I looked in the back the snow had filled the back floor and covered the rear seat. We got out and managed to shovel most of the snow out of the car with our hands and then I put the top up. Another mistake! We didn’t have the boot over the folded top and the snow had gone in between the folds. You can imagine what happened as the top went up. All that snow ended up in the car so we had to shovel it out again!
He’s Moved to Writing Poetry About His Car
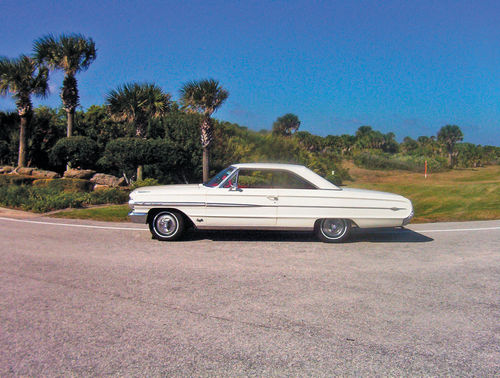
Like most of your subscribers’ cars, my 1964 Galaxie 500XL 390/4-speed has its own special story. It’s been restored, but the drive train is all original, including the factory shifter. The only thing that was changed was the manifold (to an Edelbrock) and the addition of A/C. We’re the third owners, but the second owner only had it a few months.
Just for the heck of it, here’s a poem I wrote for it that we display at car shows. Kinda chokes me up.
I AM A DAILY DRIVER
I am a daily driver No pampered life for me Don’t put me on a trailer As a curiosity.
I’m one of Henry’s finest From 1964 300 horses, factory-fresh, And four speeds on the floor.
Find me a two-lane blacktop On a starry southern night, And send me flying down it, With all my soul and might.
Just open up my throttle, And hear my engine roar My heart sings on the open road; It’s yesterday once more.
Joe Straub Orlando, Florida
That’s Joe’s white Galaxie on this page. If anyone else has been moved to poetry or song by their car or truck, let us know about it. We’d like to share your creativity with the other readers as well.
I think about that Chevy sometimes when I see a ’54 at a car show.
I’ve seen quite a few ragtops but I’ve never seen another one with a blue plaid top like mine had! It had been made from boat canvas the previous owner had gotten a good deal on. There were dark and light blue squares with a yellow pinstripe running fore and aft between the squares and a red pinstripe running from side to side the same way. I got a lot of comments on that top!
Keep up the great work with the best auto magazine out there today! I’ve learned a lot from Auto Restorer.
Bill Kautz Lebanon, Pennsylvania
It Pays to Save Those Old Issues
I thought that the experience I had with an article in the magazine might be of interest to other readers.
I read AR with interest every month. I like the How-To articles and the background articles about the Feature Restorations.
I read an article in the July 2011 issue with particular interest. The article was about subframe repairs on GM F bodies. I read it very carefully because the repair kit looks identical to the one I have seen for my Nova which is an X body. Recently I inspected my Nova to see if my subframe was as bad as the one in the article. I got lucky and the front holes where the radiator support mounts were OK. The #3 mount hole, the one at the rear of the subframe, was also good so those bushings were replaced and the bolts installed loosely. The #2 mount holes were the only bad ones. These are the mounts right at the firewall. I shopped around a little and found a repair kit of four of what look like flat washers. This kit is available from GM Classics & Chevy 2 Only in Mt. Washington, Kentucky. The part number for this kit is 2062-1 and it costs about $20 (gmclassics.com).
Before using this kit I found the locations of where the washers in the kit should be installed using the measurements from the shop manual, and ground the mount bracket holes out to the o.d. of the washer and then compared the thickness of the mount bracket to the washer. I lucked out again. They were the same. The right side was the worst so that one was done first. On the left side the new rubber mount fit the hole almost perfect but the edges right at the bushing hole were very thin and I was able to set the washer in place around the part of the bushing that was protruding though the hole and draw a line around the outside edge of the washer.
Since I do not have the space to remove the subframe I got two 5 ⁄8 coarse-threaded bolts about 3 inches long and four nuts. I threaded the bolts through a nut at the bottom and top of the frame bracket, threaded the bolt up into the body bracket and tightened the nuts to keep frame and body alignment while working on the mount brackets. I installed the alignment bolt in the left side first as the hole in the body bracket on the right side is elongated while the left side is not. I was able to jack the body up enough to grind and weld as needed. The subframe was supported front and rear on jack stands and the repair was a success.
Thanks for a great magazine.
Gary Malkin Norwalk, Connecticut
Some Thoughts On “The Headlights Went Out”
Imagine my surprise when I received my April issue and on page 22 I read “Suddenly the Headlights Went Out, Pt. 2.” (The series ran in the March-May issues.)
Please allow me to explain: At five a.m. on a Saturday in March I headed for the Good Guys National in Scottsdale, Arizona. I had just completed a frame off restoration on my ’56 Chevy and this would be my first outing. I was looking forward to joining some of my friends at the Good Guys event.
It was dark when I left my home in Strawberry, Arizona. I was headed north on SR 87, a two-lane mountain road, and after about 10 minutes into the trip, “Suddenly the Headlights Went Out.” The headlights came back on after hitting the guard rail on the southbound side of the road.
During the restoration I had used the Ron Frances Express Wiring System and a new headlight switch from Danchuk Manufacturing.
My solution to the problem, after replacing the left front fender and various other small parts, was to install a new dimmer switch and a pair of relays for the headlights. I had considered installing a pair of driving lights on a separate circuit and turning them on when the headlights were on. Then, if the headlights went out again, I would at least see what I was going to hit.
Soon I will be taking the car to the Valley of the Sun for some final body work and plan on following my wife with the headlights on low beam for half of the trip and high beam for the remainder. If the headlights pass this test I will consider the problem solved.
Thanks for a very educational article that I was able to learn a lot from.
Chet Gandy Strawberry, Arizona
Regarding the “Suddenly, the Headlights Went Out” story. I had a very similar problem with my wife’s ’73 Jeep Commando that she inherited from my father (a story for another time).
In this case I was pulling a trailer on a dark and deserted winding road in the mountains, and suddenly the lights started a rapid blinking off and on. Some investigation found the circuit breaker on the light switch was very hot. I had changed the headlights to brighter Halogen bulbs when one of the originals burned out, causing a higher amp draw on the headlight switch. These worked fine until I added the trailer lights, both tail and clearance, to the load on the headlight breaker. The total load on the switch was now over the limit.
The fix was to install a fused dual relay at the front left fender before the right side headlights split off. A direct feed from the bat/alt power ensured better function of the lights and reduced the load on the switch. Also after this episode the breaker would not hold the load it would beforehand. For this particular vehicle these are made of what we call unobtainium. Reducing the load will ensure longer reliable service.
As an aside, the new cube relays and breakers make this much more reliable than the old fused units with glass fuses I had before.
At 71 I don’t do as much but enjoy the articles and my free advice is usually worth the price.
Dan Burdick Westminster, Colorado
I have enjoyed reading the series, “Suddenly the Headlights Went Out,” published in the last several Auto Restorer magazines.
As an aircraft mechanic who has to troubleshoot very complex systems on an almost daily basis, I like to read other people’s approaches to troubleshooting a complex issue. Mr. Armstrong showed at the end of Pt. 2 that his headlight switch mounting bracket has one of the tabs for the mounting hole broken off. I have a couple of thoughts regarding this.
1. Glue it back together using a 5-minute epoxy. When I do this, I make a reinforcing tab out of some scrap plastic stock. If you don’t have any scrap stock lying around, sheet stock can be acquired from you local modeling store.
2. While I don’t know of a source for original plastic brackets, metal replacement brackets are available from Mike’s Montes (mikesmontes.com), Dixie Monte Carlo Depot (dixiemontecarlodepot.com), and Custom Monte SS Parts (custommontessparts.com).
As the author’s El Camino shares many parts (including most of the interior) with the Monte Carlo, this should help him. As someone with two Monte Carlo SSs (’84s), I have used the metal replacement bracket and I like it very much. It provides a much more solid mounting point for the headlight switch.
Andy Mehl Kalamazoo, Michigan
Thanks for the information and the product sources, Andy. In Part 3 of the series John Armstrong crafted a new bracket out of 20-gauge steel to help readers who can’t find readily available replacement parts.
Bubble Balancers Spotted at Drag Strip
John Armstrong’s articles are always interesting and always educational—and his series on wheel balancers and balancing (November-December) are good examples of his informative articles. For many years I have used a bubble balancer to balance my tires/wheels but with the information provided in the aforementioned Auto Restorer articles, I should be able to do a more comprehensive job of wheel balancing.
My simplistic understanding of balancing has been that if all of the rotating mass is concentrated in a single plane, static balancing, such as can be accomplished with a bubble balancer, works fine. But if the rotating mass is not in a single plane there is the possibility of an imbalance “couple” which manifests itself as wobble. This was mentioned in the November AR article, “Working With a Bubble Balancer, Pt. 1” and was described as being an “extreme dynamic condition.” In this case dynamic balancing (spin balancing) must be used to correct the imbalance condition. It is obvious that the narrower the tire and wheel, the most likely static bubble balancing will work successfully and the wider the tire and wheel, the greater the possibility that a dynamic spin balancer will be needed.
About 10 years ago I attended an NHRA National Championship Drag Race at the Route 66 Raceway in Joliet, Illinois. There were two major tire manufacturers at this meet ready to provide the competing racers with new tires. The tire company technicians were, to my surprise, balancing big wide slicks using simple bubble balancers that looked exactly like the lowbuck bubble balancer that I have. Their bubble balancers were shielded from the wind with a small curtain but that was the extent of the “sophistication.” I asked the technicians from both of the tire manufactures why they were using simple bubble balancers instead of high-tech dynamic spin balancers. The tech guys that I spoke with said that it was difficult to calibrate a dynamic spin balancer under “field conditions” and that bubble balancers worked OK. Some of the Top Fuel dragsters at this meet were running over 330 mph with “bubble balanced” slicks.
John Armstrong may have further explained the above situation in his December AR article when he noted that tire dynamic imbalance is of little or no issue if the vehicle has a solid rear axle housing. Top Fuel dragsters use solid rear axle housings.
In the December AR article John stated: “There is tremendous satisfaction that comes with eliminating vehicle vibrations, especially if you have done so after an unsuccessful ‘computer’ tire balancing experience.” This makes one wonder if “unsuccessful ‘computer’ tire balancing experiences” may be the result of attempting to dynamically spin balance a tire with a machine that was out of calibration? I wonder how often dynamic spin balancers are checked for calibration? Gravity is used to calibrate bubble balancers and gravity is free and pretty constant and easy to use in this application.
Please keep the John Armstrong articles forthcoming.
Fred Cailey Stockport, Iowa
Well, Fred, we have a bubble balancer follow-up on page 29. In that article, John discusses an inexpensive fix for a bubble that has grown and become unreliable.


