Proper Tire & Wheel Care
There’s a Quick Way To Approach This Work…and a Better Way. Follow This Detailer’s Advice for the Best Results.
TIRES AND WHEELS are perhaps your vehicle’s most important team; they’re literally where the rubber meets the road. While every component of your vehicle gets stressed or tested from time to time, for the tires and wheels, there’s no vacation time. They are regularly getting pounded by the road.
The immense heat bakes brake dust onto your wheels, and brake dust contains both carbon fibers and metal shavings that not only stain your wheels but also get into your undercarriage, lower moldings…and your tires themselves.
The rubber and brake dust can make wheels and tires a difficult detailing task, but nothing will complete the look of your vehicle the way clean and dressed tires can. Glossy tires and glimmering wheels regularly get the first or second glance from an onlooker, and are a surefire sign that a vehicle is constantly cared for, because, as we said, tires and wheels are constantly under fire from the road.
A Most Effective Method
Tires and wheels require frequent cleaning, and protection is as important as the cleaning steps due to the corrosive nature of brake dust. But cutting through the swath of products that “guarantee” no-wipe, no-work success for detailing might be more difficult than the actual detail job. So what follows is the simplest, most effective way to clean your tires and wheels—and protect them so that every subsequent cleaning will be easier, making that perfect look a cinch to maintain.

Plan Your Approach
The first step is to examine your tires. This is an excellent time to check the tire pressure, and check the tread for wear, both routine maintenance steps that are important for gas mileage and safety. Besides, if your tread is gone and you need new rubber, there’s no better way to start with that “like new” look than to actually buy new tires!
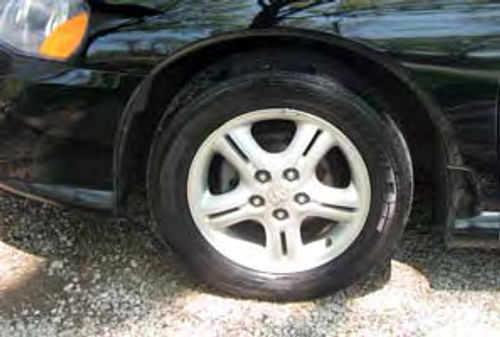
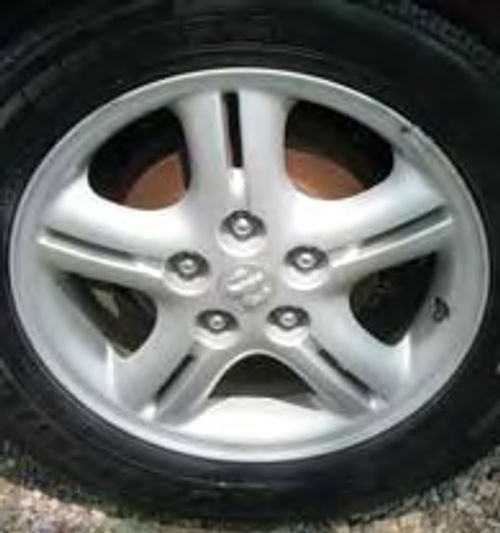
Considering that your tires and wheels must be fit for the road and, thus, worth the time it takes to detail them, evaluate your wheels. What kind of material are they made of? Aluminum will require an aluminum polish; chrome will require a chrome polish, etc.
Also, pay attention to wheel structure. The right cleaning brush for your needs will vary depending on whether you are dealing with intricate spokes or a simpler, more flat wheel surface.
This brings us to the shopping step— one place you cannot “cut corners” is by purchasing the same brush for your tires and wheels. Tires require an aggressive, harsh brush for adequate cleaning while the same bristles that will get your tires clean will cause surface damage to your delicate metal wheels which require a less aggressive brush. You can get an excellent, versatile tire brush from cleaning tools supplier OXO. Choose an equally versatile wheel brush as well, one that can get into intricate nooks and crannies with a softer bristle. From my experience, “polish balls” that fit on the end of a drill or polisher are a poor choice to get into the small spaces of a wheel, and don’t yield the same results as hand polishing.
We’ll Start With Some Cleaning
Now that you’re set with brushes, cleaning the tires and wheels to remove the contamination is the next step. The aisles of your department store or automotive store, as well as your online detailing specialists, will have dozens of cleaners specifically geared towards tires or wheels. Many of these are appealing “one step” products: for tires, usually a foam that you apply and leave. With wheels, a gel spray that you apply, wait a minute or two, and then spray off with a hose. Neither of these types of products does the job effectively compared to the steps that I’ll be outlining. These are fine if you’ve got pretty clean tires and want to cut corners on time, but that’s not the focus of this or our other detailing articles.
And I guarantee that once you try P21S Total Auto Wash, you’ll find yourself clearing your shelves of many other cleaners that this great product replaces. With a bottle of P21S in hand, moisten your tire with water, spray down the wheel and tire with Total Auto Wash, and then use your brushes to work the product in. Rinse, and repeat as necessary until you reach a state of cleanliness.
The Auto Wash is less abrasive and aggressive than most harsh cleaners, and twice as effective, from my experience. As a side note, try the same product on bugs, tar, and carpet stains, and you’ll see why you’re about to get more shelf space—the results are simply outstanding for such a versatile product.
Gel Your Tires
Once your clean wheel is moderately dry, something you can wait for as you detail the rest of the vehicle, or achieve by hand with a microfiber detailing towel, you’re ready to finish off the tires and wheels. This is where the detail work comes in.
For the tire itself, this step is rather easy, now that you’ve achieved total cleanliness with the Auto Wash. Get a premium tire dressing gel. My shop uses Sonus Tire and Bumper Dressing Gel. Apply it to the tire with a tire applicator until you achieve your desired level of shine and finish; some prefer glossy, others prefer factory matte finish. Both can be achieved with gel. Gel is a superior choice to the one-step foam cleaners which tend to spin off the wheel and onto your undercarriage or lower molding. Gels seem to have more staying power and last longer, and offer better protection. Plus, you have control over the final finish.
Turning Again to the Wheels
Now, it’s time once more for the wheels. Choose a metal polish that’s formulated for the composition of your wheels. For instance, my wheels are aluminum, so I use Mother’s Aluminum Polish.
Apply the polish by hand. This is a painstaking process with no shortcuts, but you’ll see by the “black residue” on your detailing cloth that you’re improving the finish and gloss of the wheels.
For tough areas, wrap the end of a pencil or detailing brush with your microfiber towel, and you can get the polish in and out of smaller areas. This step is as detailed and effective as your effort level—I know some people who jack up the vehicle and remove the wheel to get both sides. Needless to say, this is show car treatment and probably not a step that’s useful or necessary for your daily driver.
Seal Them Up
The final step is to “lock in” the results of all your hard work. That means sealing the polished metal. If you have an acrylic sealant handy, such as Klasse or Sonus Acrylic Glanz, a mist or polish with these products will get the metal sealed, making it more resistant to the rigors of the road and, thusly, easier to clean and detail next time.

Once sealed, there is yet another step that I recommend—applying Michelin Brake Dust Repellant, the “Step 3” of their tire and wheel care line. This product is a fine misting foam that you can put on your now clean and polished tires and wheels, and I’ve found it works rather effectively for keeping tires and wheels from quickly accumulating lots of brake dust. I recommend the extra step to ensure all of your hard work.
By following these simple steps, taking the extra time to do hand polishing, and using the right products, you’ll soon find that your tires and wheels will have that extra oomph that those lazy, one-step products just can’t generate and maintain.
Resources
Michelin Consumer Relations
P.O. Box 19001
Greenville, SC 29602-9001
Mothers Polish
5456Industrial Drive
Huntington Beach, CA 92649-1519
OXO
601 West 26th St. Suite 1050
New York, NY 10001
P21S


