Installing Three-Point Seatbelts
Many Vintage Vehicles Don’t Have Belts or Only Have Lap Belts. These Will Help to Ensure a Safer Vintage Trip.
A LONG-TIME CUSTOMER dropped by the shop sporting his latest purchase, a 1966 Mustang. The car wasn’t for him, however, he had purchased it for his 16-year-old son. (Boy, don’t I wish that my old man, excuse me, my father, had bought me a ’66 Mustang back when I turned 16… But I digress.)
The problem with this pony was the lack of adequate seatbelts.
In 1966, Ford—and everyone else for that matter—thought lap belts were more than sufficient. Besides, nobody wore them anyway.
Today, lap belts just don’t get it. You need a good three-point harness system to keep a 16-year-old, lead-footed kid safe in his ride.
We discussed the various options available for converting the lap belt system into a three-point harness system and eventually settled on a pair of three point harness systems from Custom Accessories Manufacturing.
A pair?
Yes, when ordering the Custom Accessories Manufacturing seatbelts from your local supplier—Custom Accessories is a wholesale company only—you can purchase a three-point harness system for the front bucket seats and/or a system for the rear bench seat. You must specify which system you want and what color you want. I opted for both systems in black. (Expect to spend about $200 for each set.)
These are “kitted” belt systems as opposed to universal fit systems.
What’s the difference? A “kitted” belt system has been specifically designed for installation in a given vehicle. In this case, obviously, they were designed for the 1966 Mustang. That means the mounting brackets and attachment hardware have been constructed specifically to fit this Mustang.
A universal belt system is just that, a “fits all” seat belt system. You get mounting brackets and attachment hardware that will fit your vehicle, but in most cases the brackets may need to be tweaked, shaved, bent or hammered on to get them to work.
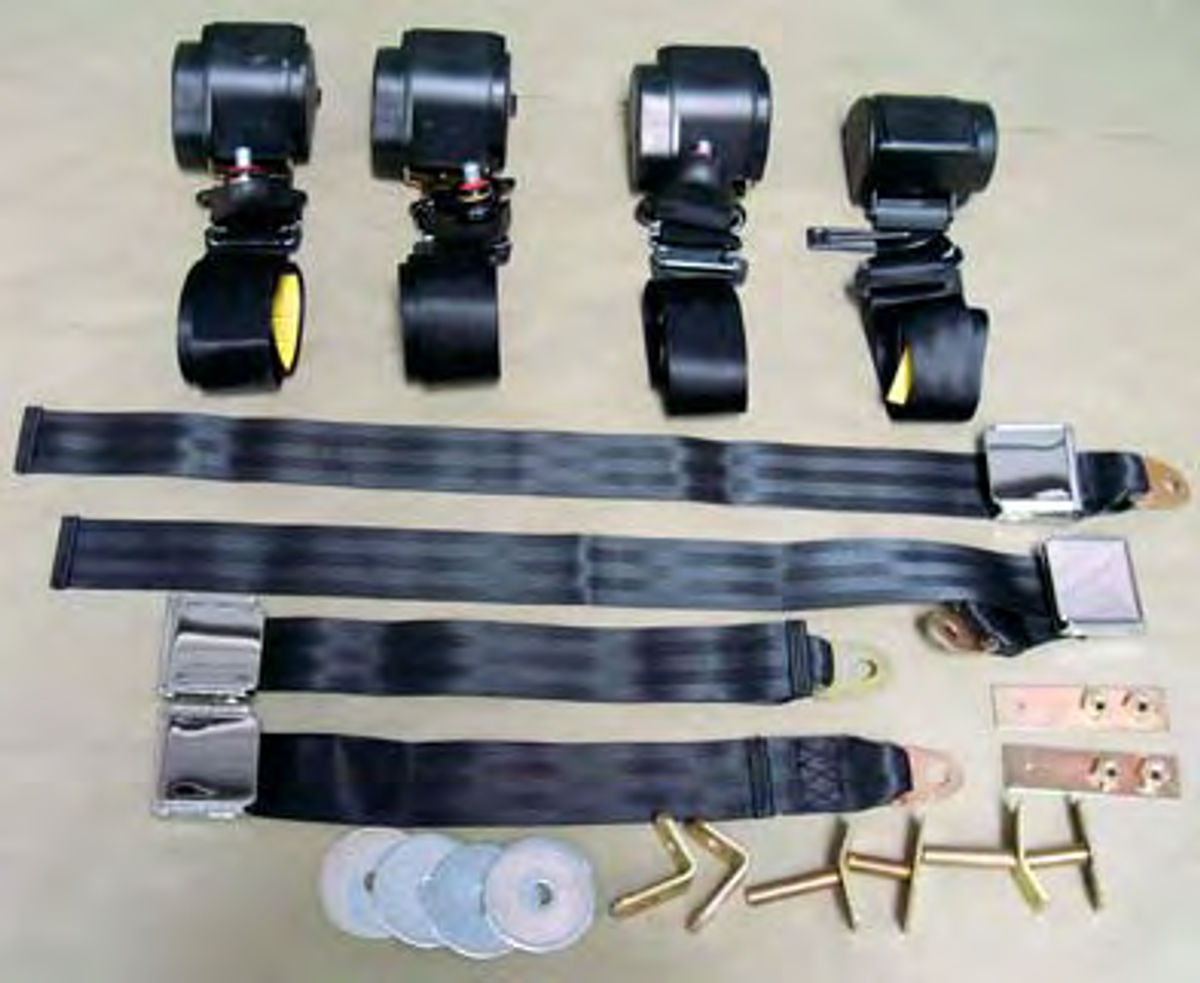
The two three-point harness systems we’ll be working with here come with everything you need (Photo 1), including four retractor belts (two for the front and two for the rear), four latching belts (the short belts are for the front and the longer belts are for the rear), and all of the necessary mounting hardware.
Starting the Installation
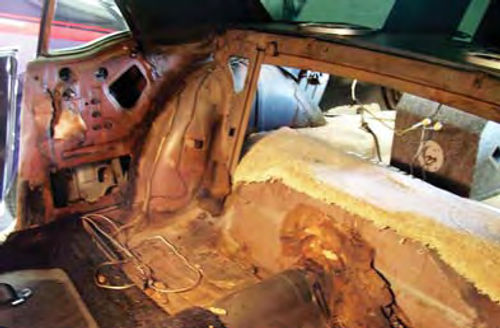
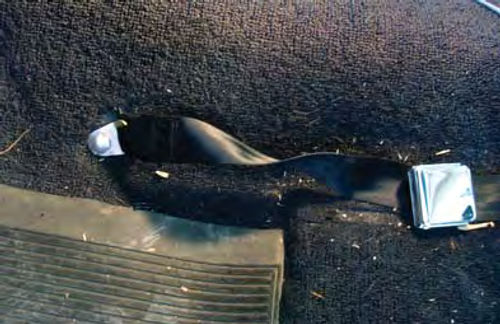
Installation starts with a little deconstruction. That calls for the removal of both bucket seats up front, the rear bench seat, all of the old seatbelts, and the door scuff plates. Notice in Photo 2 that I also removed the quarter panel trim pieces. I’ll eventually be drilling holes in these trim panels to attach the upper front shoulder belts, but for now I just want them out of the way. The carpet can stay in the car as the new inner belts for the front bucket seats use the same mounting holes as the old seatbelts. To install these belts the carpet must be in place (Photo 3).
The first belt I’ll work on is the retractor belt for the left front. The retractor mechanism bolts to a bracket added to the floor pan just forward of the rear seat. The belt then goes straight up to a second attachment point just forward of the quarter glass window regulator handle, then angles back down to the same attachment point used to mount the original outer lap belt.
The thing I liked best about this particular seat belt system is that I didn’t have to remove any of the headliner to find a place to mount the second attachment point. The second attachment point, or upper mount, for the retractor belt is placed right at the top of the door opening on the quarter panel as opposed to being mounted in the roof panel like on the newer model Mustang seat belts. This is the same style of setup the big boys use to mount the shoulder belts in a late model convertible.
That’s great for me as I know from experience that an errant welding spark hitting a headliner doesn’t cause the headliner to do a slow burn. Burning headliners tend to go “poof!” What’s left of the headliner drips onto the carpet, the seats, you and anything else that might happen to be in the car at the time of the “poof.”
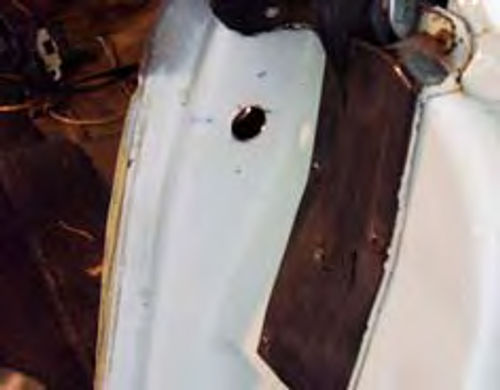
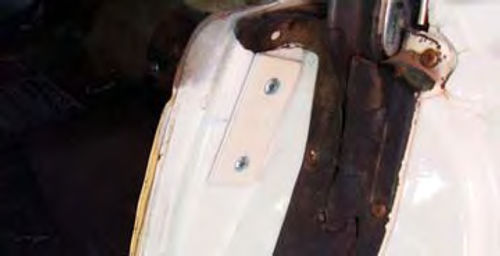
I’m actually going to start this belt installation out of sequence by working first on the second attachment point. This mount uses a T-shaped bolt/bracket that mounts in the door opening and extends through the quarter structure to the interior of the car. To attach this bolt/bracket I could have taken measurements to try and get everything exact. However, I found the best way to install this bolt/bracket was to simply flip it over, lay it against the door post, and mark the mounting holes for drilling (Photo 4).
The center hole measures 1/2-inch in diameter and the two outer holes are 3/16-inch in diameter. The larger center hole shown drilled in Photo 4 goes through all of the quarter structure and the quarter trim panel, which I had to temporarily reinstall to drill it for the mounting bolt.
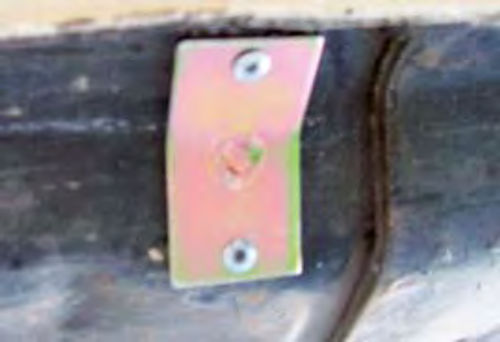
This half-inch bolt will become the upper mounting bolt for the left front retractable shoulder belt. The 3/16-inch diameter holes are for the rivets, supplied in the kit, used to secure the mounting bracket to the car (Photo 5). Notice that I painted the bracket white to match the color of the car before installation. That makes it a little less noticeable when you open the car door. The right side mounts exactly the same, and that takes care of the upper mount.
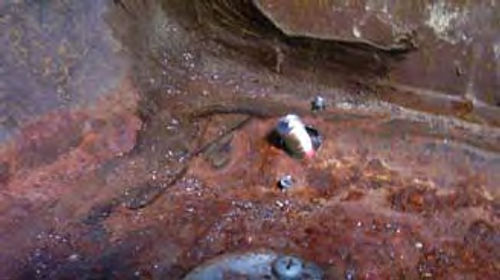
The retractor portion of this belt is anchored to the floor using another bolt/bracket that extends up through the floor pan. I apologize for the fuzzy shot (Photo 6), but this is looking up toward the underside of the floor pan on the left side. You can see how the mounting bracket is shaped to fit the floor pan in this area. It is also riveted into place.
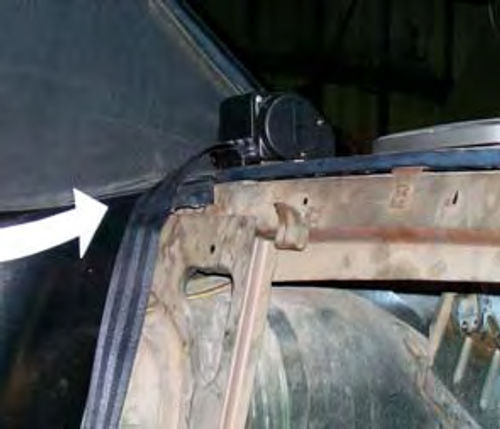
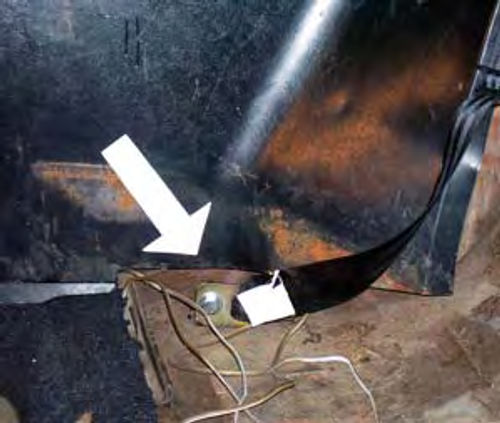
Here is a shot of the inside (Photo 7). You are looking at the left rear floor pan just forward of the rear seat, right in the corner where the pan rolls up to meet the rocker panel. Yes, from the extensive rust I expect I’ll be installing new floor pans in this car sometime in the not too distant future. (If you are concerned that the mount may pull through the rusted floor pan, I assure you that I checked this out thoroughly. Even though the floor pan is rusty, the re-enforcement plate on the underside of the pan is solid. The belt will hold.)
In order for the front seat retractors to work properly, they must be mounted perfectly vertical within the car. They cannot lean forward or backward. Should either of these retractors lean in either direction, the locking mechanisms inside the retractors will think the unit is being asked to lock down and secure the occupant. That would make adjusting the belt very difficult.
To be sure the retractors can be correctly mounted, the kit also includes a pair of these L-shaped brackets (Photo 8). Notice that the bracket is secured to the bolt installed through the floor pan. The retractor will mount in the upright hole, but not before I install the belts for the rear seat. Before that, it would just be in the way.
Rear Seatbelts

Before installing the rear seat three point harness system, I did a little experimenting with one of the retractors. I needed to know if the lock would operate properly if the retractors were mounted horizontally instead of vertically. These did.
A quick jerk on the belt caused the belt to lock up, which is what it is supposed to do in the event of a collision.
But here’s a warning for you. Just because I mounted these retractors horizontally doesn’t mean you can mount just any old retractor horizontally and get it to work properly. You must position the retractor where and how it will be permanently attached and test it. If it is locked solid and won’t release the belt, or doesn’t lock when you jerk on the belt, you must mount the unit vertically.
I mounted the rear retractors on top of the package tray (Photo 9). Notice that I mounted them as close to the sail panel as possible. That portion of the sail panel is adequately reinforced from the factory so that all I had to do was drill my attachment holes, add the bolts, and finish the installation by placing the three-inch diameter washers provided in the kit on the underside of the package tray. That helps spread the load and makes for a very secure mounting.
The opposite end of this retractor belt is attached to the quarter structure where the old outer rear seatbelt was attached (Photo 10). The inside belt is anchored where the old inner rear seatbelt was attached.
This set-up allows the retractor belt to hang on the extreme outside edge of the rear seat back where it will be out of the way and allows the inner belt to drape over the lower seat cushion so that it doesn’t end up lost between the seat cushions. There’s nothing to it.
Back to the Front
Shifting focus back to the front seatbelts, I start by mounting the retractors to the floor-mounted L-shaped brackets, like the one seen in Photo 8. Be sure to note that the brackets have been installed on top of the carpet.
From there the belts go up to the top mounts, the left one is shown in Photo 5, then thread their way back down to the floor where the ends of the belts attach to the same points where the old outer front seatbelts were attached.
A look at the final installation can be seen in Photo 11.
Some Things You Should Know
If you were watching this on TV, this project would be rated ”easy.” It is, but only if you know all of the little details of Mustang construction. I’ll start with the front seats. The seat mounting bolts are found by removing four rubber plugs per side on the underside of the floor pan to expose the bolts.
That means a floor jack is necessary to get the car high enough to go under it, and that means a couple of jack stands are mandatory for safety.
The rear seat cushion comes out by carefully pushing the lower front framework of the cushion rearward to release the cushion from the retainer hook. The seat then lifts straight up and comes out. The rear seat back may or may not be secured to the package tray by bolts accessed from inside the trunk compartment. If no bolts are found in the trunk, look for bolts at the bottom of the seat near the inner seat belt mounts. Once freed, the rear seat back is removed by pressing firmly against the top of the seat back and lifting at the same time.
All of the new belts must be allowed to swivel on the mounting bolts with the exception of the retractor mechanisms. These must be firmly secured so that no movement of the retractors is allowed.
Use a thread locking product, such as Loctite, on all of the bolts and when tightening the bolts leave just enough freedom for the belt ends to swivel. Self-locking nuts are provided in the kit and must be used. The use of these nuts will help where allowing for a little swivel is necessary.
You can use the original seat belt mounting bolts in some instances, such as on the inner seatbelts, and these bolts will automatically allow for the swivel that is necessary to keep the belts comfortable when in use.
When satisfied with the installation, get in the car and tug on each of the retractor belts. Each one should lock when jerked. If the belt doesn’t lock, the retractor will have to be shifted either forward or backward, until it does lock when pulled.
Check the fit and adjustment of each belt. Comfort is paramount. As you know from your more modern rides, the belts should be barely noticeable when worn.
Finally, wear them whenever the car is in motion.
I know from having worked in a production shop when the mandatory seatbelt law took effect in Texas that we instantly saw fewer injuries and higher survival rates for people who wore their seat belts. The cars might have been torn all to heck, but the occupants walked away unscathed. Got a question? Send it along.

Resources
LPL Body Works
5815 Contented Lane
Amarillo, TX 79109
Paint and body repair DVDs
Custom Accessories Manufacturing
1030 W. Williamson Way
Fullerton, CA 92833
Wholesale only


