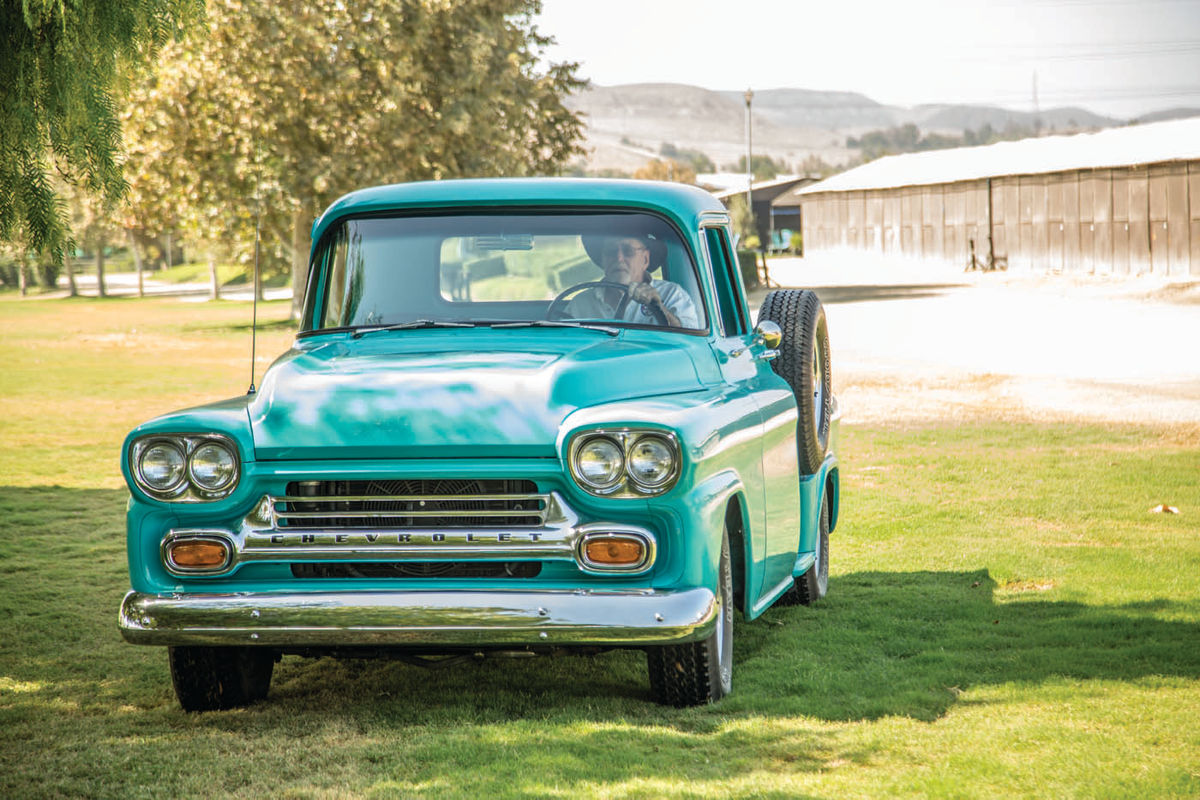
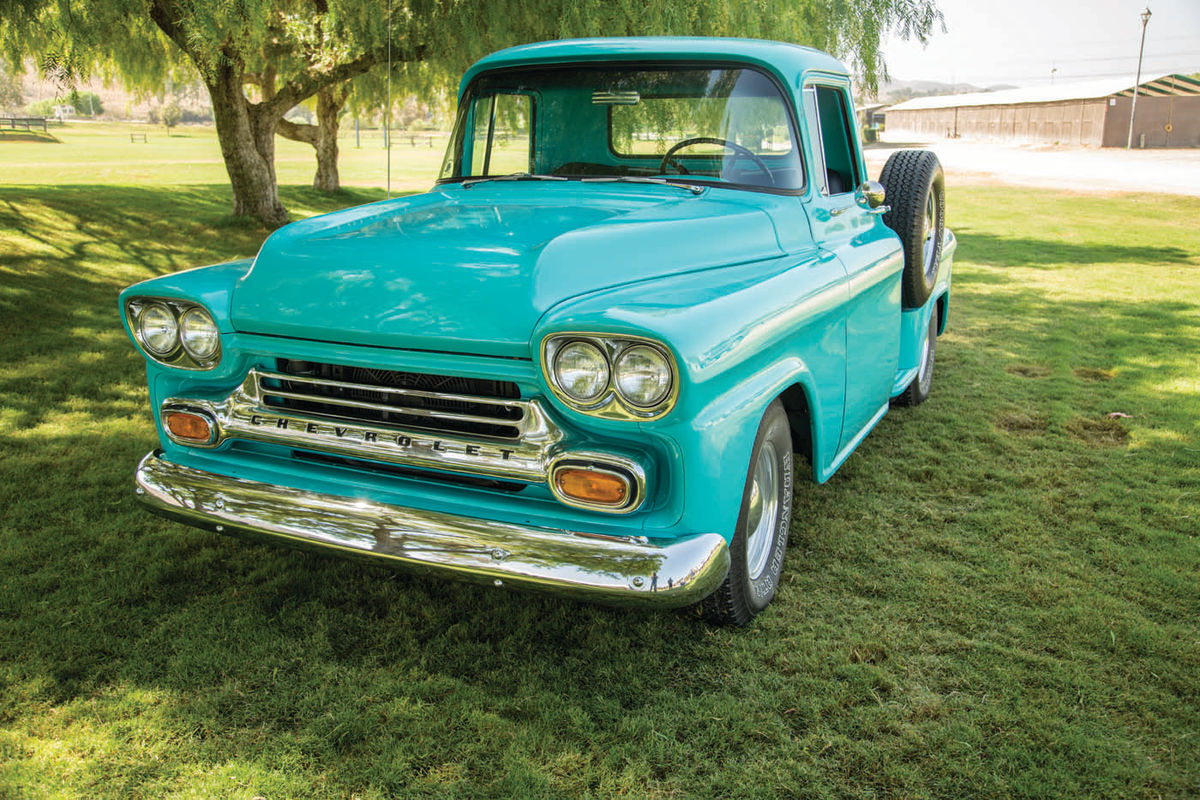
1958 Chevrolet Apache
It Began With a Gathering of Mainly Rusty and Abused 1958 Chevrolet Apache Parts. Years of Restoration and Modification Work Resulted In a Cruiser That Suits Him Just Fine.
Editor’s note: Jim Richardson, our Mechanic on Duty Writer, is a restoration veteran with decades of experience working in his well-equipped home shop. I’ve always admired his projects and from time to time have asked him to share one of those vehicles with AR readers. His Chevy truck is the latest in this lineup of good-looking vintage drivers.
The ad in the paper said: 1958 Chevrolet Pickup, $1000 or best offer. I went to have a look. As it turned out, it wasn’t a truck anymore. It actually was a garage full of 1958 Apache parts scattered around on the floor. It seems a couple of young women decided to restore it, so they took it all apart and then, like many other novice restorers, they became overwhelmed and lost interest. I had seen this happen many times before. I offered them $500 and they took it.
Brought It Home In Boxes
My son and I rented a trailer, pushed the chassis and cab onto it, heaped and flat-shoveled the other parts into cardboard boxes and then hauled the whole mess to my shop. This was the beginning of an eight-year off-and-on restoration and upgrade that entailed rebuilding or replacing virtually everything. These days the old hauler has its original chassis, cab, hood and one front fender, but that is about it.
At the time I started the project I was thinking that there were a lot of things to recommend restoring a classic Chevy truck. They are dead simple, everything is available for them, and they are big and robust. You don’t need to worry about losing some tiny plastic circlip. These trucks were designed to be fixed by blacksmiths.
Building a Special Engine
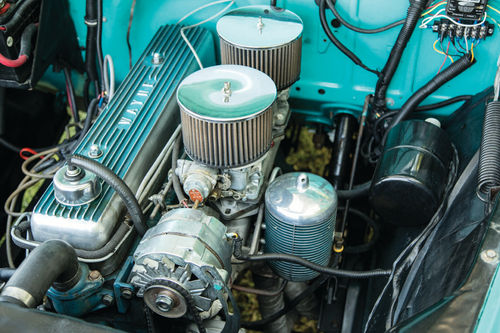
Before I made this fortuitous purchase I had been overhauling and hopping up a 1957 Chevrolet 235 Blue Flame six as sort of unfinished business from my youth. I just wanted to see how much I could get out of one of them now that I had the money and experience to do it. I treated the engine to a complete overhaul that included align boring, balancing the rotating assembly including the flywheel and clutch; new, bigger pistons and all new bearings. I also had all of the mating surfaces ground flat, and the connecting rods were cleaned up and shot-peened to make them more robust.
After that, as the result of creative tuning I was able to pump almost another 100 horsepower out of the old Stovebolt by porting the head, port matching the manifolds and shaving quite a bit off the deck and head to up the compression. Onto that I added a couple of Carter Weber two-barrel progressive carbs, Fenton headers and an aggressive Clay Smith cam. The crank was also treated to a Doug Fischer vibration damper to keep the long whippy crankshaft in one piece. For spark I added an HEI ignition.
This combination gave me a very torquey free-breathing old Stovebolt making about 220 horsepower according to Desktop Dyno.
My motive had little to do with seeing how fast I could make a car or truck go though. Instead I just wanted to see what the old in-liner’s personal best could be. And yes, more could have been done, but I also wanted the thing to stay together. In the end, with this truck I was looking for a comfortable, roadable, clean-looking parts chaser.
Adding Some Cool Comfort
I also wanted more power partly because air conditioning was a necessity if I wanted my wife to accompany me anywhere. To that end I purchased a kit from Old Air in Texas, but it didn’t include the compressor brackets, so I ordered those from Patrick’s in Arizona. Adding air also meant that a 100-amp alternator was needed, as well as a new Desert Cooler triplecore radiator and an original fivebladed fan that was used by Chevy on its air-conditioned models back in the day. I also added a pusher fan in front of the air conditioning condenser to help cool it in slow traffic on hot days, and wrapped the exhaust system down to where the pipe goes under the cab.
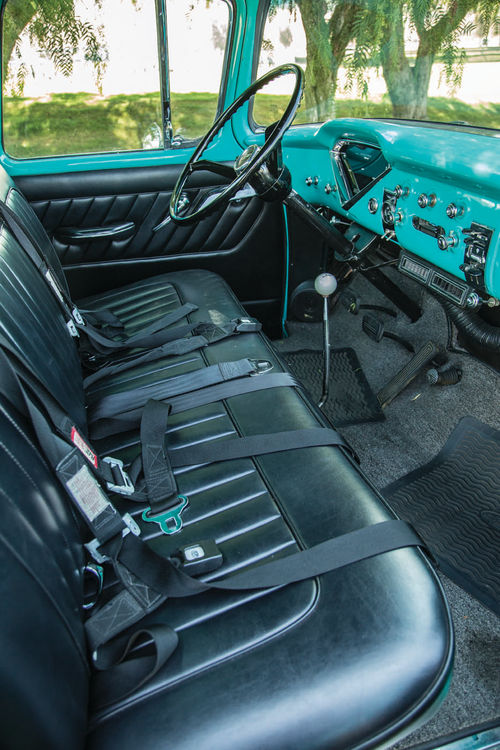
New Wiring and Instruments Were a Must

I completely rewired the truck using a Painless after-market wire harness that came with all the wiring I needed plus a nice big fuse block that we mounted on the upper kick panel inside the cab. The instrument cluster was also in bad shape, so I put in a Dakota Digital system that included a tachometer, and it turned out to be a cinch to install. I then added electric multi-speed windshield wipers to replace the old system. And then I added an after-market amp meter that could handle the 100-amp alternator because the Dakota Digital dash only came with a more modern voltmeter, and each of those gauges has its own virtues.
A Transmission and Differential That Help Make It a Cruiser
Contests of speed no longer motivated me, but having a classic truck that could cruise at freeway speeds in air-conditioned comfort and stop quickly and evenly was my goal. The breathed-upon engine was just a fun thing and I didn’t really give much thought to what kind of vehicle I would put it in when I was building it. That is until the aforementioned pile of worn-out Apache parts came along.
I had a BorgWarner R10 overdrive transmission from a 1957 Chevy sitting around the shop too, and considered installing that behind the resurrected Stovebolt when a friend named Dave Waugh convinced me that what I needed was a New Process A833 aluminum-case four-speed gearbox. That’s because the fourth gear in those is an overdrive, and the A833 is tougher than the old Saginaw that came in the Chevy anyway. And best of all it will bolt right in with a change out of the input shaft cover and the addition of a fine tooth universal joint spline.
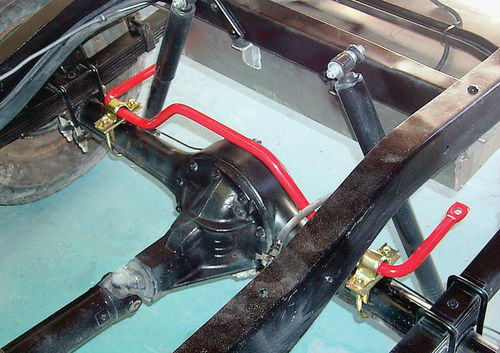
The differential in the old truck was shot too. Someone had run it with two different size tires on the back for an extensive period and they never changed the gear lube, so the thing was badly worn. Besides, it had a super low 4.56:1 ratio, which meant that cruising speed was probably no more than 60 miles per hour. I swapped it for a rebuilt 3.90:1 that—combined with the New Process overdrive transmission—allows me to cruise at 80 miles per hour at 2000 rpm. And no, I don’t have any idea what top end is, but I do have another 3000 rpm at my disposal if I want to find out.
A Need to Go… and Stop
With that higher cruising speed I knew I needed to do something about the brakes so I installed a bolt-on, power front disc brake kit with a dual bore master cylinder, and then vented the drums on the rear brakes. My pal Vince at C.H. Topping Brakes in Long Beach, California, has the special equipment to do that. Venting drums makes them as effective as disc brakes because it eliminates the fade typical of drum brakes.
I don’t like butchering old vehicles, so I stayed with the stock solid front axle but added heavy-duty sway bars and firmer shocks to help with wheel tramp and body lean. I also added rear traction masters to prevent the wheel hop that pickups without a load often exhibit during acceleration and stopping. And finally, we installed monoleaf springs all the way around to get the truck a couple of inches lower.
I also put in new kingpins and bushings, new tie rod ends and added a rebuilt steering box. None of these fixes and innovations made the old pickup truck handle like an Alfa Romeo, but they did make it safer and more predictable to drive at highway speeds.
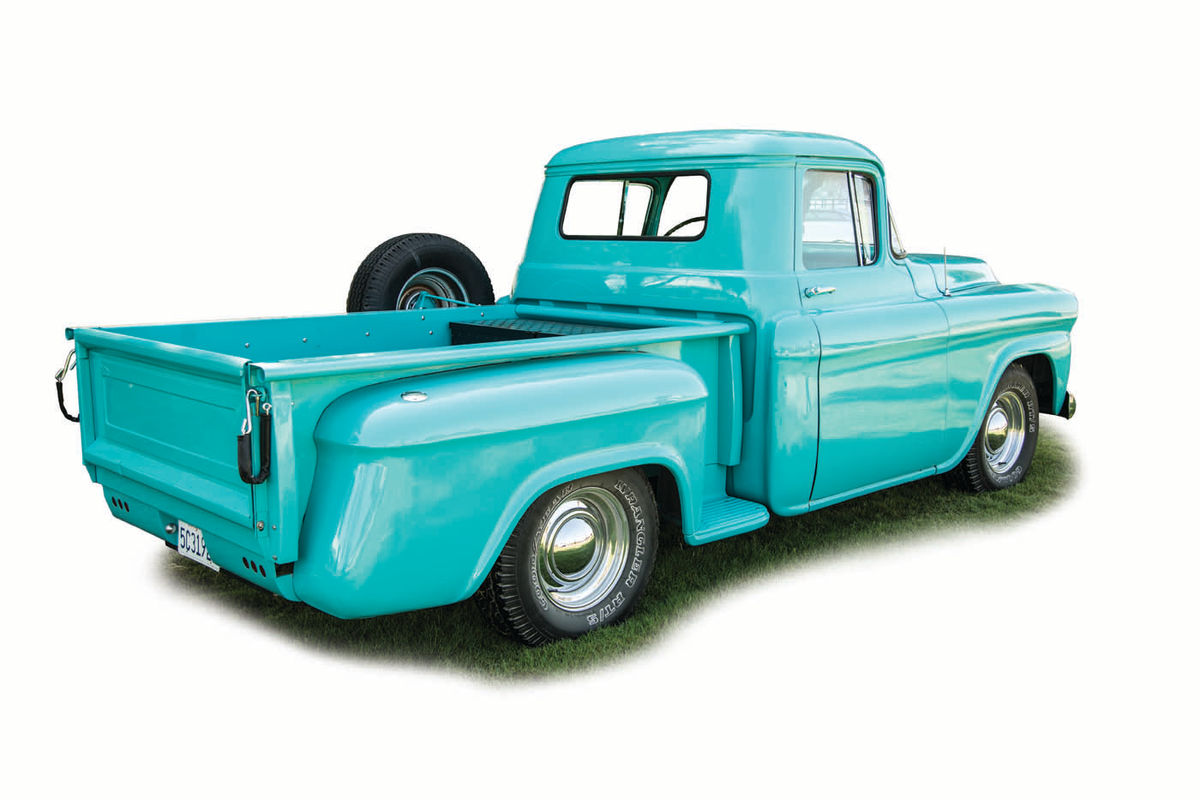
I also added a custom-made 20-gallon gas tank where the spare tire originally was mounted under the bed, and installed a welled fender and bracket on the side for the spare tire. I once had to change a flat on a pickup in a running creek full of icy water in Canada, and that meant climbing underneath to get at the spare. I never want to do that again. Also, getting the original 15-gallon gas tank out of the cab gave us a little more room for tools and equipment. I used marine fuel filler caps mounted in each of the rear fenders to fill the tank so we wouldn’t have to cruise around a crowded gas station to get the filler on the correct side.
It Definitely Wasn’t In EyeCatching Condition
The mechanical restoration had taken three years of evenings and weekends, but we still had a truck that looked like it was from an impoverished Central American coffee plantation. One window was broken, the windshield was pitted and scratched, the cab corners and the lower hinge pockets were in ragged rusty tatters, and the fenders were a cacophony of dents, bumps and holes that had been drilled for various accouterments that had long since been removed.
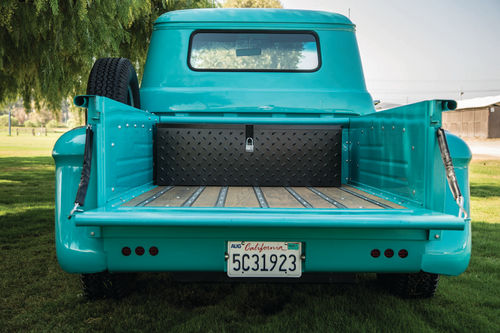
The bed wood in our old truck was the original blackened southern sugar pine and had long since rotted, so I ordered new oak slats and chrome runners as well as new bed sides, a front panel and tailgate, because fixing what we had would have meant trying to make big expanses of sheet metal perfectly flat on both sides. These items are all available from good sources at reasonable prices.
We stripped the body to bare metal and gave everything a coat of moisture-proof primer to keep it from rusting, and in doing so discovered a multitude of sins. Filling all the holes was pretty easy using a copper paddle and an arc welder, but we had to buy or configure patch panels for the rusted-out areas. Dents had been badly filled with thick plastic filler that needed to be removed, and rusted-out areas had been disguised with yet more bog. I learned that a propane torch would soften it and a putty knife would dig it out, and that an angle grinder would get rid of the residue.
I gutted the cab, removing the seat, instruments, original fuel tank and old wiring, and also took out all of the old glass. I wanted tinted glass all around in order to help keep the interior cool. I also cleaned and lubricated the window cranking mechanisms.
Old pickup cabs are double-hulled in places, so I shot in cavity wax to stop corrosion, and then shot in expanding foam to further insulate the truck from noise and heat. I also had to fix the areas where a cheap after-market sound system had been installed and where someone had kludged speakers in the doors. It looked like they had used a can opener to cut the holes. I took the center section of the dash out of a wrecked truck and welded it in to replace my mutilated one, and we rolled new panels to fit the door holes, and then installed those.
I also added a custom tail pan and LED taillights and blinkers just to finish things off. I didn’t like the taillights on stalks that came on these trucks because they looked like added on after-thoughts, so we devised our own setup. There was no good way to add a rear bumper with the gas tank in the rear, so we went with the tail pan. Most of these old small-back window service trucks did not have back bumpers anyway. And this truck was likely used by a school system or for fleet service because it was as basic as you could get.
We fixed, sanded and then painted the old hauler in a do-it myself spray booth at my shop using singlepot acrylic enamel and hardener, and then color-sanded it and buffed it out.
It only took a second to write that previous sentence, but it describes many hours of work getting the panels flat, block sanding, priming, shooting color and rubbing it out. Doing a long-lasting paint job on a mostly disassembled vehicle and then putting it together and polishing it is an extravagantly labor intensive undertaking.
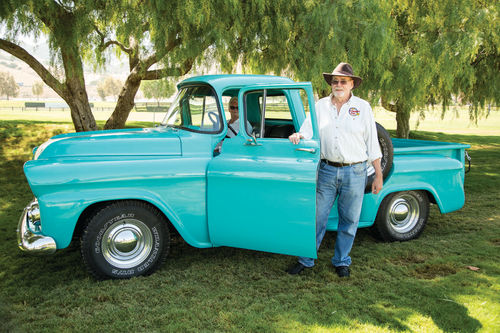
Very Happy With the Results
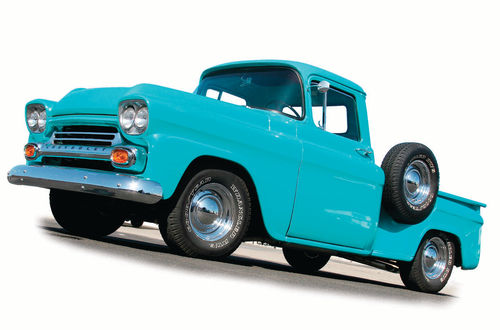
When it came from the factory, this truck was equipped with a Thriftmaster six-cylinder engine, standard transmission, a single fold down sun visor for the driver, rubber floor matting and no decorative chrome on the cab. By contrast, the top end model that year was the Cameo with its special flat bed sides, a 283 V-8 and automatic transmission or three-speed with overdrive, air conditioning, deluxe interior, big back window and plenty of razzle dazzle, which was common in the day.
But I ended up with what I wanted: A nice-looking, dependable vintage pickup to use as a parts chaser that would cruise at freeway speeds with the air conditioning blasting along with the after-market sound system, comfortable seating and plenty of room in the bed for car parts and tools.

I now enjoy every minute of driving it, though my wife prefers our 1955 Bel Air station wagon.
There are a lot of people I need to thank for helping me get this done. Most of all my son Steve, who is a good welder, my pal Bruce Haye from New Zealand who helped with the body and paint work, Mike Cox at the Glass House in San Dimas, California, for installing the glass, and my wife Bette for putting up with all the noise, colorful language, grease and grunge that are part of the hobby.
If You Plan On Doing One Yourself…
If you are restoring a classic Chevy truck and want a step-by step how-to guide that lays out the restoration process as well as how to do all of the upgrades we did on my 1958 Apache in detail, you may want to order my book: The Classic Chevy Truck Handbook published by Penguin Group HP, ISBN: 978- 1-55788-534-0. It is available from Amazon in print or Kindle form for $19.95.


