How -to Removing & Replacing a Rusty Roof
What Happens When an Old Roof Can’t Be Repaired? You Start By Looking for a Donor Replacement
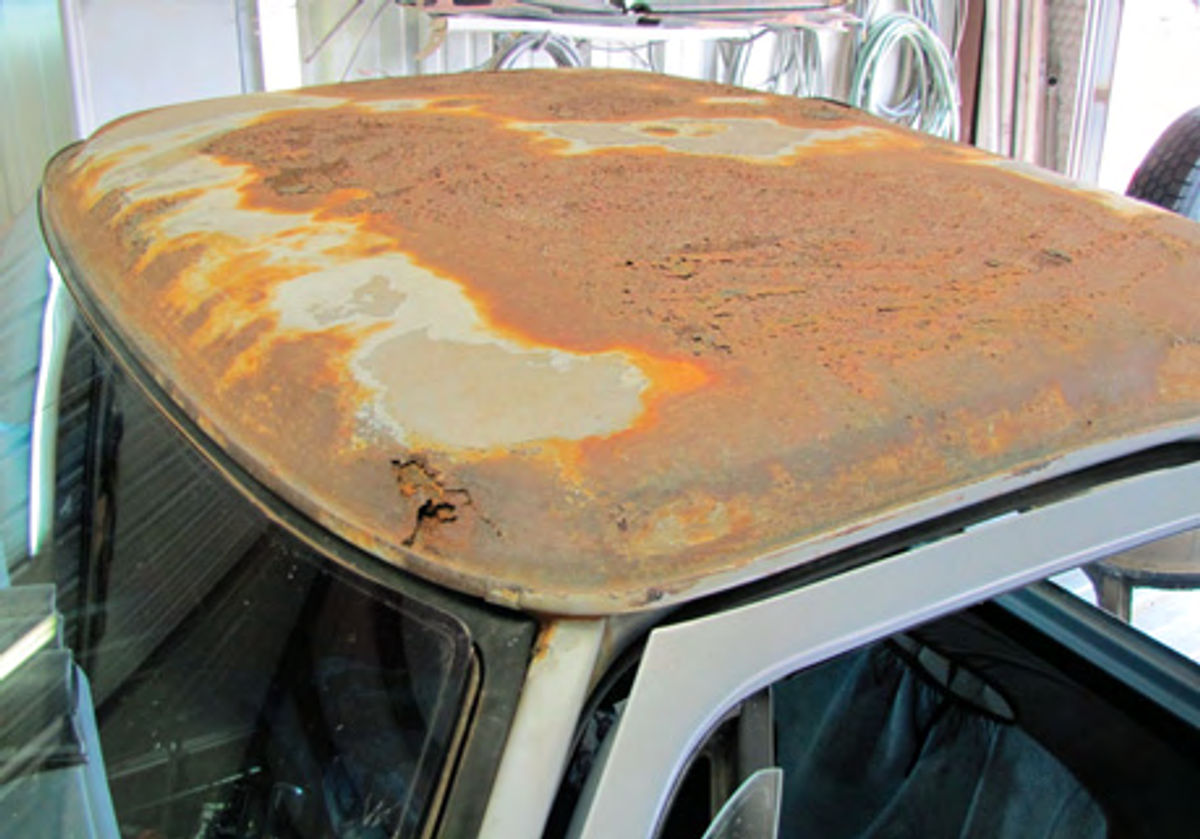
THETRUCKSEENinPhoto 1 arrivedat the shop in dire need of a new roof panel. Rust had taken a huge toll on the outer panel and that eliminated the option of cutting out and replacing only the rusted spots in the metal. That left only one solution: I needed to cut off the entire roof and replace it with the roof from a donor truck.
A tip: When selecting donor parts for your ride, nothing takes the place of clear and concise cutting instructions. For example, I instructed the owner of this truck to have the donor roof panel cut from the donor vehicle at the lowest possible point on the windshield posts and at a point that is even with the bottom of the back glass at the rear of the cab. Cutting at those points ensured that I would have plenty of metal at my disposal when determining where I’d make the final cuts.
Removing the Old Roof
Removal of the old roof starts with the removal of the windshield and back glass. In this case, both glasses originally were installed using rubber gaskets. That makes removing them a simple matter of pushing them out from the inside. Had they been glued into place, removal would have meant a phone call to the glass shop to have them come out and remove the two pieces of glass by cutting them out.


To help with the removal I took a plastic windshield knife procured from my glass dealer and ran it around the edges of the glass on the inside and the outside of the truck to help separate the glass from the gasket. From there, I gently exerted pressure against the inside of each glass to push them out.
Note: Using too much force to push the windshield out from the inside will cause the glass to break so be careful as you work the windshield out of the gasket.
Once removed from the truck, all of the glass should be stood on edge and stored in a safe place to avoid breakage.


After the glass is out, it’s time to take some measurements (Photo 2). The first measurement requires the use of a carpenter’s square to determine the height of the windshield opening. In this case the opening height is 233 ⁄4-inches. It’s hard to see in the photograph, but I noted that measurement on the strip of masking tape placed just below the square.
What does the tape do for me? I placed a mark on the tape to give me a reference point so that I know where to place the carpenter’s square in order to get an accurate reading on the glass opening height.
So let’s talk about using the carpenter’s square. The bottom of this windshield opening is basically level. That means I can pick two points, right and left side, across the windshield opening, mark those points on pieces of masking tape placed at the base of the windshield opening, as I mentioned above, then place the square vertical at the marks and take my measurements to get the height of the opening on each side of the truck.
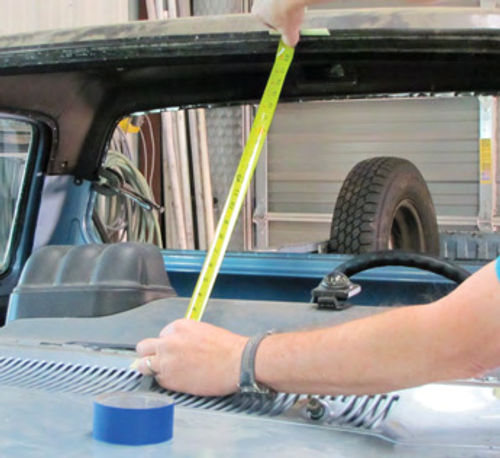
Why is this important? Having these marks to refer back to and knowing the height of the opening at those points is 233 ⁄4-inches allows me to cut the old roof off, position the new roof in place, then go back to those marks and precisely set the height of the windshield opening in relation to the new roof panel. I’ll repeat this same measuring and marking process in the back glass opening.
The next step is to mark the cut lines (Photo 3). Notice that I used 1 1 ⁄2-inch wide masking tape to mark the cut line on the left windshield post. The reason for using wide masking tape is that as long as I prevent the tape from wrinkling as I wrap it around the post my cut line will be perfectly straight.
How far down from the roof panel did I place the cut line? I elected to go four inches down, as measured from the drip rail down the post. It really doesn’t matter where I make my cut as long as I make the cut in an area of the post that is easily accessible for welding and finishing.
On the donor roof I’ll make my cut 3 7 ⁄8- inches down from the roof. That will give me a full 1/8-inch of space to allow me to adjust the new roof up or down as needed to maintain my windshield opening measurement of 233 ⁄4-inches.
What did I use to make my cuts? A die grinder with a 3-inch diameter cut off wheel works great, but for this roof I elected to use a reciprocating saw with a metal-cutting blade attached.
At the rear of the cab I placed my cut lines at the middle of the back glass opening (Photo 4). Like the cut lines at the windshield posts the reason for selecting this point is pure accessibility. I also used the wide masking tape back here to help keep my cuts nice and straight.
All that is left to do at this point before cutting the top off is to remove the seat, headliner, dome light and wiring, seat belts, and drip rails. Remember, MIG welders tend to spatter hot metal as you weld. I don’t want any of the soft trim exposed to this spatter.
Now, regarding the drip rails…how and why do I need to remove them?
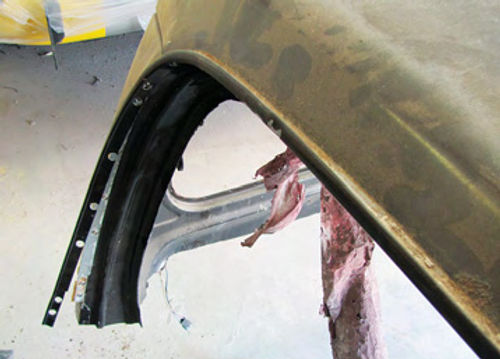
Notice in Photo 5 that I drilled out some of the spot welds attaching the drip rails to the donor roof panel. The plan calls for leaving the drip rails intact on the donor roof and eventually welding them to the truck. Drilling out some of the spot welds allows me to shift the drip rails out and away from the donor roof to make trimming and fitting the new panel a little easier. I also drilled out the vertical spot welds along the drip rails on the truck so that the old drip rails can be removed along with the rusty roof panel.
What did I use to drill out the spot welds? I use a Blair spot weld cutter (Eastwood #11279).
Once the new roof is in place on the truck all that I will need to do is weld the donor roof’s drip rails into place on the truck cab.
What this does for me is to leave the drip rails on the donor roof intact. You won’t find a more difficult weld to achieve than trying to piece drip rails back together once they have been cut in half. This method eliminates that problem. Just be sure that any helpers understand that the drip rails extending downward on the donor roof must be treated with care and not bent as the donor roof is lifted into place.
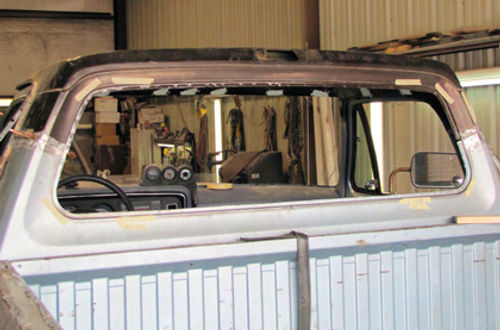
It’s a Convertible…
What I want you to notice about Photo 6 is that even though this truck is now “a convertible,” I didn’t add any reinforcing barsto the cab. That’s because the cab is small and it sits on a solid frame. Any movement or shifting within the structure of the cab will be slight and easily corrected with the use of a pry bar or two. Also notice that the doors are closed. The fact that they both open and close without binding or rubbing also tells me that structurally this cab is very sound.
OK, I understand it’s very likely you aren’t replacing the roof on a late-model Dodge truck with a heavy frame under it. In that case, and particularly if the vehicle you are working on is a unibody vehicle, or had more than two doors, you should definitely add bracing inside the passenger compartment before cutting off the old roof. The bracing will serve to hold everything in place as you position the replacement roof on the vehicle.
For some good information on adding bracing, pull out your copy of my book “Project Street Rod” and check out the bracing I added to that car before chopping the roof.
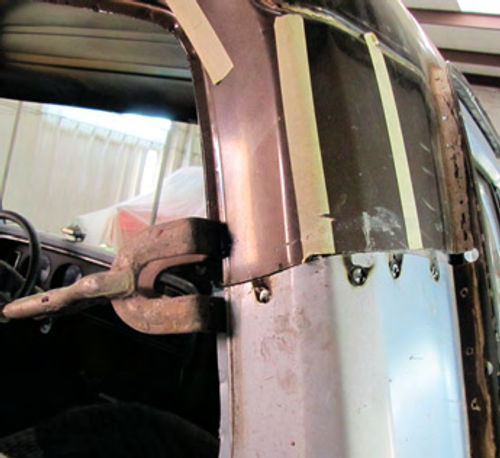
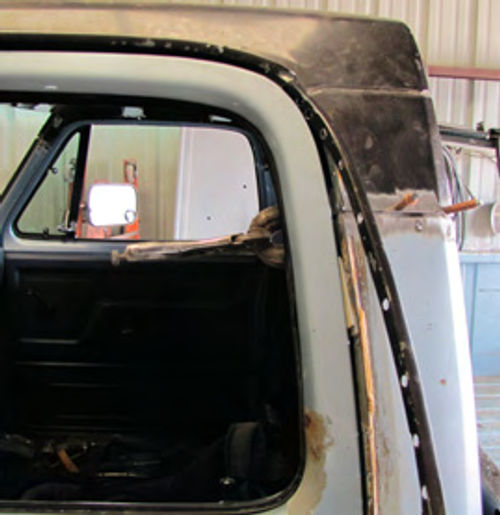
Then there is the issue of adding gussets to the windshield posts and rear cab panel. Photo 7 shows the left windshield post. Notice that I welded gussets inside the post and allowed them to extend upward about an inch. Where did I get the gussets? I cut a two-inch-long section out of the unused piece of windshield post off of the donor roof. To get the gussets to slip into the windshield posts on the truck I had to cut them apart using a die grinder with a three-inch diameter cutoff wheel attached.

What is the purpose of adding gussets to the post and rear cab panel?
The gussets will add strength to the repair as well as allow me to glove the donor roof over the gussets to allow for any necessary adjustments to the height of the glass openings.
Remember the 1/8-inch I removed from the donor roof posts to make them 37⁄8 inches long instead of 4 inches long? That gap means I can use the gussets as welding points and not have to resort to butt welding any of the pieces together.
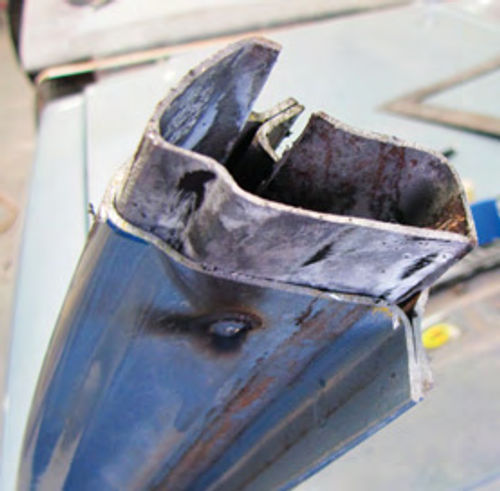
Photo 8 gives you a look at that gap before welding. I’ll end up welding the gusset to the donor post then to the truck post before bridging the entire gap with a final weld.
I also cut the rear portion of the donor roof an eighth-inch short to allow for any adjustments that might be necessary to get the back glass opening correct.
I then added gussets to the rear of the cab before slipping the donor roof into place. Notice the good alignment on the outside (Photo 9).
What’s the deal with the strips of masking tape? I had to measure and mark each of the cut lines on the donor roof. The masking tape makes those marks easy to see.
From here it is back to measuring the height of the glass openings (Photo 10). What I’m looking for is that 233⁄4-inch windshield opening measurement I took before cutting the old roof panel off of the truck. When I achieve that exact measurement I’ll tack weld the windshield posts one at a time then move to the back glass and repeat the process.
Photo 11 shows where I’m headed.
Both glass openings have been measured for fit, I’ve verified that both doors have good gaps, and I’m ready to weld.
Photo 12 gives you a look at the left drip rail. I could spend all day explaining this (see effort above), but this photograph tells the whole story. The drip rail on the donor roof is now ready to be welded to the truck.
For a look at the final outcome, see Photo 13. The glass is back in the truck, the doors fit perfectly, and the air conditioner works great. What more could you ask for?
Got a question? Send it along.
Project vehicle supplied by: LPL Body Works, LLC
5815 Contented Lane
Amarillo, TX 79109
Producers of body and paint repair DVDs
The Eastwood Company
263 Shoemaker Road
Pottstown, PA 19464
Restoration tools and supplies


