How to rebuild a standard (manual) transmission
YEARS AGO I FIRST OBSERVED how tough the American passenger car three-speed standard transmission was by watching guys with monikers like Lefty and Junior indulge in a peculiar form of destructive testing called drag racing. Countershafts sometimes popped out the back ends of gear cases, gear teeth shattered, thrust washers were ground to bits, and gear cases even cracked in two on occasion. But for the most part these standard, ’50s-era, all-American gear box es held up well, even when subjected to brutal torque and abusive shifting. If it hadn’t been for my misspent youth, I might never have seen the inside of a stick shift transmission. Just about nothing goes wrong with them if you change their lubricant at the recommended intervals, and shift them sensibly. Such transmissions usually last twice as long as a car’s engine under normal conditions.
We said essentially this same thing in last issue’s Weekend Wrench describing how the standard transmission works, but it is worth repeating for this reason: Often as not, people assume that if they are having trouble shifting gears, the problem must be in the transmission. Seems logical enough; but in fact, difficulty shifting, as well as ominous driveline noises, are more likely to be symptoms of a faulty clutch, worn shift linkage or a dry universal joint than a faulty transmission.
So before you jerk the tranny out of your car, make sure the clutch is properly adjusted, its release bearing is in good condition and properly lubricated, and that the pilot bearing in the crankshaft hub is not dry. Also make sure the clutch lining isn’t worn out, and that the shift linkage to the transmission isn’t worn or merely out of adjustment and that the U-joints are healthy and properly greased. (Look for more on these procedures next month.) If all of these items check out, try to isolate your problem using the troubleshooting tips in the April issue before resorting to major automotive surgery. After that, if you feel fairly certain your transmission needs work, here’s what to do:
Preparation
Before you get under and get dirty, obtain a shop manual for your make, year and model and spend a quiet evening studying the transmission section to familiarize yourself with every aspect of the job. A basic three speed, standard transmission is not terribly complex, but it will require a careful, organized approach to take it apart and repair it correctly.
Also, now is a good time to make a list of any special tools, or their common substitutes, that you might require:, For example, on 1958 Chevrolet transmission we overhauled for this installment of Weekend Wrench, Chevrolet Special Tool J-932 was specified in the manual for releasing the circular retainers for the synchronizer cones. You could spend the next two years looking for tool J-932, or you can get a pair of ordinary, convertible snap ring pliers which will do the same job, and are available at most tool stores for about $10. In some cases your shop manual will have illustrations of these special tools so you'll be able to figure out what you can use as a substitute. If your manual lacks illustrations, visit a local transmission repair shop and ask what tool will do the job.
Removal
Jack the car up at all four corners, and put it on sturdy jack stands. You will be wrenching some big bolts, and muscling some big parts, so the car must be as stable as possible. Finally, when you have assured yourself that it is safe to do so, roll under and split the driveline at the rear U-joint. Tape the bearing cups in place to avoid losing the needle rollers inside them. Pull the drive shaft and front U-joint from the transmission output shaft. (These instructions are for conventional, open-driveshaft cars. For Buicks and Chevrolets with closed drivelines, for the most part those built before the mid-’50s, consult your shop manual for instructions.)

Drain the gear case lubricant by removing the bottom plug. If the lubricant is black and gritty, it’s an indication that the transmission has been neglected or possibly abused, and you may have some extra work ahead of you. But don’t be too discouraged by darkened fluid, because owners often didn’t replace it and it’s not a certain sign of major problems.
Next, disconnect the shift linkage from the transmission side plate. Place a transmission jack under the tranny and run it up. Wrap a sturdy safety chain around the transmission and jack, and bolt its links together. This will keep the transmission from rolling onto the floor, or you, when you start moving it.
Remove one of the top bolts attaching the transmission to the bell housing and find a couple of bolts that are at least 3 inches longer and the same diameter and thread type as your originals. Hacksaw the heads off of these longer bolts, then install them in place of the top bolts holding the transmission to the bell housing. Make sure the transmission is in neutral, then remove the rest of the transmission attaching bolts and slide the transmission back along your homemade guide studs and onto the transmission jack. (The guide studs help prevent damage to the clutch disk due to tipping and tweaking of the clutch shaft at the front of the transmission during its extrication.)
Disassembly, Inspection and Repair
Scrape and then wash the exterior of the transmission case with solvent or a strong solution of household cleanser before opening it up. You won't want grime falling into gears and bearings. Now place the transmission on your work bench and remove its side plate by removing the cap screws that hold it in place. Wash the side, (or top) plate in solvent, then carefully inspect the shifting forks and detent mechanisms. If the forks are bent or the metal surfaces have been worn away, the forks should be replaced. If the springs and balls in the detent mechanism are pitted or the balls are no longer round, they too should be replaced.
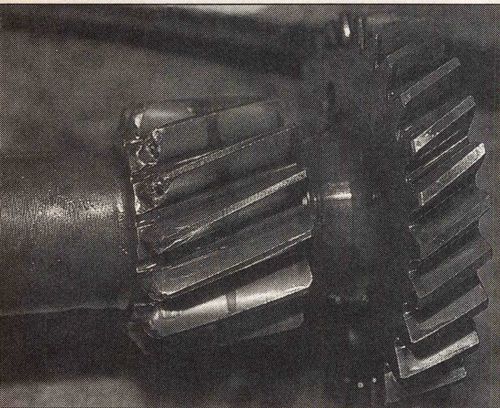
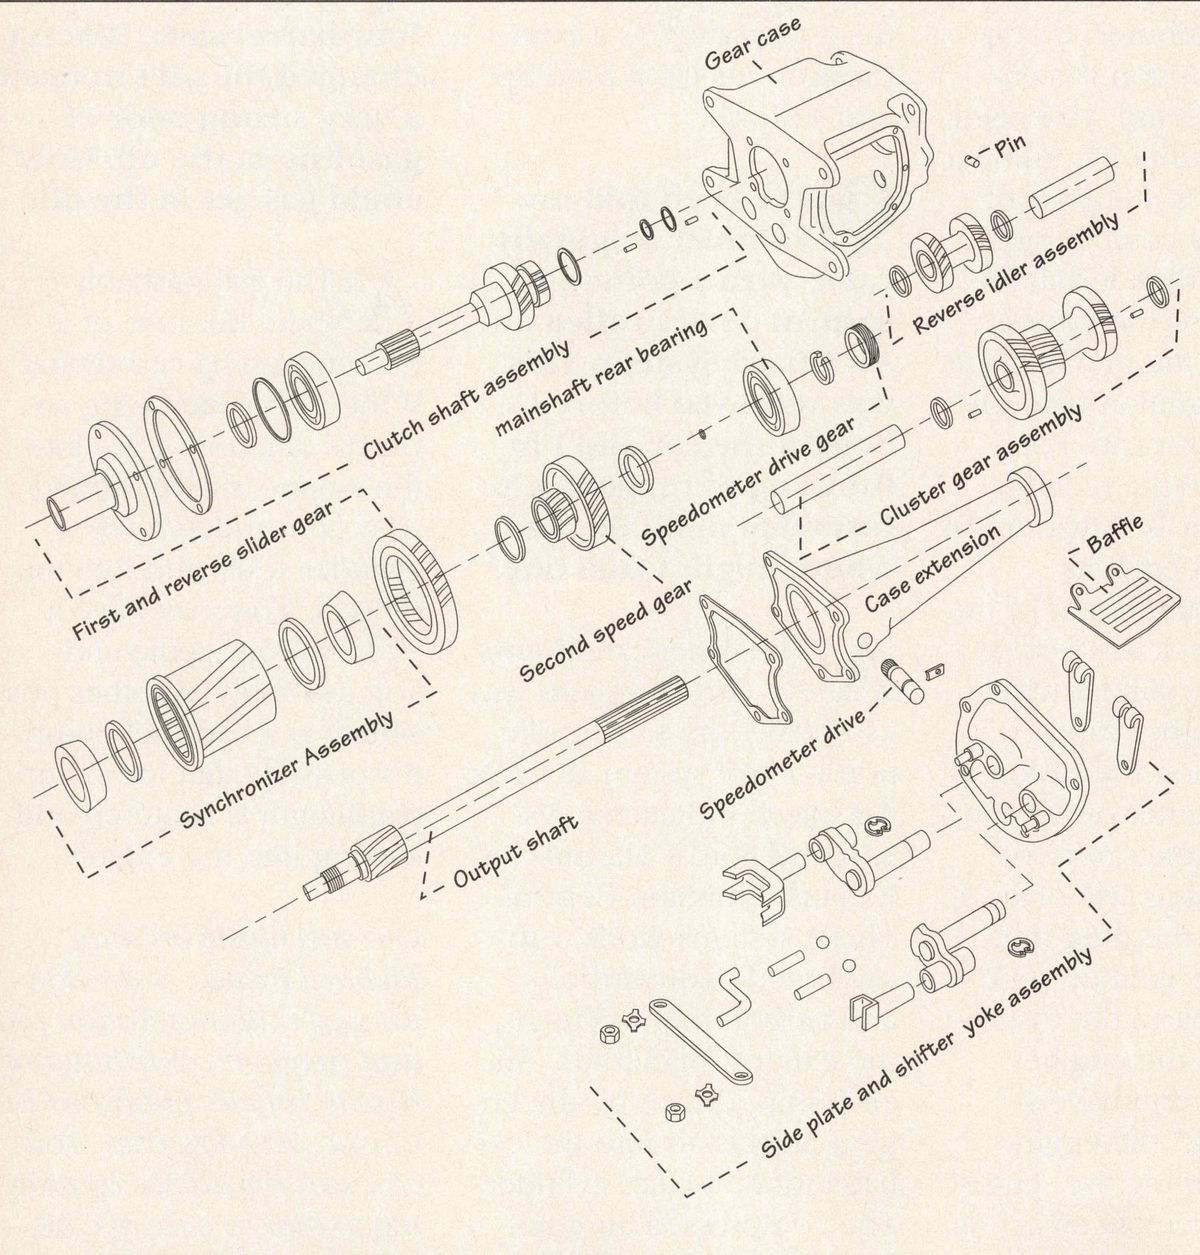
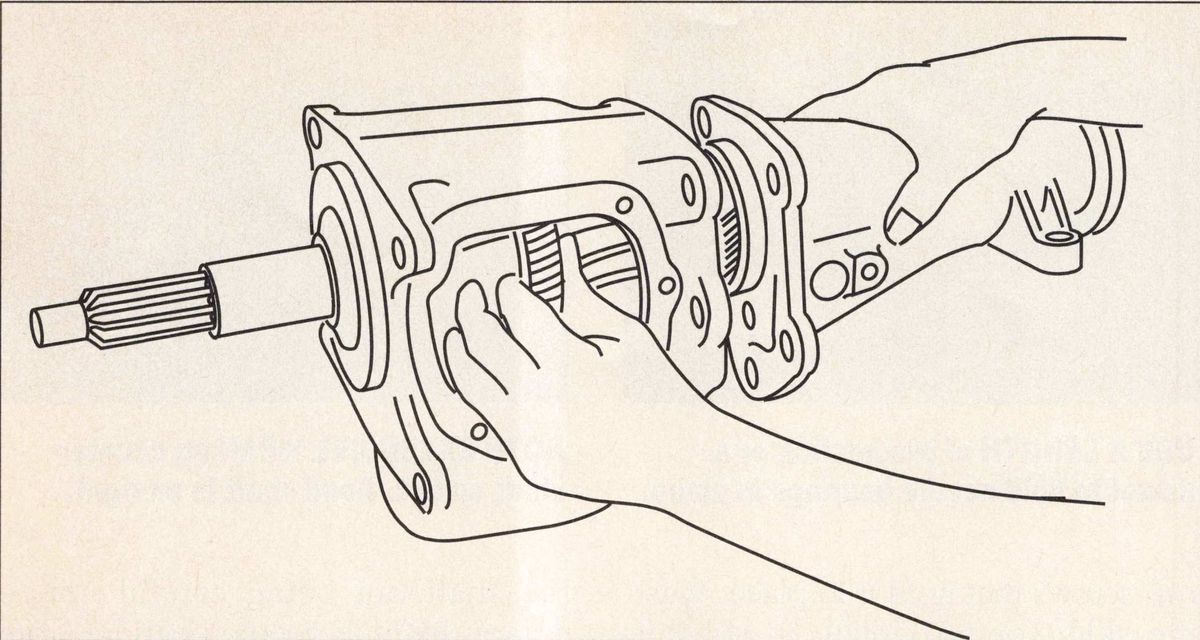
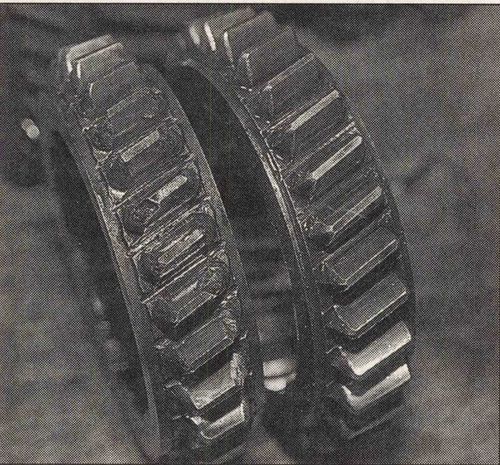
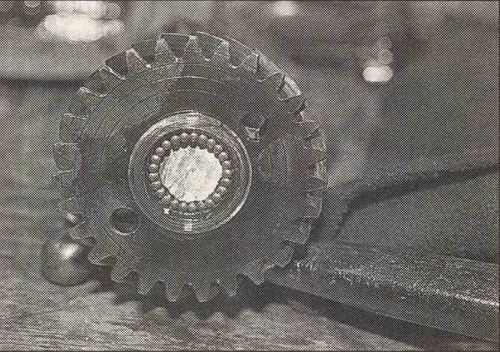
Remove the bolts that attach the rear extension case, then hold the first and reverse slider gear and synchronizer assembly steady as you pull the extension and output shaft assembly out the back of the transmission. Lift the slider gear and synchronizer assembly out the side of the case. Inspect the slider gear for chipped teeth, wear, or pitting. Slight chipping on gear teeth can be dressed with a small knife-sharpening stone, but large chips will mean noisy operation and eventual gear failure, so the gears should be replaced. If the gears have been chipped, be sure you clean all fragments out of the casing. Otherwise, they'll be caught in the transmission during operation and cause major damage.
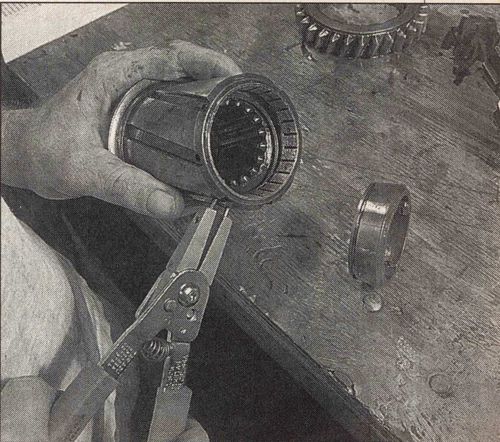
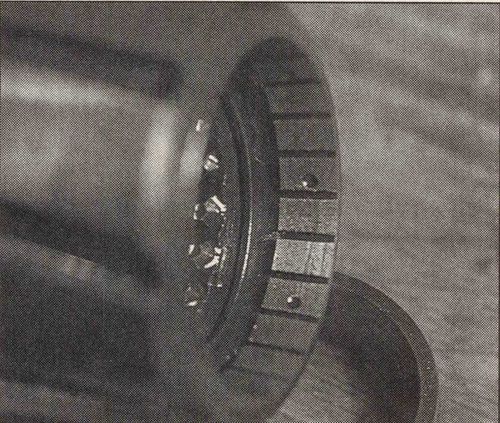
With your pair of snap-ring pliers (or special tool J-392 if you have it) release the synchronizer cones from the second- and third-gear dog clutch. Inspect the synchronizer rings and cones for wear. The tiny, annular grooves in them should be sharp and well defined. These grooves strip the oil from the cones and rings as they come into contact with each other so they can press together and synchronize the gears. If these grooves are badly worn, second and high gears will not synchronize _ effectively. Clashing, and damaged gear teeth will be the result. Replace worn synchronizer parts.
Unbolt the clutch-shaft retainer at the front of the transmission and pull the shaft out being careful not to scatter the little needle bearings from the mainshaft pilot bearing. C like to store the needle rollers in those little plastic canisters that 35 mm film comes in, but any small jar will suffice. While it is a good idea to replace all the needle bearings when you have a transmission apart, if your classic is a rare make you may not be able to find new ones.) Inspect the pilot-shaft bearing surfaces for wear and replace any parts that are damaged.
Wash the front roller bearing on the clutch shaft with solvent. Never spin a bearing with compressed air to dry it because you could blow grit into the bearing. Oil it and turn it slowly to check for smoothness. If it’s loose or catches while you are rotating it, replace it. If you must replace it you will need to have it removed by someone who has a hydraulic press. Many auto parts stores and machine shops offer this service. Have your parts dealer match the bearing and order a new one. The above instructions apply to the large, mainshaft rear bearing as well.
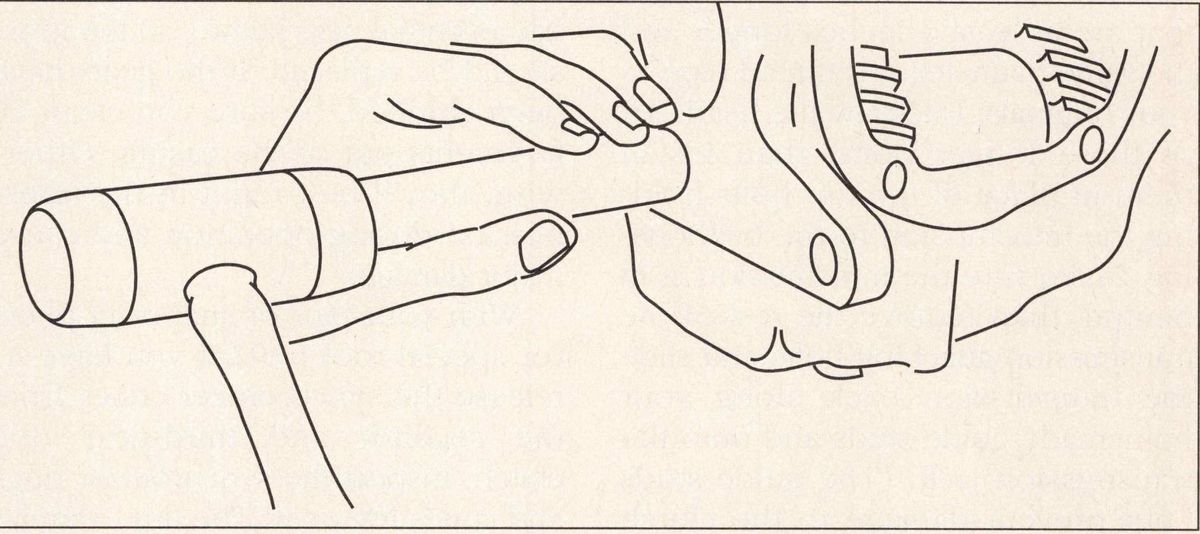
With a hammer and brass or mild steel drift, tap out the cluster-gear countershaft working from front to rear. Never try to go the other direction because the hole in the front of the transmission case is smaller than the one in back and you will ruin your transmission case if you go the wrong way. As you drive the countershaft back, and it’s free of the front hole, it will begin to move more easily. When it does, slide in a wooden dowel of the correct diameter, or insert a length of broom stick that is cut to the length of the cluster gear assembly. Closely follow the countershaft with the dowel to hold the needle bearings in place at both ends of the cluster-gear assembly. Inspect the cluster-gear assembly for chips and pits. Carefully push in the dowel at either end to remove the cluster gear. Store the needle bearings in a labeled container, then look for worn bearing surfaces and pitted or damaged needle bearings. It is always best to replace all of the needle bearings if they are available for your transmission. Check your local parts supplier or mail order services for these items.
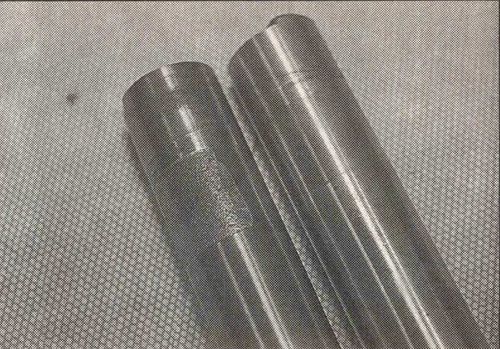
Inspect the countershaft for pitting and ridges. In a pinch, if you cannot find a good replacement cluster-gear assembly or countershaft and the bearing surfaces are not deeply pitted or rough, you can clean up the bearing surface with fine emery cloth and then install new needle bearings, but this should only be done if new gear assemblies are not available. On a restored vehicle that will only see light duty, these cleaned bearing surfaces will last a long time, but they may someday fail and allow the gears to drop out of correct mesh. Also, such cleaned races can eventually become noisy. I only offer this tip because replacement parts are not available for some makes and years. Inspect the thrust washers that held the countershaft in place. If they have annular wear on their flat surfaces, replace them with new ones.
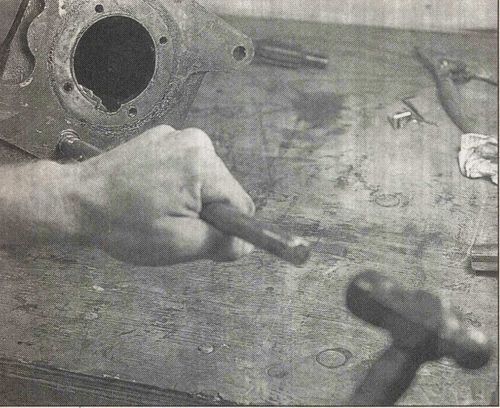
Tap the retaining pin for the re verse gear idler shaft from the outside of the gear case completely into the shaft itself, so the shaft can be removed. If your transmission is painted, and the retaining pin is perfectly flush with the gear case, you may have trouble finding it. Perform the same inspections as for the clustergear assembly on the reverse idler gears, thrust washers and bearing surfaces, and repair or replace any defective parts. Finally, don’t forget to check the second gear assembly and speedometer gear mounted on the output shaft for wear and pitting. If you need to disassemble this unit, you will need your snap-ring pliers again.
Assembly Purchase new gaskets or make new gaskets using the correct thickness of gasket paper. To develop a pattern, simply place your old gaskets on the paper, then give them a shot of spray paint from an aerosol can. When you lift up the old gasket you will have your pattern. Cut it out with a utility knife. Never use an old gasket twice, and never use shirt cardboard or manila envelopes for gasket material. Such gaskets are prone to failure. Before you begin assembly, make sure your bench and your transmission components are clean. Pay special attention to the inside of the gear casing, because it’s bound to contain small pieces of ground metal after years of service and you may find some small metal chips as well. Even small amounts of grit left behind will damage gears and bearings. Coat the reverse idler-gears and idler-shaft with transmission lubricant and slip them into place along with the correct thrust washers. Use a new pin to hold the reverse idler gear shaft in place, and coat it with Permatex before driving it home. Tap it in until it is just below flush with the gear case.
Paste needle bearings in place in the cluster-gear assembly using Vaseline or heavy wheel-bearing grease, then paste the thrust washers on the ends of the cluster-gear assembly with grease. Insert the cluster gear, then carefully tap the countershaft into place. Give the gears a coat of transmission oil. Check the runout (back and forth movement) of the cluster-gear assembly using a feeler gauge of the correct thickness, or a dial indicator gauge with a magnetic or clamp base.

Hold the synchronizer assembly with the first and reverse slider-gear installed on it and slip the extension case and output shaft into place making sure to correctly orient the notches in the synchronizer dog clutch on the output shaft. Coat everything with gear oil. Now paste the clutch-shaft needle bearings in place using Vaseline or chassis grease, then, with a new gasket pasted into place with Permatex or silicone sealer, slide the clutch shaft home in the gear case. Install the cap screws and new lock washers, then tighten evenly to 10 to 12 lb.-ft. of torque. Check everything to make sure it moves freely.
Make sure the gears and shifters are in the neutral position, then coat the side plate gasket on both sides with sealer and paste it in place on the side plate. Carefully set the side plate on the gear case, then using new lock washers, install and tighten its cap screws evenly to 10 to 12 lb.ft. Reinstall the transmission and adjust its linkage according to the service manual. Fill the transmission to the inspection hole on the side of the housing using proper lubricant for your model.
If you’ve done the job right, your transmission should shift smoothly and silently, and last you a lifetime, provided you don’t lend your car to my old friends Junior or Lefty.


