
How -to Pick Your Own Cruising Music
So, You Like Your “Correct” Radio But Want More Variety? This Will Let You Keep That Radio & Enjoy It, Too.
IN THERE STORATION hobby there are a number of different schools of thought ranging from mild to wild, traditionalist to full-out custom. For those who tend more toward the traditionalist end of the spectrum, there is a lot of nostalgia and pride that goes into restoring your car back to the way it was when it rolled out of the factory. However, nobody can deny that automotive technology has grown by leaps and bounds since those years and decades past. And even something as simple as your car’s stock radio may seem like a relic compared to today’s modern media centers that are more like computers than radios.
But there is an alternative to being stuck with the limited offerings of AM radio and it doesn’t involve the removal of your vintage set, either.
Brew City Engineering has put together a very-easy-to-install package that can bring your stock radio into the 21st century without altering its original appearance or wiring (Photo 1). In less than an hour their RediRad radio adapter can allow you to play your iPod, MP3, Satellite Radio, CD, InternetRadio or other portable music device through any car’s original radio. The RediRad is manufactured right here in the USA and Brew City Engineering is so confident that their customers will love it that they offer a 60-day, money-back satisfaction guarantee with their product.
Listen to Music, Not Static
I’ve tried some FM transmitters in the past that you plug into your cigarette lighter, tune your radio to a particular station, and then the signal is transmitted through the air to your stock radio…but I’ve never been happy with the amount of static and background noise experienced with the broadcast.
The RediRad, on the other hand, uses a direct connection that eliminates all of that fuzz so you get nothing but clear music.
Also, the offering from Brew City Engineering is the first of its kind that I’ve found that’s compatible with an AM radio. In fact, their radio adapter is so well thought out and precisely made to be vehicle-specific that it comes in five different configurations.
There are AM-radio versions for 6- and 12-volt electrical systems with either positive or negative ground setups as well as a newly-released FM-radio version that provides full stereo with no interference. And perhaps the best part is the price for a unit. They range from about $100 to $150, depending on the application, which is much less expensive than having your stock radio converted or replacing your radio with a full aftermarket setup.
For this test I installed their RediRad model #RR100-N into a 1965 Thunderbird as the car still has its original AM-only radio and 12-volt, negative ground electrical system.
But before we get into the RediRad installation, there are a few important things to look into to help ensure that the system will operate properly. For starters, your vehicle’s stock radio and speakers must be in proper working condition. Also, be sure that the wiring and electrical connections are clean and the charging system is up to spec. After I verified those conditions on the Thunderbird, I was ready to move forward.
Select a Good Hiding Spot
The first step is the same as you would perform while doing any electrical work on your car: Disconnect the negative battery cable from the battery.

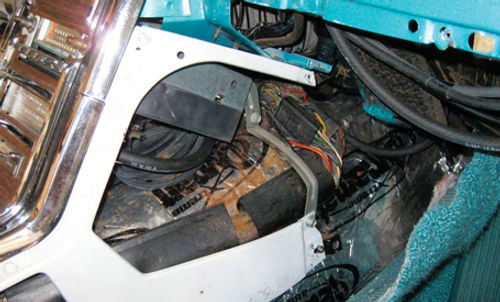
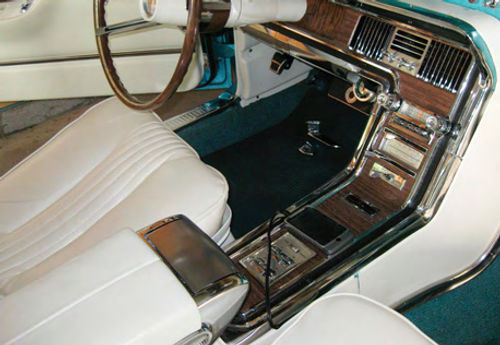
Next, I chose a hidden location for the RediRad box. Since the antenna wires are the shortest wires on the unit it makes sense to hide the box as close to the stock radio as possible. I removed the stainless trim and the access panel on the passenger side of the center console on the Thunderbird (Photo 2). Once the panel was out of the way I was able to find a cavity right under the stock radio with a bracket that would hold the RediRad in place with no worries about it just hanging loosely or causing unwanted vibratory noises while I’m driving down the road.
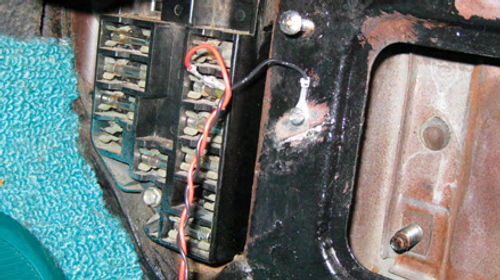
On the Thunderbird the fuse block is located behind the passenger side kick panel which is ideal for installation of this setup as you don’t have to worry about routing wires past your pedals (Photo 3). If your fuses are on the driver side be sure to route all wiring so as not to obstruct your accelerator, brake or clutch pedal functions.
At this point I removed the passenger kick panel as well as the lower dash access panel. Your first connection will be the black wire of the black/red wire pair. This is your chassis ground and you want to ensure it’s a clean one. Using a properly sized drill bit I put a hole into the metal behind my kick panel and cleaned the area with some sandpaper to be certain the RediRad would be properly grounded. A screw and some dielectric grease were all it took to secure the ground wire to the chassis.
The next connection is your red power wire. There are a number of ways you can attach this wire. You can find your radio’s power wire in the harness and tap into that. You can pick another power source that’s only on when the key is in the “on” position, or you can go right into the fuse box using a brass adapter provided by Brew City Engineering (Photo 4). To keep this project from altering any of my stock wiring I chose the final option.
Using the fuse box diagram I located the radio fuse and pulled it out. The brass adapter that comes with the unit slips directly over one of the metal ends of the fuse and you can then plug the fuse right back into the box and you should have power. (Keep in mind that the RediRad needs power when your radio is turned on. So, while there was no reason to doubt my factory fuse box diagram I did reconnect the battery and used a test light to verify that this was the correct circuit.)
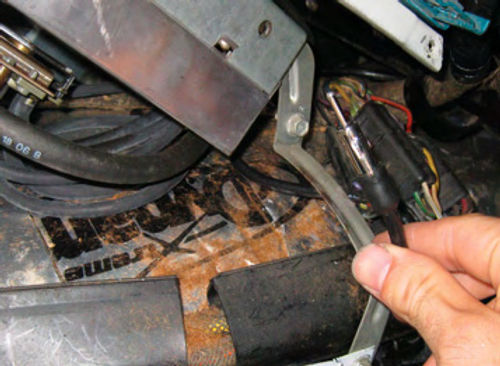
Now that I had both power and ground accounted for it was time to hook the RediRad up to my stock radio, and it couldn’t be simpler. You need access to the back of your radio in order to remove the stock antenna wire. For the Thunderbird I was able to get to the antenna wire easily since I’d already removed the panel on the side of the console. I unplugged the vehicle’s antenna cable from the radio and checked to make sure there was no damage or corrosion on it (Photo 5). Then I plugged the male plug from theRediRad into the radio’s antenna socket. The vehicle’s antenna cable then gets plugged into the RediRad’s female connector (Photo 6).
The Sound of Music
Finally, it was time to make the final connection and test out the unit. The RediRad audio cable was plugged into my cell phone as I use it to stream Internet Radio and play my MP3 files. I Reconnected the negative battery cable under the hood and turned on the radio. (The AM band RediRad operates at about 1000 kHz on the AM dial. Since there was no SAE standard for radio dials before the 1980s, your radio’s display may not have a “10” on it. If it does, tune to that point. If not, tune as closely as possible to that area on the dial.) Then I simply powered up my phone, selected the music player function, set its headphone output volume to about 2/3 of maximum and the RediRad began to broadcast clear music through my stock radio. If the signal is a little fuzzy you may need to adjust the tuner slightly. Once you find the optimal tuning, set it as one of your push button presets.
The RediRad has two switches on the box that should be addressed before closing up access to it. The switch on the left controls the detection mode. From the factory mine was set to keep in RediRad mode but switching it to the right will enable automatic signal detection mode. When in auto detection mode the unit only broadcasts over the 1000 mHz band when your device is powered up. When it’s in RediRad mode it is always attempting to broadcast overthat station. So, if you should want to listen to a regular program on 1000 AM you need to be in auto detect mode as RediRad mode would give you nothing but dead air if your music device wasn’t plugged into it.
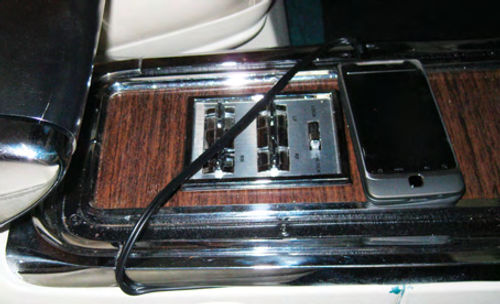
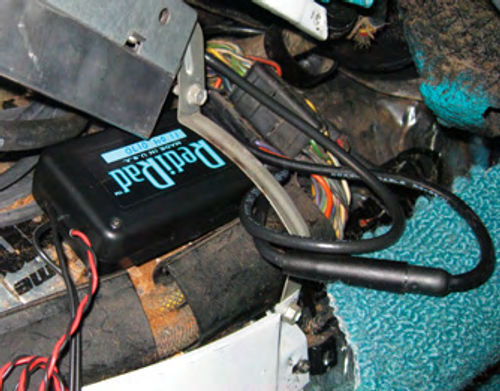
The switch on the right is your audio gain switch. Switched to the right it will give you higher audio gain and a louder signal, however if your portable music source has no provisions for volume adjustment you may want to switch the gain down to prevent distortion of your music. Once I had these switches in my desired positions I hid the power and ground wires under the dash by tying them to some of the factory harness wiring. Then it was just a matter of reinstalling the dash, kick, and center console access panels. For an ultra clean installation I ran the unit’s audio cable behind the stock trim on the console so there are only a few inches of it showing and it can easily be tucked between the seat and console if I want to hide it completely (Photo 7).
There you have it…in under an hour I was able to update my music listening capabilities for a reasonable price and without altering any of the car’s factory components (Photo 8). The best part is the RediRad automatically detects the signal from your portable music device and turns itself on and once you stop your music player it returns back to normal AM band in a few seconds.
And for you custom guys, theRediRad will work even if your car or truck has no antenna.
Resource
Brew City Engineering, Inc.
P.O. Box 180095, Delafield, WI 53018
877-BCE-0203


