How -to More About Automotive Bolts
We Need to Expand on Some Topics From Our Earlier Article, and Look at Other Items Holding Your Ride Together.
WHEN I DID the automotive bolt article for the September 2010 issue I fully understood that I had only touched the surface of the bolt issues that arise in automotive restoration. My thought was if you needed help in identifying a bolt or needed a replacement for a missing bolt, here is a way to help determine what you have or what you might need.
Judging by the amount of mail and the number of emails I received, I definitely hit a home run. I also received a number of notes from readers with far more bolt savvy than I possess.They offered some of their knowledge that I want to pass along.
The bulk of those notes had to do with thread counts, mostly to remind me that the TPI (threads per inch) depends upon the size of the bolt and whether a bolt is UNC (universal course thread) or SAE (Society of Automotive Engineers) fine threads. For example, a 5/16-inch diameter UNC bolt has 18 threads per inch while a5/16-inch diameter SAE bolt will have 24 threads per inch. The point I want to make would be to use a thread gauge like the one I used in the article to measure the thread count on a lug bolt so that you know for certain what you have or, more importantly, what you need.
Another point brought up by several astute readers had to do with the left hand thread lug bolts used on vintage Mopars. You would think that after having restored a large number of Mopars I would know that the left hand threaded lug bolts were on the left side, not the right side as I stated in the article.
Finally, I learned a little more about engine head bolts. When a head bolt is tightened it stretches and the joint compresses (head to block) when an external load is applied (tightened to torque specifications). That load is shared by the bolt and the joint by the ratio of their respective spring rates. I take this to mean what I thought I understood without knowing exactly why, and that is to never use a bolt to attach a cylinder head unless that bolt has been specifically designed for use with the engine being assembled.
My thanks to everyone who responded to the article.
This brings me to the “what have you done for me lately” part of this followup. It is time to delve deeper into automotive fasteners and look at things other than the standard hex head bolt the automobile manufacturers use to assemble their vehicles.
Fender Bolts
When it comes to attaching fenders, or for that matter just about everything else identified as a bolted-on sheet metal part, the Detroit Three came up with an entirely new idea on bolts. The change was so radical and unique that these bolts were quickly dubbed “fender bolts” (Photo 1).
Pictured in Photo 1 are the two most common types of vintage fender bolts out there. At one point all of the Detroit Three were using a version of the bolt on the left. Notice the large star-shaped washer. This washer does not come off.
It is there to prevent the bolt from being pulled through the slotted openings that give fenders that little bit of adjustment to aid in alignment and to act as a locking washer to prevent the fender from moving once the bolt has been tightened.
Now take note of the business end of this bolt. The end is basically blunt, but notice that the threads don’t start until you move up the bolt about a quarter of an inch. What’s that all about? Consider that if you dropped this bolt into a nut plate or a “J” nut (I’ll explain these nuts later) this “pin” on the end of the bolt would force the bolt to align itself to the threaded hole in the nut plate or “J” nut. The idea here is to reduce the chances of cross threading the bolt into the nut.
Car makers hated cross threaded bolts because it required several more seconds of time to force the bolt into the nut. Forget about backing the bolt off and attempting to get it to go in straight. The threads were already damaged and as we all know one cross threaded bolt equals two lock washers. (That’s a little body shop humor for you.)
Now look at the bolt on the right in Photo 1. In the 1970s, GM made a change that has yet to be improved upon. They went to a very large flat washer then tapered the business end of the bolt to a point before threading that taper all the way to the end of the bolt. This bolt is practically impossible to cross thread.
If you venture into the ’80s and ’90s model years of GM products, you will find the washer on these bolts has changed but the tapered and threaded end has stayed the same.
Torx Bolts and Screws
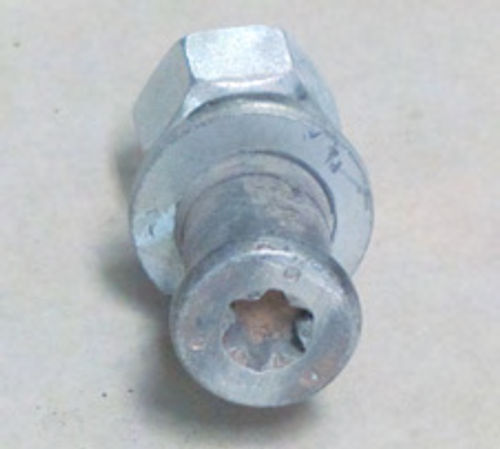
Pronounced “torks,” the name Torx actually refers to the round head of the bolt or screw and the six-pointed star shaped socket recessed into the head (Photo 2). Generically known as the “hexalobular internal driving feature” bolt, Torx head bolts and screws came into wide use on vehicles in the ’80s. Since that time automobile makers have used the Torx style head on everything from headlight bezel screws to door latch striker bolts.
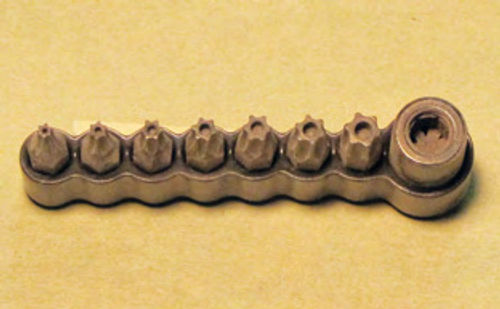
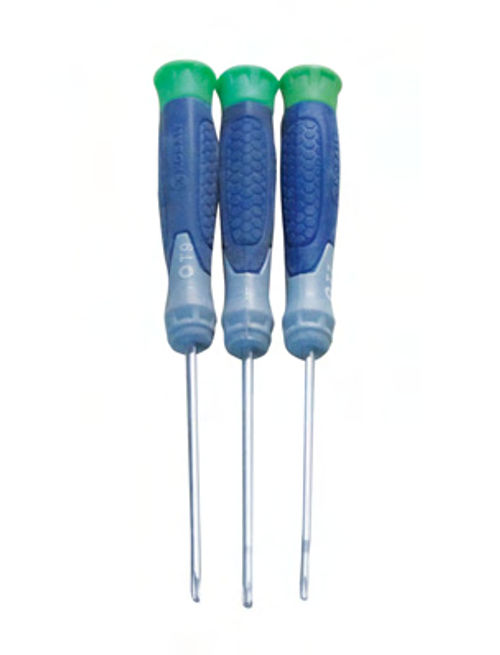
Of course that means special tools are needed to install or remove these bolts. Venture into your local auto parts store and ask for a Torx driver and you will be shown sockets (Photo 3), which is probably the best route to take when purchasing these tools for automotive use, and drivers (Photo 4). Drivers usually are small and normally used to remove screws and not bolts.
Although available in a huge variety of sizes, from T1 up to T100, the most commonly used socket sizes for automotive applications range from T10, which is 2.74 mm point to point, up to the T50, which is 8.83 mm point to point.
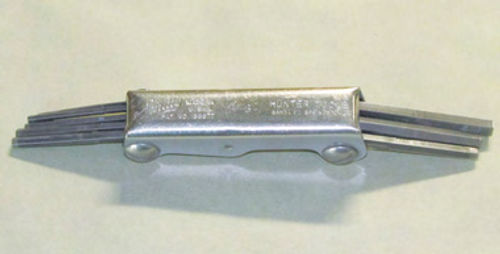
Torx driver for automotive use range in size from T7, which is 1.99mm, toT9, which is 2.50 mm point to point.
In case you are wondering, T20 is a common size for newer fender bolts, T40 is a common size for latch striker bolts, and the T50 is commonly used to secure pickup beds.
The “Tamper Proof” Torx
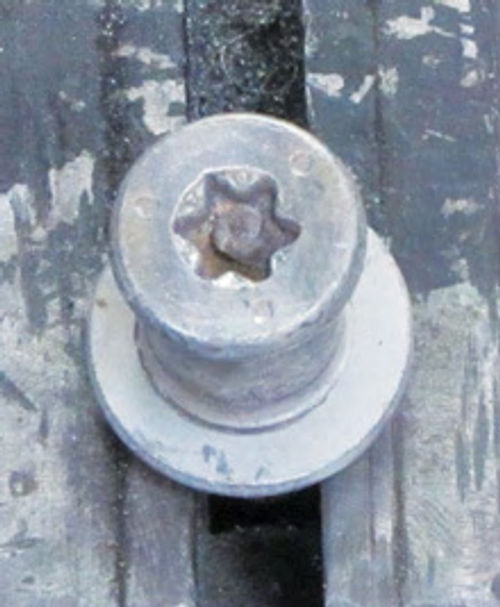
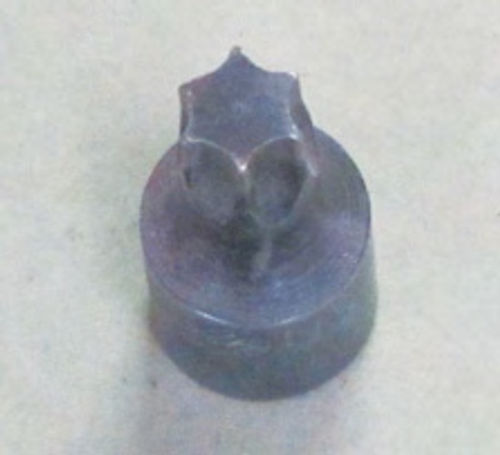
Still in the Torx head world, if you are restoring a Pontiac you may encounter a bolt similar to the one in Photo 5. Notice the pin at the center of the female socket that prevents a Torx socket from fitting into this socket. Known as a “Tamper Proof” Torx, these bolts were used to attach hood latches, secure steering linkages and probably in other places I’ve yet to come across. How do you remove a Tamper Proof Torx bolt? You use a Tamper Proof Torx socket like the set shown in Photo 6. The hole in the center of the male socket slips over the pin in the female socket on the bolt.
Allen Head Bolts
I touched on these bolts last time so this time I’ll make it quick.
I most often see these bolts used to attach headers. More often than not these bolts are either chromed or made of stainless steel. That makes the grading of these bolts suspect as I mentioned in the previous article on bolts. The good news is that a reader emailed to let me know that grade 8 chrome and stainless steel bolts are available through several sources on the Internet. I’ll let you do the browsing, just Google “grade 8 chrome bolts” for a long list of suppliers.
I’ll move on by adding this note: Any time you use stainless steel bolts be sure to apply an anti-seize agent to the threads before installing the bolts. The anti-seize agent will prevent the bolt from galling, which is basically rust created by the metal’s tendency to self-oxidize.
Note: Every bolt you install on your exhaust system needs a lock washer and anti-seize applied to the threads, especially exhaust manifold bolts as these bolts have a serious tendency to seize up.
For installation and removal of Allen head bolts you will need a set of Allen wrenches.They are available as individual wrenches, sockets, or as a combination wrench like the one in Photo 7. Sizes for automotive use range from 3/32, 5/32, 1/8, 3/16, 5/16, 1/4, 7/16, and 1/2-inch.
In case you are wondering, Torx, Tamper Proof Torx, and Allen head bolts are all available in metric sizes and, of course, they all require metric wrenches or sockets for installation or removal.
Automotive Screws
Did you know that GM stopped using Phillips head screws back in the ’70s? They made the switch to Pozidriv— which from three feet away look identical to Phillips head screws—to allow for more torque to be applied on the screw without the screwdriver slipping.
Pozidriv screws are little more than an improved version of the Phillips head screw and were developed by Phillips and the American Screw Co. I suspect someone got tired of rounding off the slots in their Phillips head screws and these were the result of that frustration.
Like I Said, it is difficult to distinguish the difference between the two…unless you know to look for the second set of cross-like features set on the head of a Pozidriv screw (Illustration 1).
How do you install or remove a Pozidriv screw? You can actually use a Phillips Screwdriver to install or remove Pozidriv screws.The Phillips Screwdriver won’t fit very well, but it will get the job done if the screw isn’t too tight or doesn’t require a lot of torque to install it.
However, don’t run out and purchase a set of Pozidriv screwdrivers just because your Phillips screwdrivers are showing signs of wear and it’s time to replace them. Pozidriv screwdrivers cannot be used on Phillips head screws. The business end of the Pozidriv is machined at specific angles to ensure a tight fit in a Pozidriv screw. That machined tip doesn’t allow this tool to mesh with the flat-sided grooves of a Phillips screw.
Thatsaid, if your projectride happens to be a GM product from the ’70s, a good set of Pozidriv screwdrivers will make all the difference in the world. You will appreciate that difference the first time you need to remove a set of aged wheel opening molding screws from your Chevelle.
Single drivers and full sets can be found anywhere automotive tools are sold. They are available in four sizes, #0, #1, #2, and #3, with #0 being the smallest and #3 being the largest. The #2 screwdriver would be the most common size used. Each size is available in various lengths and handle configurations.
Now, let’s talk about some of the things that all of those fasteners are screwed into.
Square Head Nuts
You won’t find very many of these on vehicles anymore but when you do find one, such as when restoring the oak floor in a pickup bed, they can be extremely difficult to remove.
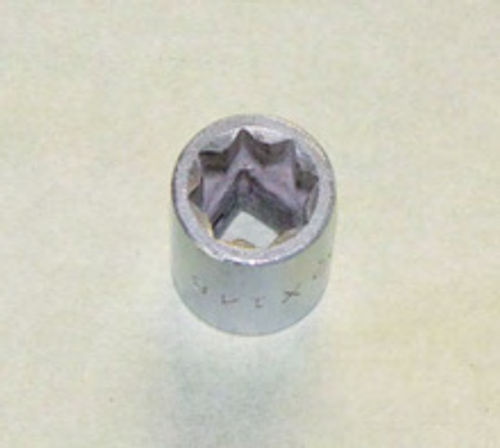
Six- and twelve-point sockets don’t work very well, especially when rust is involved, and open end wrenches are basically useless. Fortunately, an eight point socket, more commonly known as a “Double Square Socket” was invented to remove these nuts. The one in Photo 8 is a 3/8 drive, 7/16-inch socket made by Mac #X 148. Snap-On also makes double square sockets, and both Mac and Snap-On offer these sockets in 1/4, 3/8, and 1/2-inch drives and in various sizes and lengths. Keep in mind, how ever, that this type of socket may be difficult to find at your local automotive parts store. If they don’t carry these sockets, try Snap-On (snapon.com) or Mac Tools (mactools.com). Both will carry them or can order them for you.
Nut Plates
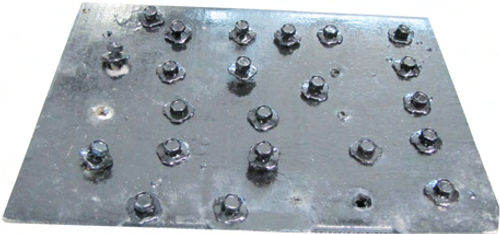
What’s a nut plate? Take a look at Photo 9. This was another time-saving invention put to extensive use by the automotive industry. Instead of requiring two people for bolt installation, one on the outside to push the bolt through the hole and one on the inside to thread on the nut, the factory simply welded the nut to whatever panel needed a bolt to secure it.
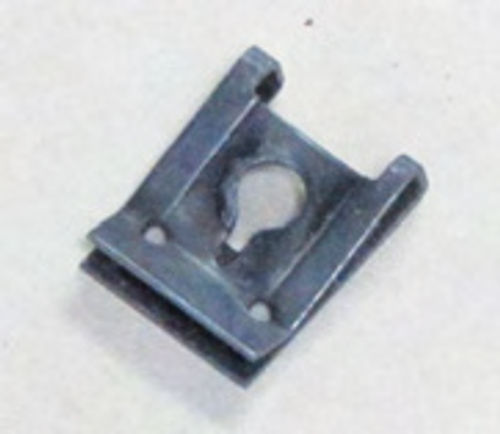
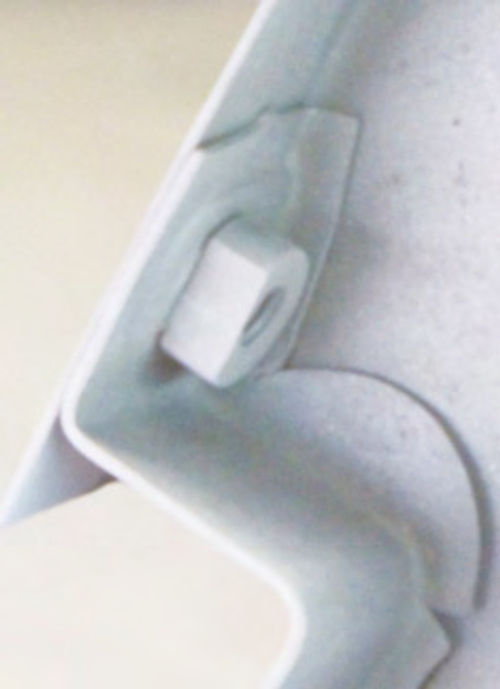
The removable equivalent to the nut plate is the “J” nut (Photo 10). So named because of their shape, “J” nuts eliminated the need for welding square nuts to panels. These removable nuts could be clipped into place on a panel by slipping them into pre-stamped slots. You’ll find “J” nuts on fenders, core supports, hoods, deck lids and doors. They are still popular today and are available in various sizes and lengths, including a number of metric sizes.
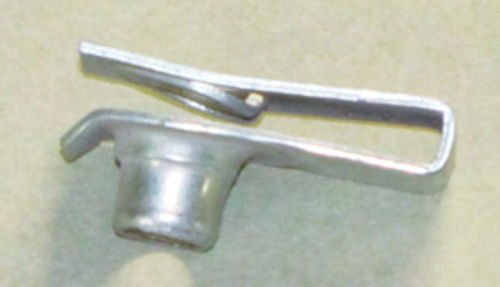
Metal fold-over retainers would be considered the lightweight version of the “J” nut (Photo 11). They, too, are designed to slip into pre-stamped slots but their use is generally restricted to retaining lighter materials such as grilles, headlamp bezels, and interior trim pieces that are best attached using screws.
Speed Nuts
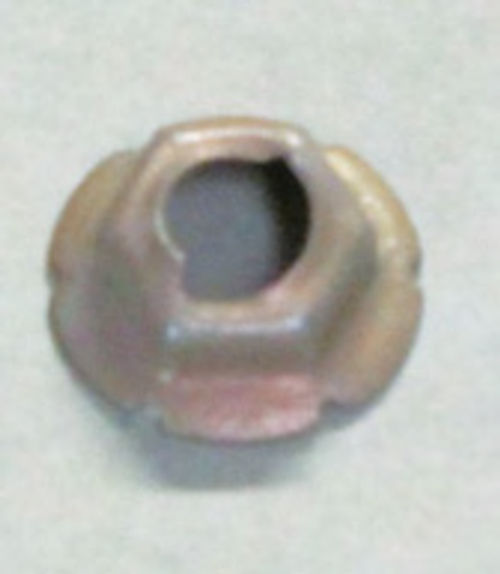
You will rarely see speed nuts being used on threaded bolts (Photo 12). Where you will find them is on pewter moldings and emblems that mount to the vehicle using unthreaded and tapered studs. Because pewter is a soft metal and speed nuts are capable of cutting their own threads, that makes them ideal fasteners for trim pieces that might otherwise be subject to breakage due to overtightening.
The New World of Plastic
A discussion on automotive fasteners would not be complete without the mention of plastic fasteners. Today you will find plastic being used on just about everything once considered the exclusive realm of metal fasteners.
If there is anything good to be said about these fasteners it is that they never rust. Aside from that, plastic fasteners aren’t of much use on vintage rides. Let’s face it; it takes metal to hold vintage vehicles together.
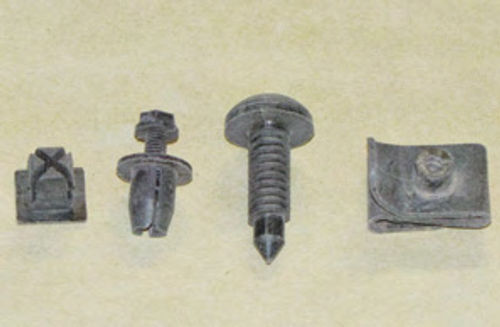
Photo 13 shows four of the most common types of plastic fasteners out there. From left to right, a square push-in retainer primarily used to secure grilles, headlight bezels and license plates. Next is a plastic rivet used to hold things like grilles and plastic fender skirts. Next is a plastic screw used primarily to attach interior trim pieces, and,finally, a plastic “J” nut. You will find these on plastic fender skirts, plastic air dams, and on interior trim pieces. Is that all? Not by a long shot. Plastic isthe new metal. It’s The only thing holding the grocery getter in the garage in one piece.
When you need to replace the aging plastic fasteners on your ride your best option is to take the old piece, broken or not, to your local automotive paint supplier. He will have an assortment of these fasteners on hand as well as an extremely thick catalog filled with the oddball plastic fasteners car guys frequently need.
A Couple of Bolt Tips
A big detractor to a fresh restoration is a bolt that the factory originally painted but now shows signs of having been removed once or twice.
To clean bolts I poke holes in a strip of cardboard, insert the bolts into the holes then run my bolt strip through the bench blaster filled with coal slag. If you need a good blaster, try the Eastwood #22107 Blast Cabinet. To refinish the bolts after cleaning them I poke holes in the top of a cardboard box to hold the bolts and then paint them when I’m painting the car (Photo 14).
If a blast cabinet isn’t in your future, consider the Eastwood Vibratory Tumbler #13384. This unit is ideal for cleaning bolts and other small parts.
Yet another issue to be considered here is how are you going to get all of those bolts holding the sheet metal on your ride to thread securely into the mounting holes. The rule here is to install all of the bolts and save the tightening until every bolt is in place and all of the panel alignment has been handled. Got a question? Send it along.
Resources
LPL Body Works, LLC
5815 Contented Lane, Amarillo, Texas 79109
The Eastwood Company
263 Shoemaker Rd. Pottstown, PA 19464


