How to modify body panels to fit together perfectly
FIT AND FINISH SHOULD be high priorities in the scheme of restoring a classic vehicle for show or go. Aligning panels during the body work portion of your restoration is the foundation of the beautification process. If this step is done with anything less than exacting standards, the overall appearance of the vehicle is going to suffer. Just as some people look better than others in a tight pair of jeans, it is essentially a matter of fitness. If the body panels on your 1953 Ford Sedan Delivery don’t line up properly, you and everyone else who looks at it will know it. This isn’t something that is easily hidden. Imperfections are obvious, as obvious as why you don’t see Roseanne doing commercials for Levi's.
Shaping up your auto body calls for everything from metal forming to the final buffing of your paint job. The following tips pertain to one aspect of auto body fitness: achieving perfect panel fit. Some techniques are aimed at addressing the imperfections that came from the factory, and others will help you adjust panels that have been knocked out of alignment by the everyday hazards that most cars face.
Before you pry, pull or pound any metal on your vehicle, an initial fitting is required without the vehicle or the panels being altered in any way, shape or form. If you are going to replace any panels, put them on now. After that, don’t remove any sheetmetal components from your vehicle until you are satisfied with the total fit. The weight of the engine, transmission and interior is necessary to make certain panels fit properly. Without any one of those major components, the vehicle will not rest in its normal position and what seems to be a good panel fit may later become a problem.
In approaching your project, always begin with the rear quarter panels. The reason you begin in the rear is because the rear quarter panels are welded into place and cannot be adjusted without a great deal of work. As a starting point, the trunk lid should be aligned with the quarter panels on both sides and to the body panel or the bumper. A “16-inch gap around all body panels that are being joined is the target. The next step is to align the doors to the rear quarter panels. This is followed by aligning the doors to the front fenders. At any point you may have to back-track in order to reach a happy medium. To continue the alignment in a logical fashion, the door and the rocker panel edges are the next point of concentration. And, finally the hood should be aligned with the front fenders.
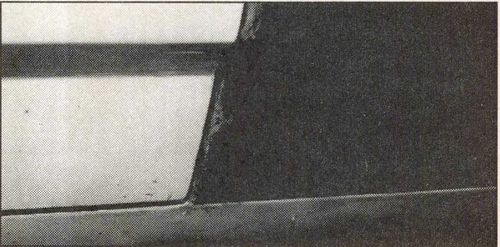
Sure as the sun will come up tomorrow, it is likely that you will have to hammer, pull and bend the panels to attain the proper sheetmetal fit. The ravages of time and the probability of a less-than-perfect job at the factory when the vehicle was new increase the odds that a perfect fit will not be realized on the first occasion. Even though you have done all that is humanly possible, there may still be an unsightly gap on one or more of the edges. In our example all the panels aligned nicely except the gap between the driver-side fender and door. Here are my recommendations to remedy the problem.
I suggest the following tools in order to do the job correctly and with ease. I recommend an Ingersol Rand Model 302 or a Dynabrade No. 52207 angle grinder. I like them because they are light and easy to control when cleaning and forming metal. A Mirka Trim Cut Disc is my choice for use with the grinder because it sharpens itself as it is used allowing me to work without interruption due to changing discs. A mig or tig welder use a Daytona Mig) that allows heat control for delicate work is recommended to perform the welding tasks that are likely to be needed.
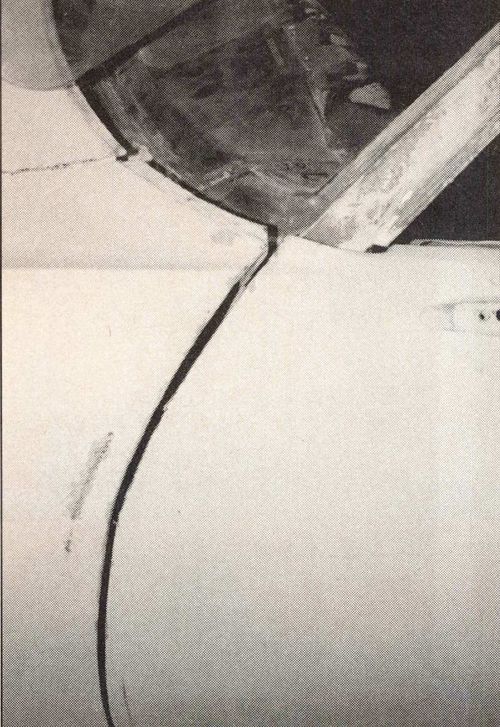
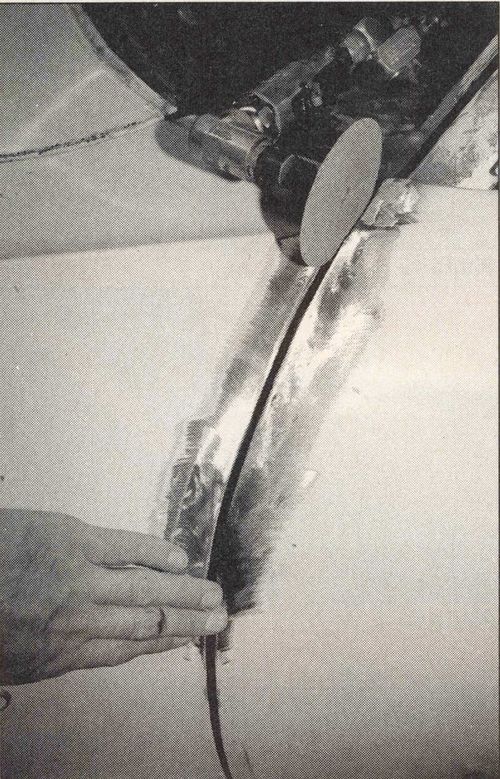
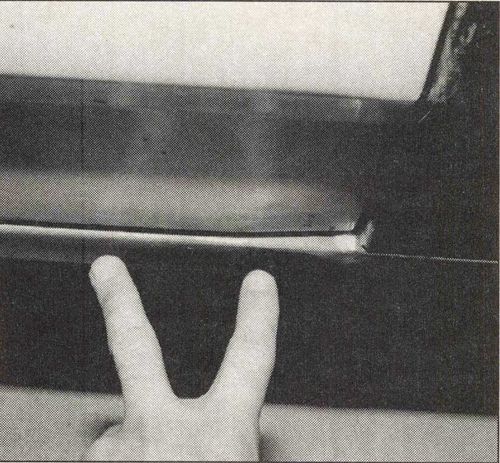
In Photo #1 you will notice a huge gap where the door and fender panel meet. The gap is large at the top and narrow at the bottom. To correct this situation on your vehicle, begin by using the grinder to shear the paint as shown in Photo #2.
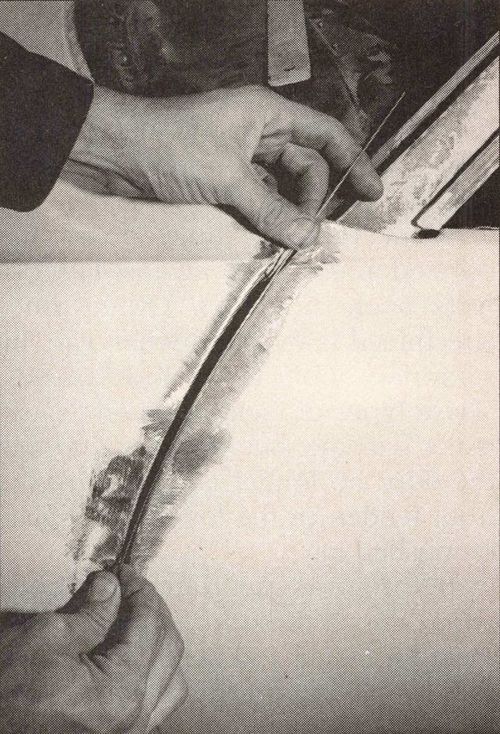
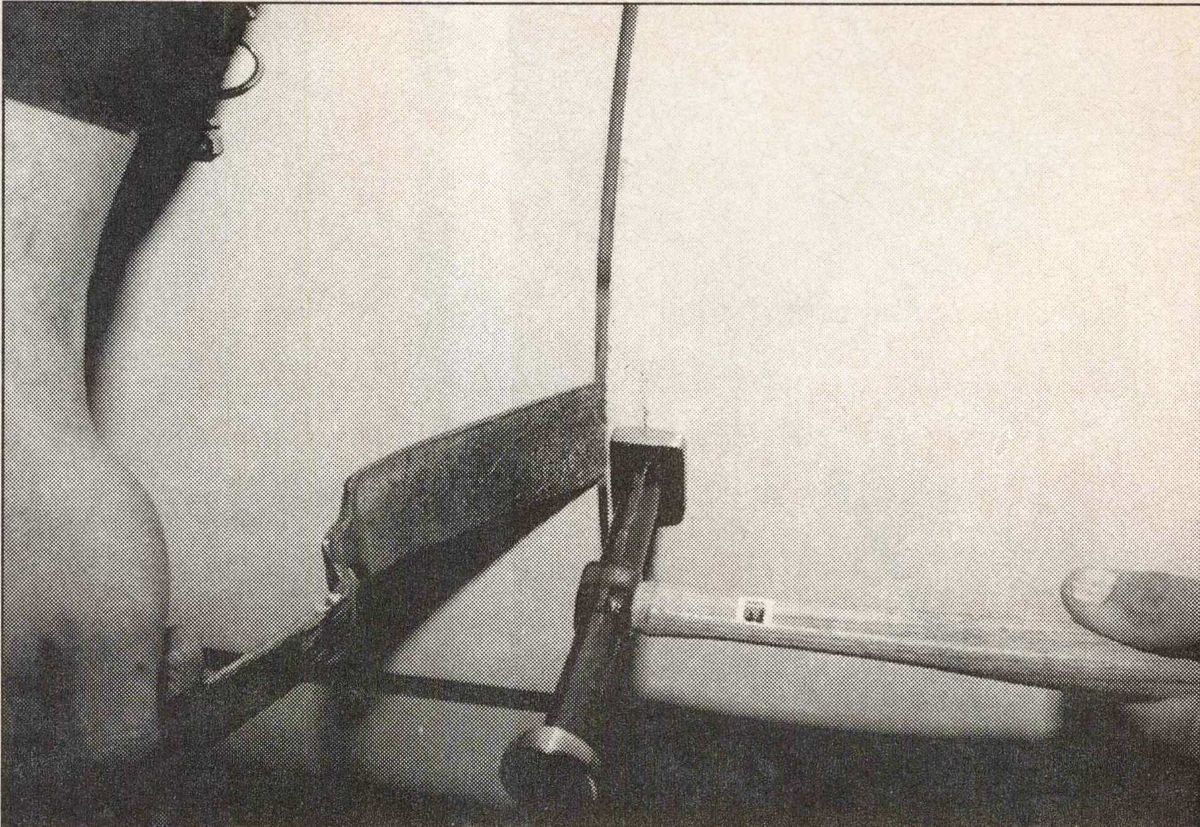
Next, take a piece of 1/16-inch OD mild steel welding rod and bend it to the natural contour of the door on the gap edge as shown in Photo #3. Tack-weld the rod to hold it in place as shown in Photo #4. Continue adding rod until the gap is closed to the 16-inch measurement that is our target. Don’t worry if you have closed the gap a little smaller than the target size. Now weld a solid bead to join the tack-welded rods to the edge of the door.
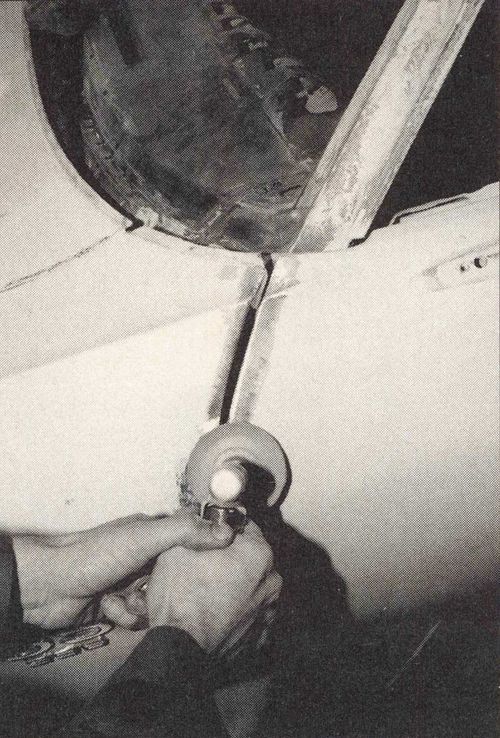
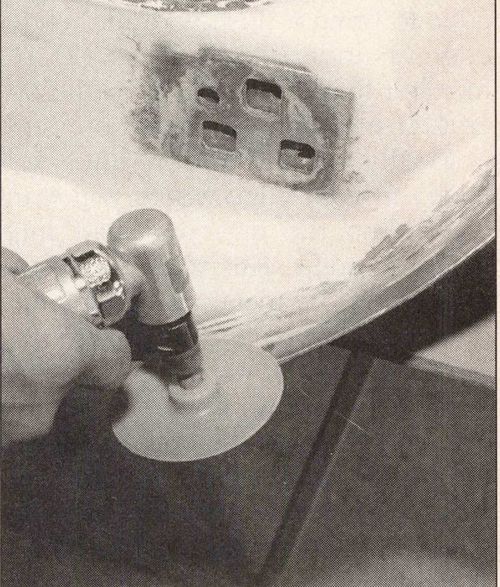
With the unsightly gap now closed, use the angle grinder (Photo #5) to establish the “16-inch gap all around. One way to keep track of your gap is to test the opening with a ¥16-inch file. Grind a little and see if the file will slip into the gap. Grind a little more and check again. One reason I recommend a small grinder like the Ingersol Rand 302 or the Dynabrade No. 52207 is its size and weight and allow you to grind away small amounts of metal so you can better control the amount of material you remove with each pass. In addition, a tool of this type and size is easy to hold and operate because it exerts almost no pressure against your hand while grinding. Therefore, it’s easier for you to use a light touch and grind in an even fashion.
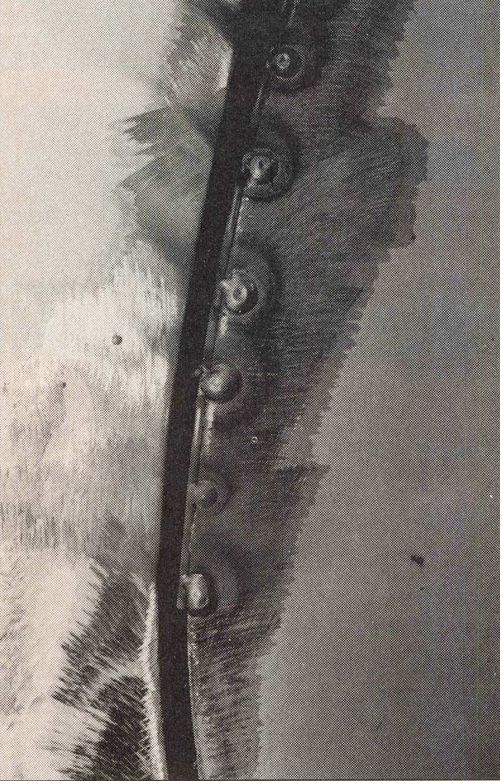
You’re going to remove the door, but before you do, scribe the door hinges where they meet the back side of the door. This will simplify the reassembly process and assure a better fit. Now you can remove the door. You can see in Photo #6 how much weld was necessary to close the gap and create the proper alignment.
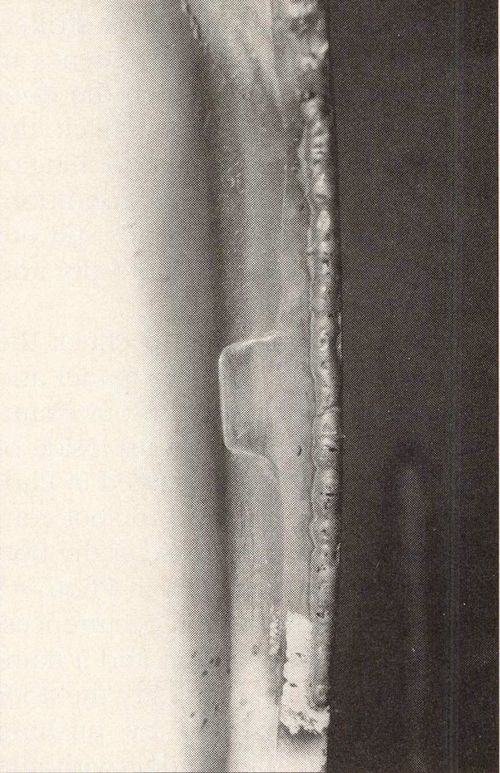
Photo #7 demonstrates how to carefully grind the weld to make it flat. Do not grind on the side as this will alter the gap width you have just labored to correct. I recommend using a 120-grit Mirka Trim Kut disc to make this grind extra smooth.
Proceed with any body work that needs to be done, and remember, if you remove any panels that were fitted with the aid of shims, mark the shims so you’ll know exactly where they go. I wrap them in masking tape and then write the shim’s location on the tape. That way you'll get a perfect fit when you replace the panels. Doors don’t always need extra metal to achieve a good panel fit. Sometimes the gaps are OK, and they just need some adjustments to bring about the alignment you’re seeking.
From time to time doors are opened and bashed against low objects (such as “curbs, Otter times sheetmetal is tweaked when cars hit stationary objects at low speeds. These types of incidents won’t cause major damage, but you may find that the door no longer is flush with the front fender, or the lower edges may be pushed in.
Before you get into any body work, check the door striker adjustment for height and depth and the effect it’s having on the way the door fits. Just moving the striker sometimes can improve door alignment. But when you’re adjusting the striker, keep in mind that its movement can affect the ease with which the door opens and closes. Also check the pins and bushings in the door hinges. If they aren’t in like-new condition, replace them. If your door’s still out of alignment, you’ll have to pry and bend some metal.
Use a straight edge to check the evenness where the door panel and the quarter panel meet. In our example, the door panel lines up inside of the fender panel as illustrated in Photo #11. Also, it’s not hard to spot conditions such as this crease at the bottom of the door as seen in Photo #13 These both are common occurrences.
Use a slapping spoon and a hammer with a squared end. Pry the door edge with the spoon by pushing down toward the fender with the spoon handle. As you pry the door edge to bring it flush with the fender edge (as indicated in Photo #12), remember that “easy does it” is the operating principle. Increase pressure gradually on the spoon until you have the door edge where you want it. Tap on the door one-half inch from the edge. This will release the tension on the metal and enable the door edge to remain in position so the panels will fit nicely.
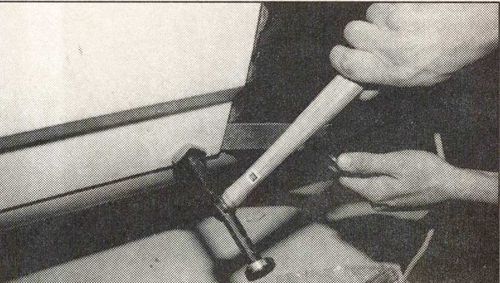
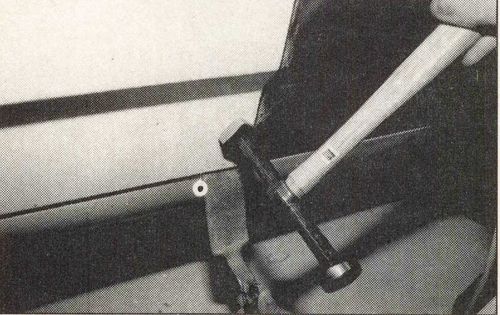
Photo #14 shows how the spoon is used to pry up on the bottom edge of the panel. Then use the square hammer to tap on the crease where the metal starts to bend. Again, take a slow and easy approach to the work. Pry lightly with the spoon and in crease pressure until the panel is where you want it. Use the same approach with the hammer. Start by tapping lightly and, if that doesn’t work, keep tapping a little harder until the metal is seated as you want it.
As indicated in Photo #15, reverse the hammer and spoon and apply pressure from the other side as you tap with the hammer to make the panel uniform.
You will notice in Photo #16 that the panel fits well after our adjustments. Your next step: is to take a hard block with 80-grit paper and sand the area — in one direction only. Where the sandpaper cuts through the paint at the high spot, you have identified the spot to tap on with the hammer. Tap lightly on these high spots to make them even with the rest of the panel.


