
How -to Making Some Subframe Repairs
Early Camaro/Firebird Subframes Rust at the Body Mounts. This Kit Will Repair the Problem on Your GM Pony.
RUST IS OUR enemy…even someone who’s only been in the hobby a brief time knows that. It eats away at our wheel wells, rocker panels, floors, and even the surface of our favorite rides. However, there is another area we may overlook, thinking it’s a tried and true solid unit…the frame. Unfortunately, it’s not always as tried, true and solid as we might think (or hope). Years of hard driving, weather elements or even storage can allow the enemy to creep up into our frames and cause damage that must be addressed.
You’ll Likely Find It Here…
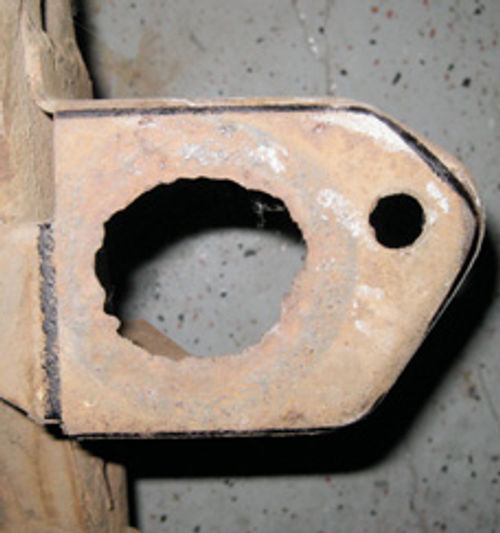
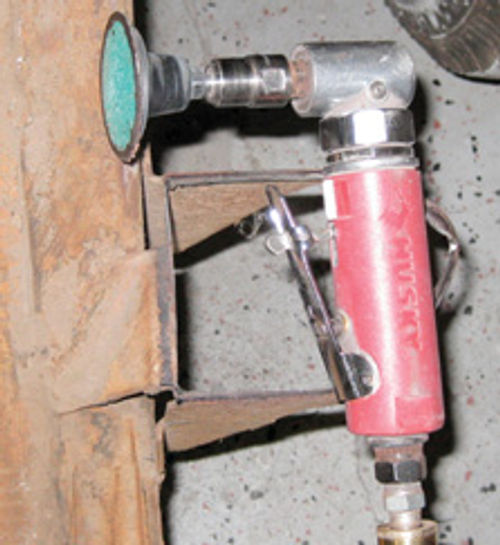
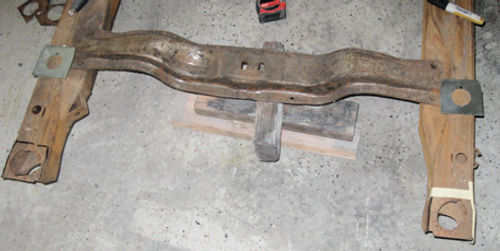
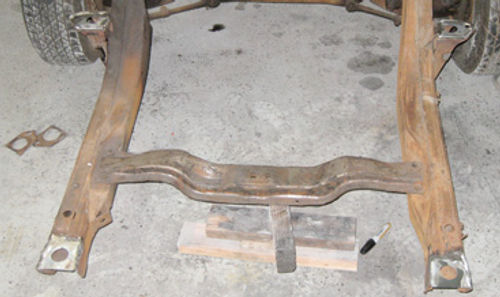
A very common place for this rust damage to appear is on the subframes of the first-generation GM F-body cars (Camaro/Firebird) built between 1967 and 1969. GM designed these unibody cars with a removable front subframe that attaches to the rest of the shell at four points. Each of these contact points is supported by a set of rubber bushings that sandwich into the subframe and then bolt up into the main body. This design works well for attaching the two parts of the car; however, it also creates a nice little pocket to trap moisture and promote rust. Over time, road grime builds up between the subframe and bushings and it becomes harder and harder for water to escape from this area, promoting rust. As the mounts begin to rot away the holes start to elongate and you begin to get slop in your front end. Eventually the holes become large enough that the bushings can almost pass right through them (Photo 1).
A Rescue Kit
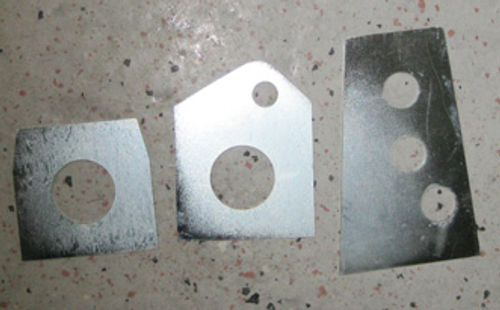
The aftermarket has come to the rescue with a fantastic repair kit. Before, you had to make your own patch pieces for the subframe. Now, with access to a grinder, MIG welder, and some attention to detail you can do this repair in a few hours in your garage. OER (oerparts. com) manufactures a six-piece repair kit that’s available from a number of restoration part suppliers and it runs about $50 (Photo 2). That’s a small price to pay for quality parts and the time saved not trying to fabricate your own. The kit includes plates to repair all four of the mounting points between the subframe and unibody as well as two plates to repair the area where the radiator support mounts to the subframe if you have rust issues there too.
For this article we will focus on the four mounts that attach the subframe to the car. As noted earlier you’ll normally find the original holes for the bushings rotted out to a size much greater than when they were manufactured. This causes a problem that will require some patience and attention to detail on your part to lead to a successful repair. The front subframe is designed to attach within a very tight tolerance. Your suspension and steering geometry rely on this to keep your car tracking true and even your body panel fit is dependent on proper alignment. If you don’t weld the repair plates into the same spot as the factory, you can have problems during final assembly. This is most important on the two mounts that attach just below the firewall of the car. The bolts pass through into large cage nuts in the car that do have some wiggle room; however, you should be as precise as possible. Luckily we have fantastic reference materials available to us via books and the Internet. For this project you can find factory measurements in the old Fisher body manuals giving you distances between mounting holes and even references for squaring everything up once the subframe has been attached to the rest of the car. This information is invaluable for making sure your car rides as good as it looks.
We’ll Start at the Front
To begin the process I like to start with the front body mounts. There are actually two holes in this area…a large one for the mount and a smaller one used for alignment purposes. Most of the time the smaller holes are still intact and this makes things much easier for installing the repair pieces.
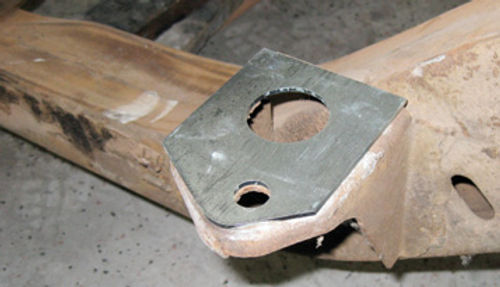
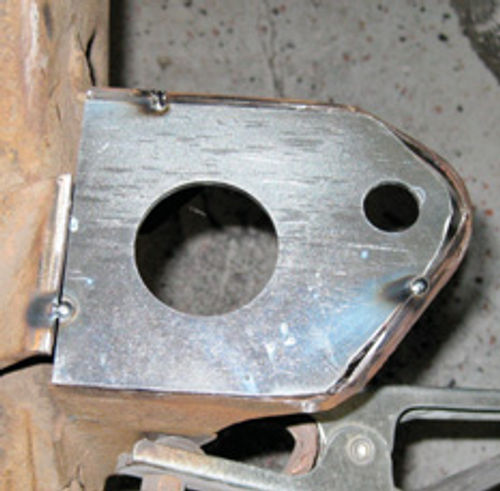
Take the repair plate that you plan to use on the first mount and place it over the top of the original location using the alignment hole as a guide for correct placement (Photo 3). At this point the need for additional patience begins. Be sure to take a tape measure and check your dimensions. The best measurement here is from the front radiator support mount holes back to the hole in your repair plate. Measurements are taken center to center and it makes life easier if you have a helper to assist in measuring as well as a straight rod you can pass through the holes to compensate for the difference in height between mounting points.
Once you are satisfied with the placement of your first repair plate, use a marker to trace the outside of it onto your subframe (Photo 4). This is a good time to note that it may be tempting to just weld the repair plates above or below the factory material to aid in alignment. DO NOT do this…these kits are designed to replace the factory metal in the frame. Any other method of installation can result in improper suspension geometry.
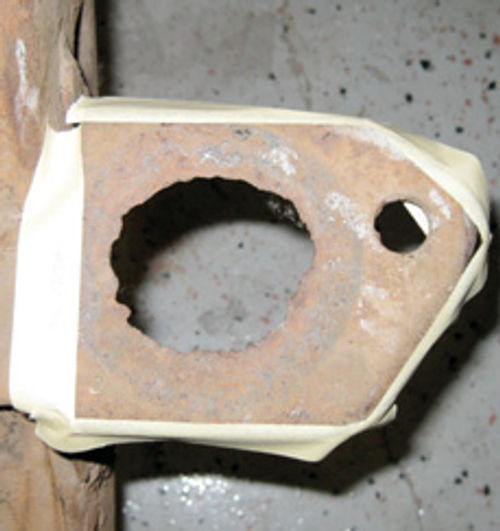
After tracing your pattern remove the repair piece. Now take some masking tape and tape out your lines…just inside of your markerink. I find it substantially easier to see my cut line between the tape and rusty frame rather than if I were trying to follow ink.
Also, by moving your tape just inside of your previous marks you’re giving yourself some extra security against removing too much material (Photo 5).
Remove Some Old Metal
At this point use a grinder with a cutoff wheel and carefully cut out the damaged body mount area from your frame. Then switch over to a small grinding disc and begin fine-tuning your cut (Photo 6). Take your time to remove just enough metal that your new plate drops into the void with only enough gap for proper welding. You don’t want to be bridging a large gap with weld material and compromise frame strength here. When you are satisfied with the fit, clean up the edges of your hole with your grinder to give yourself clean metal for welding. Adjust your welder to the proper setting and tack your new plate into place for the time being (Photo 7).
Going Over to the Other Side
Now move to the front body mount on the opposite side of your subframe. The process on this side is basically identical; however, you have more measurements you can take to ensure proper location. Besides measuring from the radiator support mount you can also now measure the distance between the front body mounts. Again, when you are happy with the fit and alignment, tack weld the second repair piece into place.
Turning to the Rear Mounts
The Fisher manual doesn’t give any specific measurement for the rear mount positioning so here we have to do the best we can with what we have. You can measure the distance between the front and rear mount holes in the unibody of the car with your helper and use this as your spec. Be sure that the cage nuts are centered when you do this so there’s some wiggle room in all directions afterward if you’re not spot on. Once you have this number you’ll again place the repair plate over your old frame material, double-check your measurements, and trace with your marker to set up your cuts (Photo 8).
The cut is a little different on the back. The frame is basically folded over it self at the rear and it’s only necessary to cut out the top layer of the old subframe.This accounts for about half of the area only. Once you cut this out you can use your grinder to remove any remnants of the stock welds to smooth out the location where your repair piece will sit on top of the subframe. Again, clean up the hole and double check your measurements before tack welding the repair piece into place.

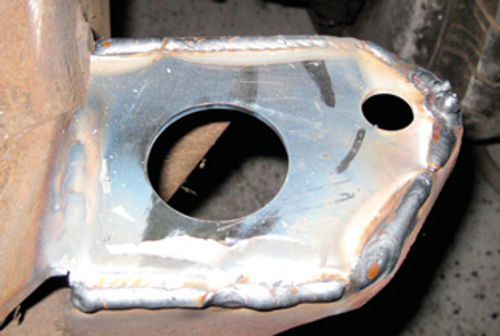
After you have tacked all of your repair pieces into place take the time to make a final check of all of your dimensions. If you’re not satisfied it’s easy to break your tack welds and reposition any pieces that may need it. Once everything checks out it’s time to weld it all solid. The frame material is pretty thick but it’s still good practice to weld about an inch at a time and skip around between mounts to prevent any heat warpage (Photo 9). While it probably won’t interfere with the bushing installation I still like to dress my welds afterward with my grinder for a cleaner look. As long as your welds have proper penetration you shouldn’t have to worry about this weakening your repair and you will be left with a seamless repair (Photo 10).
Test-Fitting On the Car
Now all of your patience and double checking will pay off. Using a fresh set of body mounts and new mounting hardware you’re ready to test fit your subframe back onto the car. It’s not necessary to have the suspension and wheels attached; however, it does make maneuvering the front end around a lot easier.
Install a two-piece mount into each hole in the subframe with the collared piece on top in each location.Then you can slide the unit under the car and loosely start each bolt through the frame and into the unibody. Using an alignment tool in the small holes next to the front mounts you can get the subframe close and then using the measurements from the Fisher manual again, you can square it all off from front to rear of the car(Photo 11).With any luck, everything is able to be adjusted to factory spec and you’re ready to pull the subframe back off for some type of stripping and then paint or powder coating before final installation.


