How to fix and restore body rust on your classic car restoration.
THE FIRST CLASSIC I ever stripped for painting was a fabled “rust-free California car” from the desert. Nevertheless, when I got the thing down to bare metal, I was surprised. An apparent encounter with a garage door had damaged the roof years before and the dents had been repaired with a lot of plastic filler. Then there was the usual rust-out under the trunk lid and in the kick panels. But the biggest problem was that one front fender had been ripped, brazed and smoothed with filler, making it a slightly different shape than its companion on the other side of the car.
I also discovered that unless you are restoring a very popular make such as a Mustang, Camaro, VW Bug or Model A, for which new replacement panels are available, you probably will need to learn how to fabricate and install patch panels. I say probably, because often good original tin can be found even for less common makes. And obviously it is easier and better to replace a damaged panel with an original than to repair your old one.
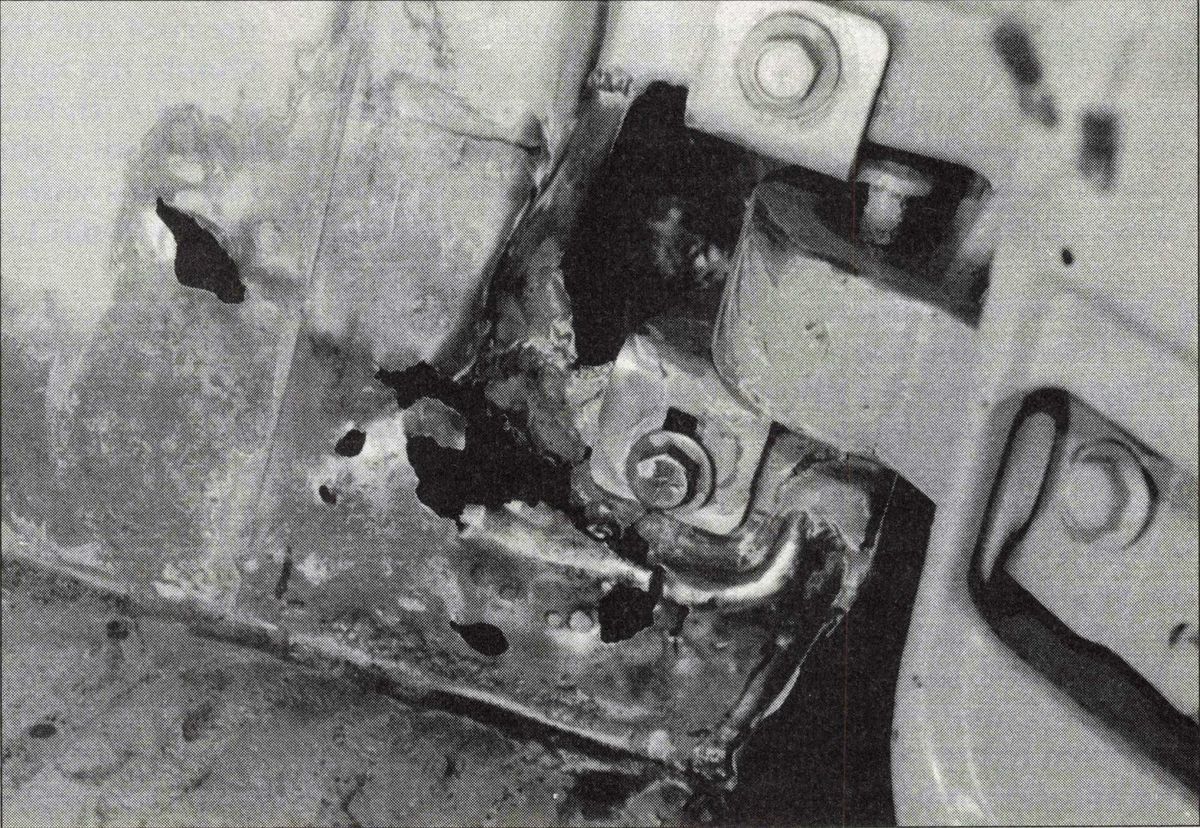
Even if you are just refurbishing a car, you won't want rust eating away at your efforts. And if you are doing a full restoration, you will want to strip your car’s sheetmetal of paint and rust, repair any damage, and replace all the filler used in old repairs. Even well-maintained original cars often will reveal a multitude of sins under their paint if they are 20 years old or older and have not had exceptional care all their lives.
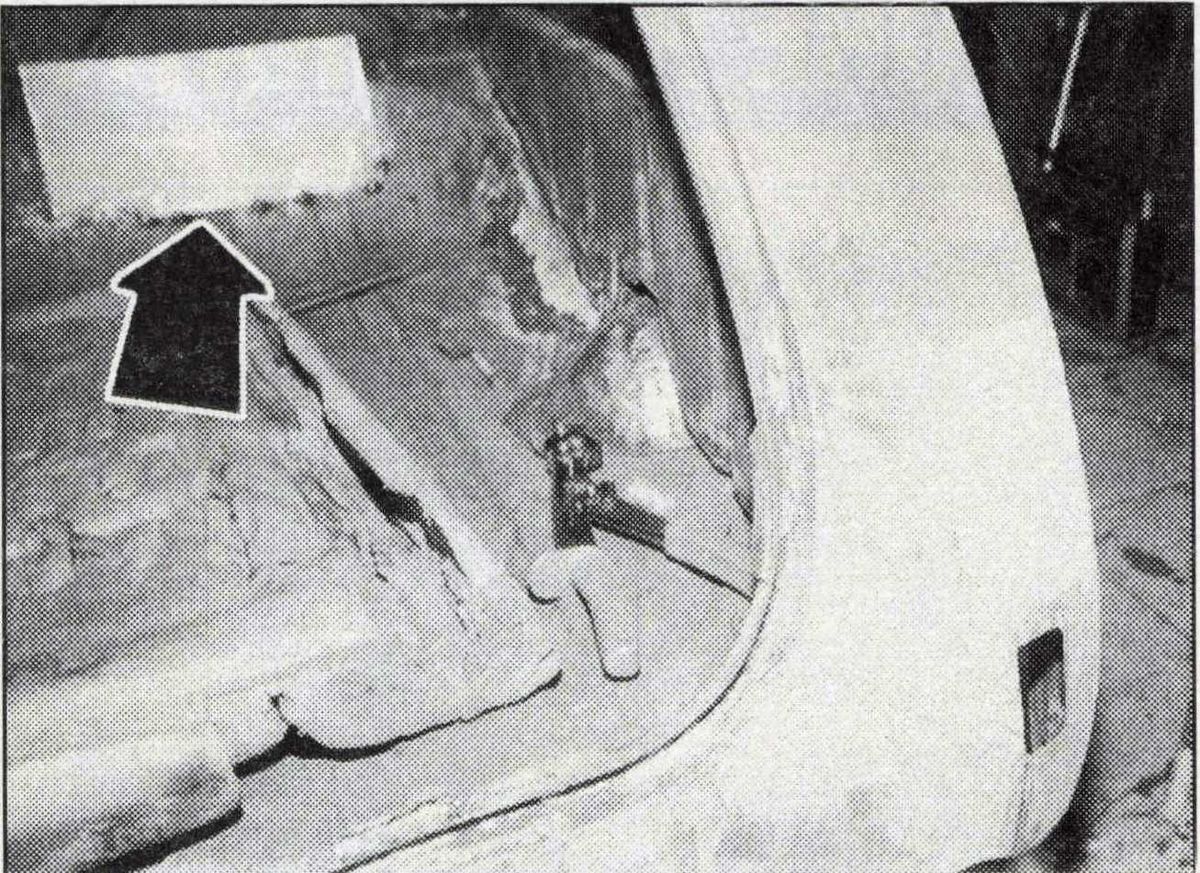
And, of course, on rare cars as well as popular classics, those welded-on, rusty rear fenders and those rotted floor pans will still have to be cut out and replaced with good metal the old-fashioned way. There is really no other choice. Rust can be neutralized and stopped temporarily, but as soon as it gets any oxygen, it will start growing again. Besides, rust weakens panels whether it is neutralized or not. The only effective way to handle heavy rust is by cutting it out and replacing it with healthy tin. Luckily, the job is fairly easy to do.
Welding Wisdom
Patch panels have been installed on cars a number of ways by hobbyists, including brazing, welding and even pop riveting them on. Brazing isn’t as strong as welding, and pop rivets require lap joints that are subject to corrosion in the unprotected metal of the lap. By far the best method is to butt weld them into place. The problem for many of us in the past was that it had to be done with a torch, and torch welding is difficult to master.
A few years ago, oxy-acetylene torches were all there was to work with. In skilled hands, such torches produced outstanding results, but acquiring the skill to use them took a long time and meant spoiling, warping and melting a lot of sheetmetal to get the hang of it. Then MIG welders came along. Nowadays even most body shops rely on them. They don’t produce a clean-looking weld, but they are simple to use, the welding done with them is just as strong as gas welding and you grind all welds smooth anyway.
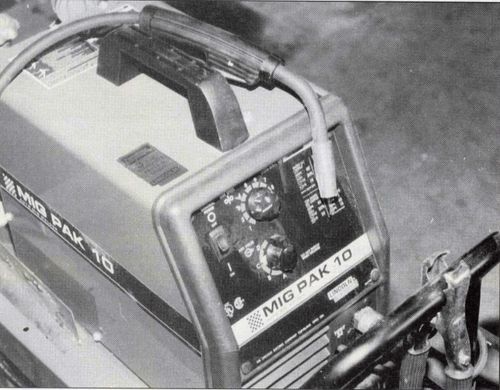
MIG welders for home use are available for around $500 for a light duty model that will operate on standard 110-volt household current, to $3000 and more for a heavy duty, professional model. For the hobbyist restorer, the light duty rigs such as the Lincoln MIG PAK 10, available from the Eastwood Co., are fine. The PAK 10 even comes with a video tape that will get you up and running in no time. After a few hours of practice on scrap metal to get the wire feed rate and the angle of the nozzle right, you'll be ready to go to work.
Keep in mind, however, that electric welding can damage your vision if you don’t protect your eyes from its brilliant glare, and any kind of welding can spatter you with molten metal, so wear welder’s leather gauntlets and a face mask that offers the correct level of protection for the work you are doing (Sunglasses may look cool, but they offer no eye protection when welding.) And if you value your pompadour, a welder’s hat is a good idea, too. Finally, while you are welding, keep a fire extinguisher as well as a first aid kit handy.
If you do decide to use scrap metal from a junked car for your patches, you will need to strip all of the old paint, dirt and grease off before you attempt to use it. Heavy duty aircraft paint stripper will do the trick, or you can strip small panels in a metal bucket using hot water and crystal drain cleaner. Wear goggles and neoprene gloves while working, and don’t let kids or pets anywhere near this corrosive witch’s brew. Rinse the panel thoroughly with clean water, dry it and then remove any surface rust with a wire wheel or sandpaper followed by the application of a product such as Pre-Kleno or Kwik Prep before starting to work.
Patch panels need to be made of the same gauge (thickness of steel) as your car’s body and they must have the same carbon content as the original, too. There are more exacting ways to determine carbon content, but usually if the replacement metal spits the same colors and types of sparks as the original when touched with a surface grinder, you will be okay as far as carbon content goes. If you feel uncertain about recognizing the types of sparks different metals give off, hit a few pieces of scrap metal around your shop with a grinder. You'll be able to discern the difference.
The main reason you do not want to patch your classic with metals of different gauge and carbon content is that when you try to weld them together, one will melt while the other is still just getting warm. Also, the two metals will have different characteristics when you try to work the repaired panel. I am currently patching the body of a 58 Chevy Apache pickup, and I found that an early ’80s Audi hood was perfect for my needs. It was the right gauge, and had the correct carbon content. Of course, you can buy new sheet steel from metal dealers too.
Be sure to butt weld in patch panels on your car’s exterior because lap welds, though easier to do, are prone to rust and will stiffen the metal in odd places and keep it from flexing in the area where it is overlapped. Eventually the lap joint may start to show as a line in the body of the car as the patch ages. Also, more filler is required to make lap-welded patches look good. However, lap welds are fine for floors, inner panels and trunk bottoms where they can be protected with undercoating.
Template Tips
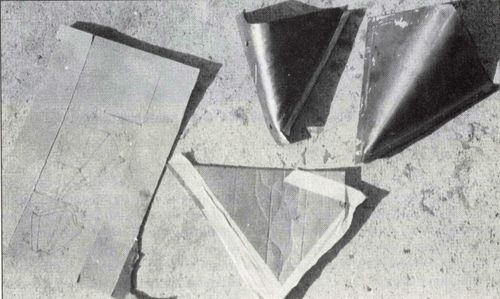
Templates for patch panels can be made out of shirt cardboard or cardboard boxes. A block of wood and an X-acto knife are all you need to cut one out. An old-fashioned cloth tape measure is good for determining dimensions, and if you run into any trouble figuring things out, find someone who sews to help you. Clothing patterns for the human body are made the same way as patterns for car bodies.
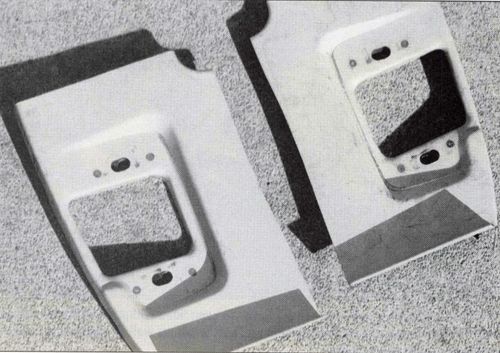
There are several ways to make a pattern for a patch panel. Perhaps the easiest is to make your pattern before you cut into your old panel, then use it as a template to cut out your corroded metal. To allow for curves in your cardboard template, lightly scribe, but don’t cut through, the back of the cardboard at regular intervals so you can bend it to the correct radius. Tape your panel pattern into place and examine it to make sure it is what you want before starting to cut the old metal.
When you have your pattern just right, place it on your replacement sheetmetal and scribe around it. If you are using an old car hood for patches, cut out a small, manageable piece to work on before tracing your template. Cut out your new panel using aviation tin snips, leaving about a A-inch surplus all around. (Car hoods are especially useful sheetmetal sources because they are big, flat panels and often devoid of serious rust.)
If you need to make sharp, 90 degree bends, use a couple of soft blocks of wood such as scraps of a 2-by-4 in a vise, to hold the metal in place and then use a third piece to gently bend the metal over. An oxyacetylene torch or even a propane torch can be used to heat the metal to make it easier to shape.
If you need to make a gentle curve, a piece of scrap wood can be shaped to the correct radius with a band saw or a file, then your sheetmetal can be tapped over it using rubber or plastic mallets or body hammers and dollies. You also can order a shot bag from a body and fender tool supplier to use as a base for shaping your panel. A shot bag looks like a leather throw pillow, but it is filled with buckshot which will give slightly as you work the metal. You can even make a less durable, but no less effective, shot bag out of heavy canvas, then fill it with sand.
Cutting Remarks
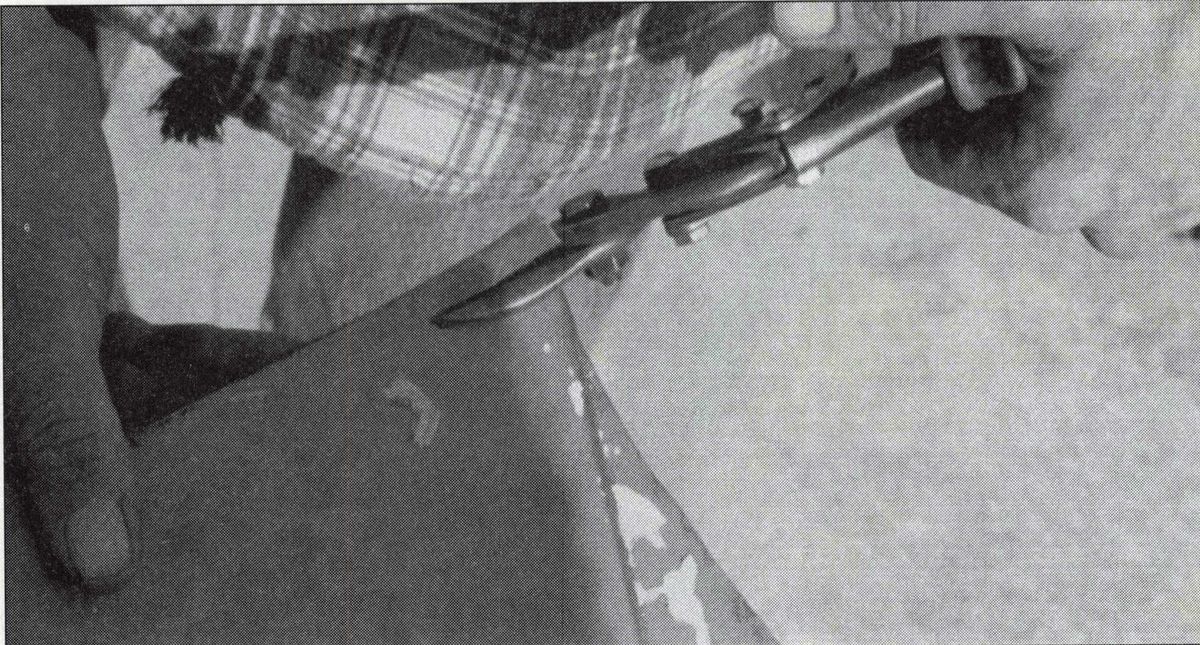
A saber saw is best for cutting out panels, but a die grinder with a cutting wheel, or good-quality aviation tin snips (you'll need both right- and left-bladed) are also good for cutting out rusted panels. An oxy-acetylene cutting torch is not good for this job because it will leave ragged edges and will warp the metal with the heat it produces.
Cut your patch panel a little larger than it needs to be so you can clean up the cut edge on the car with a grinder or file, and clean up, trim and fit you patch panel precisely. This part of the process calls for patience and care. Make sure contours and moldings line up exactly. Nothing looks worse than a kick panel that goes straight — as it should — then suddenly veers up or down.
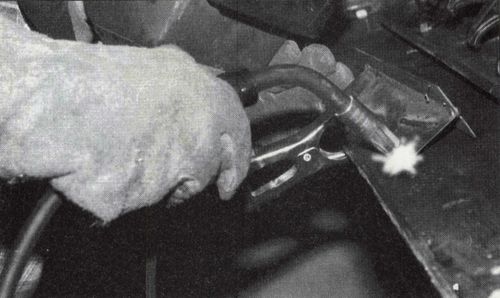
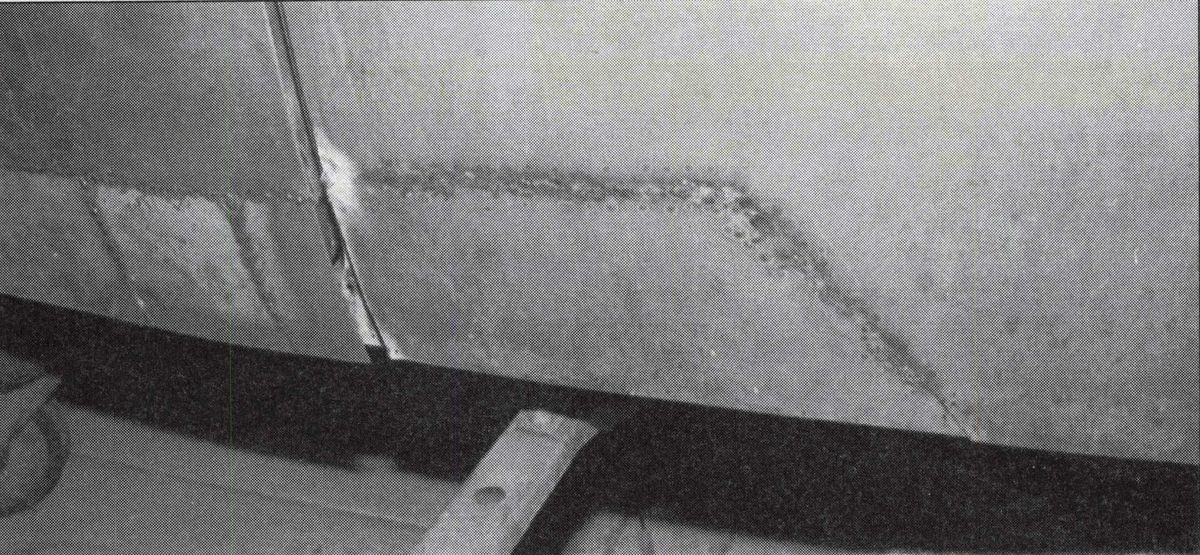
Hold your panel firmly in place for welding using C-clamps or specialized vise grips made for the purpose. Tack or spot weld the ends of long cuts and make as many other welds as necessary to hold the panel in place. Step back and double-check your alignment. If anything is cockeyed, now is the time to fix it. You can easily grind off a couple of tack welds and make corrections at this point.
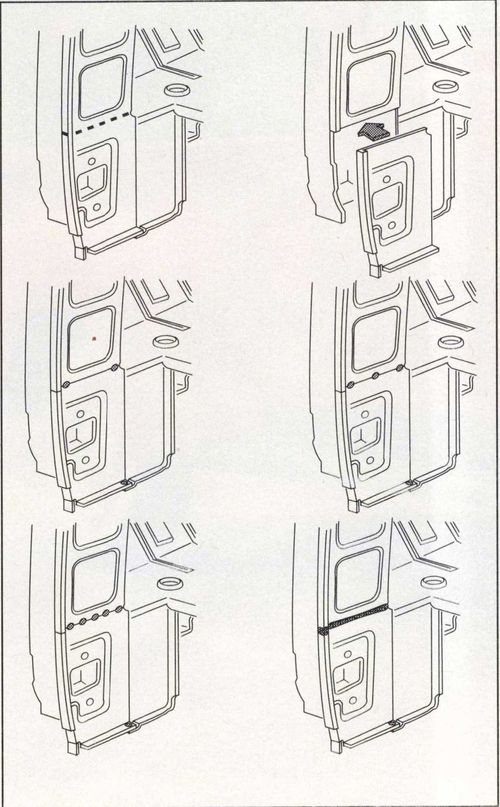
Next, tack your panel in place in the middles of the cuts or seams. Keep alternating from end to end around your patch tacking as you go, until your spot welds are about %-inch apart. Take a dolly and hammer and work out any slight warping in the patch panel and fender. Finally, weld the patch in place, 4-inch at a time, alternating between sections so you don’t over-heat and warp any one area. Use a general purpose dolly and hammer to help flatten each half-inch of welding as you go, so you will have less finishing work to do later.
Let the area cool, then file it smooth with a coarse vixen file or a grinder. Use a hammer and dolly to work out any warping or low spots. Finish the panel cosmetically using either plastic filler or lead. A body spoon is good for flattening warped panels, and the shrinking techniques described in the March issue of CAR can be used to do final shaping. When you are finished working the metal, make sure you shoot the panel with a little water-proof enamel primer before you turn your attention to other work.
Incidentally, if you find that you need to replicate spot welds for lap joints for a totally authentic look, you can drill small (40-inch would be typical) holes in one of the panels where the old welds would have been, then spot-weld the panels through the holes using your MIG welder. The effect is quite convincing.
You can make a rust bucket whole again with enough patience and a couple of old Audi hoods. The professionals in the art of patch panel making have even been known to create wooden bucks on which they have made entire fenders, piece by piece; and classics that have been severely damaged in collisions have been made whole again by these masters.
Practice, don’t hurry, and you too can work wonders with your classic’s body. Next issue we will tell you the secrets of doing a show quality paint job in today’s environmentally sensitive world.


