How - to All About Automotive Bolts
A Bolt Might Fit, But That Doesn’t Mean It’s Right for the Job. This Will Help You to Make the Correct Choices.
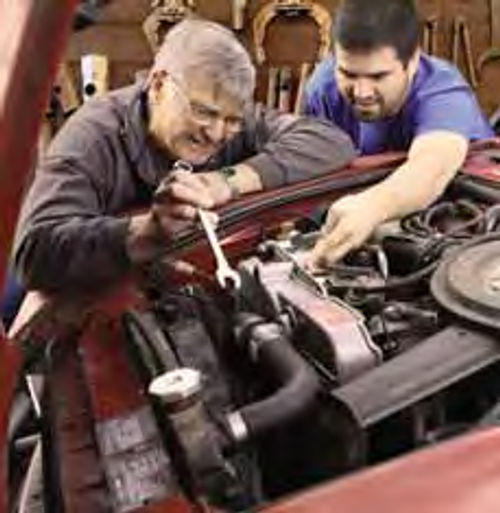
ANYONE WHO HAS ever disassembled their classic ride and then spent the amount of time it takes to reassemble it knows without a doubt that almost every portion of that vehicle is held together with one type of bolt or another. They also know that due to rust, abuse and pulled threads, it takes a lot of new bolts to put that vehicle back together again. That’s where knowing which bolt to use where and why can come in handy.
Out in the world of vintage automobile restoration, finding the correct bolts to assemble a vehicle can be very difficult. The bolts used must not only be the right grade and the right thread, they must also have the rightlook. You simply cannot use a common hardware bolt and a flat washer to attach the fenders on your 1968 Chevelle SS. Even if the grading and the threading are correct, sometimes the look just isn’t.
But while installing bolts that cosmetically look right is an important factor to consider when restoring an old ride, making certain the bolts that you use have the right thread and the right grade rating is even more important.
Bolt Threads
Generally speaking, bolts for vintage American-made automobiles come in two different thread types, UNC (unified course thread) and SAE (Society of Automotive Engineers). Out in the shop we refer to these bolts as being either standard thread (UNC) or fine thread (SAE). Both of these classifications are lumped under the heading of American bolts.
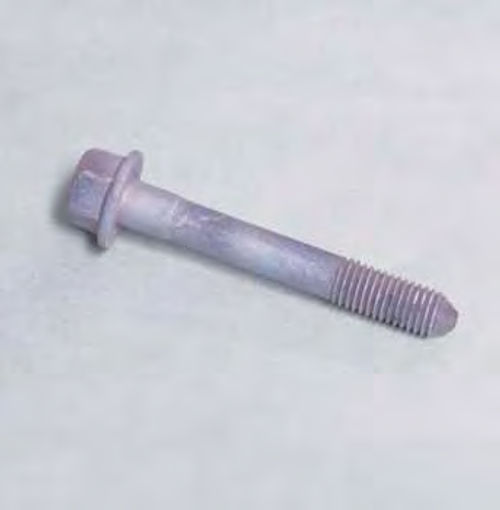
You’ll find standard thread bolts just about everywhere sheet metal parts are attached to the body or frame. You’ll Find fine thread bolts in those places where specific types or specific grades of bolts are needed. A good example is the bolt used to attach the steering column to the steering gear box. That bolt is always Grade 8 and uses SAE threads.
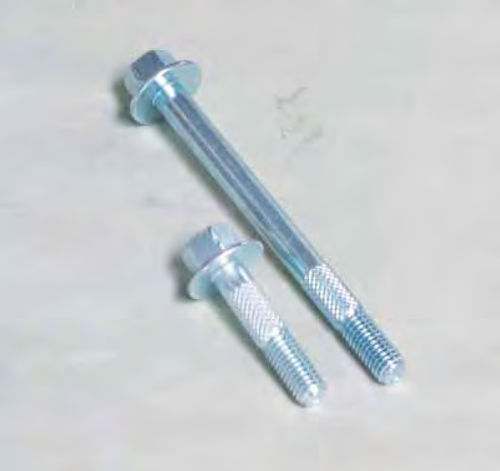
To further distinguish the difference between the two types, UNC bolts will have 13 threads to the inch while SAE bolts will have 20 threads to the inch. If you compare the two side-by-side, the difference is obvious (Photo 1).
To help you find bolts with the correct threads, the bolt aisle at the automotive parts store (some home improvement centers carry a great selection of bolts as well) will have, for example, bolt bins marked 5/16x13. This designation tells you the bolts in this bin are 5/16-inch in diameter and have 13 threads per inch. These are standard thread bolts.
When you find, for example, a bolt bin marked 5/16x20 that tells you this bin contains 5/16-inch diameter bolts with 20 threads per inch. These are fine thread bolts.
What you won’t often find when searching for bolts is the grade designation stated on the bin label. To find a particular bolt’s grade you need to look at the bolt itself. And to do that correctly, you need to know what you are looking for.
Bolt Grades
Bolts are graded according to their tensile strength properties starting with a grade level of 1 and continuing up through Grade 8, with the most common grades being 1- with a tensile strength of 65K PSI; 3- with a tensile strength of 90K PSI; 5- with a tensile strength of 120KPSI, and 8- with a tensile strength of 150K PSI. This actually represents less than half of the bolt grades out there, but unless you are a rocket scientist and need to use some pretty specialized fasteners, Grade 8 is about the top of the line. What’s the definition of tensile strength? The amount of pressure it takes to break a bolt.
As far as automotive bolts are concerned, and I’m talking vintage vehicles here and not the late-model stuff that may contain some lower grade bolts used to attach the fenders, the most common bolt grades found are Grade 5 and Grade 8. Now let me qualify this statement. Back in the olden days, vehicle construction took into account the need to retain heavy fenders, bulky bumpers and large panels. The manufacturers weren’t concerned with weight or fuel mileage. While their fit and finish may have left a lot to be desired, there was no way you were going to take one of these vehicles apart with your bare hands.
Today that’s not the case. Fenders are basically hung on vehicles the same way aluminum siding is hung on a house. How’s that? Aluminum siding is either screwed or nailed to the existing structure of a house. It offers no support to the house whatsoever. It’s just there for decoration. It’s the same way with the fenders on late model vehicles. They offer absolutely no structural support to the vehicle. They just make it look good. Given that, having large, strong bolts to attach them is a waste. Cheap, weak bolts, something like Grade 2 bolts, equal less weight and less cost.
So the next question has to be how do you tell a Grade 2 bolt from a Grade 8 bolt when you are standing in front of the bolt bin? Fortunately, they are plainly marked or conspicuously unmarked as the case may be.
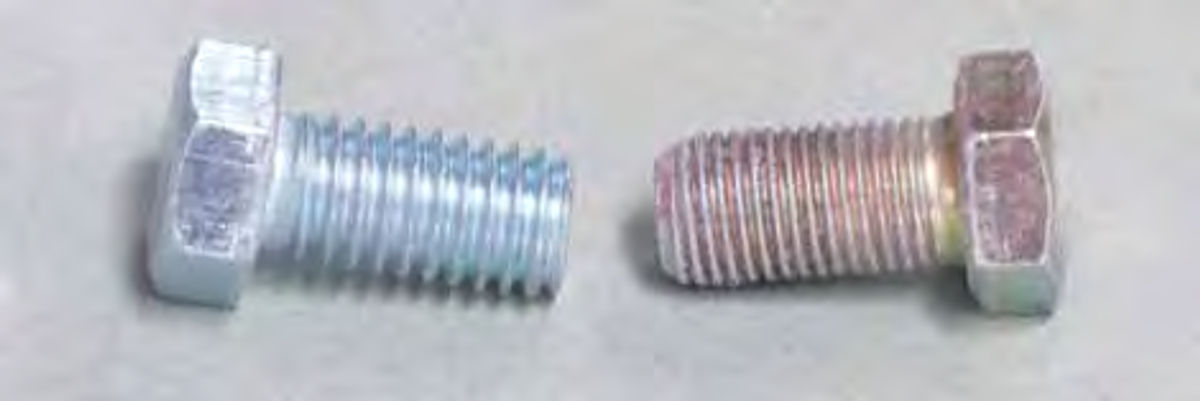
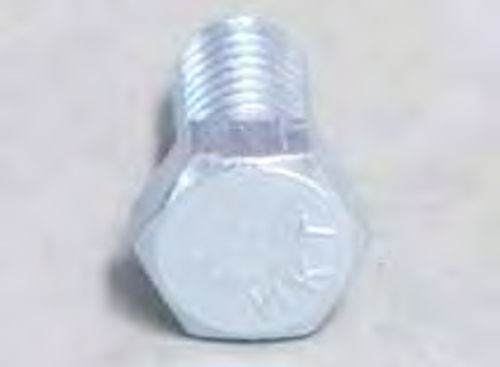
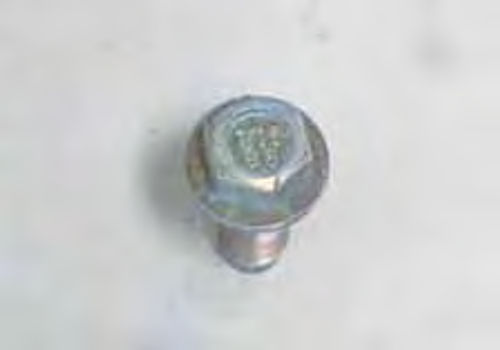
Heading back to the parts store for another look down the bolt aisle you will find cheap bolts sold by the bagful that either have no markings of any kind on the heads or have letters used as identification during manufacture (Photo 2). These are most likely either Grade 1 or Grade 2 bolts. I refer to these as “hardware store” bolts and they have no place on your vintage ride.
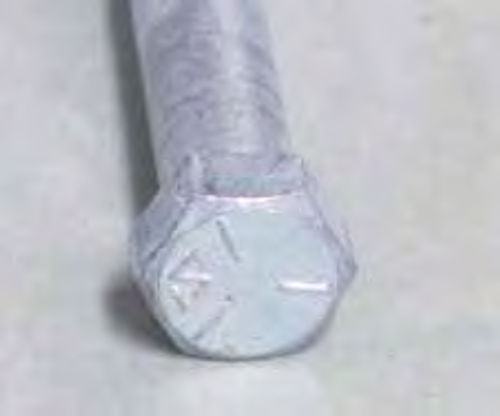
What you are looking for is at least a Grade 5 bolt. This bolt will be clearly identified with three radial line marks on the head (Photo 3). Another good indication that you have found the right bolts is if the price jumps from 20 cents a bolt to 80 cents a bolt, you have just found the Grade 5 bolts.
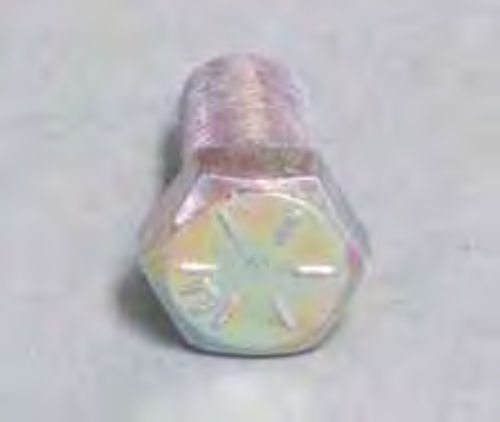
Stepping on up to Grade 8 bolts, look for bolts with six radial line marks on the head (Photo 4). Yes, you guessed it. The price goes up accordingly.
One more thing to consider is the nuts used to fasten these bolts. If you pick up a Grade 5 bolt, be sure you pick up a Grade 5 nut to go with it. The nuts will not be marked, but they should be in the same bin as the bolts, thereby keeping them separate from the lower-grade nuts. Why match the nuts to the bolts? If you were to use a Grade 1 nut on a Grade 5 bolt and torque that bolt to 60 foot pounds, for example, you might strip the threads right out of the weaker nut.
Getting the Right Look
That’s the nuts and bolts of nuts and bolts, but none of these bolts are going to look like the original ones used to fasten the fenders on the old ride. The reason for that is pretty simple, they aren’t the same. Ford, GM and Chrysler had their own ideas of how a bolt should look.
Here are some examples (Photo 5). These bolts were removed from ’60s-era vehicles. The two bolts on the left are from a GM product and the two bolts on the right are from a Ford. The things to note about all of these bolts are first that the flat washers don’t come off. The reason for that is two-fold. It made for quicker assembly at the factory and it provided a much-needed larger attachment surface. Fender mounting holes are always slotted. The flat washers prevented the bolts from being pulled through the slots if tightened too much.
The second thing to note about these bolts is how the threaded ends are tapered. None of these bolts have the typical blunted end found on other bolts.
So why taper the ends?
The taper is there to ensure that even if the bolt isn’t perfectly aligned with the nut plate, it will still thread into the plate. That sped assembly.
If you look at the heads of these bolts you won’t find a grade marking, despite the fact that all of these bolts are Grade 5. How do I know that? All of the bolts used by the American automobile manufacturers in the 1960s were at least Grade 5. Considering that, the need to mark the bolts just wasn’t there.
I suspect the issue of bolt finish is going to come up so I’ll address it right now. When I restore a vehicle I like to media blast the bolts to clean them. What do I use? My blast cabinet is filled with coal slag. That leaves the bolts clean and rust-free, but they no longer have the right look. To give them the correct look I apply a black oxide finish (Eastwood #10238Z), or a zinc finish (Eastwood #10049Z). That’s about as “factory” as you can get.
What do I do when the need for exact factory replacement bolts rears its head? I turn to the Internet. Most of the big name restoration parts suppliers for GM, Ford and Chrysler carry an assortment of replacement bolts that are the correct grade and have the right look.
If I can’t find the bolts I need at any of these places, my next stop is at the local vintage vehicle reclamation center (also known as the salvage yard). I look for the same year-model vehicle as the one I’m working on because automobile manufacturers had a tendency to change bolt styles from year to year.
Engine Bolts
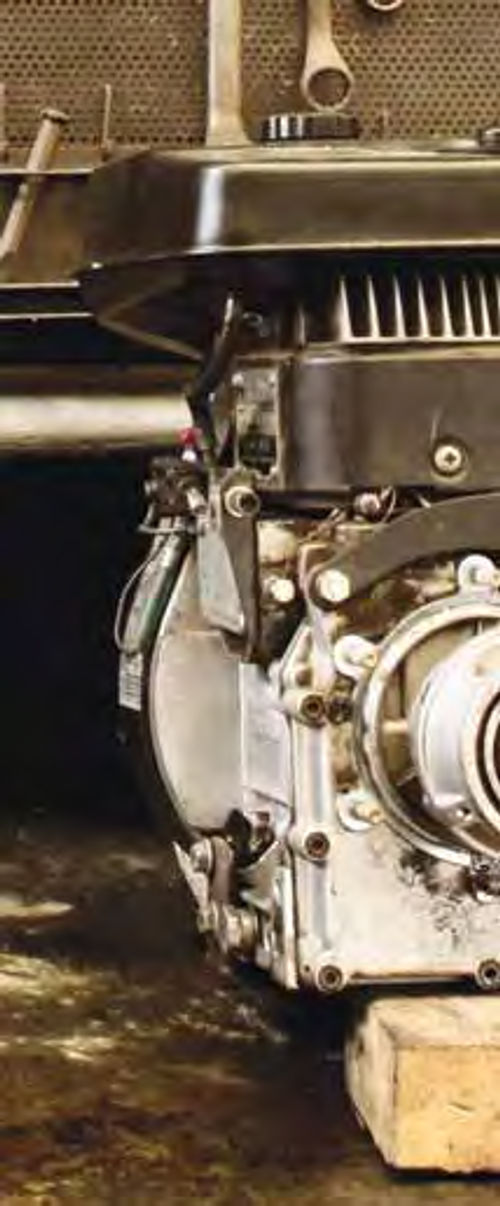
Have you ever considered why when building an engine, the bolts are always classified as “head bolts,” “rod bolts,” “main bolts,” and so on and you should never use bolts specified for any other purpose? That’s because all of these bolts are at least Grade 8 and they have been manufactured for a specific purpose. Consider a head bolt. This bolt may or may not have the Grade 8 markings on its head but it will always be Grade 8 and it will always have a shoulder area located just underneath the head (Photo 6). That shoulder is there to provide a secure mounting between the bolt and the head. In other words, engine head bolt cavities are milled to provide a tight fit at the shoulder of the bolt.
But that’s not the only reason Grade 8 bolts are used to assemble engines. Have you ever considered why internal engine bolts have torque specifications when installing them and why they never require the use of a lock washer? It isn’t to be sure you get a good seal between the mated surfaces. That’s why gaskets are used. It is because these bolts actually stretch as they reach the torque specifications and that stretching quality causes these bolts to act as clamping devices. That’s why some of these bolts will actually pop when enough force is applied to loosen them.
While I’m on the subject of engine bolts, let’s consider the common starter bolt. This, too, is a Grade 8 bolt, so shouldn’t any Grade 8 bolt work to hold the starter in place? You’d think so, but if you do a close inspection of one of these bolts you will see that starter bolts always have a cross-hatching effect just above the threads (Photo 7). The crosshatching does one thing; it secures the starter and prevents it from vibrating and moving as it turns the engine. What does a little movement hurt? Ever crank an engine and have the starter continue to spin for a second or two? The starter continues to spin because the gear is in a bind against the flywheel and is having difficulty disengaging. The most common cause for this is the use of incorrect bolts or bolts that have loosened.
Stainless Steel and Chrome Plated
Street rod builders like to use both of these types of bolts. They look good and they never rust (Photo 8). But that’s where the desirable traits of both of these types of bolts end.
The problem with stainless steel bolts is that they are actually just slightly stronger than a Grade 2 bolt. They don’t even come close to the strength characteristics of a Grade 5 or Grade 8 bolt. Why not? Stainless steel bolts are made from an alloy of low carbon steel and chromium. The addition of chromium is what gives stainless steel that enhanced corrosion trait that keeps these bolts looking good over a long period of time. Stainless steel bolts are inherently weak because the low carbon content doesn’t allow the steel to be hardened. If you can’t harden the steel, you can’t improve upon its strength characteristics.
Chrome plated bolts are subject to an entirely different issue. While you can chrome plate Grade 5 and Grade 8 bolts and get them to look good, the problem is that during the process of electroplating the bolts can become brittle as a result of hydrogen embrittlement. This is a condition where hydrogen is introduced into the metal as a result of the electroplating.
There is a cure for the embrittlement, which is to heat treat the bolts to remove the hydrogen, but how can you know the chrome bolts you just purchased have been properly heat treated and that they are no longer brittle? I’m not sure you can and that’s not a chance I’m willing to take.
Metric Bolts
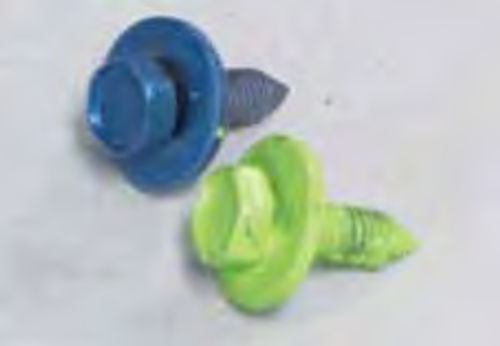
If your project happens to have been manufactured after 1980, chances are that vehicle was assembled using metric bolts. They were easy to identify as back in those days metric automotive bolts were coated with either a blue or green rust resistant coating (Photo 9). That’s something to keep in the back of your mind when restoring one of these vehicles.
Today metric automotive bolts can be much harder to identify as the color coding, so to speak, has given way to the black oxide look of vintage automobile bolts. To know if the replacement bolts you are looking at are metric you have to check the bin label for the “M” identifier. All metric bolts are identified by an “M” prefix followed by three numbers. Here’s an example, “M9x1.2x15.”
As I said, the “M” prefix identifies the bolt as having metric threads. The first number indicates the diameter of the bolt in millimeters. The second number is the distance between the threads, also in millimeters. The third number is the length of the bolt in millimeters.
Let me back up here and talk about the second number. All metric bolt threads are measured using the distance between the threads, as in 1.2 millimeters, rather than the thread pitch used in American bolts. What is “thread pitch?” It is the number of threads per inch.
To determine the strength characteristics of a replacement metric bolt, you have to look on its head. What you are looking for is an 8.8 or a 10.9 (Photo 10). The first number, the 8, for example, indicates that this bolt has a tensile strength of 116k PSI. That’s close to the tensile strength rating of a Grade 5 bolt. The second number, in this case another 8, means the bolt has a yield strength of roughly 140k PSI. The yield strength indicates the amount of pressure needed to stretch the bolt out of shape.
A metric bolt with a 10.9 stamped on the head has a tensile strength rating of 151k. That’s roughly the same rating as a Grade 8 bolt, and a yield strength of 156k PSI.
Just be aware that the bolts used to attach fenders to many later model vehicles often have a tensile strength rating much lower than 8 due to the “hung siding” effect I mentioned previously. These lower-strength bolts must be kept separate from all of the other bolts holding these rides together.
Lug Bolts
I decided to include lug bolts after talking about metric bolts because should you do any updating to the suspension system on your ride, part of that updating might come with new lug bolts that are metric.
Originally GM liked to use 7/16x20 lug bolts; that’s 7/16-inch diameter with twenty threads per inch, while Ford and Chrysler liked to use 1/2x20 lug bolts on their vintage vehicles; that’s 1/2-inch diameter with twenty threads per inch.
Chrysler also liked to use left-handed lug bolts on the right side of some of their vehicles, so be aware of that. How do you know if you have left-handed threads? Those lug bolts were stamped with an “L” on the end of the bolt. That made them very easy to identify.
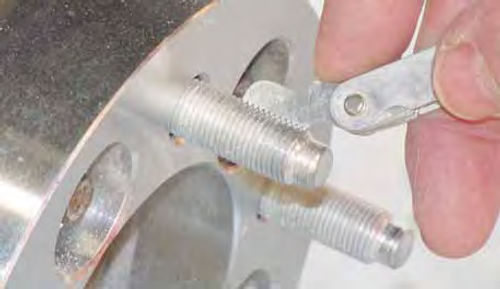
The issue that comes up when replacing suspension components is that it is nearly impossible to visually distinguish the difference between a metric lug bolt and an American lug bolt. But don’t fret; there is a very easy way to tell the difference (Photo 11). I use the thread gauge from a tap and die set to verify the threads. I always start with the 20 threads per-inch gauge. That is the gauge size that is most typical for American lug bolts. If it fits perfectly, I know I have American lug bolts and all I need to do from here is measure the diameter to see if the bolts are 7/16-inch or 1/2-inch. If it doesn’t fit, I refer to the metric side of the gauge and check until I get a perfect fit.
Where do you start with the metric side of the gauge? A common size for metric lug bolts is M14x1.5x22. The gauge I look for is the 1.5mm gauge. If it fits, I’m in business; if not, I keep checking. Got a question? Send it along.
Resources
LPL Body Works, LLC
5815Contented Lane
Amarillo, TX 79109
DIY body and paint DVDs
Eastwood Company
263Shoemaker Rd.
Pottstown, PA 19464
Automotive restoration tools and supplies