
How -to A Pickup Bed Rebuild
Everything Needs to Be Level & Square and Holes Must Line Up. So, Be Patient and Measure Very Carefully.
INSTEAD OF BEGINNING at the beginning, we’re now joining this build in midstream and will focus on the restoration of the bed box. The vehicle is a 1947 Dodge Pickup truck and, as you might imagine, the original wooden floor for this bed long ago succumbed to the ravages of time and termites.I’ve already disassembled the steel parts of this bed and made the necessary repairs to most of those panels. They are now in primer. The original tailgate and front panel didn’t fare so well so I opted to replace both of them with new aftermarket pieces.
As for the rotted wood portion of this bed, I can’t be certain what type of timber initially was used to construct the floor, but I do know the original wooden cross members used to support the bed were made of oak. I know that because I still had the badly rotted original rear cross member. Since that piece was oak, I decided to purchase a complete oak wood kit for the bed and start over. (Contact information for the wood supplier is at the end of this article.)
Start With a Level Surface
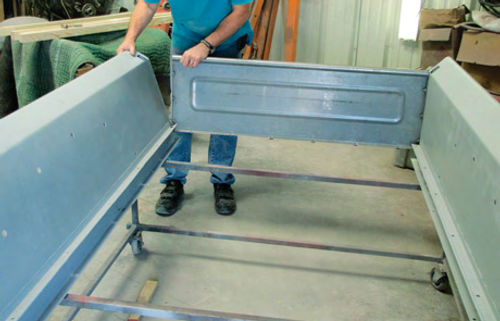
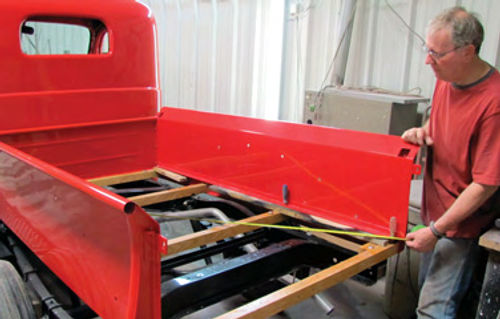
Photo 1 shows the pickup bed after this part of the restoration has been nearly completed. I made two major changes from the way this bed originally was constructed in that the oak floorboards were left natural and coated with marine varnish, as opposed to painting them black, and the skid strips along with the bolts used to attach them are now stainless steel as opposed to being painted black as well.
(How do I know the boards and skid strips were originally black if they’re now missing? I had a pretty good source of information. The truck’s owner grew up riding in the back of this truck. He insisted the boards and skid strips originally were black.)
Using stainless steel means I’ll never have a rust issue with any of the skid strips or attachment bolts but it also means I need to use an anti-seize compound on all of the bolts just in case I ever need to remove one. As you may recall from the bolt article I did in the February issue, I mentioned that stainless steel bolts can gall and seize once you tighten a nut on them. An anti-seize compound will prevent that from happening.
The instructions that came with the wood kit called for a level working surface so the first step was to level my square steel tubing roll-around assembly rack. I’ll use this rack to do the initial assembly of the bed and start the process by bolting the steel side panels to the new front panel (Photo 2).
The next step is critical and must be absolutely precise. I need to cross measure the bed and make any necessary adjustments to be sure it is perfectly square (Photo 3). Look closely and you can see that I have clamped the left side panel to the rack to prevent it from moving. That lets me shift the right side panel either forward or backward until the bed is perfectly square. Also notice in the photograph that I have installed the new rear oak cross member to make certain the rear of the bed maintains the same width as the front of the bed, which happens to be 481 ⁄4-inches. I took all of my measurements, the cross measurements and the width measurement, at the bottom of the bed and not at the top.
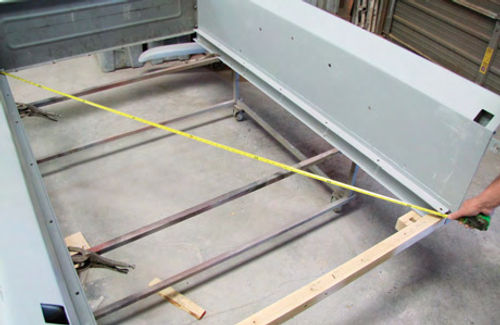

Why measure at the bottom? The bed sides are not secure at this time and they have a tendency to sway a little. This in and-out sway could throw off my measurements and cause me to build this bed slightly out of square. Measuring at the bottom of the bed eliminates the sway factor and ensures that this bed is nice and square.
This is a point I can’t stress enough. If the bed isn’t perfectly level and square the floor boards will never align evenly with the rear cross member and any holes that are drilled in the oak boards and cross members—and several must be drilled—may be in the wrong place. If that happens, the only remedy is to bring out the checkbook and start over with new lumber.
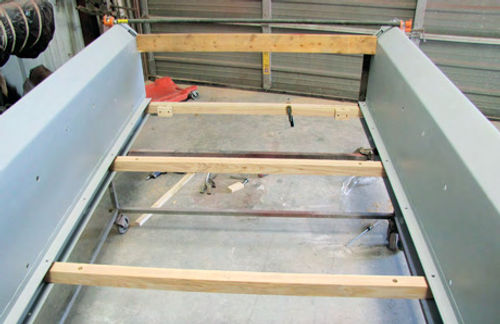
I mentioned above that I have already installed the rear cross member to help establish the width of the bed at the rear. This cross member is different from the others in that it has boxes near each end to facilitate bolting the cross member to the truck’s frame rails. The other three cross members, which will be installed now, do not have these boxes but otherwise are identical in size and shape (Photo 4). Since I will be drilling pilot holes in each of the cross members it’s a good idea to number them one through four with the number one cross member mounting at the front of the bed.
However, cross member installation isn’t why I showed you that photograph. Notice the two-by-four spanning the upper rear of the box and the carpenter’s pipe clamp above the two-by-four holding it in place.What’s that all about? Before I go any further I want to be sure the tailgate opening is square. The two by-four clamped into place lets me maintain an exact 481 ⁄4-inch width at the top and the bottom of the bed to be sure the tailgate will fit. Eventually I’ll install the tailgate to test that fit.
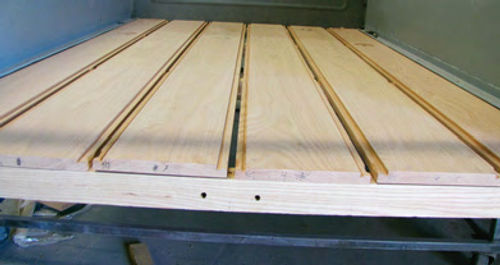
Next I installed all six of the floorboards on top of the cross members (Photo 5). Notice that I have spaced each of the boards evenly across the width of the bed by maintaining exactly a 5/8- inch spacing between each board. Something that’s difficult to see in the photo is that while all of the boards lay on top of the cross members the two outside boards tuck underneath the metal flanges on the side panels.
Now It Becomes a Bit More Difficult
That’s the easy part of the construction. From this point on it is the attention to detail that will make or break this pickup box restoration.The first detail is to drop a 3/8-inch flat washer between the end of each floor board and the front panel of the bed. This ensures a uniform look to the boards and the gap helps with drainage to prevent moisture from being trapped between the boards and the steel front panel.
Note: I informed the truck owner of my concern about moisture being trapped between the forward edge of the floor boards and the front panel. We decided that drilling a series of 5/16-inch holes just above the bottom flange of the new front panel would help with drainage and hopefully prevent the floor boards from wicking up any moisture that might linger in that area of the box. I drilled those holes before refinishing the panel.
The plan also calls for coating the floor boards with marine grade varnish to seal out the moisture, but since we are talking end grain lumber here anything I can do to eliminate the trapping of moisture against the ends of these boards has to be a good thing.
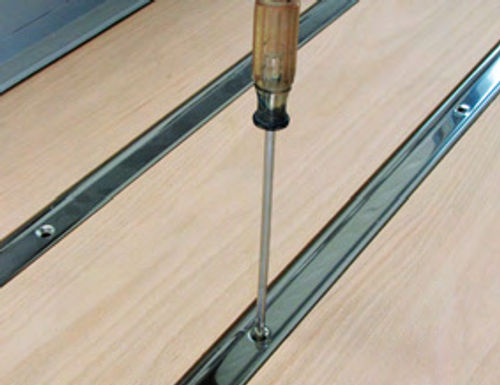
Next, the stainless steels kid strips are laid into place so that the cross members can be marked for drilling the 3/16- inch diameter pilot holes required for the wood screws that will secure the strips to the floor boards. To help maintain the positioning of the stripsIstarted at the rear of the box and drilled 3/16- inch holes in the rear cross member then secured each skid strip using the stainless steel screws provided in the kit (Photo 6). To help the screws thread into the hard oak wood I first coated them with wax.
From here I can use the skid strips as a guide to mark the remaining cross members using a long punch to indicate where each hole should be drilled (Photo 7). Once I take the bed apart for refinishing I’ll drill each of the marked holes using a 3/16-inch drill bit and drill about halfway through each crossmember.
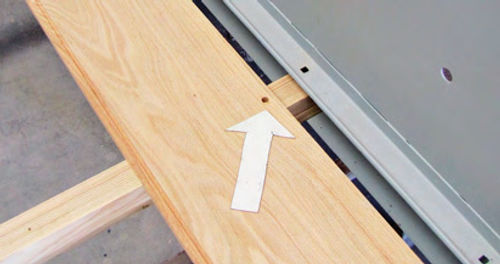
While the floorboards were in place, the two outer floorboards were also marked for drilling (Photo 8). These 3/8- inch diameter holes will accept the stainless steel carriage bolts used to secure the floorboards to the steel side panels. After that, the floorboards are marked for drilling at the front panel (Photo 9). Each board is drilled with the 3/8-inch bit at the center of the board and exactly one inch back from the front panel. These holes allow the boards to be secured to the front panel with additional stainless steel carriage bolts.
Finally, the tailgate is installed and checked for fit. This is why I took the time to square up the tailgate opening. If the gate doesn’t fit without rubbing the bed side panels, or without looking cocked to one side, I haven’t done my job.
Just below the tailgate I measured to the center of the rear cross member and marked it so that the steel support brace that prevents the tailgate from sagging under a load can be attached (Photo 10).
That brought me to the point where I could disassemble the bed and take care of the refinishing part of this build.

Time for the Refinishing
Because the steel side panels,front panel and tailgate are to be painted solid red, I opted to spray the min PPG DCC Concept single-stage urethane paint. Each panel received four coats before being color sanded and compounded to a bright shine.

As noted earlier, the plan for the oak cross members and floor boards called for leaving them in their natural color but giving each one a heavy layer of protection using marine grade varnish. I applied four coats of varnish to each of the cross members and to the undersides, end grains, and sides of all six of the floorboards using a disposable foam brush. The tops of the floor boards were treated a little differently.
For the tops of the boards I started by applying three coats of varnish with a spray gun and allowed those coats to dry overnight. Once dry, I sanded the tops of the boards using 320-grit sandpaper on a DA sander. It is never a good idea to wet sand wood. Should moisture penetrate the wood it can cause the wood to swell and that would ruin the fit I worked so hard to achieve. I then repeated this step of coating and sanding two more times until the tops of all of the floor boards were nice and slick.
Assembling the Bed On the Truck
The instructions called for doing the final assembly work with the bed off of the truck. However, I questioned whether the truck frame was as perfectly level and straight as my roll-around assembly rack. In the end I decided to build the bed on the truck and deal with any leveling issues by adding shims under the cross members where necessary.
As It turned out the frame of this truck was perfectly level and straight and my worries were unfounded. (So much for over-thinking a project.)
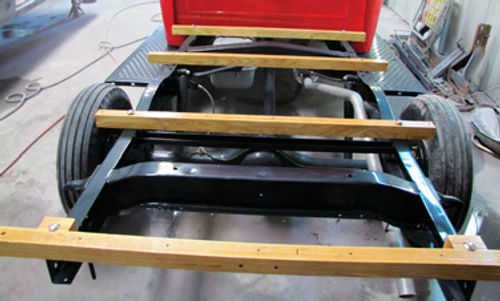
The bed assembly began with positioning the cross members on the frame and temporarily securing them using the bed to-frame mounting bolts provided in the kit(Photo 11).Notice that I also positioned the front panel in place. That’s so I can mount the side panels one at a time and use the front panel to help secure them.
With the front panel and side panels in place, the pattern of assembly repeats itself starting with cross measuring the bottom of the bed to ensure that everything is square before the floor boards are laid into place (Photo 12).
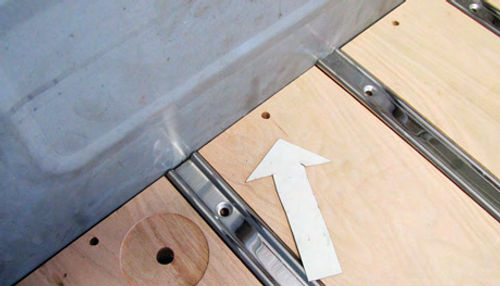
A few things are happening in Photo 13. First, the right outer floorboard is tucked under the right side panel and aligned with the pre-drilled carriage bolt holes along the length of the panel. Second, the large bolts and flat washers that secure the bed to the frame are dropped through the floorboard, the cross members, and the frame rail. These will be the last bolts tightened when this box is finished. Leaving them loose now allows me to shift the bed should that become necessary to align the floorboards to the rear cross member. Third, the kit came with a stainless steel heat shield that mounts underneath the right side floorboard above where the exhaust pipe makes its bend up and over the rear axle.

All of this work brings me back to the first photograph I showed you, the nearly completed product.
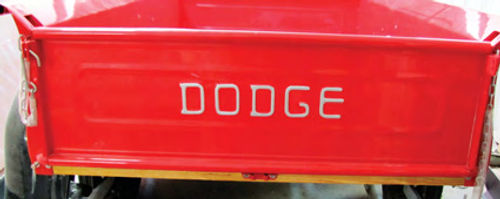
All that needs to be finished now is the lettering on the tailgate. The tailgate has raised lettering spelling out the word “DODGE” (Photo 14). I could spend a couple of hours carefully masking around each letter using quarter-inch-wide 3M Fine Line Tape #6404 or mask the entire area over and around the letters using Eastwood #11233 Sticky Mickey’s 10-inch-wide masking tape (eastwood.com; $30). I opted to use Sticky Mickey’s to cover the letters and then used an X-ACTO knife to trim away the tape from each letter. With the letters exposed, I sanded each one using a red Scotch-Brite pad and painted them silver to match the front bumper (Photo 15).
Got a question about this project or any other? Send it along.
Project vehicle supplied by:
LPL Body Works, LLC
5815Contented Lane, Amarillo, TX 79109
lplbodyworks.com; Body and paint repair DVDs
Wood for the bed supplied by:
Bruce Horkey’s Wood and Parts
46284 440th. St. Windom, MN 56101


