Excessive Force Can Damage Rare Parts
When a Stubborn Part Refuses to Cooperate, That’s Not the Time to Get Tough With It. Use Your Head Before You Turn to More Muscle…Or a Machine… for Assistance...
Sometimes we fall into the trap of thinking that the robust metal castings used in vintage cars and trucks won’t be damaged very easily. This mistake can cause rare old car parts to be ruined when excessive force is applied to remove or install them.
A tendency to use more force than necessary is often seen when parts do not come apart or go back together easily. You shouldn’t be tempted to give that stubborn assembly of tight-fitting parts an extra whack with your sledgehammer or a “tighter squeeze” in your bottle-jack press to force the issue.
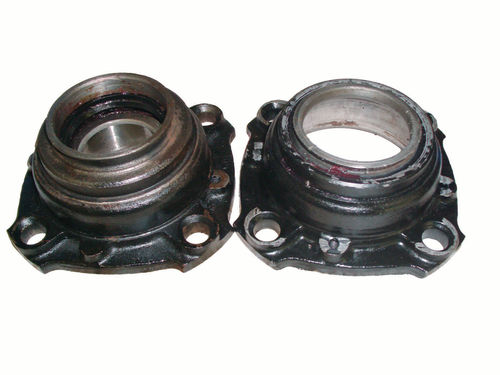
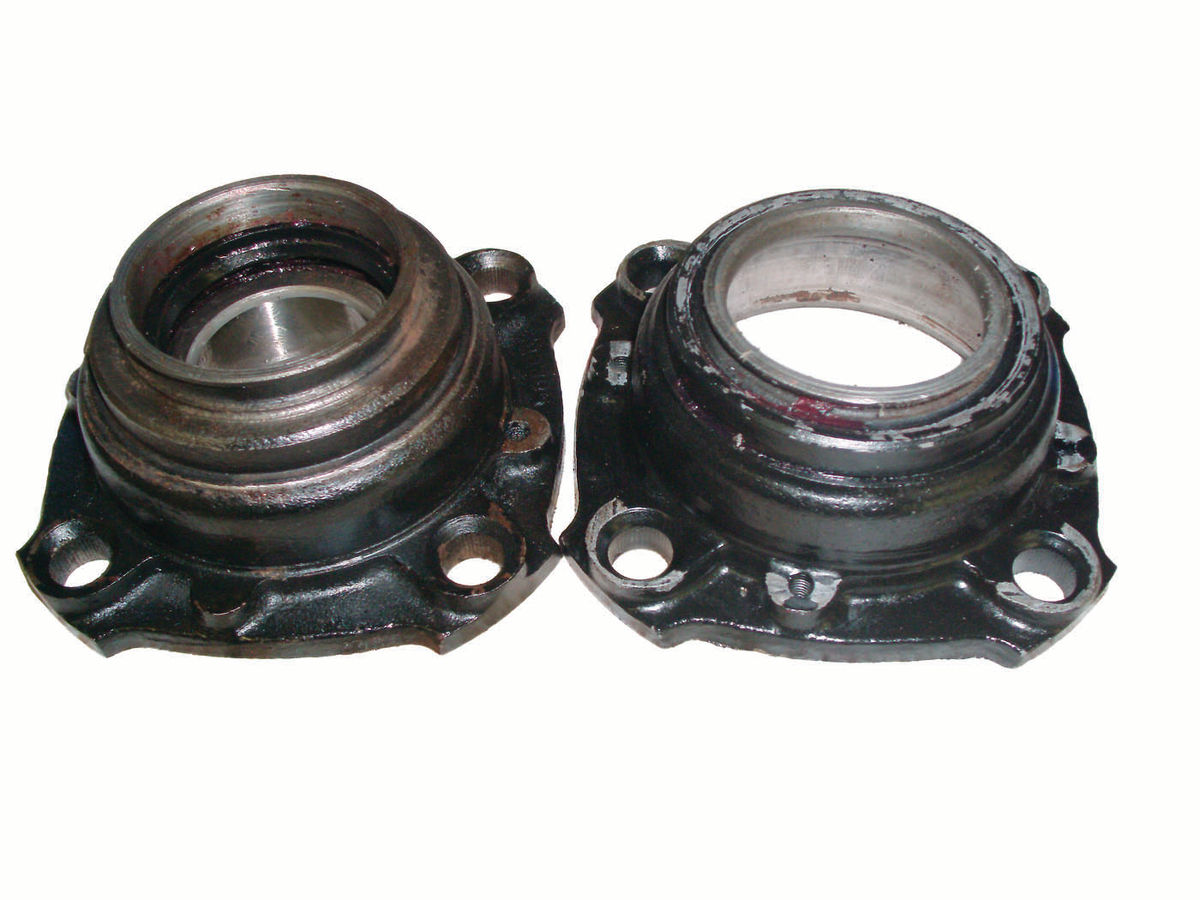
Many mechanical parts on cars and trucks have critical fits that can be affected by dirt, grease, moisture or rust. A roller bearing that was press fit into a wheel hub half a century ago may be extremely reluctant to leave its resting (and rusting) place.
By the same token, a new bearing you’re trying to seat in the hub may seem impossible to drive home if there are score marks or burrs on the walls of the seat. And if the bearing is kinked even the slightest bit, it’s also poor practice to try to force it in. A better way is to start over again and keep it straight.
Don’t Use a Press When a Hammer Will Do
Using force instead of finesse to join parts together can cause damage to castings that you wouldn’t expect to bend, crack or distort as easily as they do. After using a 20-ton press to push a bearing into a rear axle hub, one restorer was amazed to discover that the lip of the hub had been pushed about a half-inch downward and into the hub. The part was ruined and had to be replaced.

Damaging the part could have been avoided in either of two ways.
Use of the powerful 20-ton press could have been totally bypassed. A bearing driver tool and heavy hammer could have “persuaded” the bearing to be properly seated. Pounding a bearing in takes a bit more work, but avoids the possibility of applying the slow, damaging, pushing force that can be generated with a hydraulic press. In contrast, hammer blows will “shock” the bearing into position.
The second way to avoid damage would be to use a fixture of some sort, in combination with the hydraulic press, to set the part up in the press so that it won’t be damaged. Rails, plates, bearing splitters and other metal objects with just the right shape can be used to support the weaker areas of a casting so that the heavy pressure generated by the press doesn’t ruin the part.
Ironically, in the case cited above, the original damaged hub turned out to be a perfect fixture for holding undamaged hubs during future bearing installations. This fixture will allow using the 20-ton press without wrecking another hub.
A Previous Owner Might Be the Culprit
A restorer who was removing outer front wheel bearings from a much-neglected car found this harder to do on one side of the vehicle than the other. In this case, there were slots on opposing sides of the bearing seats on the back side of both front wheel hubs. The slots allowed the mechanic to insert a tool (screwdriver, chisel, etc.) against the rear edge of the bearing race to force it out toward the front with hammer blows. The bearing in the right-hand hub came out as it’s supposed to, but no normal amount of force would push the bearing out from the left-hand hub.
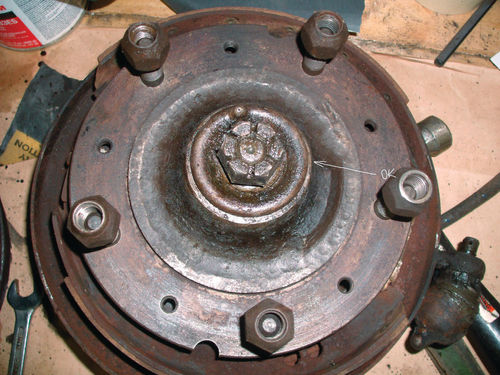
Upon closer inspection of the outer side of the hubs, it was noted that the shoulder around the bearing seat on the right-hand hub had the proper concave sides and a crisp edge at the top of the seat. In contrast, the shoulder area on the left-hand hub had “mushroomed” outward after someone long ago applied too much force to push the bearing in.
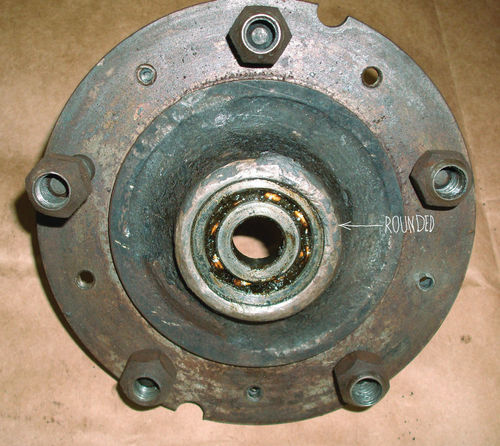
With the upper edge mushroomed over just a bit, the outer wheel bearing was “trapped” in its seat and held very tightly in place. Eventually the bearing was forced out by placing a strong, forklike tie-rod-end removal tool in the slots on the back of the hub and applying steady pressure on the rear edge of the bearing with a 20-ton press.
During this pressing-out process, the hub was set up in the press so that the hydraulic pressure didn’t further damage the shoulder area or crack the old casting. If you don’t have a press at home, most commercial machine shops will do this kind of job for $20-$40. Heat can also be used to expand the sizes of metal parts to aid in their separation. When a bearing starts to move a bit, spraying it with a light lubricant will help a lot if dirt or grease is holding it tight.
What Was Joined… Can Be Separated
The important thing to remember when doing this type of work is that the parts were made to come apart and go back together without the use of excessive force. When assemblies stay in place for many decades and are subjected to the elements for long periods of time, they will be more difficult—but not impossible—to take apart.
If a little bit of extra force doesn’t do the job, don’t resort to an excessive approach. Take a little time to think about the problem and other techniques or tools you can use to get the job done.
And always keep in mind that the only thing excessive force will accomplish is damaging a part that may be hard to replace.


