
Prepping for Vintage Vehicle Road Trips
It Soon Will Be Time to Get Back Out On the Road With Your Favorite Ride. These Tips Will Help to Keep You On the Pavement and Off the Shoulder.
LAST YEAR WE traveled from our home in Wisconsin to the Pontiac-Oakland Club International (POCI) Convention in Wichita, Kansas, driving our 1953 Pontiac Catalina Deluxe hardtop. It was a special trip for us, since we made our very first cross-country trip in 1974 driving a 1953 Pontiac Chief Deluxe sedan from Staten Island, New York, to the second POCI Convention in—you guessed it—Wichita, Kansas.
That was a memorable journey because we made it in a car that cost $175 and burned a quart of oil every 100 miles. We actually replenished the oil at the mileage interval without shutting off the engine. During that trip we saw many states we had never seen. We visited Abraham Lincoln’s log cabin, stopped at the Indianapolis Motor Speedway (and museum) for the first time, ate in an historic Missouri tavern the night President Nixon resigned, saw the St. Louis arch for the first time and made our first visit to Washington, D.C.
We saw very few old cars on the road in 1974…but during last year’s trip we saw over a thousand of them. On the way back we were driving north on I-35 in Iowa at the same time the old cars and hot rods were heading home from the “Back to the ’50s” show in St. Paul, Minnesota. It was an eye-opening experience to see so many old cars traveling the Interstate at modern highway speeds.
Earlier this year we had a similar experience when we traveled to the Mid America Motorworks’ Volkswagen Funfest in Effingham, Illinois. It was the same weekend that the Hot Rod Power Tour was taking place in Madison, Wisconsin. On our southern leg we passed groups of old cars heading to Madison. A few days later, when we were heading north again, we passed numerous collector cars going in the opposite direction.
With so many old cars on the road today and so many old-car hobbyists seeing the country from their collector vehicles, we began to understand that this is a part of our hobby that doesn’t get a lot of attention. When is the last time you read a magazine article specifically geared to traveling in an older car or truck? So, that is how we came up with the idea of an article and checklist to help you get your vintage vehicles roadworthy.

The Importance of Preparation
Since the early days of motoring, “reliability tours” have been organized to test whether vehicles can operate dependably over long distances. Today, owners of older cars, trucks and motorcycles take pride in making it back from a lengthy run without a breakdown. Returning home without incident is a sign that the machine they drive, though many years old, is kept up very well.
Electrical problems, vapor lock, overheating, brake failure and flat tires are typical problems that car collectors encounter when driving vintage vehicles on tour. Yet on most tours, you’ll find that some drivers have car problems and others don’t. The reason for this divide is simple…some people take the time to prepare their vehicles for touring and others don’t.
Preparation is vitally important. At a minimum, it is annoying to break down in a car and get stranded by the side of the road. Breakdowns cost money, too. In addition to towing charges and repair bills, a priceless collector car can get damaged by flying parts, boiling coolant or spilled brake fluid. Having replacement parts or tires shipped overnight to a location along the travel route can add a lot to your travel expenses. If an on-the-road parts failure causes an accident, it can hurt you financially—or even physically.
Preparing to travel or tour is more important today than it was years ago, because less help is available once you get started. As we all know, the convenience store has replaced the old filling station as the place to stop when traveling. Such stores will be happy to sell you gas and oil—and maybe even supply air for your tires. However, you won’t find a trained mechanic behind the counter.

Some Vehicles are Better Suited for the Trip Than Others
The first step in preparing for a trip is selecting the car you’ll be driving. If you own only one car, the choice is simple. If you own several cars, one may be better suited for such use—and it may not be that ’20s Touring Car your Great Uncle Frank left you. It really depends on certain factors. If you’re traveling to the national meet of the 1920s Touring Car Club, then you’ll definitely want to get that car ready for a long, slow ride. On the other hand, if you’re heading for the annual Hershey event, maybe your 1940 Limousine, 1956 Sedan or ’62 Hardtop will provide a faster, safer and more secure mode of travel.
If you have a choice in cars, you’ll want to think about the number of people traveling with you, the amount of luggage you‘ll need, the type of engine and transmission the cars have, the rear-axle gearing, what kind of weather you’re likely to encounter, whether the roads will be hilly or flat, if the car has a trunk and who’s going to drive. If your wife is sharing the driving chores and doesn’t know how to use a manual transmission, you’d better take the 1950s car with Hydra-Matic Drive. On a very long tour, accessories like a radio and heater may come in handy. (Think of it, a long drive without a radio can lead to monotony or some impromptu singing which your traveling companions may not find entertaining. Meanwhile, the lack of a working heater can drain a lot of the joy out of driving on a cold day.)
In some cases, fuel economy may also be a consideration, both for the cost of the gasoline and the fact that sometimes there can be considerable distances between gas stations.
Another thing to consider is whether you really want to take your best car on a lengthy trip. For example, driving your original Durant may be preferable to taking the fully-restored Duesenberg. If the Durant suffers a little wear and tear, the financial impact will be a lot less than replacing, say, a stolen Duesenberg radiator cap worth $2000. In addition, a stone chip or scratch in the paint on a 100-point classic is a lot more expensive and emotionally wrenching to deal with than a dented fender on an un-restored old car.
Don’t Skimp On Vehicle Preparation
Even with all of the above factors in mind, when you’re looking at your shiny old car in your garage, getting “pumped up” to prepare it for a long trip may be hard. After all, the vehicle doesn’t look like it’s going to break down, so you may decide to spend Sunday afternoon watching that big NASCAR race on the tube, rather than preparing your car for the tour. Don’t get side-tracked this way! Remember, any problem you find and fix in your home garage is going to save you a lot of hassle and tons of money over getting it fixed on the road.
If you’re still not convinced, think about it this way: Your local ambulance service is required by law to replace its vehicles on a regular basis and to inspect them every month. There is a standard checklist for this. Even though the ambulance is nearly new, every item must be checked over and over. The reason for these rules is simple—your life may depend on it someday! It’s the same with your collector car. If you’re touring in it on the road, your life may very well depend on the car being safe. That’s why the previous page provides a series of checklists you can use every time you prepare for a tour.
Some Proof That the System Works
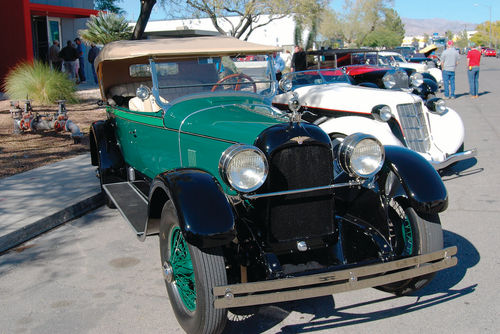
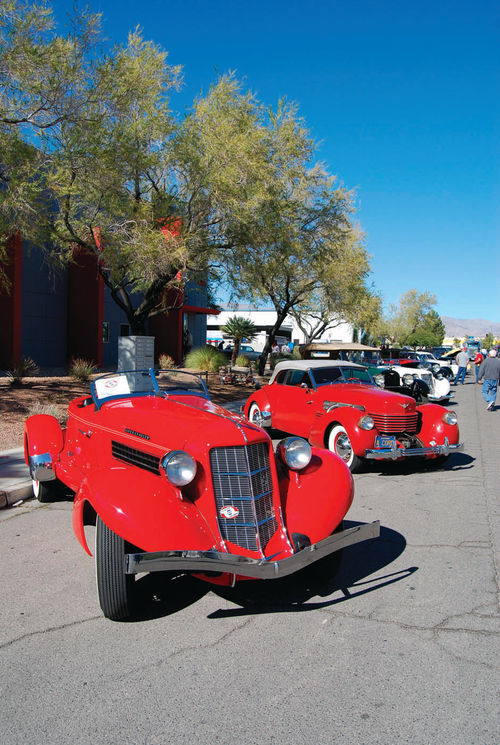
In early November 2015, while visiting the Specialty Equipment Market Association (SEMA) trade show in Las Vegas, we encountered members of the Western Region of the Auburn-Cord-Duesenberg Club who had toured to Nevada from California and other states. One Auburn Speedster came all the way from Ohio.
The cars on the tour ranged from a Duesenberg Model A to several 1936 coffin-nose Cords to a 1954 Corvette and a 1970 Chrysler 300 Hurst. Amazingly, about 20 cars had made the long journey with no more than minor problems occurring. Apparently the car owners had checked most or all of the items on the lists above. That sounds like a pretty good reason for you to make such checks before you hit the road again.
A Step by Step Approach to Touring Prep
1. Preparing a vehicle starts from the ground up, so begin by checking the tires and wheels:
Inspect tires for cuts, breaks, crazing and other damage.
Check tires for correct inflation using a tire gauge.
Check tire valve stems for leakage, breakage or rotting.
Check tire-tread depth with a gauge.
Have wheel balance checked professionally once a year.
Check wheels for bends, breaks, rust; especially at rims and bolt holes.
Check tightness of wire wheel spokes.
Check tightness of wheel lug nuts.
Check for a viable spare tire and proper spare-tire inflation.
Be sure tire-changing tools are in the vehicle and in good shape (test the jack).
2. Stopping is more important than going, so check the braking system:
Step hard on the pedal to make sure it’s firm and doesn’t “give” under pressure.
Check the backside of each tire, at the bottom, for a telltale brake fluid drip.
Check the application and release of the emergency brake (no rolling).
Check fluid level in master cylinder; top off with proper fluid.
Check to make sure the vent in the master cylinder is open.
With e-brake released, spin all wheels to check for frozen brakes.
Pull brake drum and check all parts; replace drum if needed and adjust brakes.
Re-pack wheel bearing grease at least every 3-5 years.
Rebuild master cylinder and wheel cylinders every 5-10 years.
Check to make sure that brake lights work properly.
3. A vehicle is as strong as its foundation, so check the chassis and frame:
Check exhaust for broken parts; too much rust, too much noise.
Check levelness of vehicle at all four corners and side to side.
Check for rusty, damaged, bent or broken frame or chassis parts.
Check for frame or chassis parts covered with fluid stains.
Check for broken or “splayed” leaves in leaf spring packs.
Check steering parts for looseness or obvious bends.
Have front wheel alignment professionally checked yearly.
Visually inspect motor mounts for fractures or missing rubber.
Check shocks (especially lever- action type) for fluid leaks.
Check all components for open bolt holes; missing rubber bushings.
4. It’s what’s up front that counts, so check the radiator and engine:
Check radiator with a light for debris (clean if required), test cap.
Test thermostat; flush and refill cooling system adding new coolant.
Check drive belts and hoses; if the water pump has a grease fitting, lubricate.
Check engine bay for frayed wires; also any exposed headlight wires.
Do at least a minimum of minor engine tune-up work, servicing points and plugs, etc.
Check near carburetor and fuel pump for any signs of fuel leakage.
Check all electrical and vacuum hose connections in the engine bay.
Re-torque all fasteners and check for free operation of the heat riser valve.
Check condition of battery; check for tight and clean battery cables.
Lube starter and generator bearings if oil cups are provided.
5. Now move to the sides of the vehicle, front to rear:
Check operation of headlights, parking lights, taillights, directional lights.
Check tightness of and proper setting of all rearview mirrors.
Check door hinge security and adjustments along with door striker adjustments.
Check condition of all window glass and all door and window gaskets.
Check fit of side curtains or soft top; fix loose snap-the-dot fasteners.
Check under fenders to tighten all access panels and wiring looms.
Check under door sills for fluid leaks, loose brackets, hanging wires.
Check that all side trim moldings are held on securely and won’t fly off.
Check for secure fit of rear fender skirt mountings, if applicable.
6. Interior workings—pedals, wiring, gauges:
Check for a worn accelerator pedal that could come off studs while driving.
Check for worn pedal rod bushings causing sloppy or sticking pedal.
Check to make sure all interior bulbs and dashboard bulbs are good.
Check under-dash/courtesy light wiring shorts (seen in prewar cars).
Make sure seats are secure to floor or seat-frame-adjuster mechanism.
Check accuracy of all gauges; repair if necessary (this can affect safe operation).
Check to see if the inside rearview mirror adjusts well and works properly.
Check operation of all roll-up or push-out windows; is there safety glass in all of them?
Check for proper operation of all under-seat heaters and air vents.
If seat belts are installed, they should be secured to the frame, not floor.


