A Day With a Painter
Spend Some Time With This Pro and His New Spray Gun. He’s About to Start, So Let’s Join Him In His Shop.
I WAS WORKING with the newest DeVilbiss spray gun—the Tekna High Performance Professional model—and planning to write an Auto Restorer Product Report when I realized that I had often tested and reported on various spray guns without giving you, the reader, a chance to see what goes into the testing process.
As you would expect, I don’t just spray a pass or two and then pronounce judgment on new spray guns. I put them through their paces. Some stand out, others don’t. This is one of those guns that really stood out.
So what I thought I would do is not only let you see how I go about testing new equipment, but also give you an opportunity to become a guest here in the shop to see how a day, or more precisely, days in the life of a professional painter are spent, particularly when he has a new spray gun to try out.
But before I drip paint all over my shoes, I need to give you some specifics on the spray gun I’ll be testing. After that you can sit back and watch a painter do his thing.
Some Gun Details
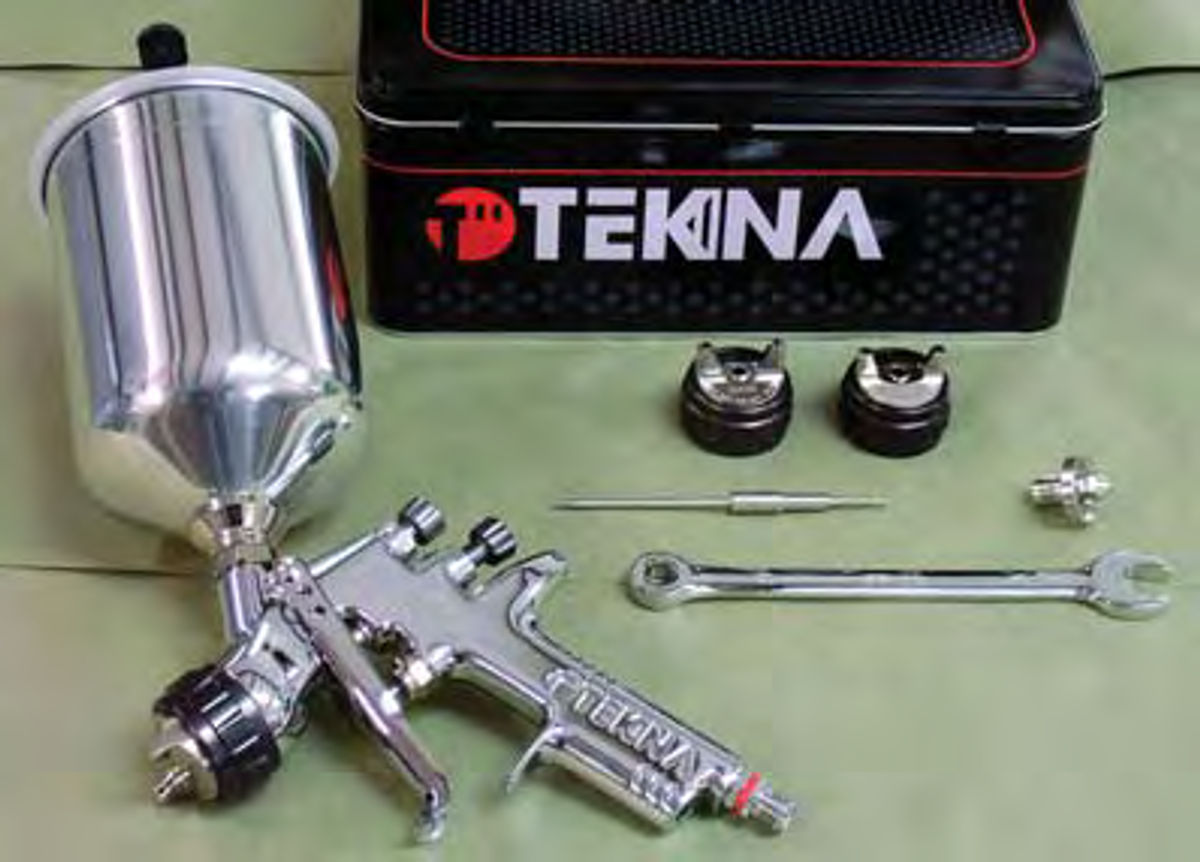
DeVilbiss refers to this $450 unit as the Tekna Professional spray gun (Photo 1). What makes this gun more professional than the spray guns I’ve used in the past? If nothing else, it has to be the attention to detail that went into this gun.
For example, the air cap retainer ring uses a thrust washer, as opposed to the O-rings used in most spray guns, to make rotating the cap easy with no chance of leakage. A thrust washer will maintain a good seal even when the cap is only finger tight. O-rings tend to leak unless fully tightened. You need that feature when you are in the middle of a major paint job and you have to change the spray pattern from vertical to horizontal.
Another feature is the seal around the needle valve.
Less expensive spray guns use a packing material around the needle valve to prevent leakage just forward of the trigger. Tighten this packing too much and the trigger sticks. Leave the packing too loose and it leaks. This gun has a self sealing plastic bushing that eliminates any chance of leakage while at the same time this bushing prevents trigger drag when tightened.
The Tekna also comes with three air caps. The first one is the 7E7 High Efficiency air cap. If you are spraying a huge, time-consuming job, this is the air cap you want. It only needs 16-22 PSI (9-11 CFM) at the inlet and will handle both base color coats and clear coat products. What’s that got to do with huge, time consuming jobs? This tip delivers more paint and that equates to fewer spray passes to get the desired coverage.
The next air cap is the 909. This air cap is designed specifically for use when spraying base color coats, particularly metallic base coats that require a greater amount of atomization. Better atomization equals truer colors and truer colors equal better color matches when spot painting. This air cap needs 18-22 PSI (13.5-15.5 CFM) at the inlet.
The third air cap is the 202. This air cap is designed for use when spraying clear coats. This air cap needs 22-26 PSI (14-16 CFM) at the inlet.
The thing to notice about all three of these air caps is the low input air pressure needed to operate the gun. That makes this gun one of the better HVLP spray guns out there.
Testing it should be fun.
Stripping, Cleaning, Masking & Sanding
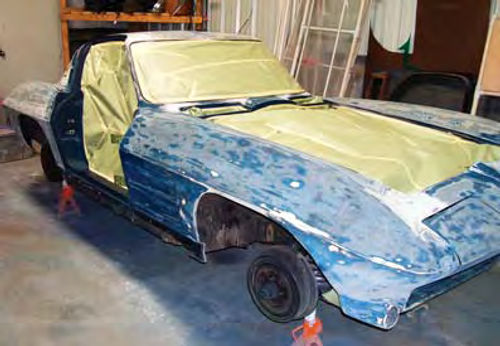
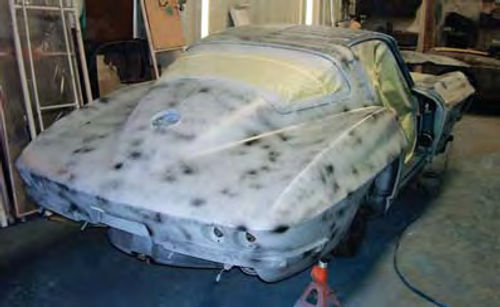
Our saga begins on the day after this car arrived at the shop (Photo 2). The plan called for stripping the car down and refinishing the exterior only. You can see that the plan is progressing as scheduled. All of the chrome has been removed from the car, the doors were removed, and so was the hood and cowl vent panels. What you can’t see is that prior to stripping the car down, the entire vehicle was pressure washed and degreased.
After the thorough cleaning and tearing down, the car was elevated on jack stands and all of the openings were masked off. Masking off the openings prevents sanding dust from entering the interior and the engine compartment. Something that doesn’t stand out in the photo as important is that once the cowl vent covers were removed those areas were also masked. Masking these areas prevents sanding residue from entering the vent system, a problem the owner would notice immediately upon turning on the heater.
Also notice that the windshield and back glass were masked off to protect them. The trick here was to apply at least three layers of 11 ⁄2- inch wide 3M #26338 masking tape around the edges of the glass. It isn’t completely unheard of for an orbital sander to take a wild turn and reach out and touch a piece of glass. Should that happen, the glass will be ruined and must be replaced. So always keep in mind that masking tape is cheaper than glass.
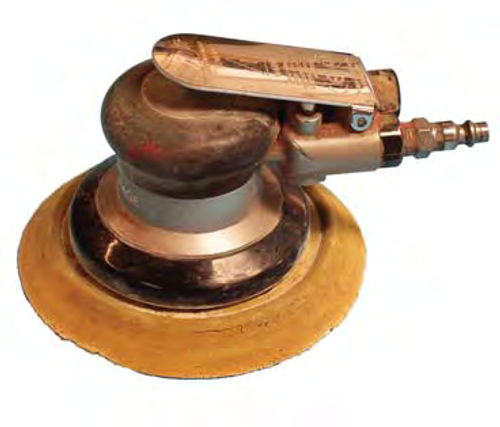
To sand the car I used 80-grit (3M #667 Hookit II Film Discs) on a random orbital palm sander. This car only had one layer of paint, the original layer of lacquer, and 80-grit made short work of removing it. I no longer use the traditional DA (dual action) random orbital sander as this machine requires the use of both hands to control the unit. The random orbital palm sander can be easily operated with one hand and offers better control over the machine. There are a lot of excellent palm sanders out there. My choice is a six-inch pad unit made by Airvantage (Photo 3). Eastwood also has a quality random orbital palm sander #11288.
A Helpful Mini Sander
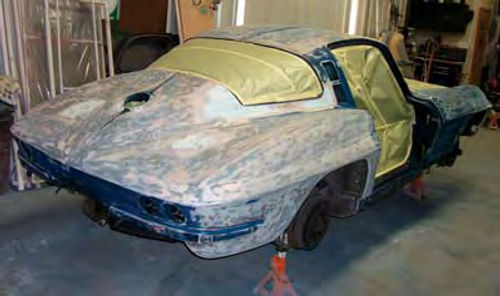
I start sanding at the top of the car and work my way down (Photo 4). Notice that I skipped the hard-to-sand areas and concentrated on getting the old finish off of the bulk of the body. This is a time consuming, dusty task and if nothing else the sense of accomplishment helps gloss over the remaining task of sanding those hard-to-reach places.
Fortunately, times have changed and there are tools out there to help out with those difficult-to-sand areas.
The one I like best is the Hutchins Model 3501 Mini DA sander. This unit comes with a 3-inch pad and a 1-inch pad (Photo 5).
This combination will allow you to sand almost anywhere without having to break out the sheet sandpaper and sand by hand. Yes, Eastwood carries this unit. Check out #11289. It will set you back $249, but is well worth the price.
This unit was originally designed to be a nib sander for use in removing tiny imperfections from fresh clear coats before rubbing and buffing. But you know how painters are, they often forget what a tool was touted to do and adapt it to fit the need at hand. Three-inch and one-inch diameter sandpapers are available for this unit, but if you can’t find them locally in the desired grit try cutting your own. All you need is top-quality Velcro-backed sanding disks of the appropriate grit, a pair of scissors, and you are in business.
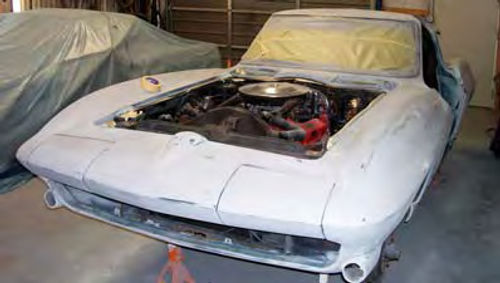
After a thorough sanding with 80-grit, the car gets four coats of urethane primer-surfacer (Photo 6).
Eastwood has been itching to get me to try their brand of primers, so I did. Look for #50240ZP 2K Urethane Primer and #50241ZP 2K Catalyst.
How did the primer work? I sprayed the primer using the 7E7 High Efficiency air cap. I wasn’t sure about using this tip to spray primer, but the Tekna laid the primer down smooth and slick. No runs, no problems. I gave the Tekna an “A” for primer spraying. That’s despite the mental block I developed from seeing such a nice gun being loaded with primer. Remember, I told myself, this is only a test. This is only a test…
Letting the Primer Cure
Once the primer has cured, it is on to additional sanding.
Once cured? Yes, and I’ll explain that in a moment, but first let’s back up a few steps and offer some more explanation on the preparation process.
Once I had the car completely sanded and ready for primer, I blew the car clean with an air nozzle and removed the masking paper. I blew the car clean again and spent some time making sure I had all of the edges properly sanded. Sometimes masking a car hides little places that need to be sanded and, obviously, it’s important that those places not be overlooked. Finally, I blew the car clean again—sanding residue is an ugly word in a paint shop—and I masked the car once again.
While the Eastwood 2K urethane primer was on the shaker, I degreased the car using PPG DX 330 Degreaser and then wiped the project car clean with a new tack cloth.
Using the Tekna with the 7E7 tip installed and wearing a pair of painter’s coveralls and a respirator, I applied four medium wet coats of primer. That gave me plenty of material to sand in order to get the body of this car nice and slick. Also notice in Photo 6 that I applied a sanding guide coat using a spray can of black lacquer immediately after applying the last coat of primer.
Now for the curing part. Although the majority of technical information sheets on the paint products I use state 2K primers can be sanded four to six hours after application, I prefer to give primer surfacer coats at least 24 hours to cure before sanding.
I have a friend in the business who has a standing rule in his shop that no primer-surfacer is sanded until it has cured a minimum of one week. He actually writes the date the vehicle was primed somewhere on the car using a water pencil just to be sure the car is allowed to sit undisturbed for that length of time. Do I ever wait a full week before sanding? I’ve been known to.

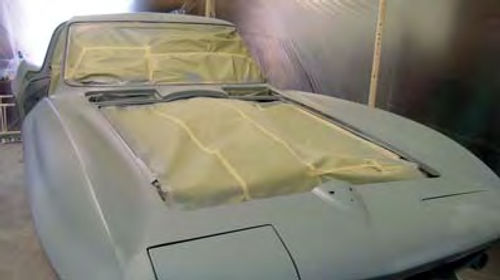
This car has very few flat panels. With that thought in mind, the plan for block sanding the primer-surfacer coats is to use an 8-inch sanding block and 320-grit sandpaper. This is a slower and more tedious process than the initial approach of sanding the car using 80-grit sandpaper. As evidenced by closely studying Photo 7 you can see I didn’t worry too much about sanding through the primer surfacer coats and exposing the surfaces below. That’s because this isn’t a production shop and this isn’t a production repair. I’ll prime this car again, applying an additional three coats of primer, and then sand it once more with some 320- grit sandpaper.
Time for the Seal Coat
No matter what brand of sealer you select, the important thing is to choose a 2K sealer. There’s a different type? Yes. I cover this subject thoroughly in my newest DVD “Curing Paint Problems,” so for this writing I’ll give the abbreviated version. Non-catalyzed sealers cannot be sanded once applied. Catalyzed sealers (2K) can. OK, a little more information. If you sand a non-catalyzed sealer and spray anything, including more sealer, over the sanded area it may lift and wrinkle. If the sealer is catalyzed, you can safely sand it without any worry of it lifting.
Look very, very closely at the left headlight housing in Photo 8 and you can see where I lightly sanded a portion of the top of this housing after applying the seal coat. I had a small imperfection that needed to be removed and using a 2K sealer allowed me do that without the risk of the color coat lifting once it is applied over the sealer.
To apply the sealer I stayed with the 7E7 High Efficiency air cap and laid down a single medium wet coat. How’s the Tekna when it comes to sealer? I’d have to stick with the “A” rating. This is one nice gun.
Color, Clear and Headlight Housings
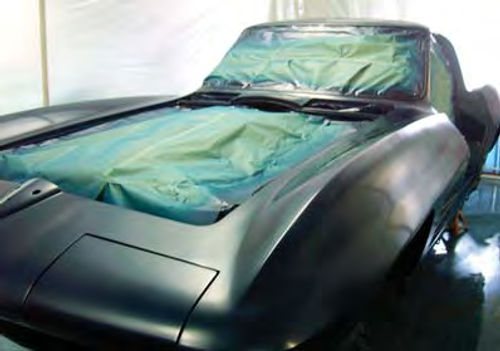
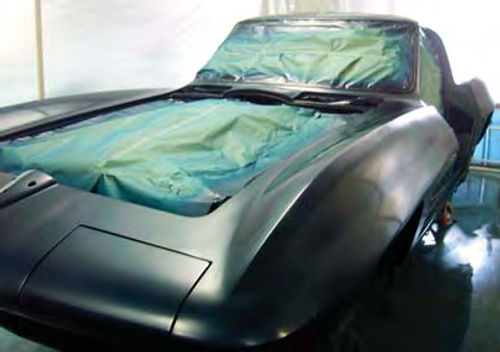
Next to go on is the color coat (Photo 9). I applied three medium wet coats of base color using the 909 air cap with the gun input psi set at 20. This isn’t a heavy metallic base coat color but I wanted to give the 909 air cap a good workout. You can see the coats went on nice and slick.
If you will take a closer look at Photo 9 there are a couple of things going on that might not be readily apparent. First, the floor is wet. I hear all kinds of arguments for and against wetting the spray booth floor. If you prefer not to wet the floor, don’t. If you decide to wet the floor before spraying, be sure you carry a dry shop towel into the booth with you. You will need to occasionally wipe the air hose dry, especially when trying to reach out towards the center of the vehicle being sprayed.
Next, notice that the headlight housings are still on the car. These housings need color on the top, bottom, sides and insides. That can be a very difficult thing to do on a car like this. To make life easier, I remove the rotation motors so that the housings could be turned by hand.
I rotated and painted every part of the headlight housings except the tops before applying color to any other part of the car. This is the best way to ensure that I don’t get any runs trying to get color into the difficult-to-reach side areas of the housings.
Why didn’t I remove these housings? I could have, but they are difficult to install and would require a lot of adjusting and fitting to get them back in the car. That’s a recipe for scratched paint.
A tip: If you happen to be working on a Vette, take the time to be sure the headlight housings fit correctly before painting the car. That’s the recipe for not getting any scratches.
Once the color coats have dried, I’ll put on three coats of clear. (They need about an hour of drying time before applying the clear coats.)
Since I used Eastwood’s primer I also opted to try their European Urethane Clear #50250ZP.
I installed the 202 air cap in the Tekna, set the inlet air pressure to 24 psi and laid down three medium wet coats (Photo 10). The final product should speak for both how well the Tekna sprayed the clear and for the quality of the Eastwood European Urethane Clear.
A Filter With an Indicator
The last subject, and by no means the least important, is how I managed to get clean, dry air to the Tekna. I used the new DeVilbiss QC3 Filter and Dryer Unit #130525 (Photo 11).
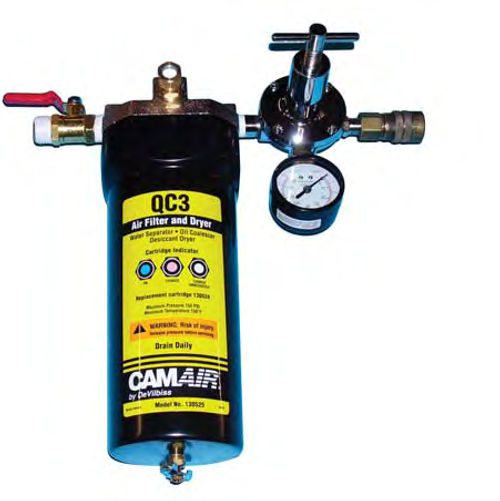
This is a point of use filter designed to remove water, dirt, oil and humidity from the air system. What does point of use mean? You want to install this filter at a point in your compressed air system where the hose used for spraying paint is connected to the system.
The filter comes with very thorough installation instructions, and the idea is to install this filter so that it is dedicated specifically for use when spray painting and not for use when operating any other pneumatic tools. To accomplish that goal, the QC3 comes with an inline cut valve to stop air flow through the filter except when you are using the filter for painting.
The filter also comes with a built-in moisture indicator to let you know when to change the filter cartridge. When the indicator appears blue, everything is OK. Change the filter cartridge (#130524) when the indicator turns pink or white. The QC3 also comes with an adjustable regulator to set the output psi and a builtin mounting bracket.
Some Job Completion Tips
Forget about trying to save the weather stripping around the doors. It’s probably old anyway.
Replace all of the gaskets around the parking lights, tail lights, door handles, lock cylinders and mirrors.
Lastly, masking tape is your friend. Use it around the door openings to prevent chipping, tape the edges of the bumpers before installation, and cover the edges of the rocker panels to prevent scuff marks when climbing in and out of the car as you assemble it.
Got a question? Send it along.
Resources
LPL Body Works, LLC
5815 Contented Lane
Amarillo, TX 779109
How-to DVDs
Airvantage Tools
10018 Lower Azusa Road #C
El Monte, CA 91731
DeVilbiss Automotive Refinishing
Eastwood Company
263 Shoemaker Rd.
Pottstown, PA 19464


