Working With a Fender Roller
Sometimes Wider Tires and Wheels Won’t Work With Stock Fenders. In Those Cases, You Can Reach for a Baseball Bat or a Tool Like This.
RESTORATION ENTHUSIASTS OFTEN find themselves caught on the horns of a dilemma when it comes to purchasing tires and suspension components for their older project vehicles. While strict purists wouldn’t think of fitting anything that wasn’t standard equipment at the time the vehicle was built, others see great improvements when they fit modern tires, wheels, shocks and springs to their toys so they can handle and perform more like a modern car or truck.
If you’ve succumbed to the “chubby rubber” temptation at one time or another, you’ve probably also learned that one of the most common pitfalls of such efforts is unintended tire/fender contact when cornering aggressively and/or at the limits of suspension travel. There’s hardly anything more exasperating after achieving just the right stance of wide tires closely-fitting the car’s fender openings than having to listen to squealing contact when you actually put your expensive upgrades to proper use.
There’s An Old and a Newer Way to Work This Project
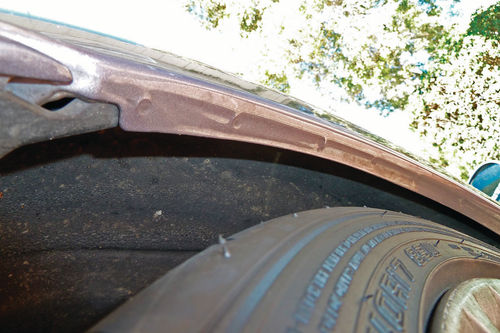
Because fenders are ordinarily sheet metal stampings, they will usually have a 90-degree bend at the wheel well opening with an inner ledge perhaps 5 ⁄8- inch wide to act as a stiffener. However, when your new wheels and tires look just right, that ledge may begin cutting into the tire’s tread or sidewall when you hit large bumps or corner hard enough to generate significant body lean. Aside from the irritating sound, it’s bad for the tires and wears the paint off the fenders, encouraging rust.
In our case, the problem appeared after we installed aftermarket Koni Sport Shocks that had a slightly lower spring perch, which lowered the car perhaps 10mm or 3 ⁄8th of an inch, and then went for a fractionally wider 205/40-17 tire in place of the stock 195/40-17 rubber — theoretically just 5 mm wider on each side, but too much!
Hot-rodders have been dealing with this problem for many years, and the time-honored shade-tree solution was to employ a wooden baseball bat and a heat gun to add a bit more clearance.
To use the baseball bat technique, you’d jack up a corner of the car so that you had room for the fat end of the bat between the tire and fender. The heat gun was used to warm the paint so that it wouldn’t crack when the sheet metal changed shape.
By rolling the bat at an angle between the tire and fender, you could bend the inner lip of the fender by degrees, and you’d continually adjust your jack to allow the angles necessary to keep working until the inner lip was bent up almost flat against the fender. The technique could do the job and the wood usually didn’t tear up the paint too much in the process.
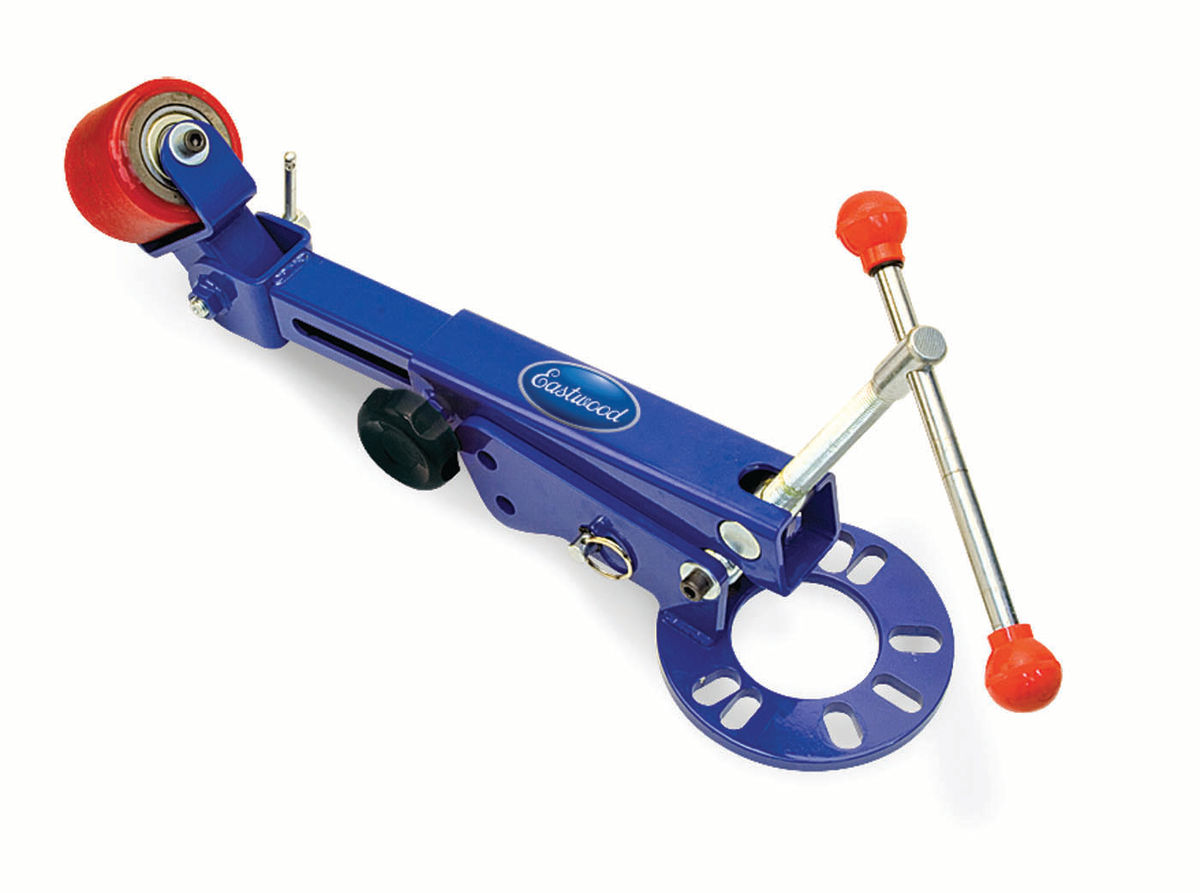
However, if a more sophisticated tool is more your style, the Eastwood Fender Roller is the best one for the job. You might as well know that a similar very cheap Chinese unit is available from the Internet, but if you read the comments of its buyers online, you won’t be tempted to get one.
Now, About That Eastwood Fender Roller
The Eastwood tool is very ruggedly built (weight 14.5 lbs.), with a thick glossy paint job that should last for years. To use it, you support the end of the car you’re working on with a set of jack stands. When working at the rear of a rear-drive car, you’ll need to leave the transmission in neutral and the emergency brake off, so you can rotate the axle ends. If necessary, you can then reposition the jack under the axle of the corner you’re planning to tweak, so that the tool’s swing has the same radius as the wheel arch. It’s actually easier to visualize in use than it is to explain, and as the photos show, we didn’t need the jack’s help for our car.
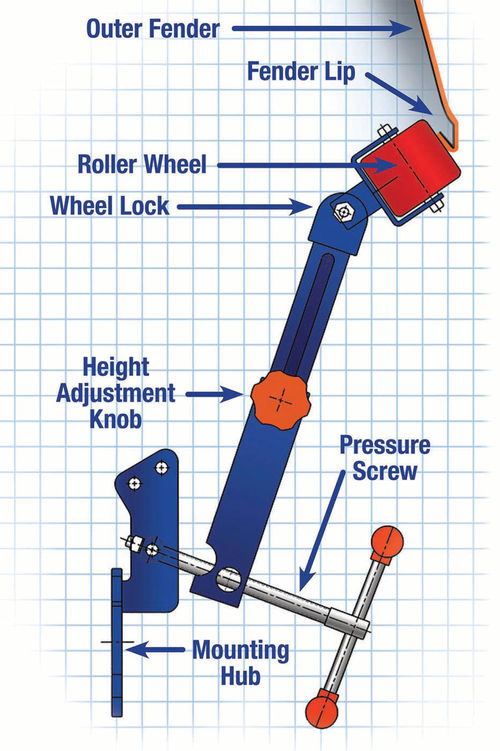
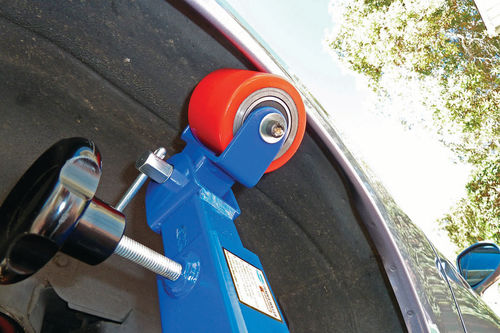
With the tire removed, the Eastwood tool’s hub is positioned over the standard wheel lugs. (The tool’s hub is equipped with slots that allow it to fit every normal four- and five-bolt arrangement, and a special eight-hole mount is available as a $69.99 option for truck-type hubs.). Dished washers are provided that allow you to use your standard tapered lug nuts to secure the tool hub. Tighten these up securely to avoid any tendency to bend the hub mounting surface when you lever strongly against the wheel arch.

The tool itself is multi-adjustable with three pivot positions, so it can fit virtually any arrangement of hub-to-bodywork distance and radius. It took us longer to figure out the correct pivot positions than it did to roll the first fender arch, but once the tool is set up, it swaps quickly from corner to corner. There are three further adjustments that are performed incrementally as you work: one for the angle of the wide roller (80mm or 3.15 inch in diameter), another for the length of the arm, and the third (the big T-handle) to move the arm in and out, to apply pressure to the inner fender flange.
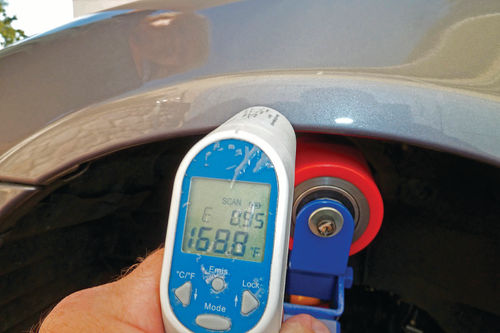
Two other tools are required, and may already be in your toolbox; a heat gun and an infrared thermometer. Eastwood has package deals, but you’ll find lower prices for these tools at places like Harbor Freight.

Starting the Project
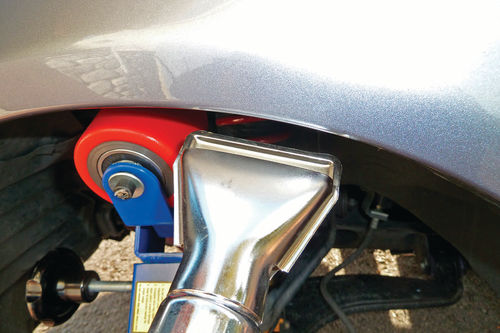
To begin the rolling process, you will set up the tool so the middle of the roller will contact the fender bead at about 15 degrees from its horizontal position. Next, you’ll use the heat gun to warm the paint, sweeping back and forth to avoid overheating any single point, and focusing its heat on the inner fender lip and its bend. Typically, you probably won’t need to do more than flatten the lip on the upper portion of the wheel arch, as this is where the majority of contact happens, but scuffing evident inside the wheel wells will reveal the whole story. Heat the paint until your infrared thermometer indicates a temperature of 150-170 degrees F. Remember, depending on prevailing conditions, the sheet metal will begin to cool down again quickly, so you’ll need to continually keep the paint hot as you work.
The big roller actually works the metal fairly easily, and even our car’s rear fenders, which had a double thickness of sheet metal for reinforcement, were relatively easy to bend. After you have achieved the first bend, readjust the tool so the roller takes another bite of about 15 degrees and extend the arm slightly to compensate for the roller’s new angle. Then repeat the rolling process. Do it until the lip is nearly flat against the inner surface of the fender, or you are satisfied with the added clearance.
A Few More Thoughts Regarding This Tool
Remember that the tool has a single purpose, to reshape the wheel arch flange, it cannot add bulges to your fenders or change the exterior shape of your bodywork, so if you demand more than it can deliver, you may do damage that only expensive repairs can erase.
For reference, we found that the tool could easily increase tire fender clearance by about 3 ⁄8th of an inch (bending a 5 ⁄8- inch lip to 1 ⁄4-inch total thickness), which was enough for our purposes.
Also, we suggest applying white lithium grease to the tool’s various threaded parts to decrease friction and avoid thread damage when using extreme leverage or pressures.
When you’ve finished your project, you may find yourself looking to make further use of the tool, and if you don’t have more potential candidates for its talents in your own garage, you can consider renting the tool or offering your expertise to others. The tool is strong enough to give you long-term service if used properly, and once you’ve mastered the technique, you’ll find it’s easy to do. It should also have excellent resale value if that’s your choice.
The Eastwood Fender Roller (Item #31158) carries a suggested price of $249.99 but at the time of this writing (March) was marked down online to $169.99.
The Eastwood Company: 263 Shoemaker Road; Pottstown, PA 19464; eastwood.com;
Editor’s note: When he’s not busy working on his cars, Dave Searle serves as editor-in-chief of our sister publication,Motorcycle Consumer News. For more on MCN, visit MCNews.com


