
Replacing Rockers & Frame Components
Rocker Covers Had Concealed Rust on Several Important Parts. The Fix Involved the Vehicle’s Structural Strength.
JUST ABOUT EVERY manufacturer of our favorite vintage rides has a reputation for body rot in certain areas whether that be the rear quarter panels, floor pans or wheel housings, etc. In the case of the MGs, rust could run rampant in just about any area of their cars including the rocker panels and underlying frame components.
That will be the main focus of this article as the prime candidate came into my shop this past winter.
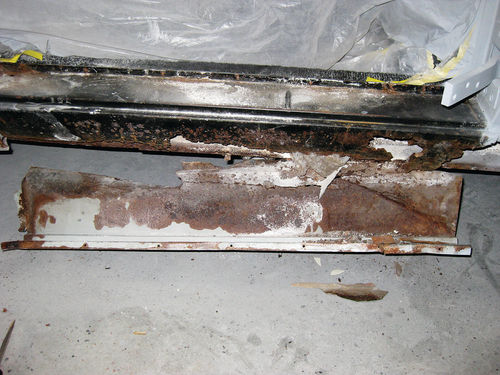
Our project car is a 1966 MGB that came in for a paint job and eventually ended up requiring about 1/3 of the sheet metal and frame replaced with new pieces. This was an unfortunate case of “buyer beware” as a backyard mechanic had previously “restored” the car and painted it using lots of chicken wire, filler and some strategic cover-ups. It’s hard to believe but there actually are rocker panel covers available for these cars that screw right over your rotted originals giving the appearance of a solid rocker and good frame pieces below. In reality, your entire vehicle’s structural integrity can be severely compromised by making this “easy fix.”
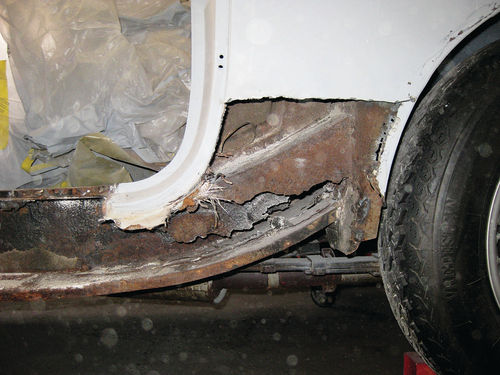
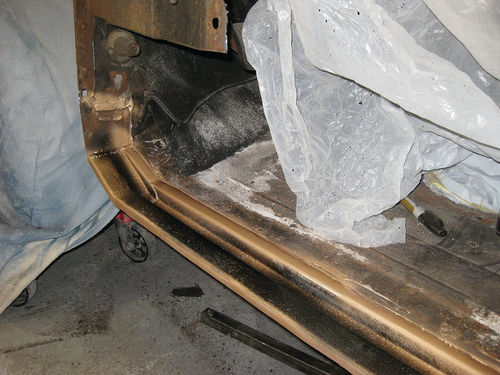
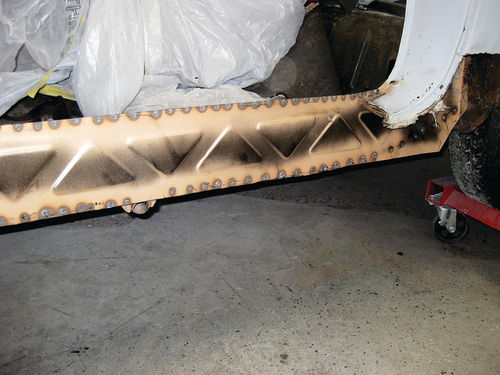
Once Those Cover-Ups Came Off…
As you can see in the accompanying pictures, once the rocker covers were removed from the car, the rest of the frame rail components below were in extremely poor shape, including some that were almost completely missing. Luckily suppliers such as Victoria British and Moss Motors have everything you need to get your MGB or other MG vehicle safe and solid once again.
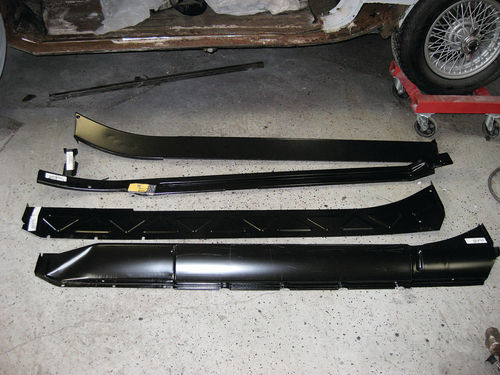
On the MGB the frame rail pieces and rocker panel are all sandwiched together to provide rigidity from the front to back of the car.
There are five pieces in total on each side of the car including a small jacking point support and they basically form a reinforced rail box from front to rear.
Let’s Start the Replacement
The first step of the replacement process is to gain access to the entire length of the rocker and frame rail pieces. To get to the front you must remove the fenders from the car. On the roadster models this also requires removal of the windscreen.
The rear becomes a bit more complicated. The back portions of the rocker and rails go behind the rear quarter panel and tie into the rear wheel housing.
In this case, those panels were rotted extensively as well and in need of replacement so just cutting the dog leg portion out of the quarter temporarily was all that was required.
There is also a portion of the rear sub frame that overlaps the inner frame rail piece inside the passenger compartment of the car.
A clean cut with a cutoff wheel will remove both portions inside and you can separate them later so the rear sub frame half can be welded back into place over your new frame rail.
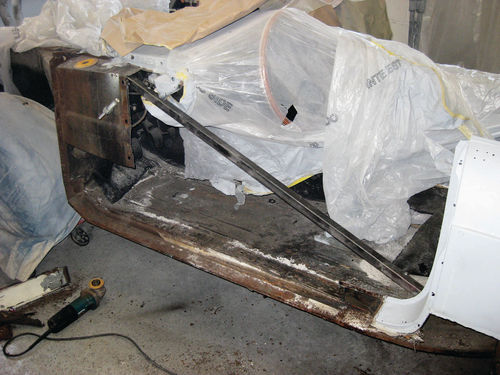
Now that we have access to the entire run of the frame rails we can get ready to begin removing the old pieces.
Before you start cutting the old rails out, be sure to brace up your doorway opening so nothing can twist while the frame is removed.
Another option would be welding the door into place with a few good tacks if you choose to leave it on the car.
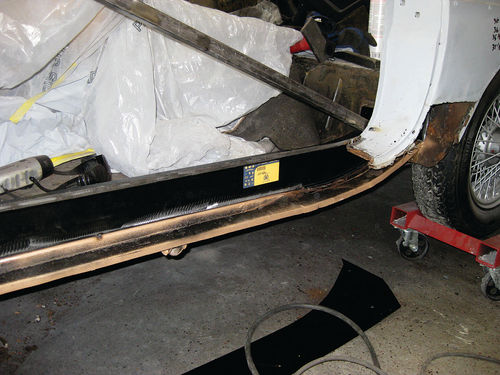
Once you are happy with your bracing you can begin removing the remainder of your outer rocker panel that hasn’t rotted completely away.
Depending on the condition of the rest of your frame pieces you can either remove the rocker with a cutoff wheel, plasma cutter, or by drilling out all of the factory spot welds. In this case all of the accompanying panels were being replaced so I used a combination of the cutoff wheel and plasma cutter to take the rocker panel out in sections.
Below the rocker panel is the inner rocker panel which forms a solid barrier down the center of the “box” we are creating with all of these panels.
In this case the inner rocker was almost completely missing; just a few remnants here and there left hanging in place which is a scary reminder of just how badly rust can eat away at hidden portions of our cars. The interior braces for the jack supports were also rotted away entirely.
This leaves only two other components left for this frame rail assembly...the inner frame rail and what is referred to as the castle wall. The inner frame rail piece was cut out including where it ties into the rear wheel housing and the front of the car at the lower firewall.

On this MGB the castle wall piece was in surprisingly good shape and the decision was made not to replace it. By not removing it, all of the front to back structural integrity wasn’t completely lost during our repairs. However, if yours needs replacing it is only welded into place at the front and back.
Prepping What’s Left In Place
Once all of the damaged pieces were cut out the remaining good metal was prepped by cleaning any rust off with a grinding wheel and coating weld surfaces with a weld-through primer to protect them after reassembly. If your lower castle wall piece is in need of repair you would want to line it up and weld it into place first to provide a foundation for the rest of the assembly.
After welding the castle wall in place you can begin lining up the rest of your panels starting with the inner side member or rail. It should line up with the outer edge of the inner high portion of the castle wall, the rear should be just inside the edge of the rear door jamb lip, and the front lined up just inside the side dash portion of the car.
If your rear wheel housing and front firewall area aren’t being replaced you can also use the marks from your original rail piece.
I like to tack the inner rail into place at this point and then sandwich the inner rocker panel and outer rocker panel into place and clamp them down to check my final alignment before doing any serious welding.
Once you are happy with the alignment of the inner rail portion you are ready to weld it into place.
I go way overkill on this piece by welding it solid to both the castle wall and the floor pan inside the car, as well as at the ends. I’d rather have the added strength where the assembly ties into the rest of the car.
The small jack support piece is next and is quite simple to install. Line it up just above the stock jacking bracket that’s under the car and weld it into place. It helps keep the rail from buckling when this area is supporting all of the weight from one side of the car.
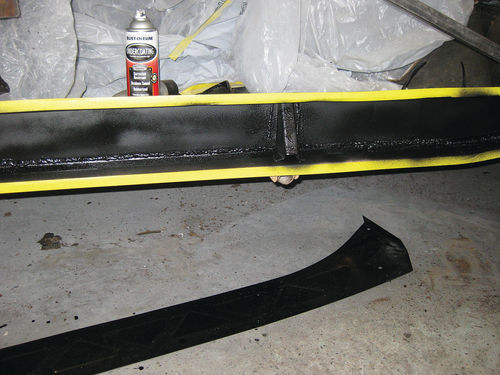
Once the support piece is in, it’s good preventative maintenance to cover your weld surfaces with tape and then give the inside of the rail assembly a shot of undercoating to keep your new parts rust-free for years to come.
You can also tape off the weld surfaces on the inner and outer rocker panels and undercoat the rest of the non-exterior surfaces.
Once your undercoating has dried, you can prep your weld surfaces between the inner rail and the inner rocker panel by removing the e-coat and spraying them with some weld-through primer. In this case a spot welder was used to assemble the panels, however if you only have a MIG welder you will need to punch some holes into the inner rocker panel in order to plug weld the assembly together. Again I like to make just a few welds and test fit the remaining pieces for alignment purposes before welding the inner rocker panel in solid.
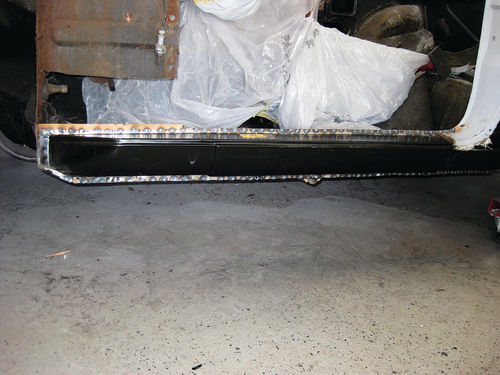
Placing the Outer Panel
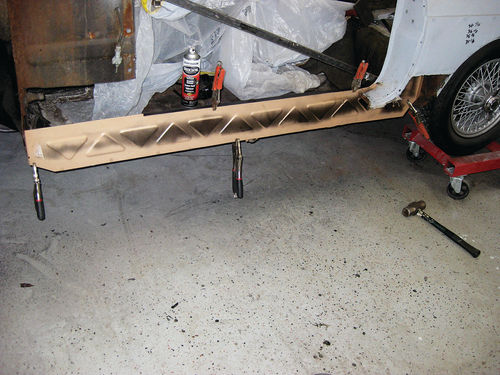
You’re now ready for the final portion of the frame rail assembly—the outer rocker panel.
Again prep your weld surfaces by removing the e-coat and spraying them with weld-through primer on the inside sections. As with the inner rocker panel, drill or punch holes through the outer panel if you intend to MIG weld it into place, or in my case I just clamped the rocker into place and spot welded it all around. The rocker is also welded to the inside of the firewall in the front and to the outer wheel housing in the rear, as well as being spot welded to the lower dash panel along with the inner rocker and inner rail piece.
Now that you have restored the structural integrity of your MG’s frame you can tie up the loose ends.
The portion of the rear sub frame that you had to cut out in order to access the rear of the inner rail can be welded back into place. Also the rear dog leg can be welded back in, replaced, or in this case the entire rear quarter panel replaced to complete the rear exterior repair.
A final note for the front…besides the side dash being tied into the rail assembly, the bottom of the A-post is as well. Be sure to re-weld the bottom of this pillar onto the new rail if you aren’t replacing it altogether.
If you have taken your time, done your test fitting, and taken proper measurements where necessary you will now have a safe and solid car with proper door gaps and no sagging in the center of the body. This will allow you to enjoy your MG once again for many years to come.
Resources
Moss Motors Ltd.
(Goleta,California)
(Petersburg, Virginia)
Victoria BritishLtd.
Lenexa, Kansas


