Replacing a Trunk Floor Panel
It’s a Spot Where You’re Likely to Find Rust In Vintage Cars. So Join Us As We Swap a Rusty Panel for a Good One.
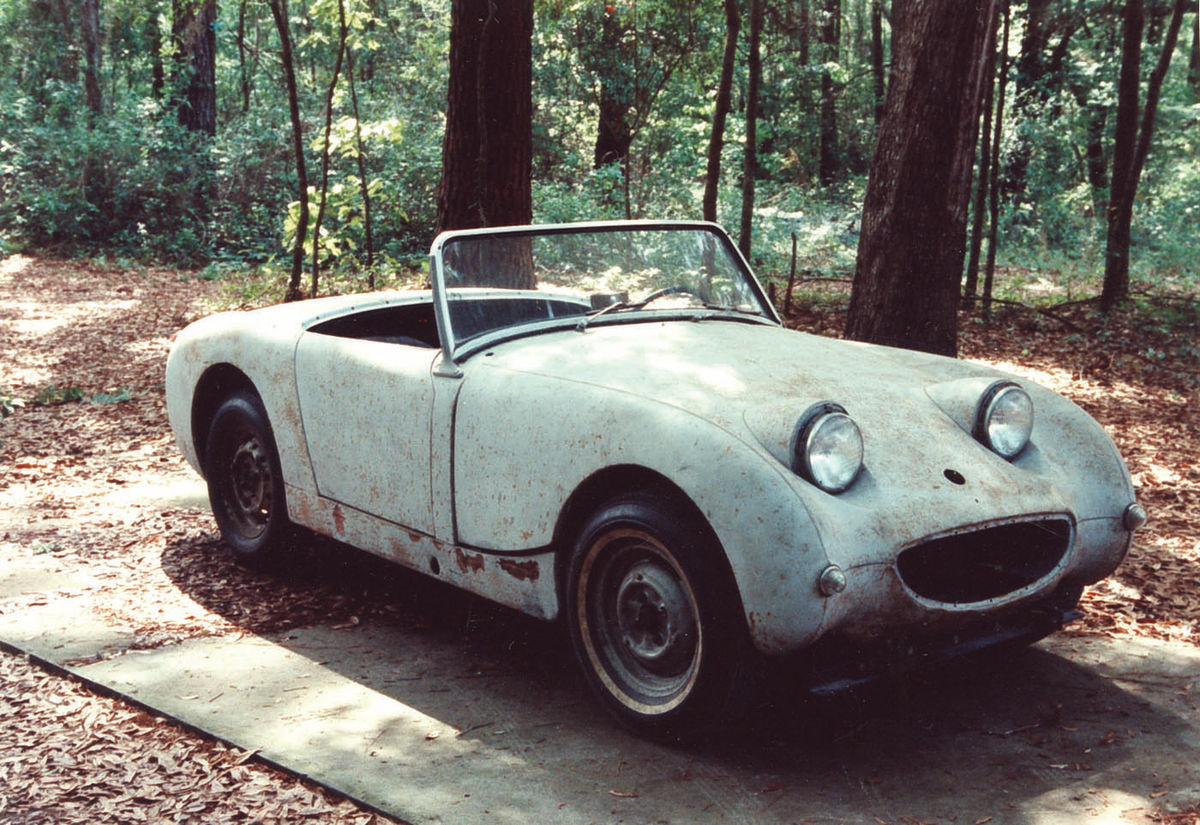
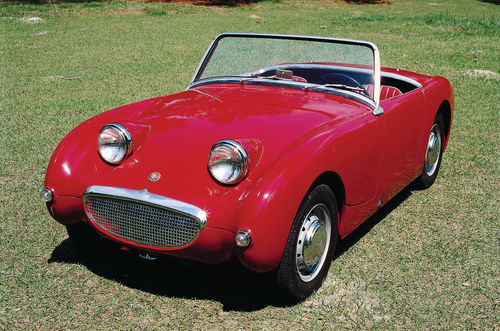
AUSTIN-HEALEY MANUFACTURED the Mk 1 Sprite from March 1958 into early 1961 with a total production run just shy of 49,000, making it the best-selling Austin-Healey model ever. Popularly known as the Bugeye in the United States and the Frogeye in Great Britain, it was one of the pioneering British unibody or monocoque cars.
In my experience, the Bugeye is uniquely suited and appealing for restoration by a hobbyist. Sturdy, relatively inexpensive (I recently saw a project car with a sound body and clear title sell for less than $800 on eBay) and a blast to drive, the Bugeye has a lot to recommend it to those looking for a small classic sports car. Virtually any part is readily available in the aftermarket, and its light weight and small scale make it very easy to work on in a home shop. Plus it is just so…appealing…cute…irresistible…pick whatever adjective you prefer the next time you see a nice one in person. (Actually, I started out thinking that Bugeyes were a bit ugly. Obviously, that has changed.)
That Common Enemy…Rust
The Bugeye body is a very rigid and robust structure, but like all cars of its era, it can be vulnerable to rust. Fortunately, as noted, so many replacement body panels are on the market it would virtually be possible to build one from scratch. The trunk floor is one of the common rust areas on this vehicle, and this article describes one approach to replacing a rusted-out panel.
With its gracefully curved, welded into-one-piece rear body section, the Bugeye is akin in structural integrity and shape to that masterpiece of natural engineering, the ostrich egg. The downside is that it will seem like an ostrich egg in size, too, when you have to work inside the lidless “boot” or trunk as will sometimes be necessary when replacing a rusty trunk floor.
Let’s Get Started
The first step is to remove the rear axle. It might be possible to do this job with the axle in place, but I wouldn’t want to try it.
If your Bugeye is disassembled down to the body tub and you have a rotisserie—or can otherwise safely rotate the body—your job will be much easier. However, since that approach often is not available to hobbyists, this article assumes that you are working with a vehicle that is not disassembled and must remain upright.
If you haven’t already, block the car up securely and at sufficient height to allow ample work space underneath, and take off the wheels. I like redundancy in my supports—both jack stands and big wooden blocks. The rear blocks will need to be placed slightly in front of where the springs bolt into the spring boxes. In any case, make sure your supports are under strong body structure members.
Axle/Differential Removal
With a few exceptions, removal of a Bugeye axle is similar to the process for most live-axle domestic cars. First remove the exhaust pipe and disconnect the flexible brake hoses and hand brake cable. Disconnect the U-joint and driveshaft assembly from the differential. Disconnect or remove the lever-arm shock absorbers. At this point, support the axle/differential assembly with a floor jack. Remove the check straps that limit axle movement. Remove the bolts that secure the quarter-elliptic springs into the spring boxes. Make sure the axle doesn’t have any other restraining attachments not covered here (a lot of modifications can be made to a car in 50-plus years) and then slide the springs out of the spring boxes as you lower the floor jack that is supporting the axle assembly. It helps to have an assistant at this point.
Gas Tank Removal
The Bugeye fuel tank bolts to the underside of the trunk floor on six captive bolts, so to fully evaluate the condition of the trunk floor or do any work on it, first remove the fuel tank.
Take all the usual precautions, such as draining it first through the plug on the bottom and avoiding any flame or other source of sparks (which would include percussion sparks from a hand tool, such as a cold chisel or hammer). You’ll need to position a floor jack underneath the tank to let it down slowly as you loosen the nuts. The Bugeye gas tank, due to the absence of a trunk lid, has a long, rigid metal filler pipe that rises through a hole in the trunk floor, continues up through the trunk space and exits through a large rubber grommet on the right side of the trunk top near the tail light. This filler pipe is vulnerable where it connects to the tank, and is sometimes weakened with rust, so special care is called for as you lower the tank while disengaging the pipe from the topside body work. That helper would be really useful for this job, too—one person to work the top and one the bottom.
Don’t forget to remove the fuel line and the sender unit wiring, on top of the tank, when you can access it. Once the tank is safely out of the way (or, better yet, cleaned and stored sans gas residue and potentially explosive fumes), it will be possible to assess the condition of the trunk floor.
Evaluating the Floor
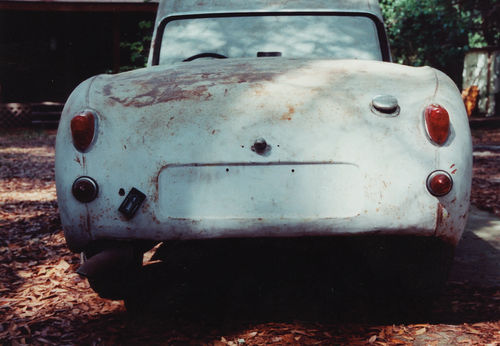
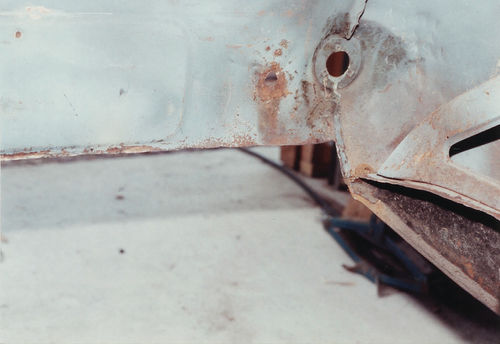
The Bugeye trunk floor tends to rust all across the back where it joins the rear apron under the license plate recess (Photo 1). From underneath, probe this area for rust as well as all around the edges where the floor joins the inner body structure. Probe the whole panel for surface rust that may have thinned and weakened it. It is, of course, possible to make small patch panels if the overall panel seems strong. But don’t cut corners on this job; in a monocoque vehicle, the strength of the whole depends on its parts, so it’s better to err on the side of caution. A trunk floor replacement panel is available for about $200 ($189.95 plus shipping from either MossMotors.com (part 452-190) or VictoriaBritish.com (part 19-757).
Most of the inner body structure pieces are available, too, so evaluate carefully with integrity of the repair in mind in addition to the consideration of your time and expenses.
For the purposes of this article, we are assuming that the entire trunk floor behind the axle arch needs to be replaced and that the surrounding inner body structure to which it is welded is basically sound. Again, make sure the body is securely blocked up under the spring mounting boxes at the rear and under the chassis subframe at the front if it is no longer sitting on its tires. You will be cutting out a major component of the rear body structure, so you don’t want to have to move the body with this panel missing.
Order the Part

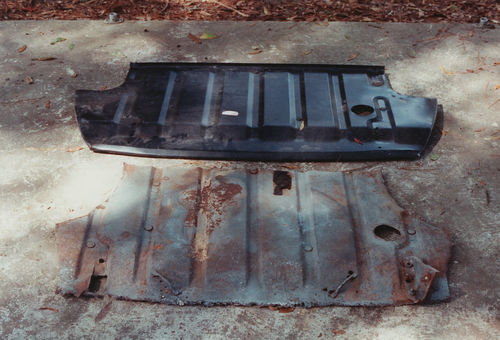
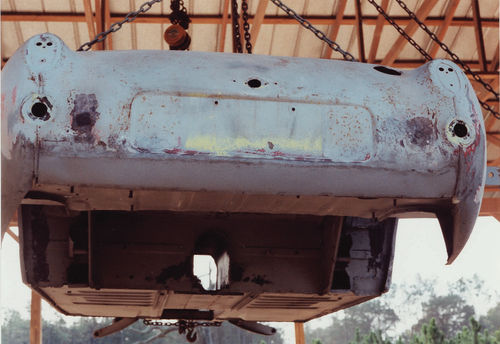
Once you have established that you need the trunk floor, order the replacement panel to have it on hand before you do any cutting. This is important. If you aren’t familiar with these cars, the precise area you need to cut might not be obvious until you have the replacement panel. Also, the fit isn’t always exact, so it is very useful to have the replacement panel to refer to as you cut out the rusted original (Photo 2).
Remove the Floor
Most of the Bugeye body structure, including the trunk floor, is held together with spot welds. If they aren’t hidden by undercoating or rust, you can drill these out with a purpose-bought spot-weld bit or simply a self-centering 3/8-inch bit. What doesn’t come apart after drilling the spot welds will need to be cut.
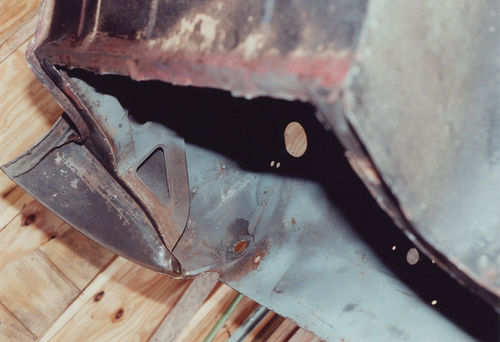
The area where the flat trunk floor joins the axle arch has to be cut all the way across in any case, and I ultimately decided that on my car it was simpler to cut my floor out and not try to drill out all the spot welds. I preserved the factory flange around the wheel wells and left a similar flange at the bottom of the large, triangular wheel arch gusset inside the fender on either side as an extra welding/mating surface (Photo 3, left arrow). I also left a flange of metal for a welding surface where the flat trunk floor replacement panel meets the axle arch (Photo 3, up arrow). If you take this approach, straighten and grind all of these flanges smooth and even. This won’t result in a strictly stock appearance but it will look good and provide an extra measure of reinforcement where the two panels meet at the axle arch.
In short, my overall strategy for this part of the job was to cut in such a way that the hole I left was slightly smaller than the replacement panel, leaving a good surface for a strong, two-ply welded lap joint all around, except at the rear, where both the original floor and the lower apron were rusted away.
Those lucky enough to own or have access to a plasma cutter can make quick work of the cutting portion of this job. For the rest of us, a cut-off wheel will suffice, and it is also surprising what you can do with a couple of good, sharp cold chisels, a hammer and a pair of sturdy leather gloves.
Fabricating a Rear Repair Panel
At the rear, the trunk floor curves down, forming a cavity all along the back edge that is very vulnerable to entrapment of rust-promoting moisture and debris. If the rear edge of the trunk panel is in bad shape, the rear apron likely will be, too, so you may have to trim the rear apron up to good metal and fabricate a replacement part from sheet steel to have something to which you will weld the trunk floor (Photo 4).
I had to beat in a bit of curve into my repair panel at either end to make it mate up properly with the fenders. On my car, this piece had to be about three inches deep across the width of the rear to the fenders (Photo 5). So far as I have been able to determine, these are not available in the aftermarket. If the apron is rusted on your car, before you cut it away, have a really good look, make some sketches or take photos for reference later when you are fabricating the part and welding the trunk floor and apron bottom together.
If you are not skilled at metal shaping and don’t have the tools (and I certainly fell into this category) don’t be intimidated by this. If you can get the shape close—say within an eighth of an inch on the curvy bit—there is absolutely nothing wrong with using a bit of body filler to smooth things out, assuming good metal and no rust underneath. If this panel is not rusted on your car, the job will be a lot simpler.
Trial Fitting the Replacement Trunk Floor
Once all the bad metal is cut out, grind or sand away any remaining surface rust, then you can trial fit the new floor, lifting it up with a floor jack or help from an assistant. You may have to trim or use a bit of hammer persuasion on the new panel. Once you see where the new panel meets good original metal, you can drill 1/4-inch holes every two inches or so along the perimeter for fill-in “spot” welds with a MIG welder. Also, with the panel held temporarily in place with a floor jack or other secure means, mark it from the inside where it meets the interior flanges you left, and drill holes along the non-perimeter mating surface on the replacement panel for additional spot welds. This should reduce or eliminate the necessity for welding inside the boot.
When you know exactly where the replacement panel fits and have drilled all the appropriate holes for fill-in spot welds, you can secure it in place for welding. Before you do, however, make sure you have sanded, ground away or otherwise completely removed all rust and have coated the mating surfaces with a protective, weld-though coating such as Eastwood’s Cold Galvanizing Compound.
Securing and Welding the Replacement Panel
An easy, effective way to secure the panel for welding is with a few strategically placed self-tapping sheet metal screws. (After all the other welding is complete, you can then weld in the screw holes.) Use the smallest number of screws you can to draw the panel up nice and tight all around. Have a look inside to make sure all mating surfaces are pulled up tight.
For those who don’t have a welder or are not confident enough in their welding abilities, you can secure the panel with the screws and then get a professional with a mobile welding outfit to come and weld it. If everything is in place and ready, this will be a short job for a pro and shouldn’t be too expensive.
However you choose to weld the panel in place, develop a strategy that allows most—if not all—of the welding to be done from the bottom of the car. You don’t want to be confined in the lidless Bugeye trunk with welding gasses.
After the trunk floor is welded in place, you can shape, fit and weld in place the rear apron repair panel if one is needed on your car (Photo 6).

Rust Converter
Once the welding is complete, take one final precaution to combat future rust and use a rust converter on all welds, bare metal and inside the seams where possible. I like Skyco Ospho (Ace Hardware, about $25 a gallon). It is water thin, and you can spray it into any cavities, laps and seams as an extra measure of protection. Wipe it off of any painted surface and let it dry for a day or so before you prime and paint. In addition, once all the welding and rust-prevention work is complete, use a paintable seam sealer to keep moisture out and make the job look good, top and bottom, before painting.
Resources Moss Motors, Inc.
440 Rutherford St. Goleta, CA 93117
25651 Simpson Road Petersburg, VA 23803 mossmotors.com
Victoria British Ltd.
14600 W 107th St. Lenexa, KS 66215 victoriabritish.com
Spridget Mania
(Part of Mini Mania)
870 Gold Flat Road Nevada City, CA 95959-3200 spridgetmania.com


