
Picking Parts & Starting to Spray
You might think I’d be ready to talk exterior painting. After all, the car has been primed and block sanded, so it should be ready for paint. Well, it is and I would like nothing better than to mix a little color and turn this ride into a dark, shiny machine. However, I can’t, or more to the point, won’t. At least not until we’re farther along in this article. Otherwise, I could put myself out of sync with what needs to be done to complete this project on schedule.
To prevent that from happening, I need to look past the last coat of clear and concentrate on what needs to happen to this ride the day after the paint dries.
For instance, how is this car going to be wired? Will the wires run along the frame rails or be routed somewhere inside the car? Do I have the wiring needed to accomplish such a task?
I also talked earlier about adding TBI (Throttle Body Injection) to the engine to bring this ride up to modern standards as far as fuel management is concerned. Is there any part of a TBI kit that will require additional modifications to the frame, things that are best done before the body is mounted?
Then there is the glass situation. It can often take weeks to have glass custom
cut and fit to a ride. With the chopped top on this car, standard-sized glass is out of the question. I’ll need to call my glass guy and get on his list. As soon as the body has been painted I’ll be in need of some glass.
Lastly, there is the interior trim. I’ll be doing most of that work myself, but I’ll still need to decide on the colors and place an order for some vinyl and carpet.
These are all concerns that need to be addressed now, while the purple paint is on the shaker and the spray guns are still on the bench.
I’ll start by addressing the first question—about wiring this ride.
A Good Source for Wiring Products
Without a doubt, Painless Performance is my first choice of providers when it comes to wiring anything.
Painless has a wiring package designed to handle just about anything on the road. They also carry all of the nit-picky things you don’t know you need until you realize that something is missing or see that something not quite so “salvage yard” in appearance would look much better. The best results are obtained by first reviewing all of the options and accessories Painless has for wiring a car and then compiling a list of those things that will be needed to correctly wire the project at hand.
For example, will the car be using an electric fuel pump? In this case, an elec-tric fuel pump will be needed for the TBI unit. Is an additional harness needed to wire the pump? Will salvage yard switches be used to handle things like illuminating the headlights and turning on the windshield wipers? Will those switches look appropriate to the car or would custom switches look better? What about the steering column? Will it require a GM wiring connector or something custom made? These are just a few questions taken from a long list that will need to be addressed in order to properly wire a car.
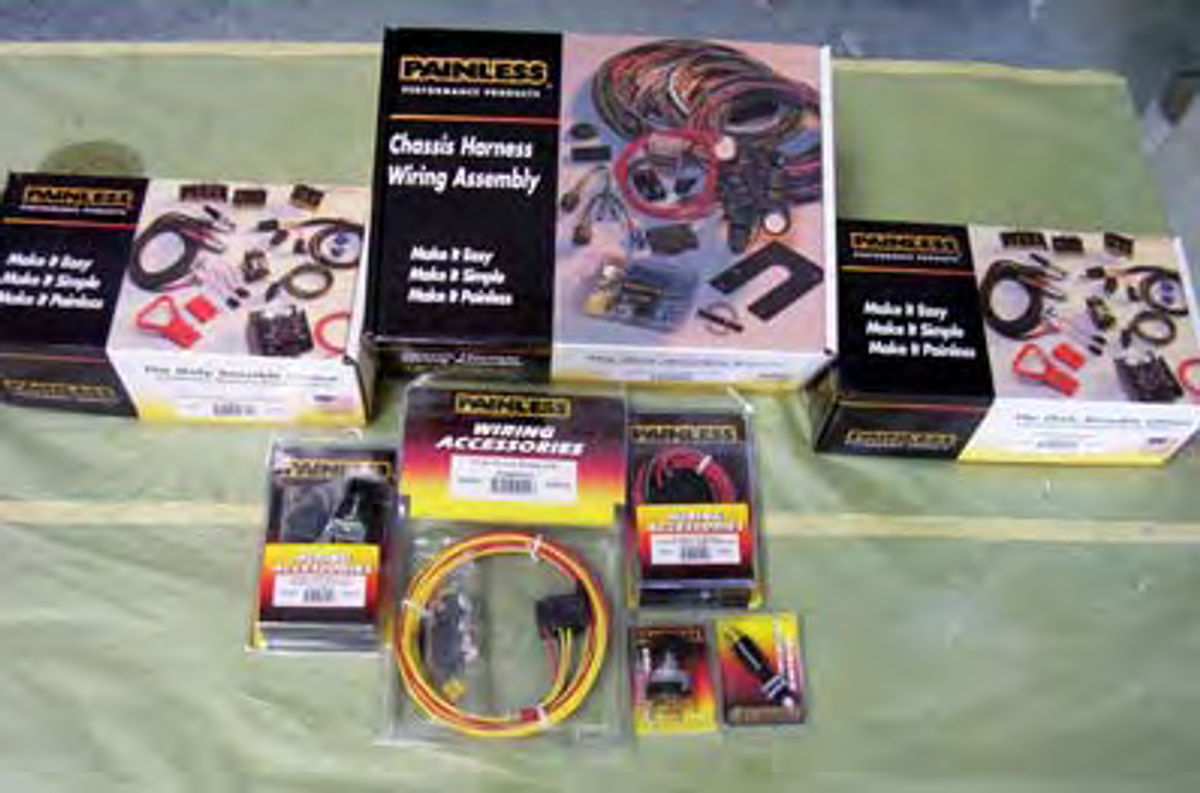
My wiring selections for the ’46 can be seen in Photo 1.
I opted for the Painless Performance 18 Circuit Universal Street Harness #10202, the 6-Pack Relay Bank #30108 (this harness is great for vehicles with power windows), Master Disconnect Switch #50710 (to shut down the electrical system for winter storage), Fuel pump Relay Kit #50102 (for the fuel injection system), Fan Relay #50407 (for use with the electric cooling fan), Headlight Switch #80152, Windshield Wiper Switch #80173, Brake light Switch #80172, and three sizes of Split Braided Harness Sleeving—1/2 #70902, 1/4 #70901 and 3/4 #70903. The split braided sleeves will shroud the wires and give the overall wiring a very professional look.
I also made the decision to route the main wiring harness throughout the inside of the car so no additional work to the frame will be required to get voltage to the rear of the vehicle where I’ll have lights and an electrically operated flipdown rear license plate pocket.
Fuel Injection Selection
As for the TBI unit, I elected to go with Affordable Fuel Injection. If you prefer MPFI (Multi-Port Fuel Injection), Affordable can do that also.
I went with the TBI system because the high-rise polished aluminum intake manifold Affordable uses with their system looks totally retro and it will be in keeping with a more traditional hot rod appearance (Photo 2). After reading the instruction manual that comes with the
TBI kit and, by the way, the manual is very well-written and easy to follow, I determined I’ll need to route a fuel return line from the engine to the fuel tank. This line will be made of 5/16-inch steel tubing and I’ll route it alongside the previously routed fuel delivery line mounted inside the left frame rail.
Since the fuel tank I’m using doesn’t have provisions for a fuel return line I’ll incorporate an inlet in the filler neck so that there is no need to remove the tank from the frame and have an inlet welded to the top of the tank. That would be a “professional only” task and not something I’d attempt here in the shop.
Sharing the Glass Work
Last on the list is the glass. The windshield, both door glasses and both quarter windows will need to be cut to a new size. The back glass opening was left in its original size so all I need to do is purchase a replacement glass for that opening.
A few months ago, I asked my glass guy to drop by the shop to discuss the possible ways we could get new glass into the car. This is some more of that pre-planning stuff that makes a huge project like this flow a little smoother.
Our decision was to urethane-set the windshield and the two quarter glasses and finish them on the outside with a thin black plastic bead situated between the glass and the surrounding metal. The black plastic bead will be a product similar tothe material GM used in the ’80s to set windshields in their vehicles.
The door glasses will also need to be special cut, which leads me to the subject of templates. I don’t want my glass guy spending his expensive time cutting and fitting a template for the door glasses. This is something I can do myself and save a few bucks in the process. All I need to do is cut a cardboard template to fit the opening then transfer that template to a sheet of Masonite and cut a slightly larger version from the Masonite. Why larger? I can trim the piece down to size, but I can’t water the Masonite and expect it to grow to fit.
I can do the same thing for the quarter glasses as all they need to do is sit in an opening where they will butt against the metal surround. No need for critical sizing and fitting here.
The windshield opening is a different matter. Here I’m dealing with the necessity of having the glass cut large enough to overlap the original metal opening so that it doesn’t fall though the hole, yet it still must be small enough to accept the plastic bead that will be needed to go around the glass. This is why you call a glass guy. He’s been there, done that before, and he will be the one cutting and fitting the windshield.

Painting Against the Clock
So, with those details out of the way, it’s time to pry open a can or two of paint. The HOK KBC 10 Purple base coat came in quart cans. I have a total of eight quarts and the first thing I need to do is combine all eight quarts to be sure the color is consistent from the first part sprayed to the last part sprayed.
To mix the color I paid a visit to my local home improvement center and purchased a two-gallon plastic bucket and two gallon-size paint cans. I poured all eight quarts of color into the plastic bucket, stirred thoroughly then divided the mix equally between the one-gallon paint cans.
From this point forward you may think the method I’m going to use to paint this car is a bit unorthodox. In some shops it may be, but for me this is the best way to proceed. I’ll be working alone and once I begin mixing and spraying
colors the clock starts ticking. I only have a short window of 12 hours between spraying the first color coat and the need to lock that color down with a coat of clear or I have to stop, sand the car and start over.
A Busy 12-Hour Schedule
Sometime during that 12-hour window, between spraying the base purple color and spraying the clear coats, I have two additional colors to apply to the car. Each of these colors needs at least an hour of cure time before it can be taped over and the next color applied. That’s more than half a day gone just spraying the additional colors and I have yet to factor in the need to lay out a color scheme tape line for each of those colors, which when finished on one side of the car will have to be duplicated on the other side. For that you can estimate one to two hours per color. That’s another six to eight hours minimum if all goes well and I still have at least four coats of clear, which will take an additional two to three hours to apply, on top of that. That adds up to a long, long day.
But that’s not all. In addition to spending hours behind a spray gun I also need to remove the body from the rotisserie and mount it on the frame, install the doors, lay out and paint the graphic colors on the doors, remove the doors so they can be clear coated separately, install the deck lid, lay out and paint the graphic colors on this panel then remove the deck lid so it can be clear coated separately.
What’s the deal with removing the doors and deck lid to clear coat them? Actually the removal is to facilitate easy access to the body openings around these components for clear coating. Once they are off the car it will be very easy to clear coat them on the bench.
Avoiding Expensive Mistakes
Something I learned a long time ago is that good help can be expected to perform at peak efficiency for about eight hours. After 10 hours the efficiency begins to drop and after 14 hours mistakes begin to happen. Paint costs average around $75 per ready-to-spray quart for the colors I’m using and polyurethane clear coat products average around $300 per ready-to-spray gallon. At this rate any mistake can be very costly.
To prevent those costly mistakes, my plan calls for breaking the painting process into two separate parts. To start, I’ll apply the seal coat, the black under base coats, and purple base color coats to the body only. That’s most of the day gone getting to that point. Once the purple dries for an hour I’ll cover the sides of the car with a single coat of clear, the roof with two coats and the firewall with three coats.
Why a single coat of clear to the sides of the car, two coats to the roof and three coats on the firewall? In case you forgot, the body of the ’46 is still on the rotisserie. It will save me a lot of physical grief trying to reach the hard to get at places such as the roof when all I have to do is turn the body and the roof is right there and easy to paint. That’s a big thing when you have a seal coat, three under base coats, and three base color coats to apply to the roof before the clear coats can be applied. All I will need to do later, once all of the colors are on the car, is apply my additional coats of clear to complete the painting process. That I can easily manage once the body is back on the frame.
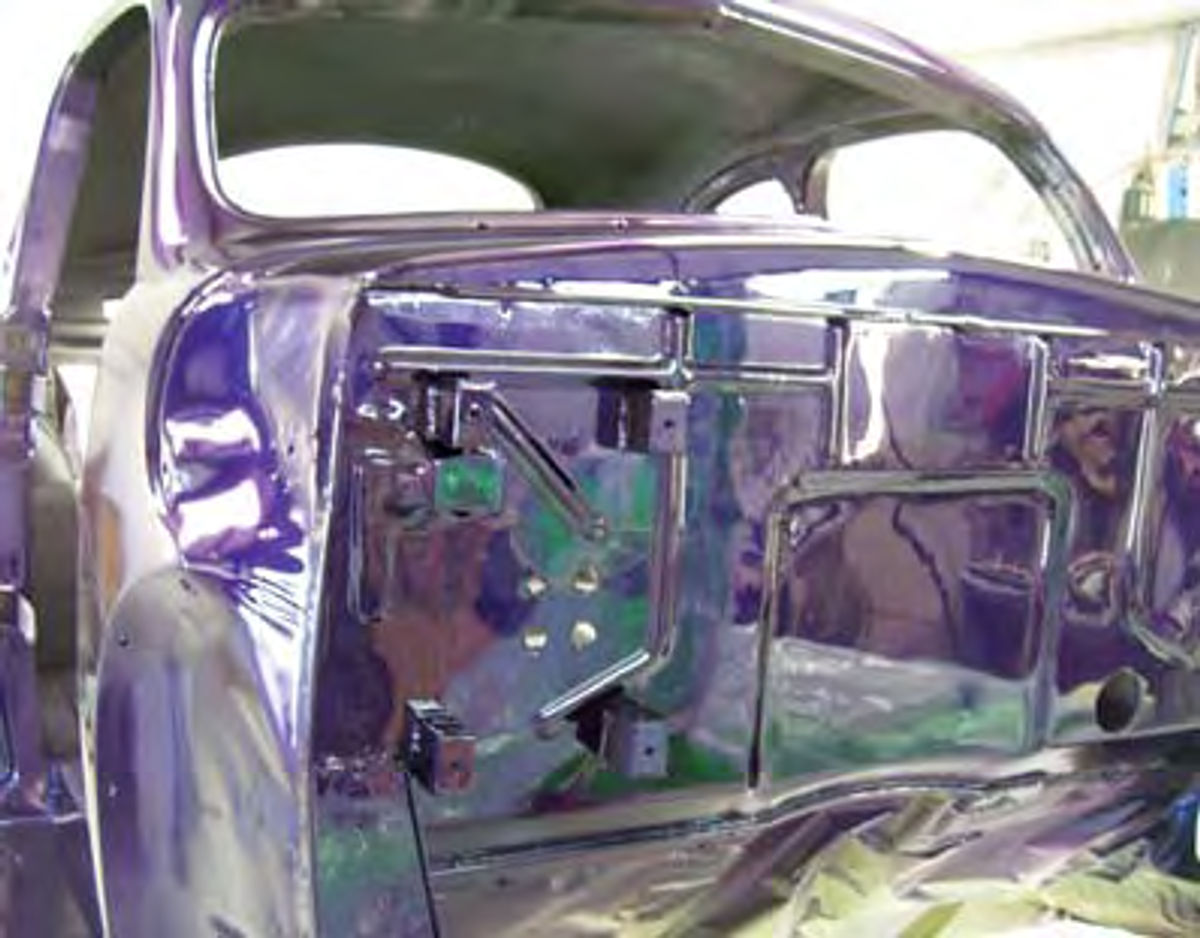
As for giving the firewall three coats of clear, that will complete this part of the car and I won’t have to contend with trying to paint around the engine and trans-
mission after the body is back on the frame (Photo 3). I’ll mask off the firewall to keep over spray off of it as I continue the painting process.
That is what it will take just to get the purple on the car. Once that is accomplished I still have the graphic colors to contend with. Which brings me back to the need to mount the body back on the frame. I can’t lay out the graphic colors correctly without having the doors and deck lid back on the car. Yes, both doors and the deck lid will have to be painted purple and locked down with a coat of clear prior to being installed back on the car for the graphic color work.
What that will do is allow me to start on the graphic work in the morning and have it done by the end of the day. I can then cover the graphic colors with a coat of clear and come back the next day and lightly sand that area using 1000-grit sandpaper before completing the painting process with additional coats of clear.
Painting Various Parts
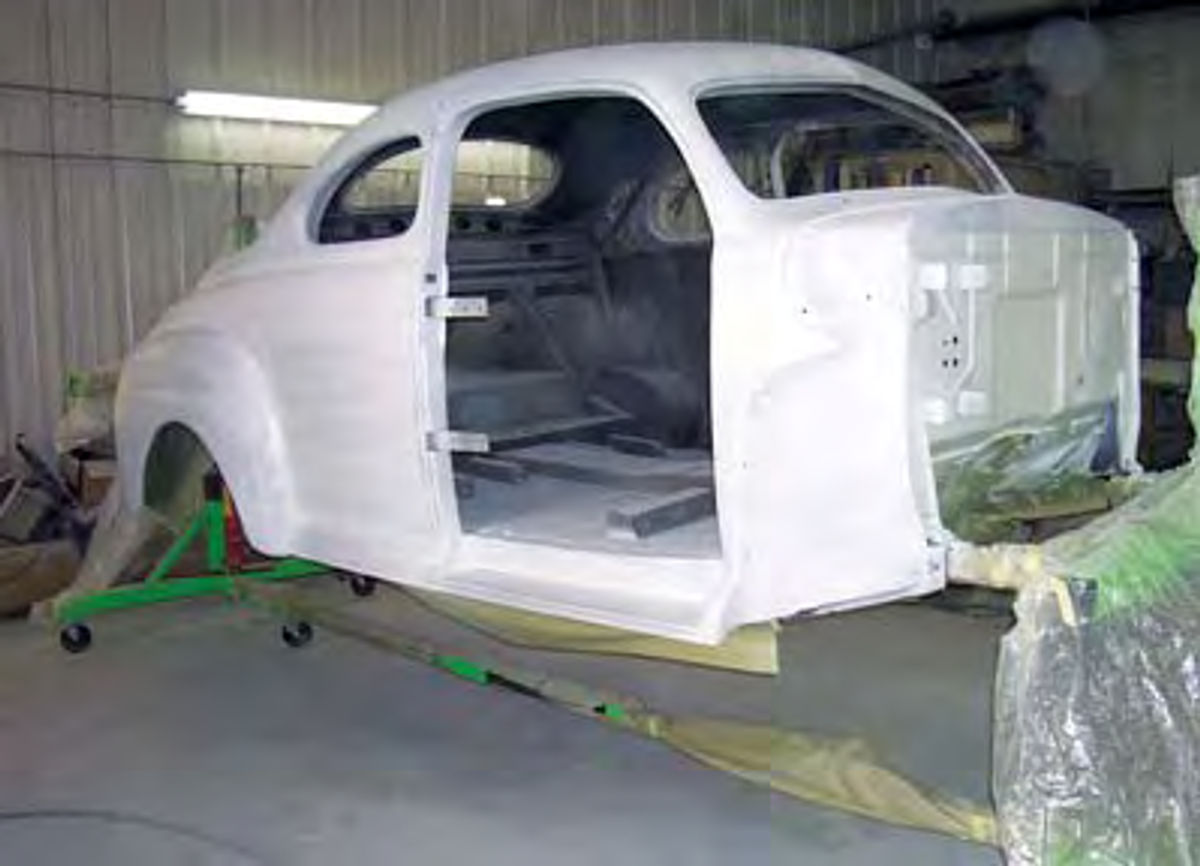
The sequence of events will unfold like this. First I apply a single, medium wet coat of sealer to the body. The sealer of choice is HOK KS 10. This is a white seal coat that mixes 2:1:1, two parts sealer to one part KU 150 Hardener to one part RU 310 Reducer. I apply the single coat using the Binks M1-G with a 1.3mm spray tip (Photo 4).
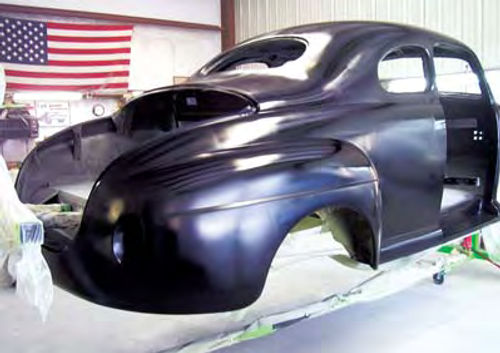
The sealer needs an hour to cure before I can apply the black under base over which I apply three coats of HOK KBC 10 Purple. The black is HOK BC 25 Under Base and is needed because the purple is a very transparent color. Without the black base I would need to apply from eight to ten coats of KBC 10 Purple to obtain good coverage. By applying three coats of black under base I can reduce the number of coats of KBC 10 Purple down to three. That saves me time and money.
HOK BC 25 is mixed 2:1 with RU 310 Reducer and applied medium wet using the Binks M1-G with a 1.3mm spray tip (Photo 5).
HOK KBC 10 Purple is also mixed 2:1 with RU 310 Reducer and applied medium wet using the same Binks M1-G (Photo 6).
The clear coat is HOK UC 35 Polyurethane Clear and is mixed 2:1:1. Two parts clear to one part KU 150 Hardener to one part RU 310 Reducer. These coats are applied medium wet using a DeVilbiss Plus GFG 670 gravity feed spray gun with a 1.3mm spray tip (Photo 7). Why switch spray guns? I use the GFG 670 exclusively to spray clears. I never put color of any kind through this gun. That makes cleaning it a snap, and besides, I like the way it sprays clear coats.
Next on my list for painting are the doors and deck lid. I’ll give them the same treatment I gave the body starting with the doors. I’ll apply a seal coat, three coats of black under base, three coats of the purple base color and a single coat of clear on both the inside and the outside. I may elect to continue the graphic work inside the door frames, thus the need for only one coat of clear. The outside of the trunk will also receive a single coat of clear, but the inside of the trunk will be finished with three coats of clear. There won’t be any graphic work inside here. I’m going to give all of these parts of the car at least 24 hours to cure. After that I’ll lightly wet sand everything but the inside of the trunk using 1000-grit sandpaper. That preps everything for the graphic colors to be applied next. What’s the deal with the inside of the trunk? It will be upholstered, so no additional painting will be required.
You will notice that I didn’t mention painting the hood and front fenders. The front fenders will be painted purple, so I can paint them whenever I have the time and simply bolt them on. They don’t present a problem.
The hood, however, is a different story. The color scheme layout for the sides of the car actually begins near the front edge of the hood and moves back along the sides of the car. What that means is that the hood must be in perfect alignment with the body to ensure that the graphic lines stay straight. I can’t do that until the front sheet metal has been installed and I can’t install the front sheet metal until the body has been painted.
The trick to being sure I have the graphic lines straight without the hood being mounted is to use the body line that runs the length of the car as my reference line for the graphic work (Photo 8). That ensures the graphic color lines stay straight along the sides of the car and enables me to continue this line forward once the hood is mounted.
Moving back to the graphic work on the sides of the car, the first color applied is HOK KBC 17 Purple. This is a much lighter purple than the deep purple used as a base color for the car. This purple is more akin to Chrysler’s Plum Crazy Purple. It goes on first because it is the dominant of the two graphic colors.
Notice in Photo 9 that I have masked the side of the car, leaving exposed only those areas that are to be sprayed KBC 17 Purple. Also notice that I didn’t bother to mask the entire car. Base coat colors don’t tend to create the amount of over spray that clear coats create and what over spray they do create dries in the air and settles on the surface like dust.
Any over spray dust I do find can be easily wiped off. Thus the reason for not masking the entire car. This color also mixes 2:1, two parts color to one part RU 310 Reducer, and I’ll apply three medium wet coats using the Binks M1-G with a 1.3mm spray tip.
The second color, KBC 20, is the same color I used to paint the frame and for the most part this color will be laid out in the form of stripes (Photo 10). Notice that the edges around the tape lines appear to be blurry. I selected this shot to show you that sometimes what seems great on paper doesn’t work out in real life.
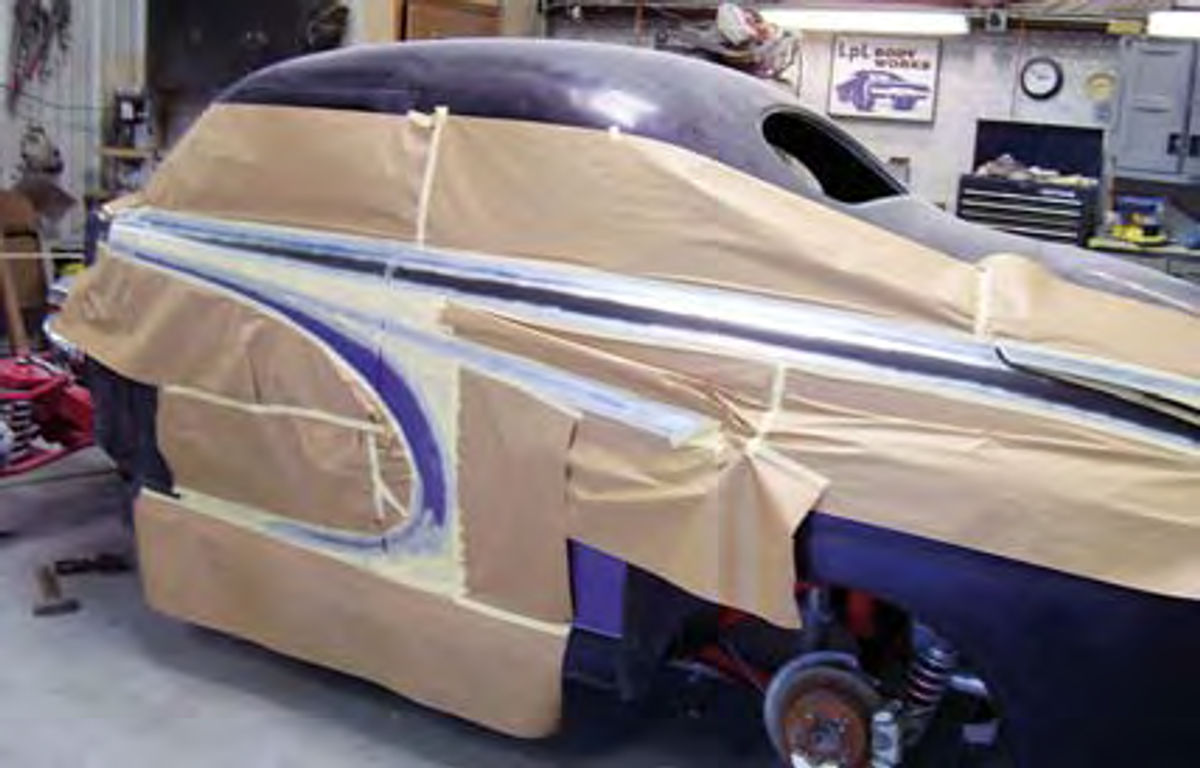
The blurred lines came from having airbrushed a silver metallic paint around the edges of the light purple. The original plan called for adding a 1/16-inchwide silver accent line to the graphics. However, once the silver was on the car I didn’t like it. It detracted from the layout. Fortunately, removing the silver was a simple matter of spraying red base color over it.
How do I make my graphic lines sharp when adding colors to the car?
I never use masking tape to lay out graphic work. I use 3M Scotch Fine Line Tape. This is a blue polypropylene film tape especially designed for multi-color separation. It leaves a nice, sharp line between the colors with almost no chance of imprint damage when used over freshly painted surfaces. Fine Line is available in several widths with the most popular being 1/16-, 1/8-, 1/4and 1/2-inch.

So, what does the car look like with the graphics on it? See for yourself (Photo 11). I think the car is going to look great. All that is left for me to do now is add a single coat of clear over the graphic work to lock down the colors.
Next time, I’ll finish clear coating the body and then do a little compounding and polishing.


