
Some show-quality paint secrets
Question:
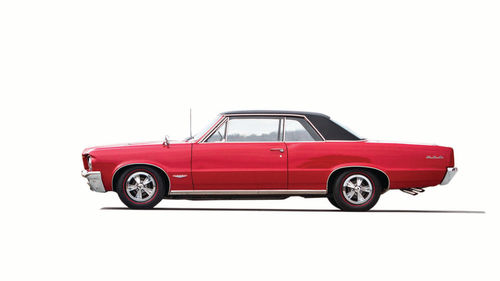
I just had my 1964 GTO painted Cameo Ivory at a local shop and they did a good job, but it is not perfect. There is still a little unevenness and orange peel. They used a base-coat clear-coat system, and it looks OK, but I have seen cars at shows where the paint is mirror-like and flawless. How do they do that? Can my Pontiac be made to look that good?
Answer:
The answer is yes… but. The “yes” part is outlined below, and is actually pretty easy, though time consuming. The “but” part is that you will need to make sure the paint shop shot on enough clear coat to permit color sanding. Be sure to discuss this process with the painter before you proceed. If they say there is enough clear coat on the car to lightly color sand it, here is what you need to do: First, gather the items listed below:
Things You’ll Need:
• 1500- and 2000-grit microfine sandpaper
• Flexible rubber sanding block
• Variable speed orbital sander
• Foam pad for sander
• Laundry detergent (a couple of drops)
• Squeegee
• Large artificial sponge
• Clean bucket
• Clear Coat Solutions (CSI) Ceram-x polishing compound (available through Amazon)
• CSI Q-7 Detailer
• Soft cloth polishing rags
You will want to start with a good fresh, but cured, paint job. Acrylic lacquer or enamel with hardener, as well as the modern two-pot systems are great for color sanding, but oldfashioned enamel shouldn’t be color sanded. Base and clear coat systems, however, do require care to avoid cutting through the clear topcoat. In fact, if the painter didn’t apply a heavy coat, you should go straight to the 2000-grit sandpaper to avoid problems.
Wash the car, and make sure that there is no grit on it anywhere. In fact, I would vacuum the garage before you start. One tiny bit of grit can put a deep scratch in your finish if you aren’t careful. The sandpaper you’ll be using is no rougher than cheap toilet paper, so it doesn’t take much grit to really mess things up.
Assuming your GTO has enough paint on it, start by cutting the 1500- grit sandpaper sheets in half, then place three or four in a bucket of clean water along with a couple of drops of liquid dish washing detergent to soften the paper a bit. Let this stand for 15 minutes, and then wrap a piece of the paper around your sanding block. Wet the surface you are going to sand using a big, artificial sponge. Now start sanding in a crisscross fashion to avoid making grooves. Use strokes of no more than eight inches, to avoid streaks.
Don’t sand along hood, deck lid or door edges, or any sharp crowns in fenders because the paint will be very thin in those areas. Just work the broad panels, and give each area the same amount of attention. Don’t bear down on the sandpaper, and keep the surface wet at all times. If you are working outdoors, use a garden hose and a small but steady stream of water to keep the surface wet. And wet the surrounding area of concrete where the car is in order to keep dust under control.
Rinse the sandpaper frequently to keep it from clogging, and when the paper no longer cuts with light pressure, throw it way, rather than running the risk of making grooves. Paint jobs are expensive, but sandpaper is cheap. Use your squeegee to check your progress frequently. You are done when all traces of orange peel and rippling are gone.
Next, switch to the 2000-grit and work the entire surface again. Make sure you give every area the same amount of attention, keep the surface wet, and check your work using your squeegee frequently. When you are finished, the surface you are working will have a satin sheen to it and none of the scratches from the 1500-grit should show. It takes a Zen state of mind to do this job right.
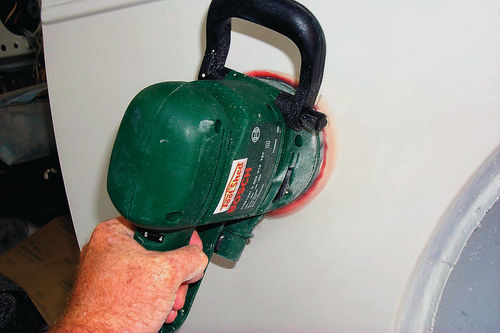
Buffing – Pros use big, powerful multi-speed buffers to make short work of the polishing, but until the new, hard-as-rocks two-stage paints came out, I always did my polished by hand. That way there was no risk of burning through or taking off too much paint. But these days my shoulders are getting arthritic, and it seems the paint has gotten a whole lot harder, so I found a good compromise power tool that is safe even in the hands of a novice. It’s called a variable-speed orbital sander.
Don’t try to save money by using a constant-speed orbital sander though, because it will run too fast and damage the finish.
Dampen the foam pad designed to attach to the sander, and then shoot a little of the new CSI Ceram-x compound onto the pad. (Never use the cheap rubbing compound in a can available at auto parts stores. It is much too coarse and inconsistent for the job.) Place the sander on the surface and turn it on at a slow speed. Don’t apply much pressure. Just let the polishing compound do its work. Polish an area about two feet square, and wipe it off with a soft cloth.
Keep working until all traces of sandpaper scratches are gone. At this point you’ll be amazed at how great your paint looks. Finish the job with a spritz of CSI detailer to protect the finish and make it look dazzling. And when you get the whole car finished, go around it carefully in different lighting situations to check for any traces of orange peel or spider web scratches you might have missed.


