
I Balanced My Brake Rotors
I N THE MARCH issue John Armstrong authored an article entitled “Balancing Brake Rotors.” Although I have seen balance weights on front brake rotors I had never considered checking the balance on my brake rotors even though balancing wheels/tires is a common practice which I continue to do seemingly successfully at home with a bubble balancer.
A few months after reading John Armstrong’s article it became time to replace the front brake pads and brake rotors on our 1984 Chevrolet Caprice station wagon. I purchased the new rotors at a local O’Reilly’s Auto Parts store and noticed that neither of the new rotors had any balance weights. Since I had already bought a motorcycle wheel balancer from Harbor Freight (the same balancer that John Armstrong had used), I decided to follow Mr. Armstrong’s described procedure and balance the newly purchased brake rotors.
Note: In the Auto Restorer article it mentions that the Harbor Freight motorcycle wheel balancer costs about $50. I happened to find this balancer on sale for $39 plus I had a 20 percent discount coupon so the whole deal was just over $31. Furthermore, in the AR article it states that several other adapters for this wheel balancer are sold separately. When I checked I was told that these adapters were no longer available. So when I balanced the two rotors, I did the job with the inner and outer wheel bearings installed in the rotor/hub.
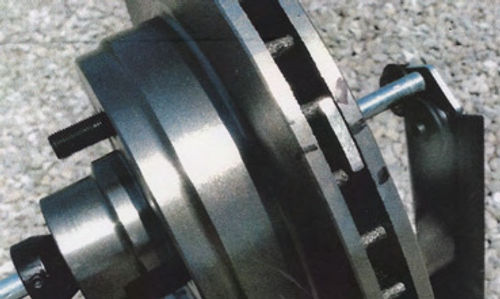
When I checked the first of the two brake rotors I found that I could not get “repeatable data” and I assumed that perhaps there was too much friction or too much misalignment in the test setup. (I had leveled the balancer, which was on my work bench and not on a gravel driveway as seen in the photographs, before attempting any balance work.)
But when I checked the balance of the second rotor, everything worked exactly as described by Mr. Armstrong. Obviously, the “problem” was that the first rotor that I checked was pretty close to being in balance and there were no issues with the test setup.
(The article said to “Spin the rotor several times and observe it. If it comes to a gradual stop, and its at-rest location ends up different each time, the rotor’s balance is good. If, on the other hand, it seems to continue rolling past where it should have run out of inertia, or even changes direction and begins rolling backward before it stops, you have a heavy spot.”)
I have a set of small brass gram weights so I started to find the correct balance by taping gram weights onto the rim of the rotor and ended up finding that 20 grams in the proper location on the outer edge of the rotor brought the rotor into good static balance.
Converting grams to ounces(grams x 0.03527 = oz) resulted in finding that I had added approximately 0.7 ounces to the edge of the rotor. Again, following Mr. Armstrong’s lead, Imade a balance weight out of 3/16” thick cold rolled flat stock that was about 2” in length and about 1” wide at the very top—and was in the shape that was described and shown in the article.
As making the balance weight progressed, I checked the rotor for balance by placing the partially finished weight on the rotor and then trimmed the weight as necessary to bring the rotorinto balance. The finished balance weight weighed 0.9 oz. I ground a “chisel edge” on a 3 1 ⁄2” long, 5/16” bolt which became the tool to open the weight’s legs to lock it onto the rotor.
Everything worked well—exactly as described in John Armstrong’s article.
Thanks again to both John Armstrong and Auto Restorer
Fred Cailey Stockport, Iowa


