How -to Replacing Universal Joints
You Won’t Need Exotic Tools to Remove & Install U-Joints. And Then You’ll Have a Smoother, Quieter Ride.
TO MAKE THINGS clear from the start, these instructions on replacing universal joints are for cars with open drivelines. For cars equipped with closed, torque tube drivelines, consult a shop manual to determine how to remove and replace their U-joints. And even on cars with open drivelines, there are variations on the cross-and-yoke design, and there also were the ball-and-trunnion types used as front joints on drive shafts in ’40 sera Chrysler products.
Things You’ll Need for This Project:
New U-joint kits
File or china marker
Large socket set
Heavy-duty vise
Snap ring pliers
Slot head screwdrivers
Rags
Molybdenum wheel bearing grease
Out With the Old
Put your car up on sturdy jack stands and make sure it is stable before sliding under it. (Never work on a car with only a jack supporting it; you invite disaster if you do.) Now move to the rear end, and using a file or china marker, mark the driveshaft in relation to the rear yoke of the universal joint so you can put the prop shaft back in oriented the same way as it came out.

Next, go up to the front and mark the front U-joint as well. It is possible to rotate the driveshaft end for end on some cars but you don’t want the driveshaft rotated 180 degrees from its original orientation when you reinstall it because the driveline is balanced just as it is.
Split the rear universal joint, leaving the rear yoke attached to the differential. Pull the prop shaft back away from the rear of the transmission. There is a splined, tubular slip joint on the front of the prop shaft to allow it to change lengths as required when the back axle bounces up and down. At this point, the next step depends on the types of U joints found on your car. For example, some types of joints can merely be unbolted and replaced.

On these types of U-joints, you simply bend away the little sheet metal locking tabs, and then unbolt the U-bolts or bearing caps. Tape the old U-joint together as you remove it so you won’t spill the tiny needle bearings out of it and end up skating on them in your shop for the next month. Put a little grease in each of the new U-joint’s bearing caps, then bolt them back in place and tighten them evenly. Use new locking devices, and bend the tabs up to secure the bolts. Install the prop shaft so it is aligned according to your reference marks and you’re done.
Addressing the More Common Type
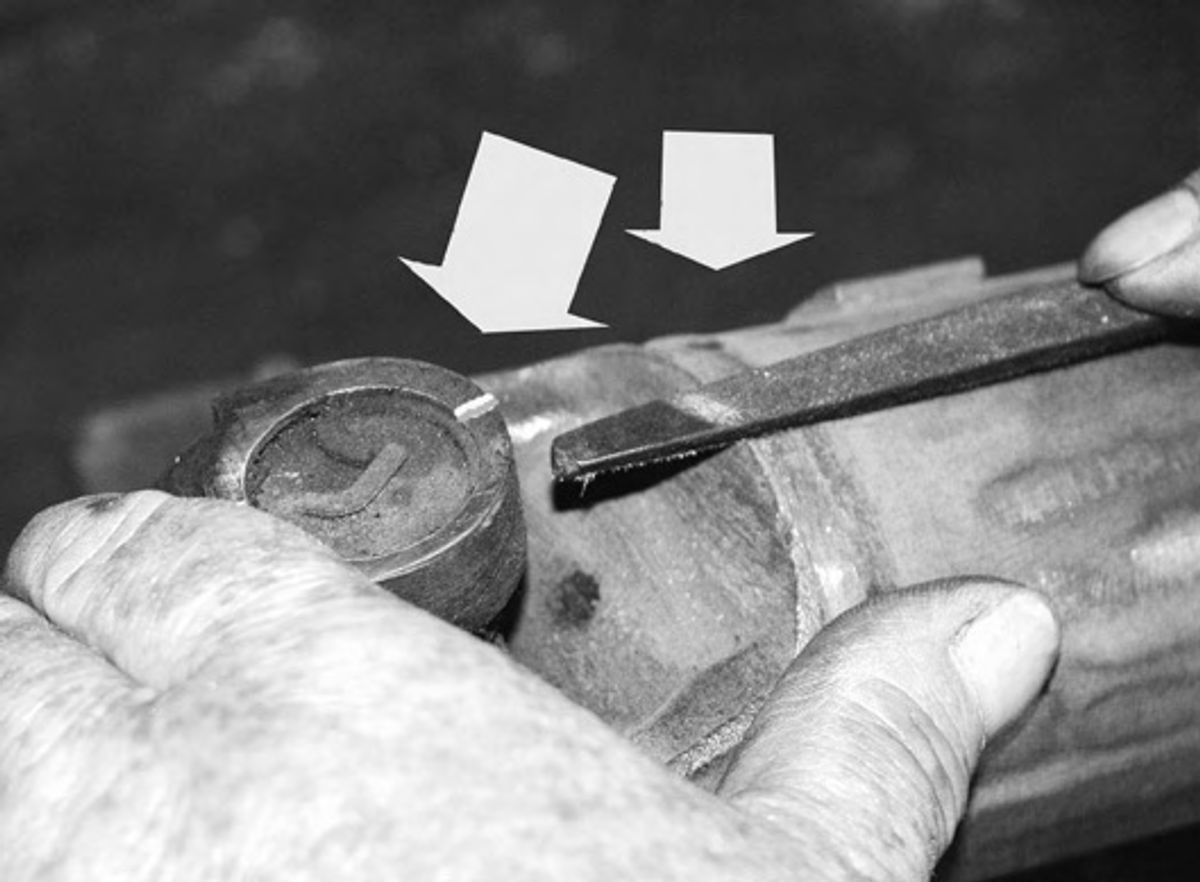
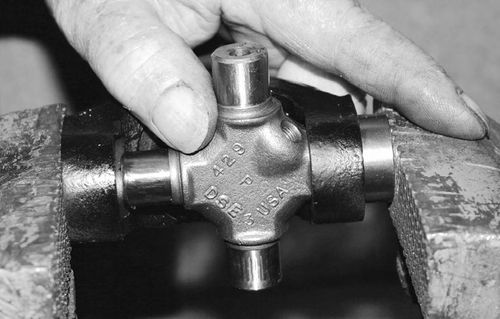
On the other hand, if your car uses the conventional, cross and yoke-type U-joint that is pressed in—and most postwar rear-drive cars do use this type—to extricate them from the driveshaft you will first need to remove the bearing cap lock rings using a pair of snap ring pliers. Your replacement U-joint kits will contain new locking rings; so don’t attempt to reuse the old ones.
Before you lift the cross out of the bearing caps, note which way the zerk grease fitting faces so you can put the new universal joint in the same way. If oriented in the wrong direction front-to rear, the zerk fitting could interfere with the U-joint’s range of motion.
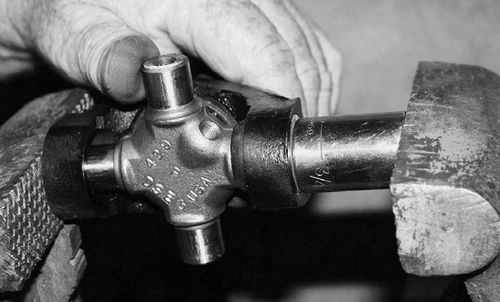
Next, press the bearing caps out of the yoke by placing one cross of the yoke horizontally across the open jaws of the vise, and then tapping on the vertical cross yoke with a soft brass hammer to drive the yoke down, thus forcing the bearing cap out of the yoke.

“If oriented in the wrong direction front-to-rear,the zerk fitting could interfere with the U-joint’s range of motion.”
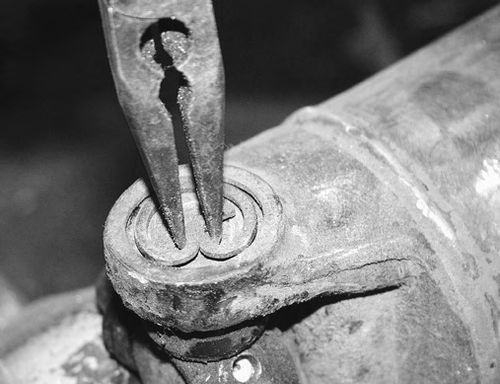
Once the bearing cap protrudes sufficiently, flip the driveshaft over and tap the yoke the other way until the bottom cap protrudes. Then grip each bearing cap in turn with the vise and slowly pull it out by moving the driveshaft yoke back and forth and pulling up on it.
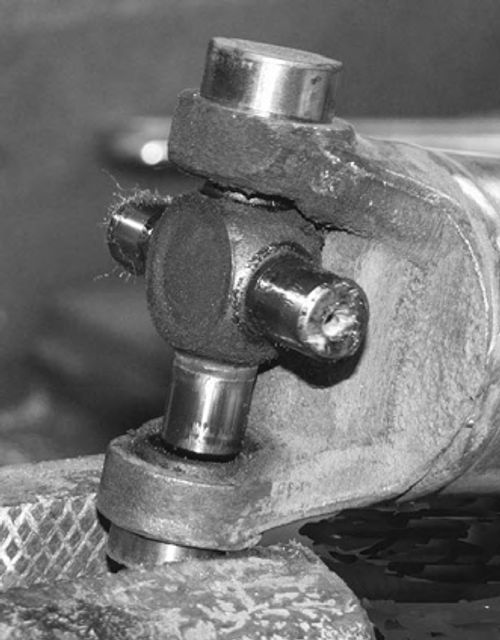
Once you have the driveshaft and slip joint yoke apart, place the ends of the steel cross on the vise jaws and tap the yoke to drive out its bearing caps. When they protrude sufficiently, grip them with the vise and pull them out. Be careful while you are working that you don’t disturb any balance weights attached to the prop shaft.
Time for Some Grease
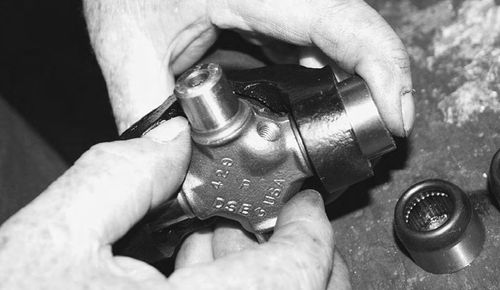
Inspect the yokes for burrs or ridges that might cause problems when pressing in the new bearing caps. It is a good idea to dress the edges of the holes in the yokes with a fine file. Smear a very light coat of grease inside the bearing cap holes in the yokes.
If your new U-joint has a zerk fitting installed on it to allow it to be lubricated (some replacement joints do not have a fitting), remove the fitting temporarily so pressure will not build up during installation. If the new U-joint is not freshly greased inside, smear a light coat of grease in each bearing cap, but don’t overdo it. If you put in too much grease, hydraulic lock may occur when you try to press in the new bearing caps.
Press in the bearing caps using your vise, being careful to not let the needle bearings slip around inside. Use a socket as a drift small enough to fit into the holes for the bearing caps but large enough to spread the load evenly in order to press the bearing caps in far enough to allow you to install the retaining clips.
They May Be Too Stiff
Chances are that once installed, your new universal joints will move a bit stiffly. To set them properly, take a hammer and drift and firmly tap once at each intersection of each cross. Test your U-joints one more time to make sure they are free and feel right. Finally, coat the splined slip joint inside, and then outside with wheel bearing grease before reinstalling the driveshaft.
And If There’s Drive Shaft Vibration…
Take your car out for a test drive. It should be smooth and silent with no vibration. If there is a minor imbalance in the prop shaft causing a slight vibration, a large worm-drive hose clamp can be installed around the prop shaft, and the screw mechanism repositioned until the vibration is minimized.


