
From our Classic Auto Restorer archives Rebuilding Door Hinges
When Doors Sag, New Pins and Bushings Can Make Them Right. But Sometimes Alignment Work Is Necessary, Too.
Editor’s note: As our long-time readers know, this publication was called ClassicAutoRestoreruntilweshortened the name in January 1999 to better reflect our broad-based areas of coverage. We have a number of excellent articles archived from our CAR days and from time to time we’ll reprint one such as this how-to by restoration pro and regular contributor Larry Lyles that originally ran in November 1998.
Another Thing that our long-time readers will spot is that when this article first ran we were printing in black-and-white (July 1997 through February 2008). But Larry replicated the original images,this time shooting in color, to better fit our current format.
HOW CAN A tiny little brass tube hold up a 75-pound automobile door? Unfortunately, it rarely does for very long. Thus the sagging doors, chipped paint and worn striker plates so often found on older cars.
Luckily, an easy and relatively inexpensive cure for sagging doors does exist. It’s called replacing the worn hinge pins and bushings.
But before you drive down to the nearest vintage parts dealer and order up a set of replacement pins and bushings, let’s make sure hinge pins and bushings are what you really need.
The tools required to perform the pins and bushings test are as follows: a flashlight to see into the dark crevices between the door and the cowl post, and Cousin Bubba, the weightlifter.
Open the car or truck door, as the case may be. The driver’s door gets the most wear and tear, so check it first.
Click on the flashlight and have Bubba gently lift the extreme outermost end of the door (the door handle end). Shine the flashlight beam on the upper door hinge and watch for movement in the hinge pin area where the pin slides through the two halves of the hinge.
The door side of the hinge should move independently of the cowl side if the pin and/or bushings are worn. This is much like dropping a 3/8-inch bolt into a 7/16-inch hole and wiggling it. The movement will be slight, but most definitely noticeable.

The test, however, isn’t foolproof. Consider this real-life case:
I once owned a ’62 Chevy truck.The driver’s door popped and snapped every time I Opened It,soIdidthewiggletest. The door showed some slack or movement up and down when I lifted it, but only when it was opened halfway. The hinge’s outward appearance seemed normal enough. From the test I decided the hinge pin and bushings couldn’t be all that much worn.
However, when I unbolted the hinge to remove the door from the truck, the doorside of the hinge simply fell off. The pin was completely sheared in half, even though I couldn’t tell that by looking or performing the wiggle test.
With that in mind, let’s get on with the hinge project.
Door Removal
Removing the door is a must when performing hinge pin and bushing replacement. A good floor jack, or Bubba, also is a must. After all, 75-pound doors tend to grow in size and weight when you’re trying to hold one up and loosen the bolts attaching it all at the same time.
Remove the door from the hinge, not the hinge from the cowl post. Most are installed using 1/2-inch or 9/16-inch headed bolts. A few of the older ones may have been installed using Phillips head bolts.Also,if you have any electrical items in the door, they too must be disconnected and removed from the door before you separate the door from the vehicle.
Did I mention marking the hinge position on the door and cowl post before loosening any hinge bolts? (See Photo 1.) Clean the door and cowl post first.
Then apply masking tape around the perimeter of the hinge to use as a marker. Masking tape is a little easier to see and realign to than scribe marks once the installation procedures begin.
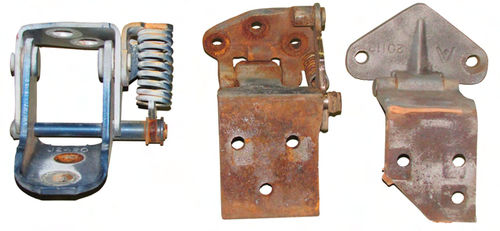
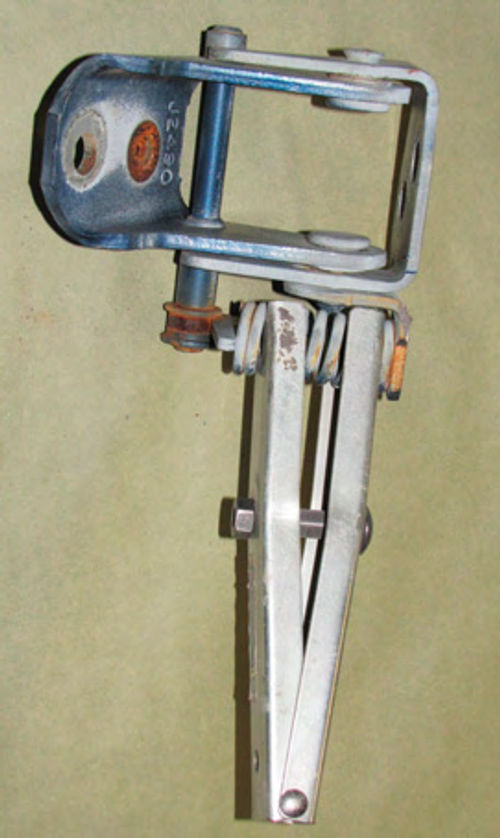
Take a look at Photo 2. The hinge on the left is a GM-type hinge commonly found on many of its vehicles beginning in the ’60s. This is a coil spring-type hinge and before the hinge can be disassembled, the spring must be removed. Shown in Photo 3 is a Steck model 21900 hinge spring removal tool. Its tang-like ends slide up on the hinge spring and a 1/2-inch open-end wrench is used to compress the spring to facilitate removal from the hinge.
Once you have the spring out of the hinge, loosen the bolt on the Steck spring tool to let the pressure off of the spring. Be certain to do this slowly and carefully. I’ve actually seen a spring jump out of one of these tools and go through some door glass. Try explaining that to a wife who already thinks you have spent too much money on the Chevelle.
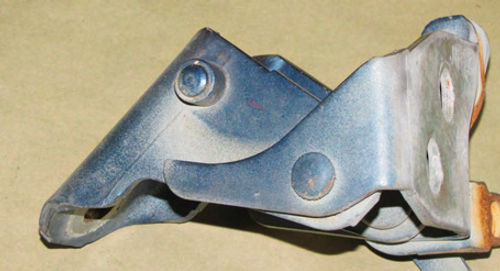
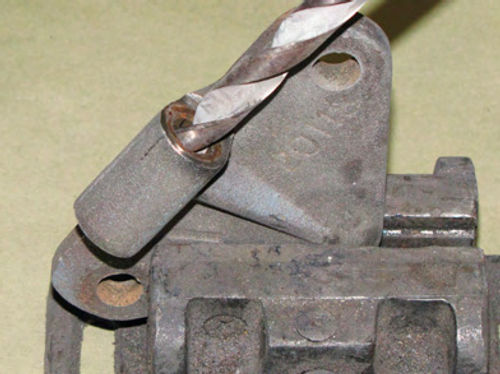
In Photo 4 notice that the end of the hinge pin on the GM hinge has been mushroomed on either side. These mushrooms can be quickly removed with a 3M #1990 cut-off wheel chucked into a 3/8- inch electric drill (Photo 5).
Once the mushrooms have been cut off, the pin can easily be driven out of the hinge with a 1/4-inch-diameter long shank punch. Note: Use a brass hammer to drive out the pin; it will protect both the pin and the person swinging the hammer. First, a brass hammer will help to keep the hinge pins from being mushroomed at the upper flange. And second, hinge pins are made of hardened steel and using a hardened steel hammer to drive them could cause the upper flange to chip and result in flying metal shards.
The hinge will now come apart, exposing the bushings. The same 1/4- inch diameter long shank punch can also be used to drive out the old bushings. The good news here is, GM has been using the same size car—and I stress car—hinge pin and bushing size forever…well, almost.
So, go to your nearest GM dealer’s parts department and ask for pins and bushings, 1 pin, two bushings per hinge. Ask for something like pins and bushings for the Celebrity (these are universal to most GM spring-type hinges).
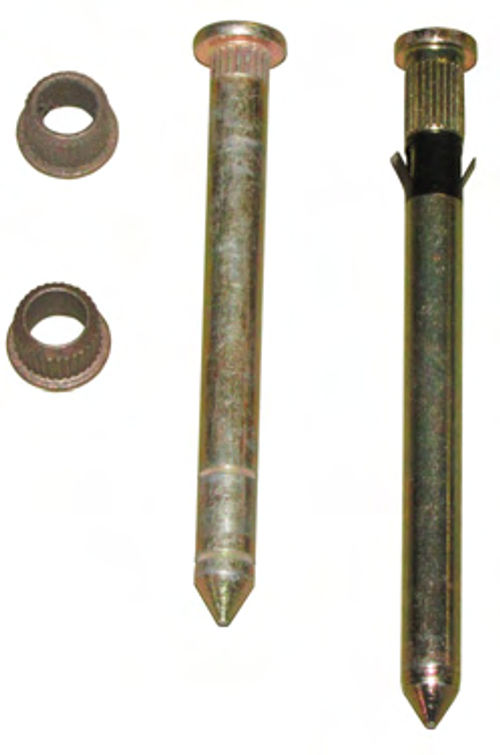
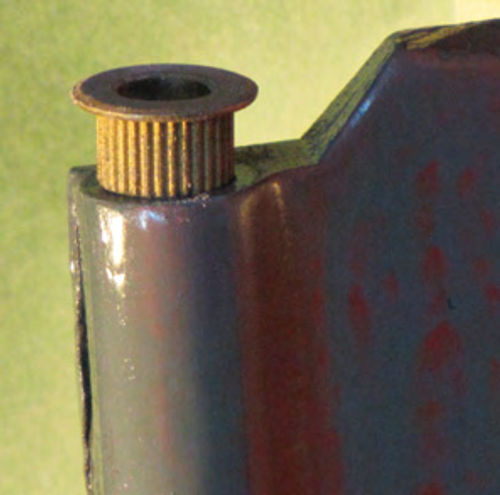
You will notice a difference between the new GM-style pins and the old ones you just removed from your hinges (Photo 6). The pin on the left is the old pin; the one on the right is the new pin. Notice the spring steel loop and the “ears” near the upper flange on the new pin. Once this pin is driven into place in the old hinge, the “ears” will spring out, preventing the new pin from backing out (Photo 7). No need to mushroom the end of the new pin. Also, note that the new and old bushings are identical in size and shape.
Install the new bushings making sure the bushing flanges, or wear surfaces, are on the outer side of the hinge half (this is the cowl side of the hinge). Slide this half into the opposite half (door side) and drive in the pin. Reinstall the spring using the Steck spring tool and you are ready to reinstall the hinge on the vehicle.
Uncommon Situations
Nothing to it, unless you are driving a ’68 XS Guzzler with Ram Air Induction and even the aftermarket guys shrug when you ask about hinge pins and bushings. I’ve considered just that problem.
The other two hinges in Photo 2 came off of different vehicles. One came off of a Chrysler body, not enough of which was left for me to make a diagnosis asto what year or which body style, and the other came off of a late-’60s Cougar.
I chose these at random to show you how easily you can replace both pins and bushings on almost any door hinge without losing three nights’ sleep and a bucketful of money chasing down exact replacement parts for whatever vehicle style or model you are restoring or repairing.
To start with, I disassembled both hinges. Surprisingly, once I drove the old and worn bushings out I found that the Chrysler hinge would accept GM-style bushings and pins.
All I had to do was drive in the new bushings with a brass hammer. The pin presented a small problem in that the length of the new GM-style pin was a good two inches longer than the old Chrysler pin. I solved that problem by measuring the length of the old pin and then cutting the new pin down to length with my die grinder. The newly shortened, “eared” pin drove into place without a hitch.
The other hinge, the one off of the Cougar, presented a different problem altogether. After removing the old bushings from the hinge, I found the bushing bore shaft to be too large to accept the GM-style bushings.
To solve this, I turned to some GM truck-style pins and bushings. I chose the ’90-and-up model hinge because of its similarity to the old-style GM hinge. Also I knew the GM-style truck hinge to be of substantial size, therefore requiring larger, meatier, bushings.
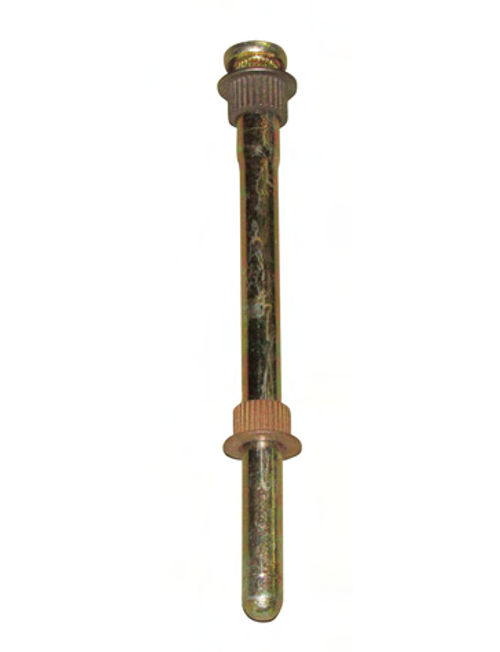
The GM-style truck hinge pin does have one important design characteristic you must pay close attention to when using it to rebuild an older hinge. The truck-style hinge pin is shouldered. Notice the shoulder on the upper portion in Photo 8? This makes the inside diameter of the bushings different as the upper bushing must fit the shoulder and the lower bushing must fit the shaft. The outer diameter of the bushings remains the same, however.
The solution to overhauling the Cougar hinge now became simple. I drilled out the old hinge, bushing side only, to 31/64-inch (Photo 9). This was the exact size required to drive in the new GM style truck hinge bushings (Photo 10). I made a mental note to install the bushing with the larger inside diameter hole in the top of the hinge half and the bushing with the smaller inside diameter hole in the underside of the hinge half. This is so when I drive in the pin it will go in like a nail, flanged side up, when the hinge is reinstalled on the vehicle.
The only question left is how to prevent the pin from backing out. I decided to split the end of the pin with my die grinder then spread the split end with a large chisel. This accomplishes the mushrooming effect without worrying about damaging the bushing. (See Photos 11 and 12.)
Reinstall your newly rebuilt hinge on the cowl side first, being careful to line the hinge up properly with the masking tape in order to place the hinge exactly where it was before you removed it. Reattach the door and there you have it. Nothing to it.
Or is it always that easy?
The Door Won’t Shut
Troubleshooting 101: Now that the new pins and bushings have been installed, the door sits too high at the rear. I can’t close it.
Without loosening anything (the hinge bolts) ask Bubba to open the door a few inches and put all of his weight on the end of it. Did this lower the door enough to allow it to shut properly? If yes, go wash your hands, you’re through. If not, pay attention.
If the door is too high at the rear and will not close properly: Check the gap between the fender and the door with the door closed as much as possible. The gap is probably wider at the bottom than it is at the top. Loosen the bolts on the lower hinge at the cowl. Be careful here—don’t loosen the bolts very much. Just a half-turn can loosen the hinge enough to allow Bubba to put a little weight on the end of the door and cause it to drop enough to close properly. When the door has dropped enough, tighten the bolts and check the fit.


On the other hand, what if the door is too low at the rear and will not close properly? Check the gap between the fender and the door with the door closed as much as possible. The gap is probably wider at the top of the door than at the bottom. Loosen the bolts on the upper hinge at the cowl. Don’t loosen the bolts much here, either. Now, place a floor jack under the rear edge of the door with the door as close to a closed position as possible. Always use a scrap 2x4 or some other suitable material under the door to support the jack. Never jack directly against the narrow flange along the bottom of the door—it will bend. With the 2x4 in place, carefully jack the door up until the lock appears to align with the striker on the door post. Open the door by rolling the jack away from the car (leave the jack under the door to maintain the level position of the door) and tighten the bolts.
If you have any other problems realigning the door, refer to my article on door alignment in the April ’95 issue of CAR. That should tell you anything else you need to know.
Alignment Tool
So, how about one last method of fine-tuning the alignment of the door?
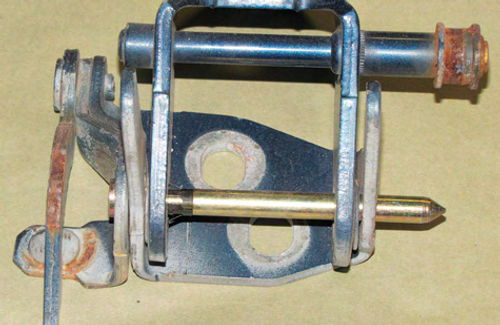
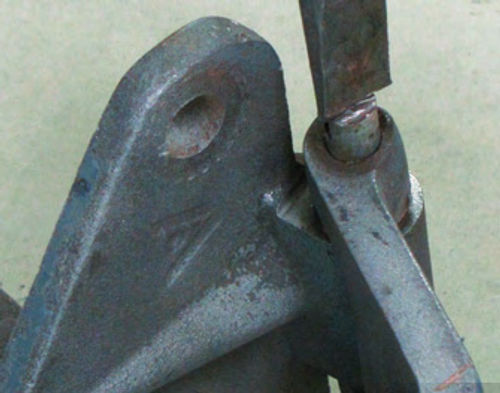
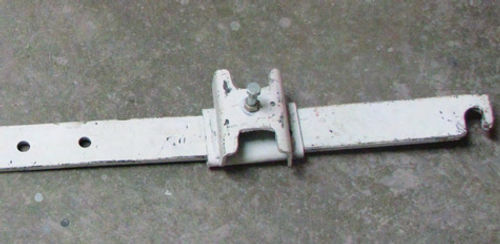
See Photo 13, this is a door alignment bar. The hook on the end is placed over the striker bolt, or striker plate, on the door post and the sliding section with the striker bolt attached is positioned and latched in the door latch, or over the rollers found on older vehicles. Then the bar can be lifted, or lowered, as the case may be, to precisely align the door to fit (Photo 14).
In our shop, we use this bar to realign sagging doors that have weld-on hinges and to repair doors that have been snatched out of peoples’ hands by the wind and tweaked out of shape.
Note: This type of tool is available through specialty body tools catalogs or you can make one yourself, like I did. In an upcoming article we’ll go into detail on this and other special tools I’ve made over the years. For The most part, they’re fashioned from items that were lying around the shop.
I’ve covered rebuilding just three hinges here, but they represent the basic design of most door hinges whether they’re on the suicide doors of a ’40 Ford Sedan or the gull wing doors on a Shelby GT. The basic thing you need to remember is bushing size and pin length. So, lay out your old hinges, decide on a course of action and go to it.


