
Pickup Cab Corner Repairs
Add Strength and Stability to Rust-Prone Areas of Your Truck. It Calls for Metal Removal, Panel Forming & Welding.
Editor’s note: This publication was called Classic Auto Restorer from its beginning in June 1989 until January 1999 when we shortened the name to better reflect the range of our coverage.
We have many excellent articles archived from our CAR days and from time to time we’ll reprint one such as this article that ran exactly 14 years ago in the June 1998 issue.
VIRTUALLY ALL TYPES of old trucks have a devoted group of followers. The object of that devotion may be a late ’60s Chevy or Ford that still goes to work every day or a truly unusual truck like a 1957 Dodge Sweptside For 1937 Hudson Terraplane Cab Pickup Express. Some people, like me, for instance, even appreciate old Japanese pickups.
One thing most of these older pickups are likely to have in common is rust, and one of the most troublesome locationsis the corners of the cab, frequently in the vicinity of the cab mounting brackets. Rusty cab corners needn’t be terminal, but they can become so if neglected long enough and can even be dangerous if the cab begins to sag on the mounts.
Most pickup cabs are basically similar in construction. Repair of front cab corners, demonstrated here on a 1977 Mazda Rotary Pickup, should be applicable to most any traditional, body-on-frame pickup, whatever its age or country of origin. For the most popular models, like ’60s and ’70s Fords,Chevys and Dodges, ready-made cab corner repair panels and cab mounts are available from JC Whitney and many other sources.
Be aware that this job is major surgery and requires some MIG welding skill, but it needn’t require a lot of other expensive tools or even much experience. It does require care, thought and basic safety procedures, such as safely blocking up the truck and proper eye, face and respiratory protection.
In addition, for such a repair job to last, proper rust prevention is a must. While you are going to cut away all the perforated metal, some metal you retain will have pits and surface rust. Plus, the interior of closed structures, such as door pillars, will need protection, whether there’s been a rust problem in those areas or not.
• After cleaning as well as possible, spray all hidden metal surfaces with a good chemical rust converter. I like Skyco Ospho (usually available at the local ACE hardware), a phosphoric acid dichromate rust converter that chemically changes rust to hard, black, inert iron phosphate. Ospho is water thin and really seeps into tiny pits and cracks.
Besides stopping rust, Ospho also works as an etcher/primer on bare, clean metal and improves paint adhesion.
I’ve used this stuff a lot and can’t say enough good things about it. It really works. However, be sure to follow the cautions on the bottle and protect your eyes and skin.
• Pay special attention to all welds. Even good welds can be the source of future rust.
Again, those hidden surfaces may be the culprit. Even if you use a corrosion resistant, weld-through coating on inner surfaces, the back side of the repair where the weld bead has melted through is likely to be bare. After all the welding and grinding is finished, I like to spray the back side of such inner surfaces with Ospho. If necessary, drill 1/2-inch access holes that can be closed with plastic plugs after the next step.


After the Ospho has cured overnight, spray all the inner surfaces with a good petroleum-based rust-proofing goo, such as Fennigan’s Waxoyl or Eastwood’s Heavy-Duty Anti-Rust ($20 per quart). The Ospho is thin enough to apply with a plastic spray bottle while the thicker, petroleum-based Waxoyl can be purchased in a refillable pump applicator and the Eastwood product requires an air compressor for spraying.
• Pay special attention to flange laps that could trap moisture where panels are joined with spot welds.
Pre-coat the hidden laps with a weld through, corrosion-resistant coating (such as Eastwood’s Cold Galvanizing Compound), and after assembly spray Ospho in the cracks.
After everything has cured at least overnight, to avoid trapping moisture close the lap joints with a waterproof seam sealer before finish priming and painting.
• On exterior surfaces, make sure subsequent grinding and sanding doesn’t remove your primer or rust-conversion coating.
• One extra word of caution. Make sure your repairs don’t block factory drain holes. The goal is to recreate the factory structures as much as possible and not give rust a toehold in the process.


Assess the Situation
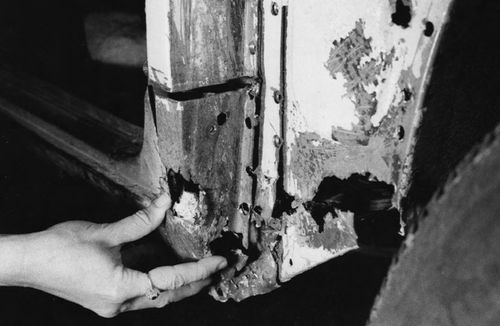
With the above thoughts in mind, let’s get started. The first step is to determine the extent of the damage. Photo 1 shows rust in the bottom of the cab side wall and the door pillar behind the right front tire after removal of the fender and door.
Probe with a sharp screwdriver or similar tool to find all the holes and weak spots. Be aggressive at this point; this is cancer removal. You don’t want to find another iron oxide tumor when you are halfway through the repair job. Pull back the carpet and remove the kick panel inside the cab to assess interior damage. Use scrapers, wire brushes and grinder or drill-mounted abrasive tools to clean up the rusted areas so you can see what’s really there.
Fortunately, on this truck most of the damage on the passenger’s side was external rather than inside on the floor in the critical area over the cab mount.
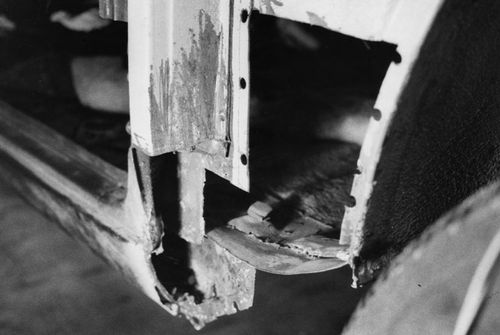
The next step is to remove all the rusty metal, remembering that the shape of your cut determines the shape of the repair panel you’ll have to fabricate (Photo 2). First, drill out the spot welds in the affected areas. Special spot-weld cutters are available for this, but a center punch and self-centering drill bit work pretty well, too. Drill only enough to separate the weld, leaving the backing plate intact for re-welding. Next cut away the bad metal, an inch or two away from rust holes if possible. I used cut-off wheels mounted in an electric drill. These are sacrificial fiber wheels that produce a dust you don’t want to breathe, so use an appropriate respirator (I use a canister mask) in addition to face and eye protection.
In Photo 3, all the rust has been cut away from the cab side wall, the bottom of the door pillar and the end of the rocker panel.
Repair Panels
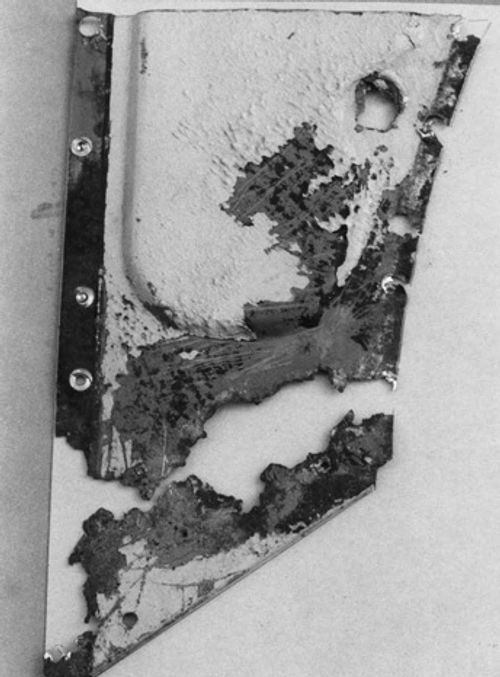
Where possible, save the pieces you cut away to use as templates for repair panels (Photo 4). If rusty panels are likely to come away in more than one piece, as shown here with the bottom of the cab side wall, take careful measurements before cutting so you can size the repair panel properly. Pencil sketches with measurements are a good idea if the repair is complex.

The cab side wall repair panel gets a trial fitting in Photo 5.
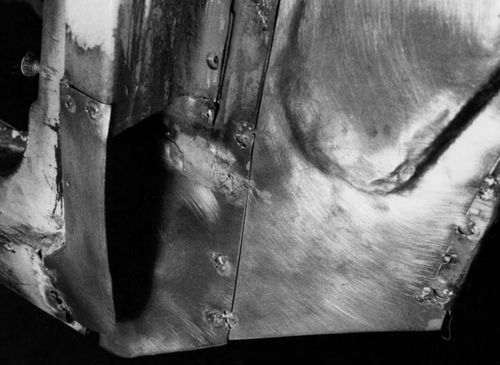
The repair panel is then shaped to follow the pressed -in contours of the original panel and welded i n place at the holes left from the original spot welds (Photo 6).
A good rule for ensuring structural integrity of the repair is to spot weld where spot welds were used and spot weld and seam weld if you had to cut where no previous joint existed. If readymade repair panels aren’t available for your particular truck, as they weren’t for mine, there are alternatives. Expensive metal brakes and forming machines, if you can afford them, would allow you to duplicate factory shapes. Good panel - beating tools would allow a skilled craftsman to do the same by hand. Or, you can do what I did; use an ordinary hammer, a vise, a wide chisel and a sandy spot just outside the shop door to pound out a panel that comes pretty close.
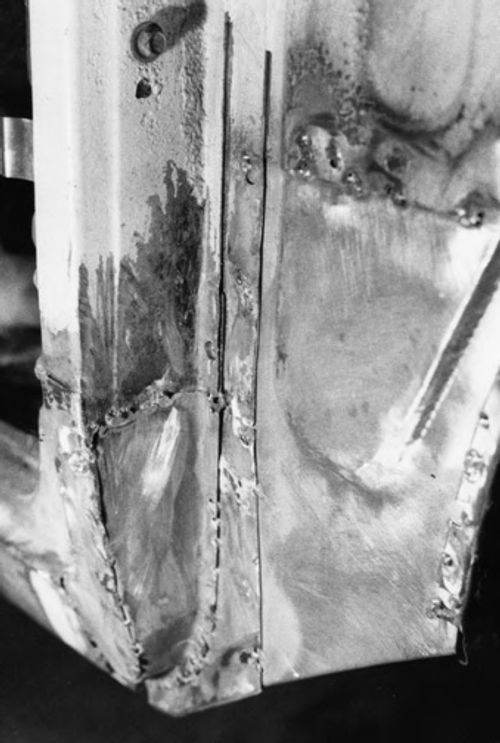
A second repair panel, this time to replace the rusted bottom of the door pillar backing plate, is welded in place (Photo 7). Sequence is important. You want to work from the inside out, producing repairs that maintain factory -orig - inal reference points as you go. The goal is to duplicate the construction of what you cut away as nearly as possible.
The last passenger side repair, which formed the bottom of the door pillar and the end of the rocker panel, was a challenge (Photo 8). It’s a complex, flanged shape, beyond the scope of my shade - tree panel -beater skills; so I formed it in two pieces, with the side piece shown tack -welded in place here.
The final piece is tacked in place (Photo 9). With this piece, the basic repair is complete.
All that remains is to seam -weld the cuts, spot weld the remaining drilled -out factory welds and then grind everything down so it’s nice and smooth. I did the best I could, sprayed everything with Ospho and then finished off with a waterproof aluminum -fiberglass body filler to make up for my lack of metalworking skill.
Another Rust Problem
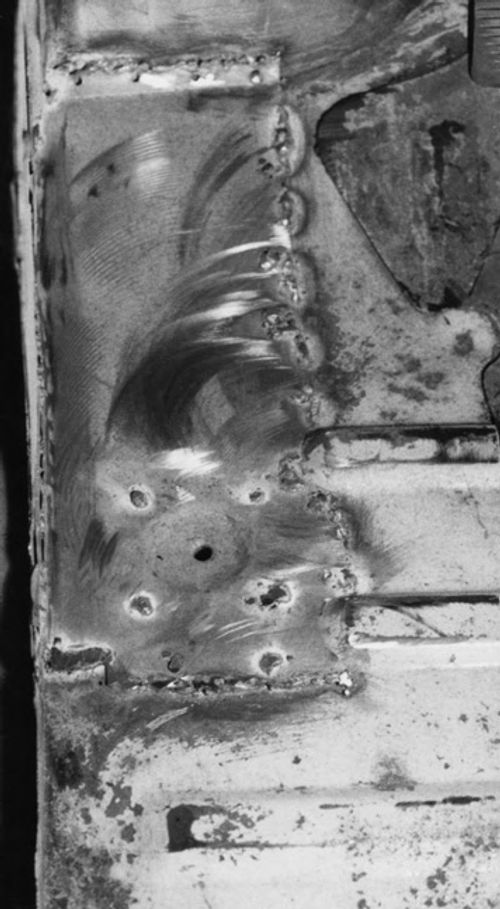
Moving over to the driver’s side, rust had seriously weakened the floor over the critical cab mount point (Photo 10). Here, we see into the footwell after the rot has been cut back to good metal in the floor and the cab side wall. The square metal bracket with the bolt hole in the center is the cab mount, to which the floor of the truck is bolted and spot - welded. Support the cab underneath with a hydraulic jack and jack stands before this kind of surgery. Be sure to position the jacks under reinforced areas and use long blocks of wood to spread the weight.


I used cardboard to form a template for this repair, cut out the repair panel and then seam -welded it all around for strength (Photo 11).
I spot -welded the new floor piece at the four corners of the bracket, as was originally done, and hammer dimpled the area around the bolt hole to receive a reinforcing washer. These welds still need to be ground smooth. If the floor has rusted so much that the cab has begun to sag, you’ll need to jack the cab back into factory original position before commencing repairs.
In Photo 12 we see the same area from the outside with the floor repair already welded in position and all the exterior rust cut away.
Some underside repair was necessary on this side because the end of the inner sill was rusted beyond redemption. I had to fabricate the sill end —a complex, folded piece that forms a joint with the cab mounting bracket (Photo 13). Again, the trick is to work from inner layers to outer layers as you weld in repair panels. Here, the new triangular piece has been welded in place.
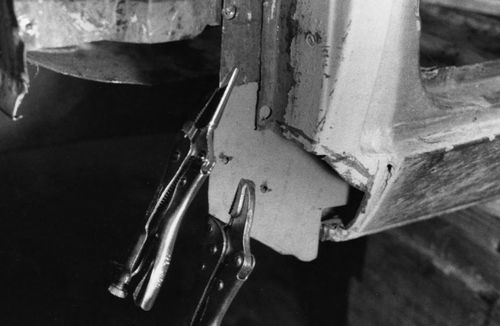
The bottom of the door pillar backing plate needed replacement, as it did on the passenger side. The panel is held in place with Vise -Grips for tack welding (Photo 14).
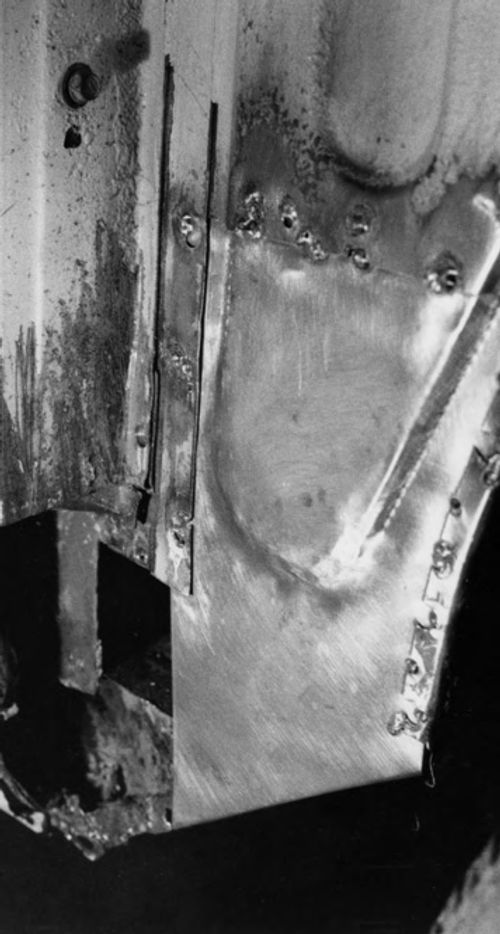
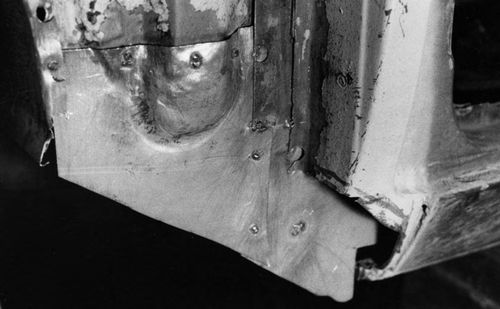
Next, the repair panel replacing the rusty bottom of the cab side wall is spot -weldedpillaris (Photo 15).
Finally, the repair that forms the end of the rocker panel and the bottom of the door pillar is welded in place in two pieces (Photo 16).
The cuts still need to be seam welded, the remaining spot -welds finished, and the cab floor must be welded to the new cab sidewall from the inside.
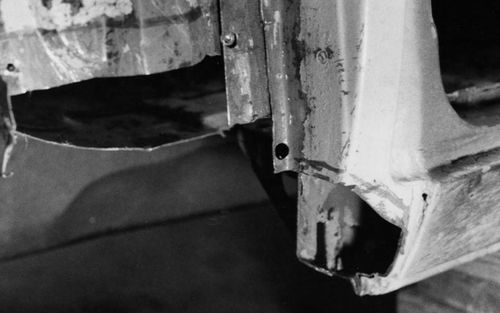
A look underneath on the driver’s side (Photo 17) shows all the repair panels — the folded end of the inner sill, behind it the bottom of the door pillar backing plate, and behind that the bottom edge of the cab side panel, which should be folded back on itself for a smooth, strong edge. Overhead is the cab floor repair panel that commenced the repair. The cab support bracket itself, which didn’t need repair in this case, is visible to the left.


