
Cutting & Installing Interior Trim
IN THE RESTORATION world, doing interior trim work yourself usually means browsing a few catalogs for replacement door panels, headliners, seat covers and carpeting—then doing the installation yourself.
However, in the “it ain’t strictly stock” world of automotive construction it isn’t likely you will be able to earmark any catalog pages where all you need to decide upon is the color of the trim. I’m not aware of any company making headliners tailored to fit chopped tops or carpet kits designed to work with shopengineered drive shaft tunnels.
This is where do-it-yourself takes on a whole new meaning…and having someone else do it can suddenly seem like the best thing to do.
Auditioning a Pro Shop
OK, let’s consider turning this project over to a professional and have him do the interior. The first step is to find a qualified trim shop. That starts with a visit to the shop of choice and having a short chat with the owner. Remember, his time costs money, so ask your questions then be quiet and listen to what he has to say.
What are you going to ask? Ask for customer references and then get in the car and go look at the work he’s done for them.

If the price of gasoline prohibits a trip down the road, ask to tour the shop to see what is being worked on at that moment. Most shops are happy to show off their work. Just don’t be surprised if they are reluctant to have you walking around the shop alone. As in any working shop, insurance is very costly and safety is paramount. When you do get to see their work, look for details such as straight seam lines and trim panels that fit. Like everything else, quality shows through and you’ll know almost immediately if the shop is worth consideration.
While you are looking at their work take a moment to look over the shop. Is it clean? Do the project cars appear to be well cared for? That’s two more telltale signs that the shop cares about its customers.
Then ask about scheduling. Most good trim shops are busy, very busy. They may only install one or two full interiors at a time and each one may take months to complete. Be ready to get in line. For example, I once signed up for a convertible top replacement in June, delivered the car to the trim shop in August, and picked up the car in November. That’s five months to do what I thought would be a simple job. How was I to know?
Then there is the big question: How much? OK, it varies. If you want leather expect to pay more, much more. If you want vinyl that looks like leather you’ll pay a little less. Is leather better? Yes and no. Leather is considered to be the top of the heap in custom interiors. You just can’t beat the look and feel of genuine leather. On the flip side leather seats look great for a while, then they begin to show wear in the form of wrinkles and shiny spots. Leather will also stain. Vinyl won’t. Consider that if you have grandkids just waiting to take a spin in the new ride.
Trying a Different Approach
Didn’t know the trim guys charged that much? Now you do. So what’s left? What if I told you there is a way for you to install the interior in your ride without spending a fortune on sewing equipment? I thought you might be interested. Let’s give it a try.
The first thing you need is a plan. Custom interiors don’t just happen; they are planned down to the last detail then constructed according to that plan. The second thing you need is the group of materials for constructing the interior.
What’s the plan for this car and how did I arrive at such a layout? The plan calls for a vinyl interior using three different material colors. The two base colors, a light gray and a darker gray, were derived from the colors in the seats. Recall that I lucked into finding seats for the ’46 on one of my excursions to the automotive reclamation center. Those seats are two-tone gray.
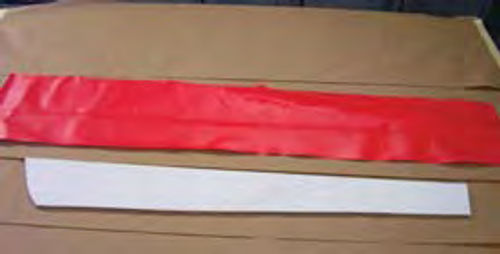
The third color is red. This will be used as an accent piece and will coordinate with the red band on the dash to bring the red exterior graphics color into the car. This keeps the flow of the car going, and as my artistic mother would have put it, “completes the touch.”
The materials list also consists of vinyl trim, foam padding, a suitable backing material, and something for making templates. I’ll go into more detail about these materials as I move deeper into the process. Right now I need to complete my plan. It’s hard to order materials if you don’t know how much you need.
Look through the window of any street rod and the first piece of interior trim you will see is the opposite door trim panel. Since this is the first part of the interior seen, this is also the best place to start the interior trim scheme layout.
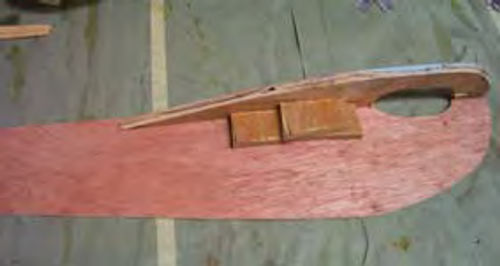
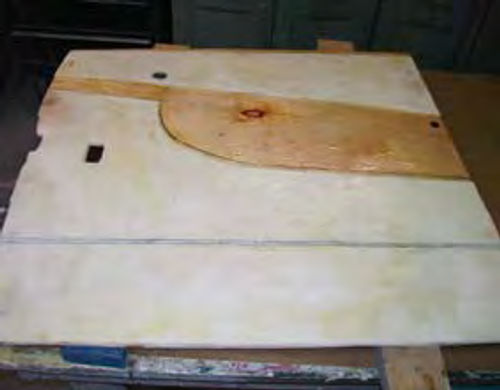
In Photo 1 I’m using heavy cardboard to make my templates and they will serve as the drawing boards for laying out the interior design. How heavy is the cardboard? In print shop terms it is 25 points. In body shop terms it is .025-in. thick.
I’ve taken the time to carefully trim and fit the pieces to the door and quarter panel as each one will be used as the pattern for the real trim panels once I’ve finished laying out the scheme. You’ll notice from all of the drawing that I had several fits and starts before I arrived at a final layout.

To explain what I’ve come up with here, the portion of the templates covered with masking tape denotes the placement of the red stripe. This stripe actually begins on the dash panel and will flow across the door and end on the quarter panel trim piece. Notice that the stripe gets progressively wider as it moves toward the rear of the passenger compartment. Parallel lines are very difficult to construct and can detract from the looks of the car if not done right. Allowing the red band to widen as it moves rearward eliminates that problem.
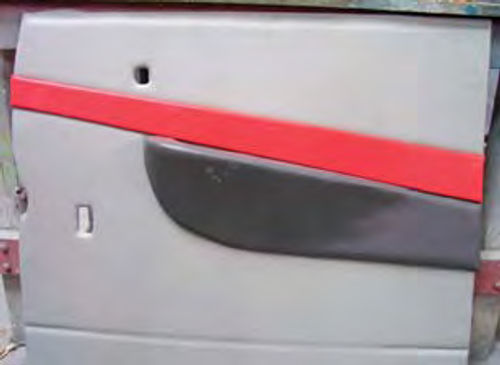
Just below the red stripe on the door panel I’ve penciled in the position of the armrest. Since the bulk of this trim panel will be covered with the light gray material I’ll cover the armrest with the darker gray. Just as I did with the red stripe, I’ll let the darker gray material continue on and move across the quarter panel trim piece.
Referring back to the armrest, the location of this piece on the door isn’t a random placement. Measure any vehicle door out there and you will find the armrest is normally located eight to nine inches below the door glass belt molding and starts roughly at the halfway point across the door where it extends back towards the rear edge of the door. This armrest will be placed about eight inches below the belt molding, but I’m going to move it closer to the front of the door so I can add a handhold. This forward positioning of the armrest plus the addition of the handhold will provide a good place to grab the door and pull it shut.
Putting It All Together
All of the interior panels made for this car will be constructed using the techniques described below. The only variables will be the size and mounting locations of each of the panels.
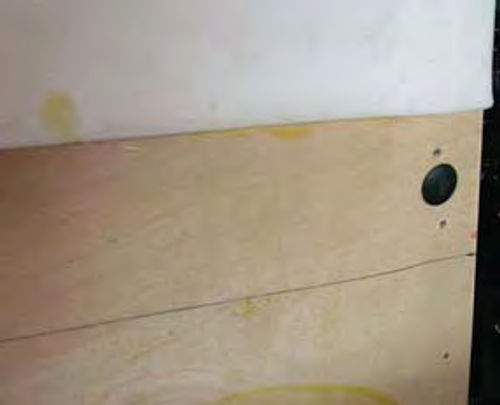
Working first with the door trim panel I start by cutting the base panel from a sheet of Lauan. This is a type of thin plywood, about 3/16-inch thick, which is available at most home improvement centers. The base panel is cut according to my template and then attached to the door using a couple of sheet metal screws (Photo 2).
The screws allow me to correctly position the base panel on the door no matter how many times I remove it to refine the fit.
How do I refine the fit? I use a belt sander or hand sanding blocks to remove any part of the trim panel that doesn’t fit right. What’s a good fit? In this case a good fit means locating the trim panel a quarter of an inch inboard of the door frame all around the door.
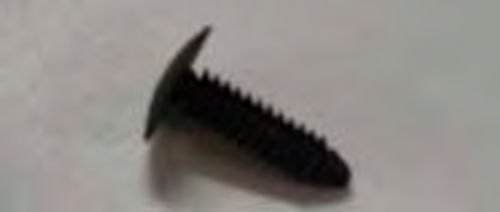
Once the fit is correct, I add plastic push-in retainers around the perimeter of the trim panel as a means of final attachment (Photo 3). These are the same style retainers GM has used to attach door trim panels on their vehicles for more than 20 years. These retainers are Crest Industries #15866 and measure 5/16-inch in diameter by 11 ⁄16-inches long (Photo 4).
To install the retainers I drill 1/4-inch diameter holes through both the base panel and the door frame. The door frame is wide enough to allow me to move inboard about an inch, drill the holes and push the retainers through the holes. The holes are spaced about six inches apart around the perimeter of the door.
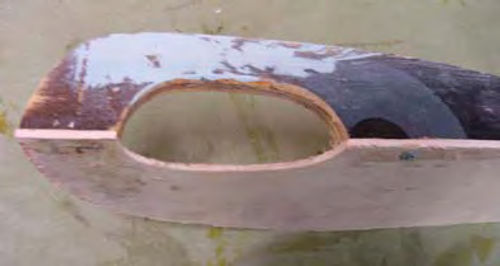
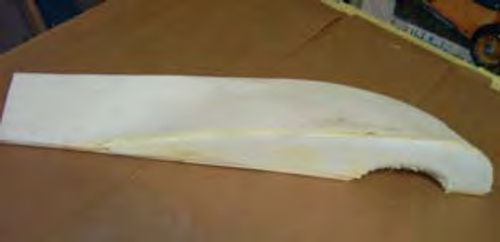
The next step is to construct the armrest (Photo 5). The base is cut from the sheet of Lauan and the top is cut from 1/2-inch thick plywood. The top is glued and screwed to the base plate. How did I determine the size and shape of the base plate? Go back and look at the template on the door in Photo 1. The base of the armrest is drawn out and marked “armrest.” The size and shape are a result of my trial and error designing.
The handhold in the armrest is an oval slot cut both into the base plate and the top. The edges of the slot are rounded off to improve comfort when gripping the armrest. What’s a good length for the handhold? Anything large enough to accommodate all four fingers comfortably. In my case that’s about three inches.
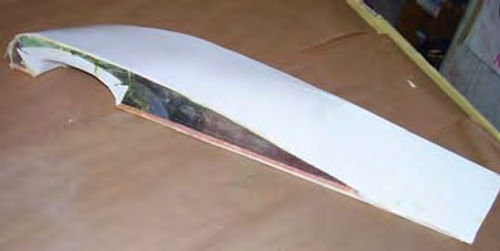
After the glue dries overnight, I finish the armrest by covering it with cardboard. This is the same material I used to make the templates and it will span the gap between the outer edge of the top piece and the bottom of the base. The cardboard is cut two inches larger overall than the base plate then glued and stapled in place (Photo 6). I’ll give the armrest at least three layers of cardboard for extra strength.
Here are some details that aren’t so immediately obvious.
When attaching the top plate to the base plate I positioned the top plate 1/4- inch below the top edge. This allows for the 1/4-inch-thick foam padding I’ll be adding to the top. I also stacked and glued two pieces of scrap half-inch plywood under the top (Photo 7). This will add support to the top as well as provide a very secure place to screw the armrest to the trim panel.
It’s Time for the Foam Padding
The best foam padding to use when constructing automotive trim panels is 1/8- and 1/4-inch-thick closed cell foam. Both thicknesses come in 54-inch-wide rolls up to 30 yards long. Knowing how much to buy depends upon the size of the car being trimmed out and how complicated your design will be. For example, I’ll use 1/4-inch-thick foam on the door, quarter panel trim panels, and roof so I’ll need about six yards. I’ll use 1/8- inch-thick foam padding to make the accent pieces such as the red bands on the side panels and the centerpiece for the roof panel so I won’t need quite as much of this material. I’ll order three yards. Knowing how much foam padding to order also tells me how much vinyl to order, six yards of the light gray, three yards of the dark gray, and one yard of red for the accent pieces I’ll be adding to the door and quarter trim panels.
If there is anything to know about gluing closed cell foam padding to the base panels and vinyl covering it is that the surface of the foam must be sanded to break the film on the surface. If this film isn’t broken, it can easily separate from the padding beneath and ruin all of your hard work. I use 80-grit sandpaper to roughen up the foam surface and break the film.
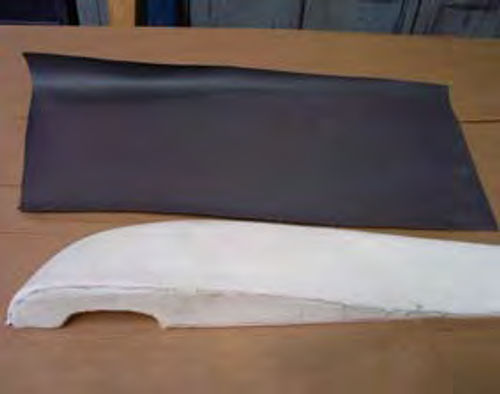
Working on the armrest first I begin by spraying both the foam piece and the armrest with 3M #8090 Super Trim Adhesive Yellow. The important thing here is to allow the adhesive to dry to the touch before covering the armrest. Once the adhesive dries, the armrest is then covered in foam (Photo 8). A tip: Wrinkles in the foam can be removed by gently pulling on the wrinkle to smooth it. Any wrinkles that won’t pull out can be sanded smooth.
Next I cut a piece of the dark gray vinyl that is slightly larger than the armrest, (Photo 9), then add adhesive to both the armrest and the back of the vinyl.
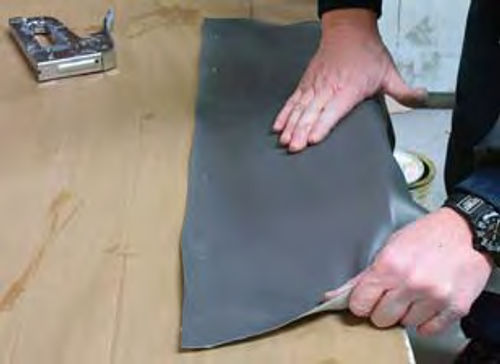
Here’s a trick you can only pick up by watching the pros ply their craft. The edge of the vinyl is stapled and cemented to the work bench. It’s like gaining an extra hand when it comes to stretching the vinyl tightly over the armrest (Photo 10). It takes a lot of stretching and pulling to get wrinkle-free results. By the way, vinyl has a grain that allows it to stretch more in one direction than in the other. Use that stretching action lengthwise on the armrest to get a glove-tight fit (Photo 11).
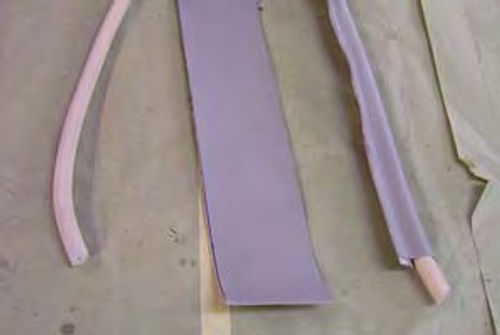
Next comes the red insert. I start by cutting a length of Lauan plywood to match the red insert I drew on the door template pattern. I cover the plywood with foam then cover the foam with a strip of red vinyl (Photo 12).
Finally, I cover the door panel with foam then cover that with the light gray vinyl. Notice in Photo 13 that I trimmed away the foam padding in the areas where the red stripe and armrest will be located. Also note that I cut the openings for the inside door handle and the power window switch before covering the panel with vinyl.
How do I secure the armrest and red striped panel to the door trim panel? I give both pieces a generous application of adhesive then screw and staple both pieces to the trim panel. The trick to stapling is in selecting staples of the correct length. In this case, 1/2-inch-long staples work best. One-inch-long wood screws are used only in the area of the armrest where I added the scrap plywood for support. Finally, both ends of the red stripe and the single end of the armrest are wrapped around the edges of the trim panel and secured with staples (Photo 14).
The kick panels and the quarter panel trim panels are constructed using the same techniques used to make the door trim panel, with a template and a little Lauan plywood. The problem is that I can’t install either of these panels until I’ve installed the wind lace that wraps around the door openings.
Wind Lace
In the old days, most cars used wind lace around the door openings to stop the wind, thus the name. It not only slowed the wind it also improved on the looks of the interior. The overall fit of the car was poor and a little fabric overlap acted to hide a lot of sins.
To make the wind lace, I start by cutting a 21 ⁄2-inch-wide strip from the roll of light gray vinyl. I’ll need 10 feet per side and since it’s considered poor form to cut and sew pieces of vinyl together to make a wind lace I’ll cut my strips from along the outer edge of the roll.
The core of the wind lace is a half-inch thick, round rubber material purchased from my local trim shop.
All I have to do to make the end product is apply glue to the underside of the vinyl, let it dry, then wrap the vinyl around the rubber core (Photo 15).
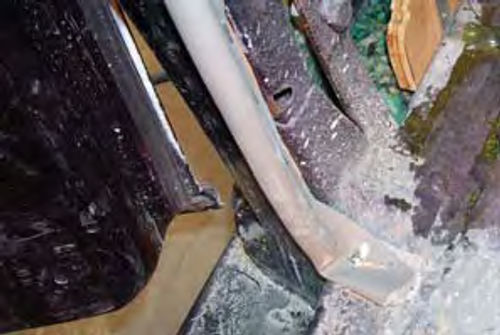
Since this car originally came with wind lace around the door openings, most of the retainer clips were already in place. In areas where the retainer clips were missing, I secured the wind lace to the opening using one-inch staples. I also screwed the ends of the wind lace to the floor pan using #8 flat head sheet metal screws just to be sure it remained secure (Photo 16).
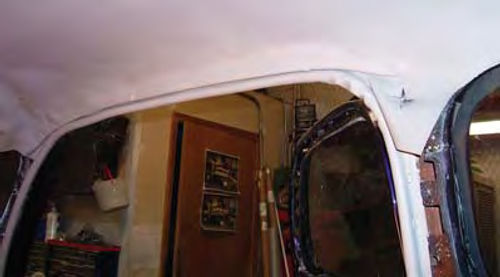
At the top of the door opening I still needed a way to neatly fold under the headliner. I opted to visit my local automotive reclamation center and scavenge the headliner retainer strips from two Ford Pintos. These retainers will allow me to bring the headliner down and over the retainers where I can tuck them under for a very nice look (Photo 17).
Next time, the headliner goes in as I work to complete the interior. Got a question? Send it along.
Resources
LPL Body Works, LLC
5815 Contented Lane
Amarillo, TX 79109
Paint and body repair DVDs
Crest Industries
231 Larken Williams Industrial Court
Fenton, MO 63026


