
Building a 1935 Indy Car
Restoration Students at McPherson College Worked to Help Recreate the Car that Won at Indianapolis Eight Decades Ago. Let’s Visit Their Shop and Watch Them on the Job.
OVER 80 YEARS ago, “Automobile Racing” author Ray F. Kuhns advised aspiring race car builders to shape body panels “in the usual fashion” in a power hammer. Kuhns would not likely have imagined that in 2015 college students would still be following his advice, but that is exactly what we do every day in the metals lab at McPherson College in McPherson, Kansas.
While modern technology certainly has its place in automotive restoration, learning traditional techniques, such as the use of the power hammer, is an indispensible part of our students’ training. Thus, when James Long of Grass Valley, California, asked if we could recreate the body of an old Indy car from scratch, our students eagerly seized upon the opportunity.
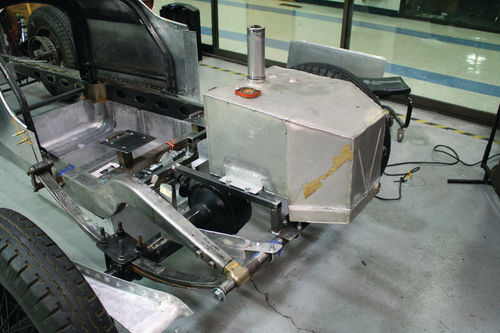
By the time he called us, Long had made significant progress in his effort to recreate Kelly Petillo’s 1935 Indianapolis-winning car. Long had assembled a rolling chassis using the correct Rudge wire wheels and a period-correct set of frame rails. Long selected Petillo’s car because 1935 was the first of many Indy-winning cars powered by the Offenhauser 255 cid engine, a power plant developed by Harry Miller a few years earlier. Long reasoned that if he couldn’t obtain the appropriate 255 cid Offy engine, he already had a 110 cid Offy that could be substituted and remain within the Miller/ Offenhauser lineage. Long’s goal for the completed car was to travel to different events and allow young passengers to experience the exhilaration of riding in an Offy-powered open wheel car. Understandably, assisting this man on this most noble of quests became a moral imperative for me and my students.
Doing Some Homework and Building a Buck
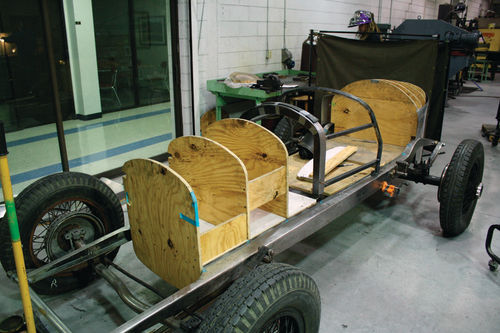
Using an assortment of screen shots taken from newsreels of the 1935 race, as well as Miller body drawings reproduced in Mark Dees’ “Miller Dynasty,” we created drawings for our car that we felt would keep it faithful in appearance to Petillo’s car, while accommodating the chassis, radiator, and gas tank that Long provided. Because our body drawings were on graph paper at 1 ⁄8 scale, enlarging and transferring shapes to plywood for a body buck was simple.
We used spray adhesive to attach 1" gridded gift wrap paper to plywood sheets pretty side down which left the gridded side of the paper up.
After transferring our drawings to the plywood at their true size, we cut out the stations and assembled a buck to use as a guide in shaping the body panels. Generally, a buck is not used as a form to bend metal, but rather it is a three-dimensional placeholder indicating where the finished sheet metal surfaces should lie in space. Once the metal is shaped, the buck is removed.
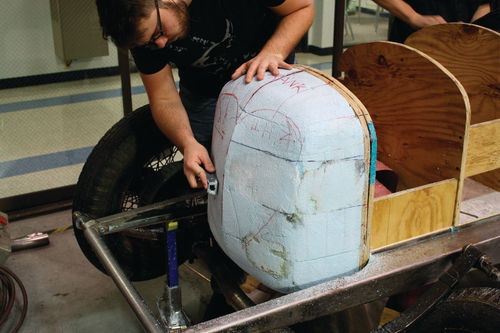
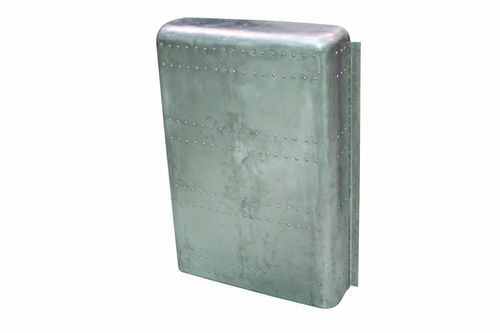
The Grille Shell Presented Challenges
We carved the buck for the grille shell out of Styrofoam. With a lot of shape change in a small area, the shell would have been difficult to represent accurately with plywood. Furthermore, the solid three-dimensional foam model allowed us to visualize our design on the car more completely. The finished shell had to clear the front axle, house a radiator designed for a flathead Ford, and resemble Petillo’s very distinctive original.
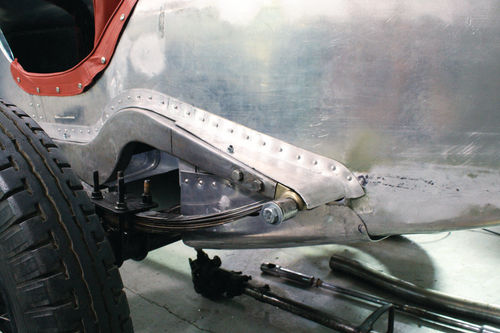
Building In Some Added Strength
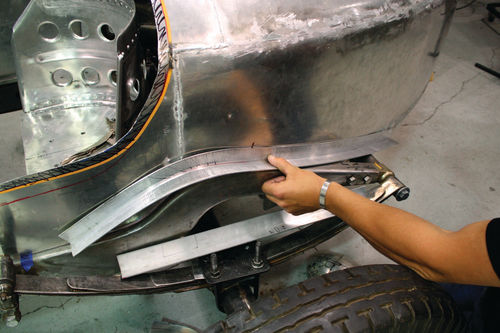
The steel support structure beneath the cowl on cars of this era appears to have been almost standardized in design and is well-documented in period photographs. Interestingly, many of the body drawings specify 5 ⁄8" steel square tubing for the cowl structure, but we, and apparently many of the builders of the time, used 1" tubing for enhanced rigidity. We built a simple jig to facilitate the bending of the tubing while it was hot.
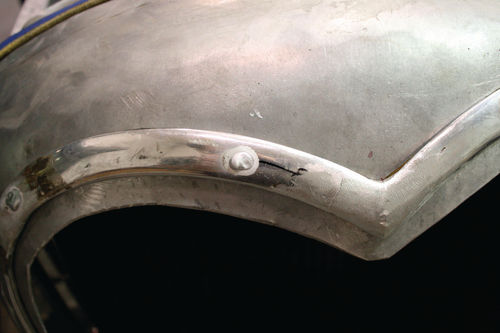
We used 14ga aluminum for the exterior body panels, as specified in an original Miller drawing we found, and used 12ga aluminum for the belly pan. Nervous that a modern driver could easily weigh as much as the jockey-sized Petillo and his slender riding mechanic Jimmy Dunham together, I encouraged the students to add ribs to the belly pan. Once installed on the car, the completed belly pan did not flex in the slightest under the author’s ponderous two-hundred-some-odd pounds.
Shrinking, Stretching, Welding and Riveting
Draping large sheets of paper over the wood buck allowed students to anticipate what would need to happen to each piece of aluminum for it to conform to the correct shape.
Large wrinkles indicated that the metal needed to be gathered, or “shrunk,” while tears indicated that the metal must be spread out or “stretched.” If the paper lay undisturbed over the buck, such as along the length of the hood, the metal only needed to be bent.
For shrinking, we relied heavily on socalled “thumbnail” shrinking dies, which came into use on power hammers around 1919. For stretching, we used either the power hammer or the English wheeling machine. Both are traditional coachbuilding tools for thinning out the metal and redistributing it over a larger area.
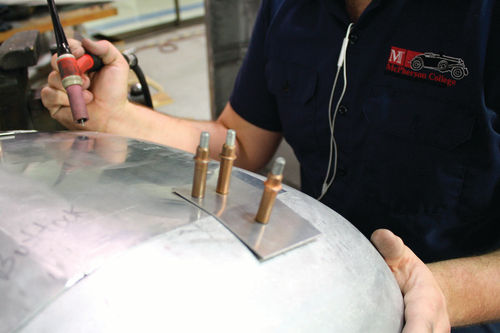
Where welding was needed, panels were fused by either the Tungsten Inert Gas (TIG) process or with an oxyacetylene torch. When confronted with the innumerable rivets found on this car, we were blessed to have a veteran military helicopter mechanic in our midst to help us refine our riveting technique. Spring-loaded temporary rivets, called Clecos, were used to maintain panel alignment until all the riveting was complete.
Embracing Some Retro Technology

Over approximately eight months, 13 students contributed their time and energy to the project. By working steadily at various times of day and night, they were able to make consistent progress without being in each other’s way. We finished the body in time for the car to be displayed in Gasoline Alley during the Sports Car Vintage Racing Association’s Indianapolis meeting in June 2015.
As the official taskmaster for the project, I was delighted with the car, of course, but by far the best part of the build was being immersed in the energy and enthusiasm that comes with helping young people reach a shared goal. Despite the widely held perception that students today are enamored with, and sometimes enslaved by, the latest technology, in my experience they prefer a power hammer to a smartphone any day. The responsibility falls on all of us who love restoring old cars to put the right tools in their hands and show them what can be done.
Editor’s note, continued: Ed Barr is an Assistant Professor of Automotive Restoration Technology at McPherson College, the only school that offers a bachelor’s degree in auto restoration. The school says its hands-on program “provides students with many advantages including internships with national museums and restoration shops, in-depth learning and dedicated instructors who will personalize your experience.” For more on the school, visit mcpherson.edu.


