
A WAY TO Watch Those Tires
This Monitor Will Keep Tabs On Your Tires As You Drive. If Something’s Going Wrong, You’ll Know Within Seconds.
A friend of mine, Brian, and I recently were swapping trailer stories. He makes numerous trips around the United States with vintage race cars during the racing season. These cars include everything from a 1911 National that finished 7th in the first Indy 500 to a 1969 Lola T-163 Can Am car. As you might expect, he has had several trailer tire issues during his travels and was in the process of upgrading his equipment to hopefully eliminate tire problems.
A Faster Tire
The first upgrade was to replace Load Range E tires with Load Range G. Brian runs these trailers hard and fast at the weight maximums. The only time Brian goes under 75 mph is the last 200 feet before his driveway. The E tire is not designed for these highspeed cross country trips. The G tire has a slightly higher max load but, more importantly, it is designed to run at Brian speed. These tires also take special rims that are rated at 100 psi. And, you guessed it, the G tire costs about double what you’d pay for the E.
Keeping Track of Those Tires
The second upgrade was to put a tire monitoring system in place to keep track of truck (if needed) and trailer tires in real time. The system he is using and the one I installed on my F350 pulling a 3-axle trailer is the EEZRV Tire 515 TPMS.


This system has a 3.5-inch monitor that has several options for mounting on your dash. It monitors for low and high pressure, high temperature, rapid air loss, and catastrophic failure. The system can handle up to 26 tires and the monitor can be configured to match your tire setup. Excess tire spacings are simply skipped during the setup mode. The monitor goes from one tire to the next every 6 seconds. You also can manually go to a tire in question by using the + and – keys.
The individual tires flash when the system is reporting their info. In the monitor image shown here, my camera caught the right front tire flashing on.
Mounting the Sensors
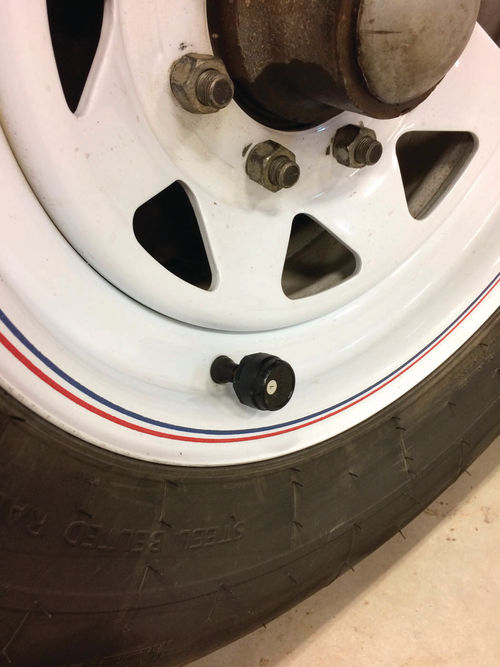
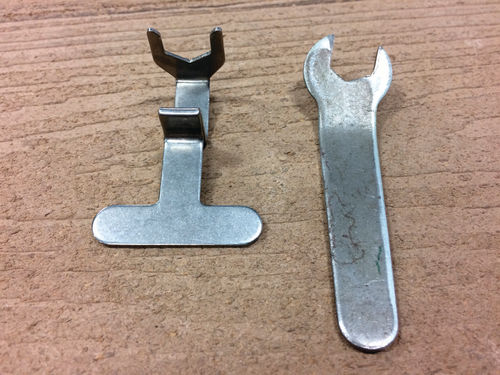
There are two types of sensors that attach to the tire valve stems. The first as shown on the trailer rim is the anti-theft design which is about an inch tall. This sensor has a plastic shell covering the sensor and needs to be put on with a small wrench. Once on, it will simply spin in place if an attempt is made to remove it by hand. The downside to this style is that it has to be removed to add pressure to the tire. It also is difficult to get the exact pressure you want because as you screw it on with the wrench, air is leaking out. So you need to overfill a little to get your correct pressure. I found the wrench provided worked well with rims when the valve stem was exposed on the outside but not so well with the valve stems in the cutouts of the rims on the F350. The wrench on the left in the photo on this page was the one provided. I modified the one on the right from my own toolbox to help put the sensors on the truck wheels.
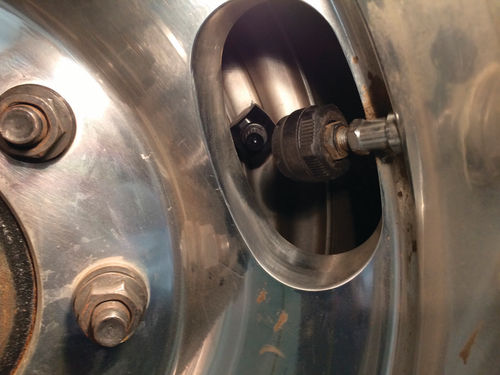
The second sensor is a flow-through type. It is 2.5 inches long and air can be added through the sensor. The company does not recommend this long style be used on trailer rims where it could be exposed to road hazards like curbs. Another downside to this style is that it can be stolen as easy as removing a valve cap.
The kits can be ordered with a mixture of the two types of sensors. I ordered 10 anti-theft and 2 flowthrough to be used on the inside duals where putting on the anti-theft items would be very difficult. The aluminum rim picture shows the anti-theft sensor on the outside and the flow-through on the inside dual.
The sensors have common batteries that are rated for 3 to 4 years. The sensors come apart easily and replacement is fairly simple.
Installing the Monitor
The monitor came with three different options for mounting…a suction mount, hard mount and a wire-type bracket that propped up the unit on the dash. A fourth way is to simply use some Velcro.
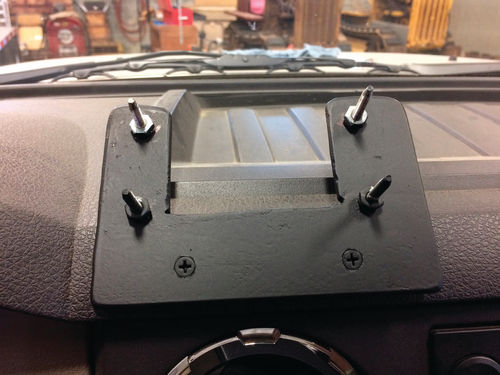
I did not install the factory mounts as they placed the unit too far forward for my liking. So I made my own bracket out of ¼ x 3 flat steel. I simply put some screws in the plate that matched the recessed holes in the back of the monitor. I was able to give the unit a little tilt toward the driver side and the unit can be easily removed for theft prevention.
How To Get One…
These kits areavailable directly from the company’s web site www.eezrvproducts.com. The kits vary in price depending on the number of sensors you need. A 6-unit kit is $289; a 10-unit is $429. Additional sensors are $38 but are slightly cheaper if you buy the ready-made kits.
Remember that you can get a kit with a mix of sensors; you just need to specify your requirements when ordering.
Set-up was fairly simple but you need to follow the instructions. Their tech support is excellent.
As a disclaimer, I have no commercial interest in this product, just a desire for everyone to have trouble-free trips. My short experience with this product has been positive and I would buy another one.


