
John’s Tool Chest, Pt. 7
Once Again We’re Searching Through That Well-Stocked Toolbox and This Time We’ve Found a Couple of Items for Hard To-Reach Fasteners and Adjusters, and a Homemade Vacuum Reservoir Jar as Well.
A Carburetor Adjusting Tool & More
What you see in Photo 55 is a tool made by Blue Point (#TM-64). It’s marketed through Snap-on as a carburetor adjusting tool, but could be useful for many other tasks as well. It’s 18 1 ⁄4" long, and has a 1 ⁄4" drive at one end, and a knurled knob at the other. One hand is used to hold the knurled collar located 6" in from the end, while the other hand rotates the knob on the end. This in turn rotates the internal shaft and turns the drive on the opposite end.
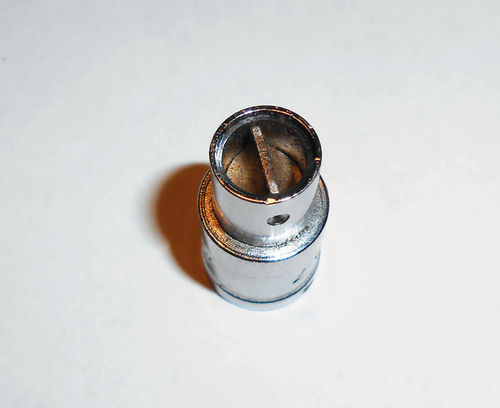
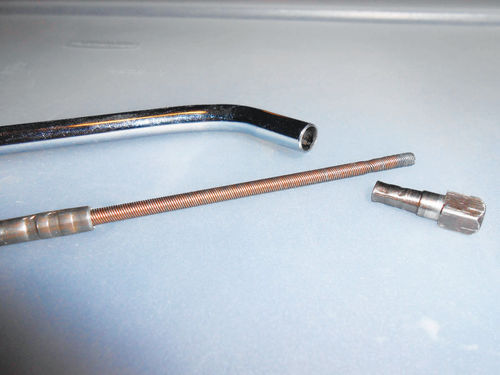
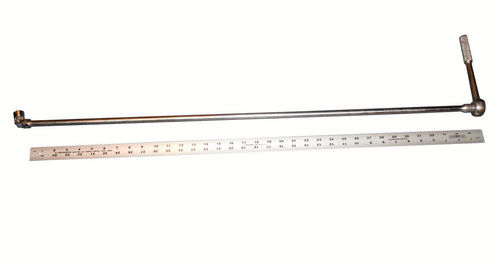
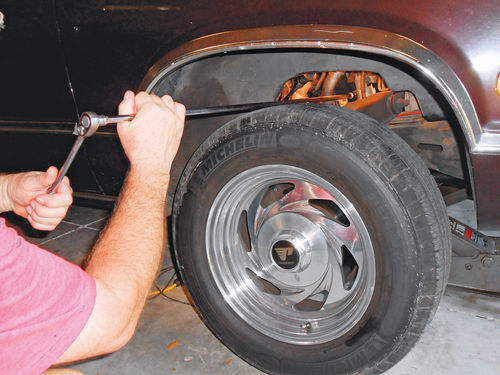
Photo 56 shows the Snap-on socket (#TM85) that is used in conjunction with the tool for carburetor adjusting. Or you can use any 1 ⁄4" drive socket on the end. The fact that the tool is rigid and has a 45° bend near the drive end also makes it useful for starting or for removing a difficult-to-reach fastener (once initially loosened). Obviously it’s not designed for any degree of torque, but in situations where you are dealing with something small, and there isn’t enough room for your fingers to fit, this is a possible option. Difficult-to-reach hose clamps, the small nuts on a GM starter solenoid, and even distributor dwell adjustment on GM’s V-8 engines of the day are all good examples.
It’s great for adjusting carburetor idle mixture screws as well. Years ago I owned a similar carburetor tool made by Mac, and the drive end was a permanent, non-removable part. Unfortunately, it was made of soft material, aluminum if I remember correctly, and the blade end finally deteriorated to the point that the tool was no longer usable. It was replaced with this tool, no doubt a better design. The drive tool is listed online at Snap-on for $27.60, and the socket is another $19.50.
Tool Use Update: While using this tool to adjust the carburetor idle screw on my 1986 Chevy Caprice it started to slip. At first I thought maybe the screw or threads in the casting of the carburetor had stripped.
When I removed the tool from under the air cleaner housing I could see the 1 ⁄4" drive end had actually backed off the flexible cable as seen in Photo 57. Nothing had broken, the parts had simply separated. You are looking at the exterior tube, the flexible drive, and then the 1 ⁄4" drive end.
This is a Blue Point item, and while many people consider that to be a Snap-on tool, technically it’s not. Actually it is a division of Snap-on, and distributed by them, but won’t necessarily have the same warranty. JB Weld is looking like a good option here to secure the drive end, but it will need to be applied sparingly and carefully so that the drive doesn’t accidentally become bonded to the exterior tube.
Extra-Long Extension
The extension shown in Photo 58 isn’t for everyone, but for those who remove components such as engines and transmissions fairly regularly, this makes life easier. This is a Snap-on (#FX 36) 3 ⁄8" drive, 36"-long extension. Nothing beats it for reaching between the transmission and its surrounding floor tunnel to access the mounting bolts. With a flex socket on the end you will be able to work around the fattest automatic transmissions with ease, at least most of the time.
Recently I found myself using it to change the spark plugs through the right wheel well of my El Camino as seen in Photo 59. A good approach, as the extension placed the ratchet well out beyond any interference with the tire. Sure, you could add a bunch of extensions together and establish the same length, but it would be loose and sloppy, and if you tilt it downward its weight would likely pull it apart. Snap-on shows this extension online for $88, but there are other manufacturers to choose from.
Vacuum Reservoir Jar
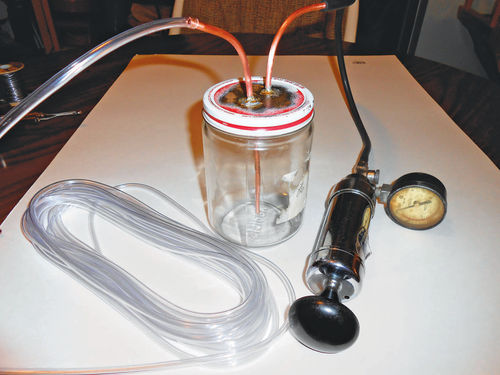
This tool has been mentioned previously, most recently in the December 2011 issue’s homemade tools article. I’m bringing it up again because it was needed recently to flush out the old brake fluid on one of our vehicles, and after more than 30 years I managed to misplace it. Every time I was in the garage I caught myself looking for it. It wasn’t loaned out, and most people wouldn’t know what it was for anyway. And if you’re wondering, there are no kids around so there is no one to blame. Ultimately, it was time to make a new one. So instead of just talking about how it was made, I can show you. It’s easy and inexpensive to make, requiring a glass jar with a metal lid that will seal, some 3 ⁄16" copper tubing, 3 ⁄16" clear aquarium hose, solder and a soldering gun.
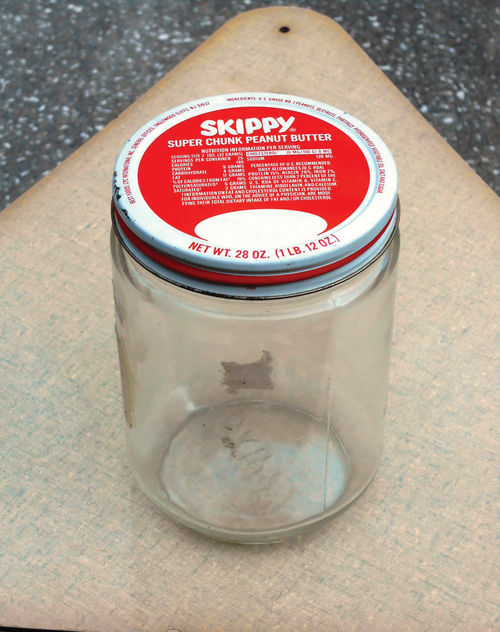
Photo 60 shows an old peanut butter jar from my mom’s jar collection; this will become the new vacuum jar. If you have a choice between a larger or smaller jar, a larger one is more useful as it won’t require emptying as frequently, but naturally there is a practical limit. You will most likely be using a hand vacuum pump, and if the jar is too large, you will find yourself pumping forever.
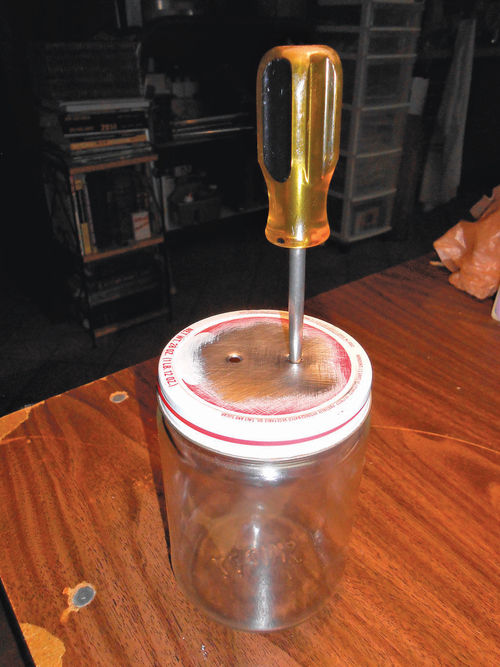
First the paint was removed from the top of the lid and then two 1 ⁄8" holes were drilled about 1" apart. Next, a tapered awl tool was used to enlarge the holes slightly as seen in Photo 61, until the copper tubing fit snugly. This creates a pocket for the solder to puddle up in, and allows you to control the fit of the copper tube. The fluid tube extends to the bottom of the jar, while the vacuum supply tube shouldn’t extend more than 1" inside the lid.
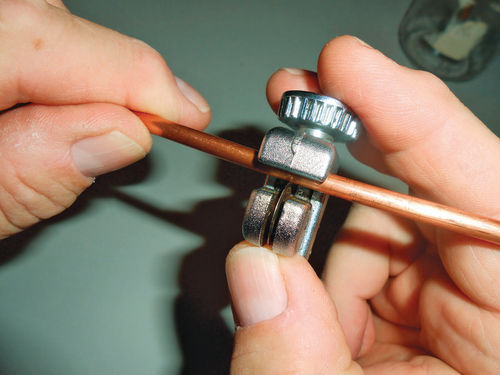
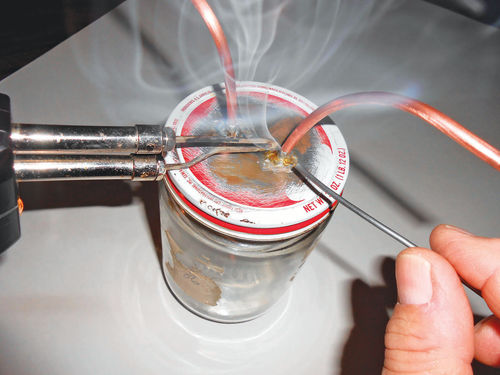
As shown in Photo 62, a tubing cutter was used to trim lengths of copper tubing. For this jar one tube was cut to 12" in length, and the other was 6" long. Using some fine steel wool or sandpaper, polish up the copper tubing in the area where it is to be soldered to the lid. Position the copper tubes in the holes, and decide which one you want to solder first. Heat both the lid and tubing, and then apply solder. Rosin core, 40% tin, 60% lead is what was handy, and worked well as seen in Photo 63. Applying a small amount of solder to the tip of the soldering gun helps transfer its heat to the lid and tubing. From then on, only apply the solder to the metals being joined, not the gun tip. This will ensure a dependable soldered connection.
Photo 64 shows the finished product. That’s 25’ of aquarium hose that was purchased for less than $4 at Wal-Mart. Sure it’s more than needed, but when compared to the cost of the 8’ length, it only made sense to have extra. The copper tubing was $1.79 per foot from Ace Hardware, but if you have other uses for this size copper tubing, www.zorotools. com offers a 50’ roll for around $27. The tubing is bent at an angle once it exits the lid to make life easier with the hose connections. This was easily done by hand.
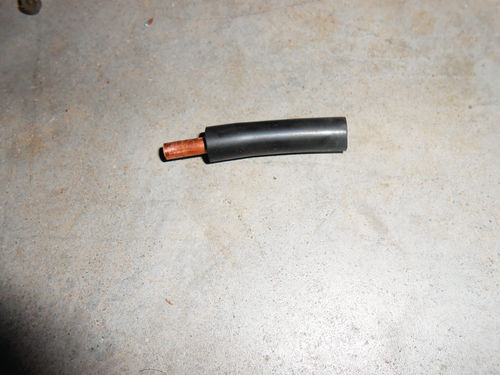
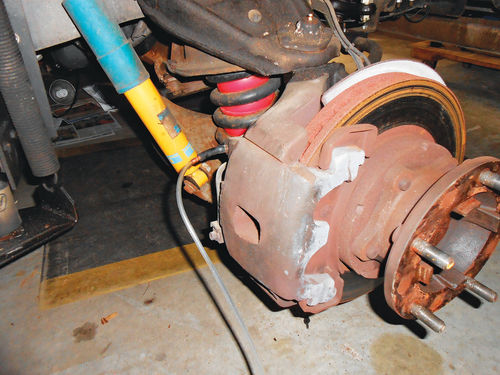
The aquarium hose won’t stretch and fit over most brake bleeders, but adapters are easily made with copper tubing and vacuum hose. Cut a couple of 1" (or shorter) sections of copper tubing. They can be fit into different-size vacuum hoses like you see in Photo 65. I believe this is 3 ⁄16" vacuum hose, and should you need to go to the next-larger size, consider sliding the aquarium hose on first, and then the vacuum hose over the top of that for a tight fit. You can purchase a small sampling of different-size vacuum hoses the next time you are at the local auto parts store. With the adapter attached to the end of the aquarium hose, it’s easy to connect to the brake caliper for bleeding as seen in Photo 66. You can now use this tool for flushing and bleeding brake systems, removing old power steering fluid from a pump reservoir, removing automatic transmission fluid from an overfilled transmission, or use it with most any light fluids. As long as you don’t tip the jar over during use, no fluids will enter the pump.


