MAKE YOUR OWN GASKETS
Fabricating Gaskets Can Be Fairly Simple and Will Save You Money and a Trip to the Parts Store. And Don’t Forget the Personal Satisfaction You Get By Doing It Yourself.
Editor’s Note: Our Mechanic on Duty writer, Jim Richardson, has been contributing to Auto Restorer since the beginning days of the magazine and many of his earliest articles were directed at the “Weekend Wrench;” designed to help a hobbyist with projects that come up on a regular basis and can be accomplished with a collection of everyday tools and supplies. This article on making gaskets was Jim’s first contribution to AR and remains useful today, three decades after it was first written. Oh, and we should point out that in the initial years all how-to articles were illustrated with black-and-white images. Color was reserved for the features. Here’s Jim:
Things You’ll Need for This Project
• Utility knife
• Hole punches
• Sealant
• Small ball-peen hammer
• Metal straightedge
• Fiber, cork or rubber gasket material
You’ve just adjusted the valves on your classic’s engine, but now you need to replace that gasket that goes between the side plate and the block. You call the parts supply and ask if they have a new one. After being put on hold for 15 minutes while the counter man looks in his stockroom, gets a cup of coffee and answers several other customers’ questions in the store, he comes back and says: “All we have are complete sets for those. They’re $79. We can courier one out to you but that will cost another $4, and it’s too late today.”
It turns out that your alternatives are to pay $83 for an entire gasket set in order to get the one you need—then wait for the package to arrive—or try to make your own gasket.
If you’re at all anxious to finish the job it won’t take a great deal of cogitation to decide on the latter approach, but then you are faced with the challenge of how to make a proper, leak-proof seal that will hold up over time. If this becomes your dilemma at some point, fear not. It’s easy to create most of the seals and gaskets used in your old car with a few simple tools. Here’s how:
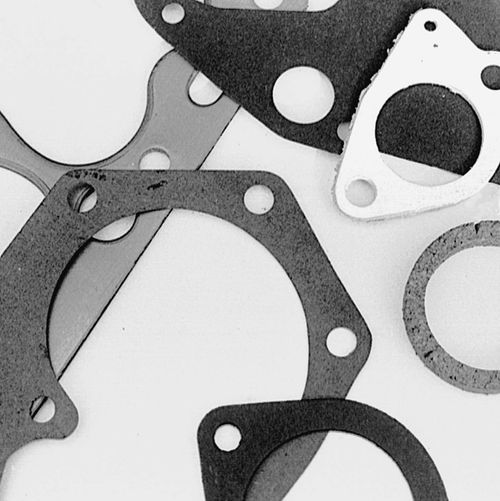
Fiber Seals
Fiber seals, such as the one for your transmission side plate, are the easiest to make. You’ll find a selection of fiber gasket paper available at most auto supply and hardware stores. It comes in several thicknesses. I keep a couple of rolls of it around at all times for just such emergencies. Make sure you buy the correct thickness for your application. It’s a good idea to take a piece of your old gasket with you to the parts store so you won’t make a mistake.
You need to be certain that you have the correct material thickness because gaskets that are too thin will leak, and gaskets that are too thick may allow delicate stamped sheet metal plates to warp and deform when they are tightened into place.
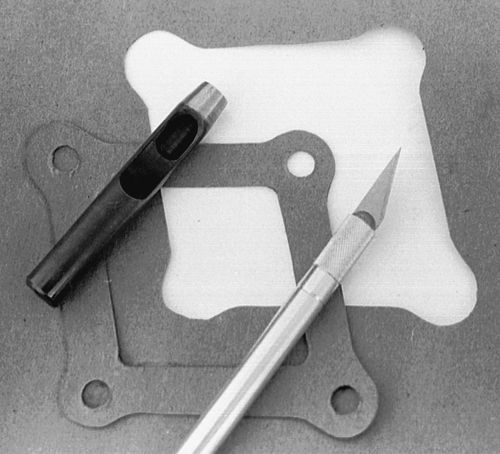
Making Patterns
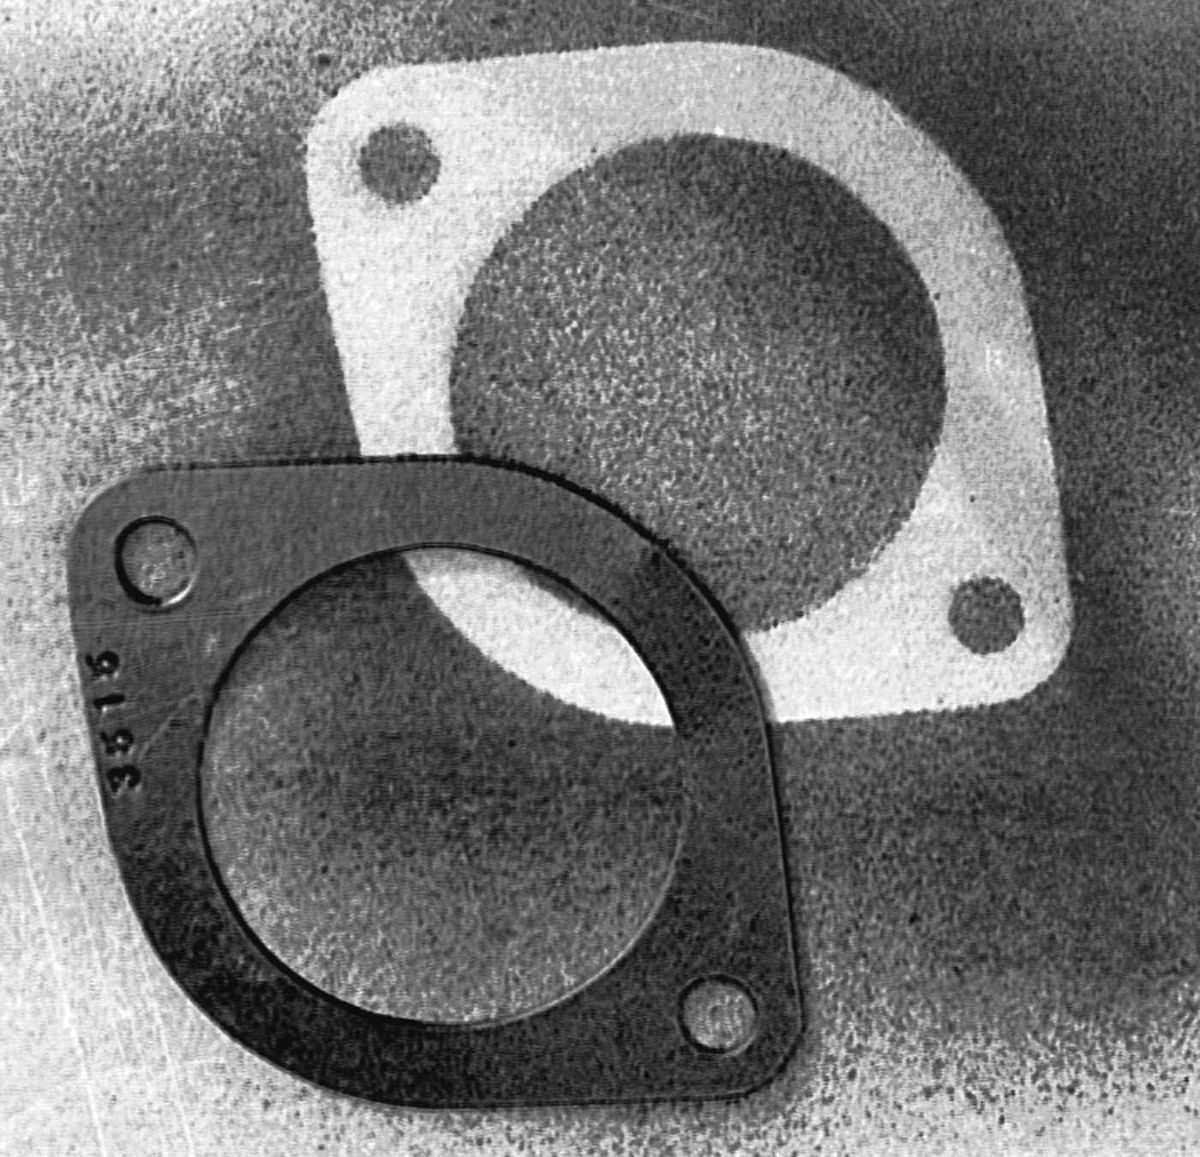
There are several ways to make an accurate outline for your new gasket. The easiest and quickest, if your old gasket is still intact, is to simply place it on a piece of gasket paper and shoot it with a fog of aerosol paint. When you pick up your old gasket, you will have your pattern underneath.
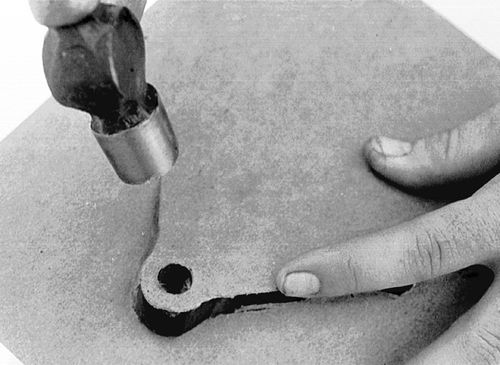
If your old gasket disintegrated when you took things apart, there is another, almost as easy way to make a pattern. This method is especially useful for making large seals such as the one for the housing cover on your differential. Start by cutting a square of fiber gasket paper a little larger than the gasket you will need. Thoroughly clean the mating surfaces you want to seal. Now place the fiber paper on the casting. Using the rounded end of a ball-peen hammer, tap directly over a couple of holes until you cut through the gasket paper. Now loosely install a couple of bolts to keep the paper from shifting while you work.
Gently tap the rest of the holes, and around the outline of the mating surface using the flat of the hammer, just enough to make an outline, but not hard enough to cut through. Now remove the paper and place it on a wooden cutting board. Use hole punches to cut out the rest of the bolt holes, then use your utility knife and steel straightedge to cut out the gasket.
You could just tap your way around the part with your hammer until you cut out the entire gasket, but this leaves a rather ragged edge. Old-time mechanics sometimes kept special little gasket hammers to do this, but gaskets cut out with a hammer are not quite as strong as those cut with blades, nor are they as tidy looking. On a show car, this could be important.
If you have trouble finding a set of hole punches, you can make your own out of old metal fuel lines, brake lines or even curtain rods and other scrap tubing. Just cut off about a 20 millimeter length of tubing, then file one end to a sharp edge. Another tip: When cutting thick fiber paper with a utility knife, it is best to make a couple of gentle passes rather than to attempt to cut all the way through in one heavy slash. You stand less chance of tearing the paper or distorting your seal by doing it that way.
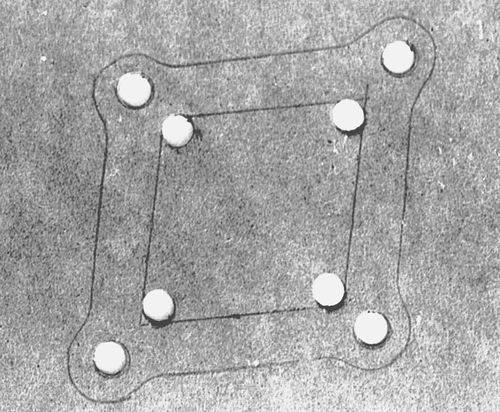
If you are working with small, delicate parts such as carburetor castings, you won’t want to pound on them with a hammer. Instead, place the part upside down on the gasket paper and trace around it with a sharp pencil. Don’t forget to trace out the screw holes too. Make sure the point of your pencil is sharp and up against the bottom edge of the casting at all times. Now lift off the casting and measure the thickness to the inside edge of its mating surfaces. Measure in the same distance from the outside edge on your gasket paper, then draw the inside opening. Now cut out the seal with your utility knife and hole punches.

Cork Gaskets
You’ll find that cork gaskets are a little more difficult to make, but they’re still no big deal. You can use the aerosol paint trick to make your pattern. Be extra careful when cutting out a cork gasket. Cutting cork is a little like cutting fresh bread. It takes a sharp knife and several passes so as not to distort and tear the material.
Another important tip when installing cork gaskets is to only snug up the screws or bolts holding the mating surfaces together. If you keep tightening beyond the point at which the gasket is held firmly in place, the material will just squeeze out from between the mating surfaces. Also, you run the risk of warping sheet metal pans and covers, thus causing them to leak.
Rubber and Neoprene Seals
Rubber gaskets require the same care and precautions as cork gaskets. Don’t try to cut too deeply on your first pass and don’t over-tighten when installing them. Usually a light coat of clean bearing grease is all you need to apply to get them to seal.
Head Gaskets
This is the one example where you may have to order the complete engine set for $79 to get what you need. And if you have a rare, early car, even a complete engine set could be difficult to find. In that case you can try soaking your old head gasket in water overnight to get its asbestos center to expand back to compressibility before installing it.
The Seal of Approval
Many of us have seen amateur mechanics make gaskets out of manila envelopes or shirt cardboard. Don’t try it. The fibers in such materials are not strong enough for the job, nor are these materials impregnated with the proper resins. In a pinch on tour such a gasket will suffice to get you home, but it should be replaced with a proper one at the earliest opportunity. Finally, don’t be tempted to reuse old gaskets, and never install nicked or torn seals.


