
Building a CENTER CONSOLE
The Car Had Been Built With a Console But It Later Was Removed…and Lost. So He Gathered Up Some Sheet Metal and Stainless Steel, and Got to Work.
My wife has had a 1970 Ford Torino GT since it was new. She won it in a Sears promotional drawing in December 1969. It’s a one-owner vehicle and has never been in an accident. It’s an Arizona car, un-restored, with original paint and original parts.
The car was parked in her garage in 1983 when her husband pulled the engine and drivetrain to rebuild the engine. He passed away before he could get it done so it sat there all apart for about 30 years. Then Ruth and I were married in 2011. I knew she wanted to see the car running again and especially get to drive it. It held a lot of memories for her. It was their daily driver while they were raising their four daughters.
In 2015 I set out to get the car on the road again. I found all of the parts, rebuilt the 351 Cleveland 4-V motor and had the transmission checked out and like Willie Nelson, we were “On the Road Again.” (For more regarding the initial Torino project, see the March 2016 issue.)

Turning to the Details
Once the main objective had been met, I began looking for other items that could use some attention. A couple of things her husband did almost immediately when they got the car in 1969 was to replace the stock wheels with the popular “American Torque Thrust” wheels, and since they were young newlyweds he took out the console and put a pillow between the bucket seats so Ruth could sit next to him. (I think at her request.)
I will keep the wheels on the car, at least for the time being, because they always were a part of the Torino and they represent a popular style of the time. But I wanted to reinstall the console. Ruth knew they had kept it but we were never able to find it. So I began searching the Internet, magazines and even ran “want ads” but I could not find a correct console. I was able to find them for an automatic but not a 4-speed.
I then decided I had two choices. Have a shop build a custom one, and who knows what that would cost…or design and build one myself. I chose the second option.
Design and Metal Work
This brings me to the real purpose of this story, to demonstrate the building of the console.
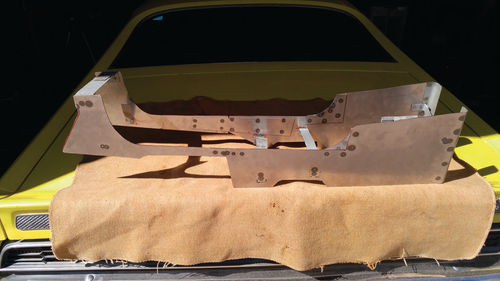
First I needed to create a design of what I wanted it to look like. Then I needed to make templates for the side panels of the structure.
I measured and cut the contours of the “hump,” each side being quite different and irregular. Then I determined the size of the box, the box height and width and how the unit would roll up to meet the dash and also properly cover the shifter hole.
Even though I knew I wouldn’t be able to replicate the original factory console, I wanted it to look as though it belonged in the car.
Then I cut the panels from 16-gauge sheet metal and attached them together at different points with metal straps and a spot welder, making sure everything was straight, square and level in the car. This took some patience and numerous instances of putting the unit in and taking it out of the car; measuring, trimming here and there and making small adjustments until everything fit just right.
Now We Need a Cover
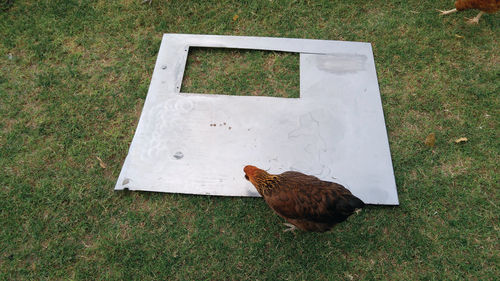
The next big step was the top cover or center piece. I considered several types of material: sheet metal, aluminum and even stainless steel. I made a trip to the local salvage yard where I frequently go to scrounge parts and material. I happened on a heavy stainless steel door off of an old commercial refrigerator. I thought this would work well and they sold it to me for only $10, so off I went.
I then needed to decide what pattern I wanted to apply to the metal and settled on a circular overlap design. I thought I would just go to a machine shop and have a design etched into the metal and have the piece rolled at the ends and trimmed to fit. But I exhausted several attempts to find a shop that would do it. So I decided to try the job myself. I had never worked with stainless and wasn’t sure just how to go about it.
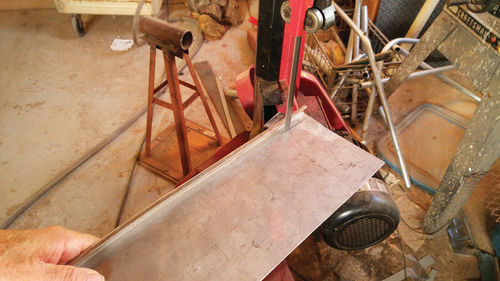
I found that I could actually cut the stainless sheet with my metal band saw in my shop. I cut off a piece to see if and how I could make a design pattern in the stainless material. I tried several methods and finally settled on using 3” round “Surface Conditioning” pads from NAPA on my drill press. They worked well but the plastic stems broke easily. After working on a couple of practice pieces I got it down pretty good.
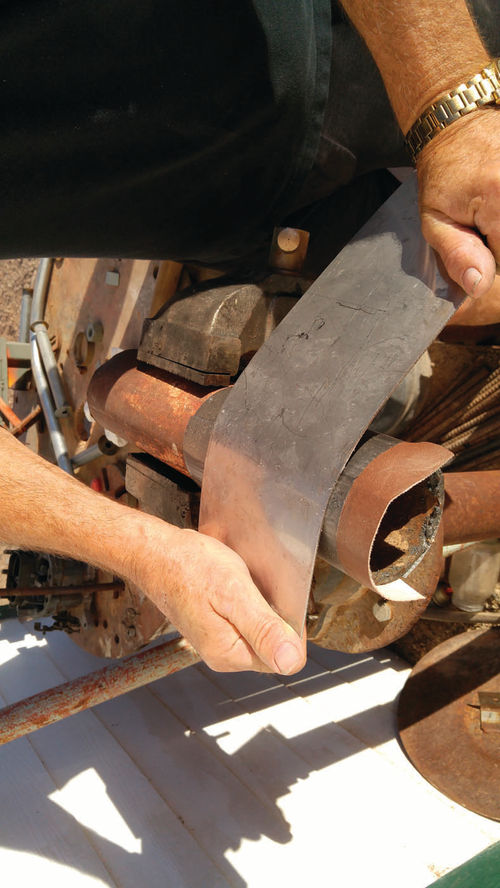
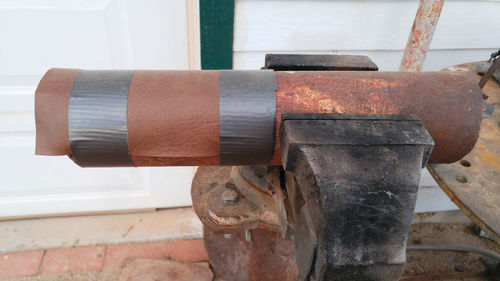
After I completed the piece I was going to use I then needed to roll up the ends to fit the frame. I took a piece of 3” steel pipe and locked it into a vise and taped a piece of Naugahyde around it to prevent marring the metal I was going to bend. Then I just rolled the metal back and forth using a stout hand pressure until I obtained the curvatures I wanted. I was surprised at how well it worked. At that point I drilled two 2¼” holes in the front of the stainless top cover to install older-style black Stewart Warner gauges which were added at the final installation.
Some Built-In Storage Space
Next I finished the armrest and storage compartment. I closed off the rear of the console frame with a 3/4” x 7” piece of pine wood trimmed to fit. I attached it by drilling holes into the back of the rounded corners of the metal frame and running in small 1/2” flathead wood screws. I also cut pieces of the 3/4” x 7” wood to form the front and bottom of the box. I used flathead screws that would be invisible under the final covering.
The next step was to make a hinged cover for the box. I used a piece of 3/4” x 7 1/2” wood and a short piano hinge and covered the lid with a piece of 1/2” foam and Naugahyde. I also finished the inside of the box by attaching Naugahyde with 3M Spray Adhesive.
Pleased With the Results


When I got to that point I covered the frame using a spray adhesive to apply a thin layer of quilt batting that Ruth had in her quilt-making supplies. Then I covered it with black Naugahyde to match the original interior.
Once that was done I trimmed the stainless top to fit and edged it with plastic door trim to give it a cleaner look and protect the Naugahyde from being damaged by the steel plate. After that I measured for the shifter hole and cut it out with a carbide cutting wheel on an angle grinder and filed the edges smooth.
Basically all that was left was to install the unit, secure it, attach the armrest/ storage box lid with the small piano hinge and reinstall the shifter boot.
All in all I think it turned out pretty good. Even though it isn’t original equipment I will keep it until I can find a factory original.
On second thought, I like it so well I think I’ll keep it like it is.


