
It’s More Than an Oil Change, Pt. 1
There are many reasons to change your own engine oil—and most of them have little to do with the actual process.
So, what are we talking about here? Well, there are dozens of items you can easily check while you’re under your vehicle. Most are visual checks, while some require minor hand pressure. And keep in mind that these are inspections that someone other than you probably wouldn’t make while changing the oil. This approach won’t add that much time to the job and, most importantly, the minor effort invested can save you from some major problems and inconvenience down the road.
Necessary Equipment & Getting Started...
Some of the basic tools you will need are shown in Photo #1. (A drain pan, grease gun, funnel, oil filter tool(s), and various wrenches, ratchets and sockets, depending on your application.) In addition, paper towels and disposable gloves will be useful.
Of course, you will need a means of lifting your vehicle. A good hydraulic jack and jack stands are a good approach, while ramps and wheel chocks will work as well.
Start by warming the engine up, then safely elevate the vehicle. Either secure it on properly positioned jack stands; ramps with the rear wheels chocked; or, if you are so fortunate, on the lift in your garage.
The basics are the same for most vehicles. You may choose to start by removing the oil pan’s drain plug and catching the old oil in either an open container, or one of those pans especially made to catch and hold the drain oil. These tend to make proper disposal a bit easier. (Remember that most communities have a disposal site for waste oil and some for oil filters, too. Some auto parts stores will also accept drain oil).
Note, some vehicles may require the removal of two drain plugs from the pan, and don’t make the mistake of draining what you believe is the engine oil, only to find you have drained your transmission, and added additional oil to your already full crankcase.
Grease Is the Word
While the oil is draining, now is a good time to locate and clean off the grease fittings prior to the lubrication process. What you may or may not have for fittings depends on whether you are working on a car or truck along with the size and age of the vehicle.
As you would most likely expect, older, larger trucks usually will have more fittings than a later small car. But with both types of vehicles your search for fittings definitely will include the steering linkage (tie rod ends, idler arms, center links, etc.). Also look closely at the inside of the front tires, both high and low. In this area you are looking for fittings to supply lubricant to (in most cases) upper and lower ball joints or king pin bushings. A typical mid-’60s Chevy car will have 11 grease fittings on the front end (seven on the linkage, and one for each ball joint). Trucks with leaf springs may have fittings on the springs’ bushings and also on the shackle bushings (where they connect to the frame).
Trucks with independent front suspension using upper and lower control arms may likely have bushing grease fittings (Photo #2). For that matter, the early Ford Mustangs had greaseable upper control arms. You had to remove the small plug on the end of each bushing and install a special two-piece, long fitting made just for that application. These “plugs” were often used on tie rod ends as well, and can be removed and replaced with a grease fitting.
Don’t forget to look at the drive shaft U-joints, and if you have a two-piece shaft, inspect the slip joint for fittings. In short, if it’s a moving part, it may have to be lubricated via a fitting and grease gun.
Most lubrication points will only need a couple pumps of the grease gun; then wipe off any excess grease remaining on the fitting or discharged around the boot. You want to keep it clean-looking, but this also reduces the accumulation of sand and dirt.
Inspect First; Then Grease
But before you start putting grease into those tie rod ends and other components, do a simple front-end linkage inspection.
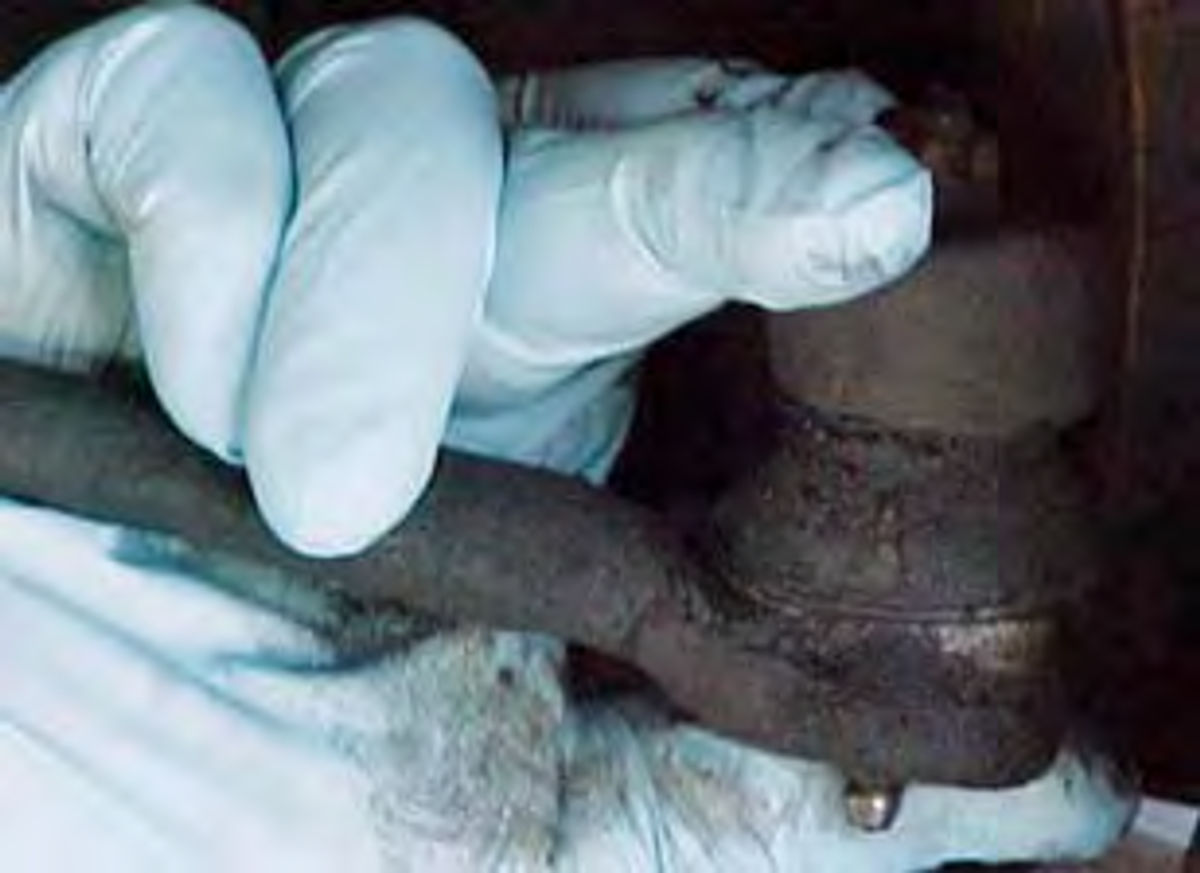
Squeeze the tie rod ends with your hand, trying to compress the joints. They shouldn’t compress easily with hand pressure (Photo #3). If your vehicle uses a connecting center link, grasp it, push upward, and pull down. Observe any looseness.
If your vehicle is supported on jack stands and the front tires are off the ground, pull in and push out the forward edge of the tires while watching the linkage for movement. These components should all be snug, and any movement indicates a need for service or adjustment. Now, it should be noted that this is not a complete front-end inspection, just a quick safety check of the more obvious components of the steering linkage. (For a more in-depth front-end inspection, see the November 2006 issue, “Do a Wheel Alignment.”)
If your application has upper ball joint grease fittings, check after you have greased each one to make certain the grease went into the joint, and isn’t piled up on top of it. It happens to all of us, just make sure to catch the grease when necessary.
Looking for Rust On U-Joints
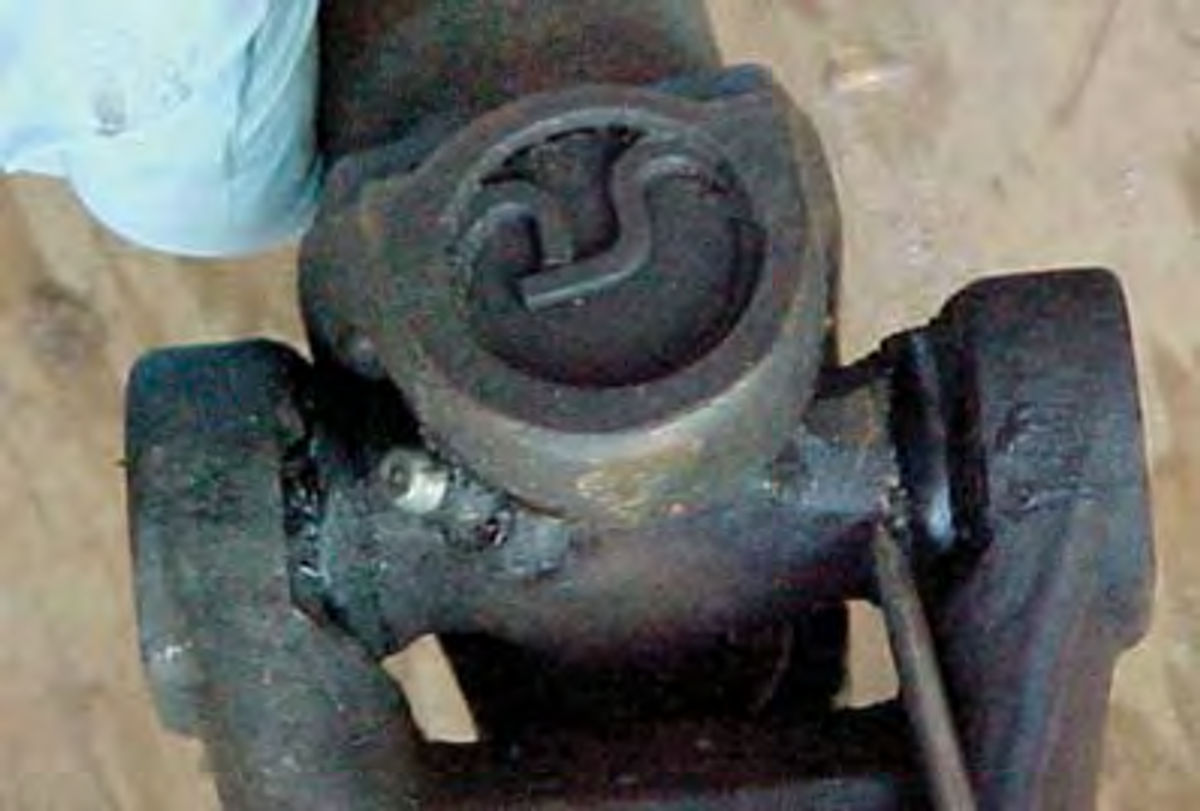
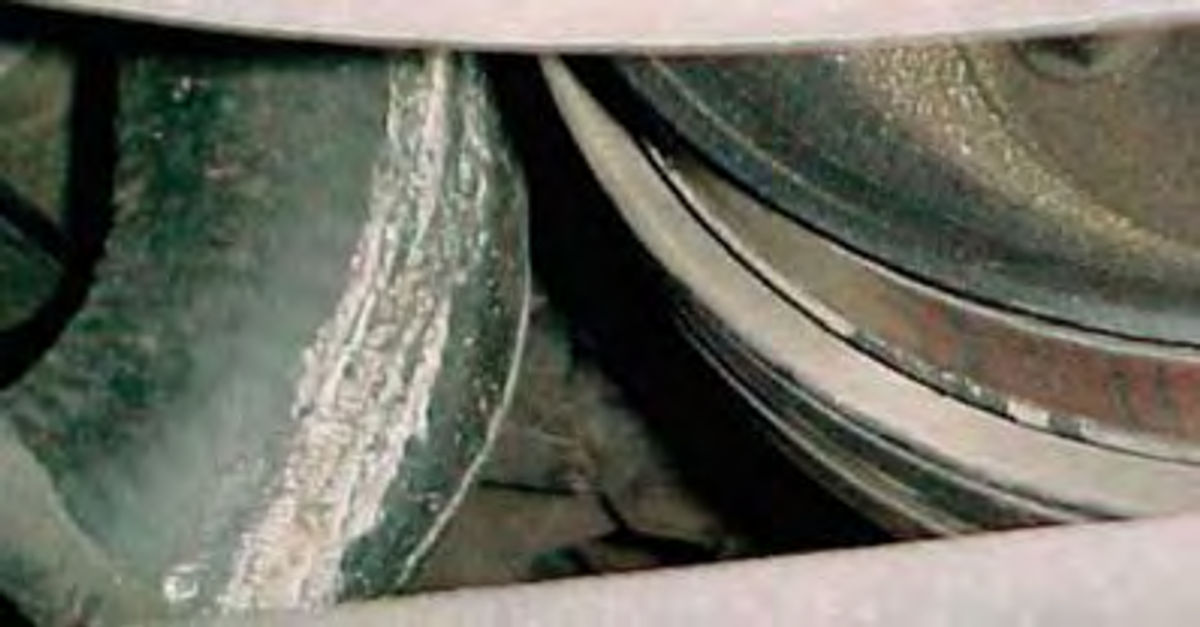
If your vehicle has an exposed drive shaft, inspect it for heavy rust, and look closely at the universal joints. If you see rust around the inside of the cups, toward the center of the drive shaft, this indicates the lubrication has dried up, and the needle bearings have started turning into rust, which means it’s time to replace some U-joints. Photo #4 shows an area to be looking at for rust.
An additional inspection can be done with the rear-wheel brakes applied, wheels chocked and the vehicle in neutral. This removes any torsional pressure from the drive shaft. You can use your hands or the aid of a small pry bar and attempt to push and pull at the location of the U-joint looking very closely for any looseness. Push in the direction of one set of caps while looking at the other set for signs of wear. For example, if one cap is facing down towards the earth, push straight up and pull downward on the shaft while watching the side caps for
movement. Repeat this test with each Ujoint, and if you do use a pry bar, only minimal pressure is needed. Any movement indicates wear and the need for replacement. These are dark areas for working, so have a good light to aid your vision.
While driving, bad U-joints will often give you a fast paced squeak. If they’re bad enough, there will be vibration or, even worse, they can break and drop the drive shaft.
If the drive shaft has grease fittings on the U-joints, they are usually pointing the wrong way to access them and you will most likely need to reposition the vehicle. If the front is already on jack stands, elevate the rear end so that the tires are off the ground and the vehicle is somewhat level. Most cars and trucks with solid rear axle housings can be lifted directly under the differential, and jack stands can be placed under each side, close to the wheels for support. If you are uncertain, check your shop manual or Chilton guide for proper lifting and support points.
If you’re using ramps, it isn’t safe to try and elevate the rear as there is the possibility of a roll-off once the rear tires are lifted from the ground and the wheel chocks are no longer serving their function. In such a situation it is best to complete the oil change process, back off the ramps and lift the rear as mentioned above, (making sure you have enough room to work) then lower it onto jack stands. If you are working on a lift in your garage, “No worries, mate!”
You May Need an Adapter Here
Now put the transmission in neutral, with the rear brakes released and the wheels free to turn. You can now rotate the drive shaft to where the fitting can be accessed. Sometimes it is too tight to get the grease gun onto the fitting. A slight rotation in either direction might open the area enough to make the difference. If not, try relocating the rear jack stands to support the vehicle by the frame instead of the rear end. This will allow the rear axle to drop and change the drive shaft angle. If that doesn’t work, go to your local auto parts store and purchase a small adapter for the job. Most of these are made with a pointed end that you push into the center ball of the grease fitting. Not having to “clip” onto the fitting allows it to be much smaller in size.
While in the area, check the grease levels of the differential and manual transmission (if applicable). The differential fill plug is either in the back or side of the differential housing, usually in line with the level of the axles. On a manual transmission it is normally located on one side, at about the center.
Before removing a plug, clean the area surrounding it to avoid any chance of dirt entering the casing, and have a small drain pan to catch grease should it be overfilled. Some may require a standard wrench, while on others 1/2” & 3/8” square drive ratchets will fit; and some used square heads. Eight point sockets are helpful with these, and if the plug’s not too tight an open end wrench will do.
With the vehicle fairly level, the grease level should be just below the fill plug hole. You can use the tip of your finger, or other means to judge the level. There are many different weights and requirements for grease used in transmissions and rear ends so make sure you know your needs.
Back to the Oil Change
With all the fittings greased, and lubricant levels checked underneath, let’s take care of a few more things with the oil change. If the oil has completely drained, we can replace the drain plug(s). Most will use a washer, some made of copper, and others nylon. Inspect the washer for wear, damage or cracks. I feel the nylon washer’s seal is the best, requiring the least torque, but they will crack with age.
Some vehicles may use a drain plug with a large head size (my Chevy requires a 7/8” wrench or socket) but only minimal pressure is required when tightening.
If your vehicle has an oil filter located underneath the engine, it is time to change it. If it is the modern spin-on type, use a filter strap or other tool appropriate for your application and remove the old filter. Wipe clean the sealing surface on the block, and if the old rubber seal remained behind, discard it. Lubricate the seal on the new oil filter with engine oil.
If the filter mounts vertically to the engine it can be filled with oil first, helping to reduce a dry start-up condition. Any oil remaining in the quart will be poured into the crankcase and count as one full quart towards the total capacity required. If the filter is mounted at an angle, filling it first isn’t practical.
A general rule when tightening filters is to tighten until the rubber seal is seated, then another 3⁄4-1 turn by hand. In most situations no tools should be needed for tightening the filter, only your hand pressure. The exception would be where you are unable to get a good grasp with your hands due to the things surrounding the filter. (Note that many filters have an anti drain back valve in them, so to thoroughly drain out the old oil, punch a hole in the center of the filter.)
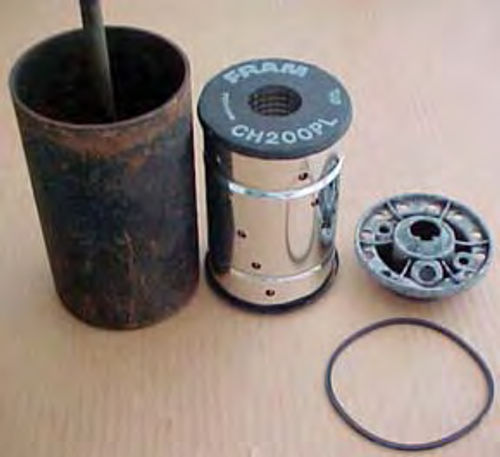
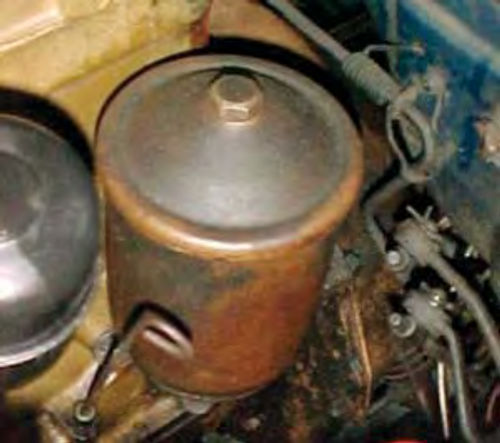
Canister type filters will vary, but the ones used by Chevrolet on their V-8 engines from 1956 through 1967 can be removed with a 3/4” wrench or socket. (Photo #5 shows the components, the can itself, a new filter, a rubber seal and the filter seat as it looks once it’s been removed from the engine block.)
Properly dispose of the oil, discard the old filter, and wipe out the inside of the can. There is a rubber seal that is stuck up in the recess where the canister seats. If you have a small pick tool set, the seal can usually be removed with the 90degree pick. If not, simply remove the two bolts that hold the filter seat in place, gently pry it out, and now easily remove the seal. Replace the filter seat and then the rubber seal that’s been lightly coated with engine oil. This is a vertical mounting filter, so if you choose, it can be filled with oil once the new filter has been dropped in, and keep track of your oil as mentioned before. When tightening, excessive force is unnecessary. We will check for leaks once the crankcase has been filled.
There are other canister types that I am not familiar with. Many are top engine mounted, like the one shown on my friend Harry’s 1950 Ford (Photo #6). Check your shop manual for proper service on these.
Go Looking for Trouble
Now is the time to catch little problems before they become big ones, or even get you stranded somewhere. The common theme here is to have your eyes open and searching for things that are out of sorts.
Among the conditions you’re checking for are fluid leaks, such as a wet lower radiator tank. It might be as simple as a loose hose clamp, or a hose that is in need of replacement. Look for stains running up the lower hose to the pump (Photo #7). This is an early sign of impending water pump failure. Possibly the radiator itself is in need of repair or replacement. Now is a better time to find these things than when you’re on your way to a car show/swap meet.
Of course, look for those oil leaks. Areas like the back of the engine often equate to leaking valve cover gasket(s), or possibly a rear intake seal (on “V” engines). Excessive oil slung at the rear of the engine is likely an indication of a worn rear main (crankshaft) seal, while at the front a harmonic balancer seal is the likely culprit.
Automatic transmissions also have front and rear seals that can leak. The fluid is usually red, a much lighter viscosity than engine oil, and will also have a different smell.
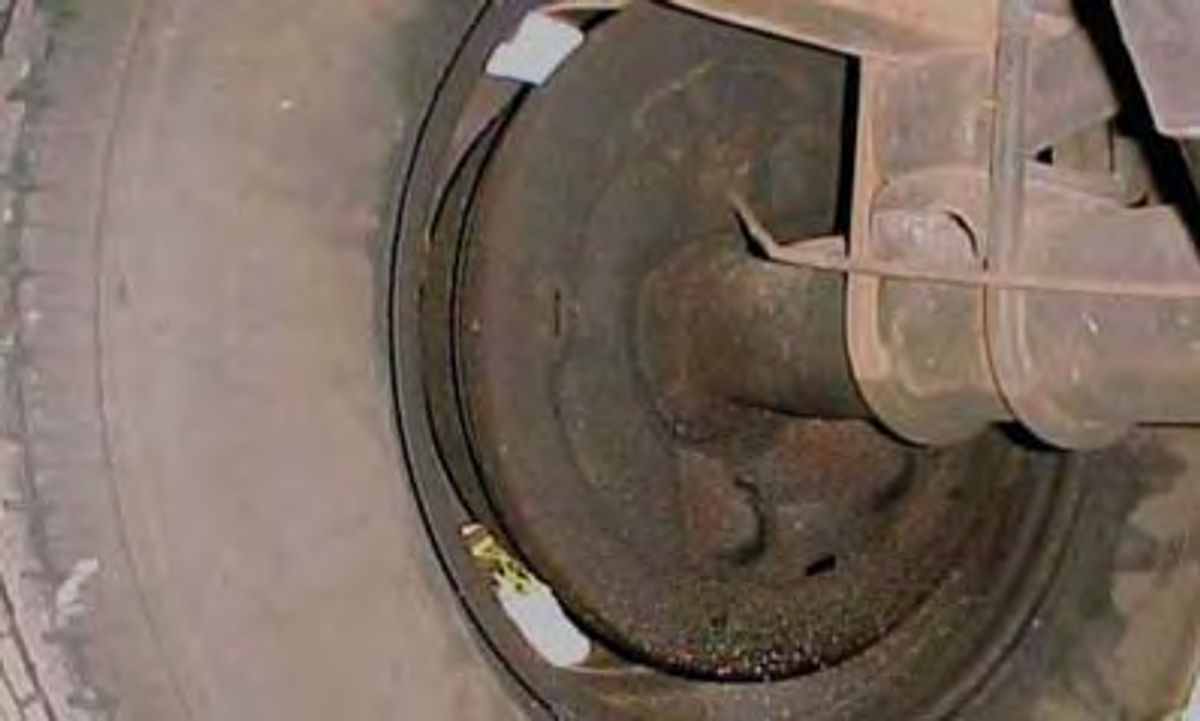
Another condition to check for is fluid slung on the inside of a tire and rim, with the brake shoe backing plate damp in appearance. This is usually found on the drive axle, and indicates at least a seal leakage (Photo #8).
This, unfortunately, tends to be the tip of an iceberg, because when the drum is removed you will almost surely have brake shoes that are contaminated, and possibly find that it was a bad bearing that caused the seal failure. Before you’re done you will likely do a rear brake job, possibly replace or rebuild wheel cylinders, and have the drums machined if they show any scoring. Could this fluid have been brake fluid? Yes, but before you ever noticed it on the back of a tire, you would have most likely felt a low, or no brake pedal.
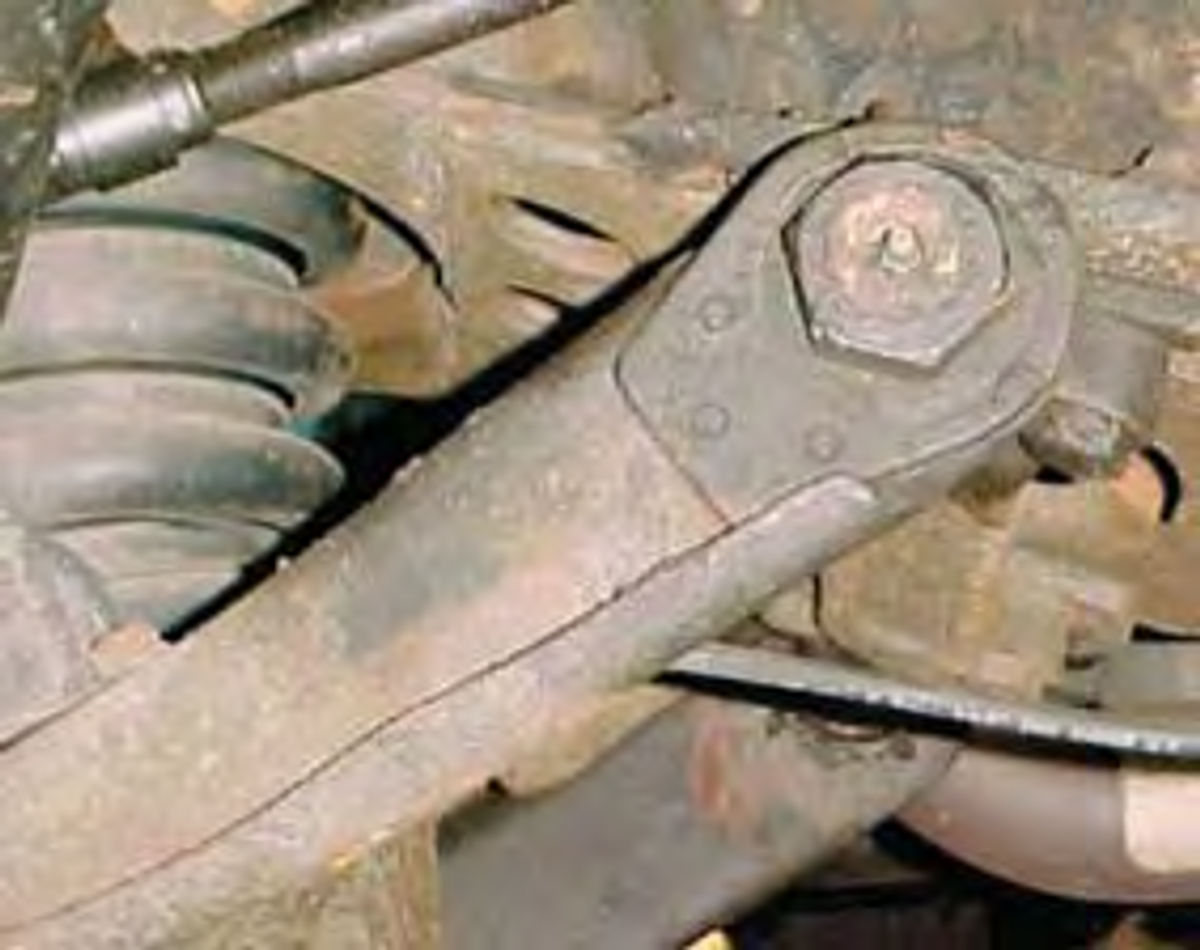
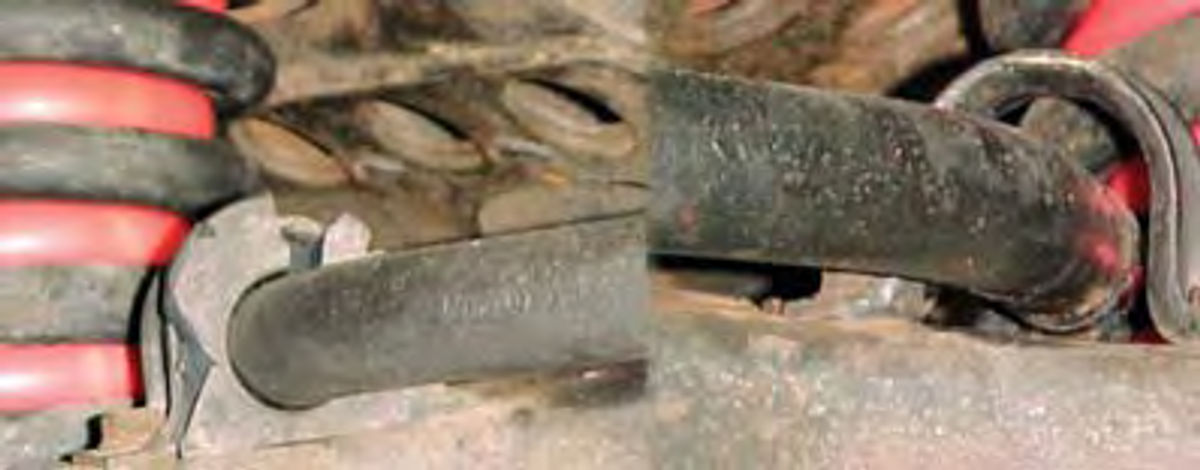
Be sure to look at all rubber components as well. Bushings used in many leaf springs, upper & lower control arms, sway bars and their connecting linkage should not show any peeling or large cracks. (Photo #9 shows sway bar bushings—one brittle and badly cracked; the other side is completely missing.)
Minor small cracking is generally acceptable in most situations, but should a leaf spring or control arm bushing appear not concentric with its retaining bolt or shaft, it is in need of replacement.
Look at those lower shock absorber bushings, they could be peeling. If the shock cylinder itself is wet in appearance, then it is a hydraulic type and is leaking. It’s time for service or replacement.
Next, we’ll look for potential problems with the vehicle’s hoses, brake lines and exhaust system, among other components. And, we’ll finish our oil change as well.


