When you need to rebuild a gearbox…
Question:
The standard transmission in my 1956 Chevrolet is noisy and popping out of second gear. I restored the car a few years ago and the transmission was OK then, so I didn’t do anything to it. I did the engine myself as part of the restoration, but I have never torn down a gearbox. I want to rebuild it myself, but am not sure what to look for or how to go about it. Any ideas?

Answer:
Old standard transmissions gone bad indicate their problems by popping out of gear, whining in one or more gears, or clashing and skipping of gear teeth when shifting.
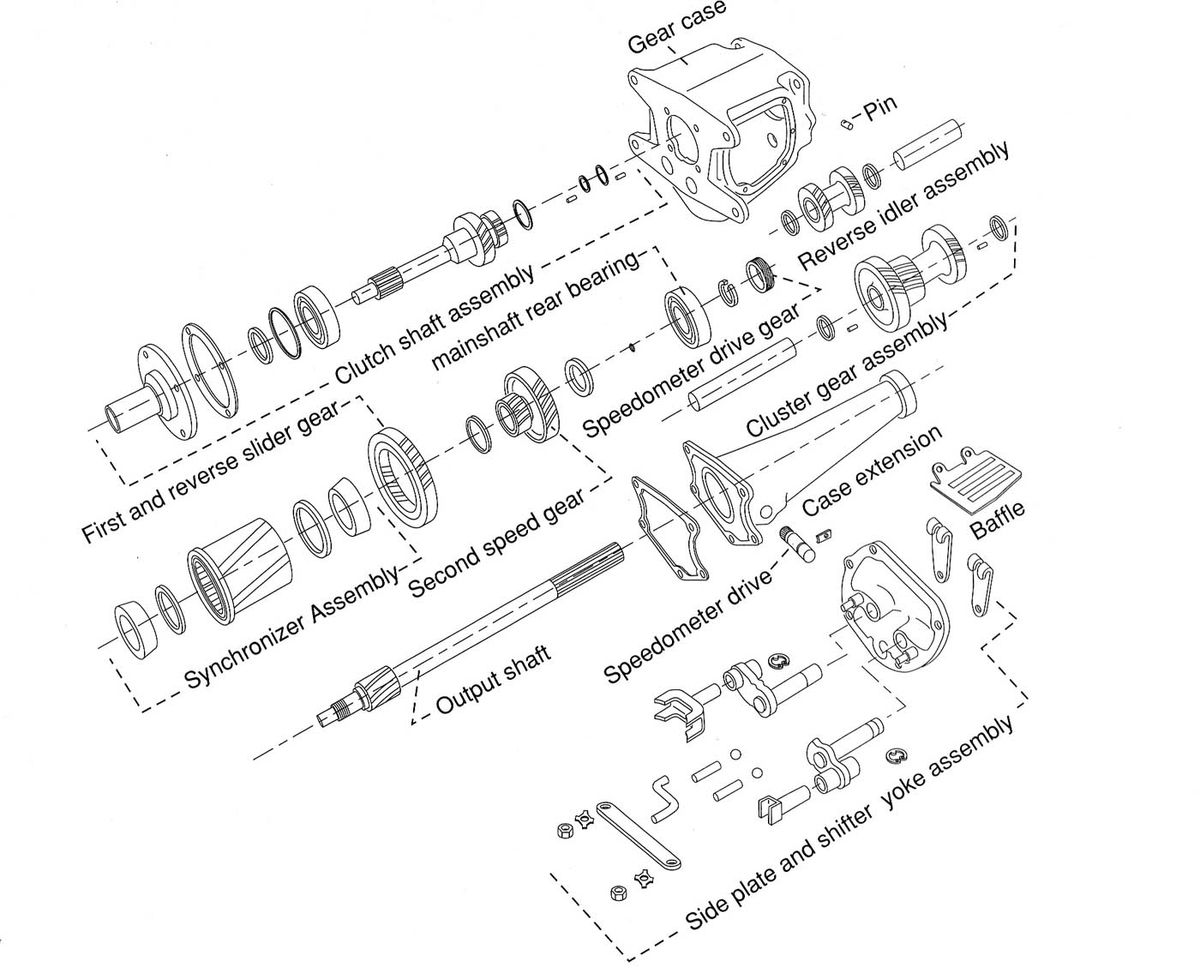
Luckily, your old Saginaw gearbox is simple to rebuild. Parts are generally available for it, and no special tools are required to refurbish it. I cover this process in depth in my book “The Classic Chevrolet Truck Handbook,” but here is a condensed version of the process:
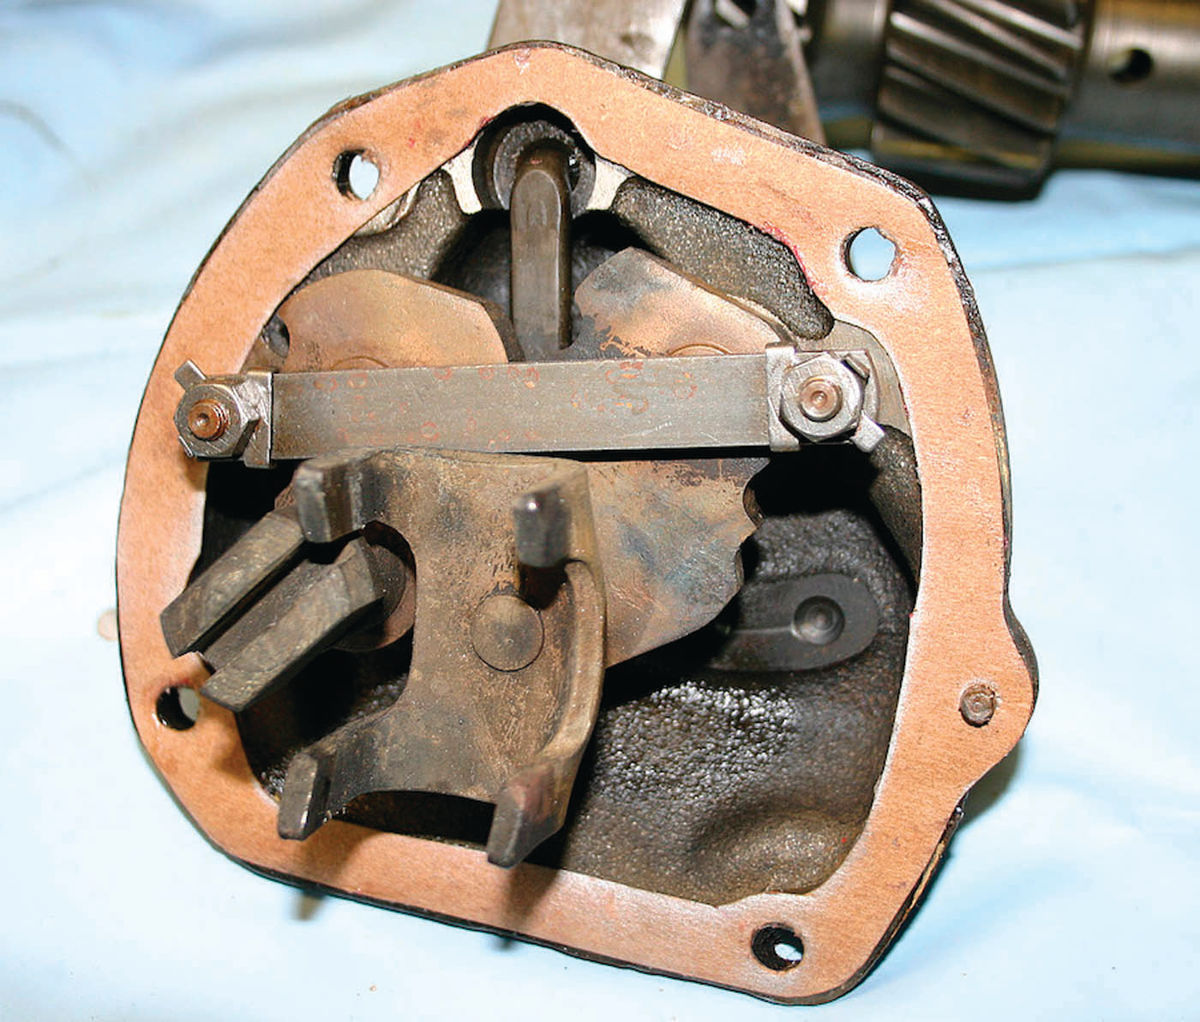
Extricate the transmission from the car and place it on your workbench— preferably in a large tin baking tray. This will keep small parts such as needle bearings from rolling away. Now remove the side plate cap screws and pop the side plate loose. Wash the side plate and shifter assembly with solvent, then inspect the shifting forks and the balls and springs in the shifting detents. If the springs are broken or the notches and indentations on the levers or side plate are worn, replace the defective parts.
Remove the bolts holding the rear extension case to the gearbox. Now, holding the first and reverse slider gear and synchronizer assembly, pull the output shaft and rear extension housing away from the rear of the transmission. Lift the slider gear and synchronizer assembly out the side of the case. Inspect the slider gear for chipped or missing teeth, wear and pitting. Slightly chipped gear teeth can be dressed with a knife sharpening stone, but large chips will mean noisy operation.

Using a pair of snap ring pliers, release the synchronizer cones from the second and third gear dog clutch. Inspect the synchronizer rings for wear. The tiny annular grooves in them should be sharp and well-defined. These grooves strip the oil from the cones as they come into contact with each other so they can synchronize the gears. If these grooves are badly worn, second and high gears will not mesh effectively. Clashing and damaged gear teeth will be the result. Replace any worn synchronizer parts.
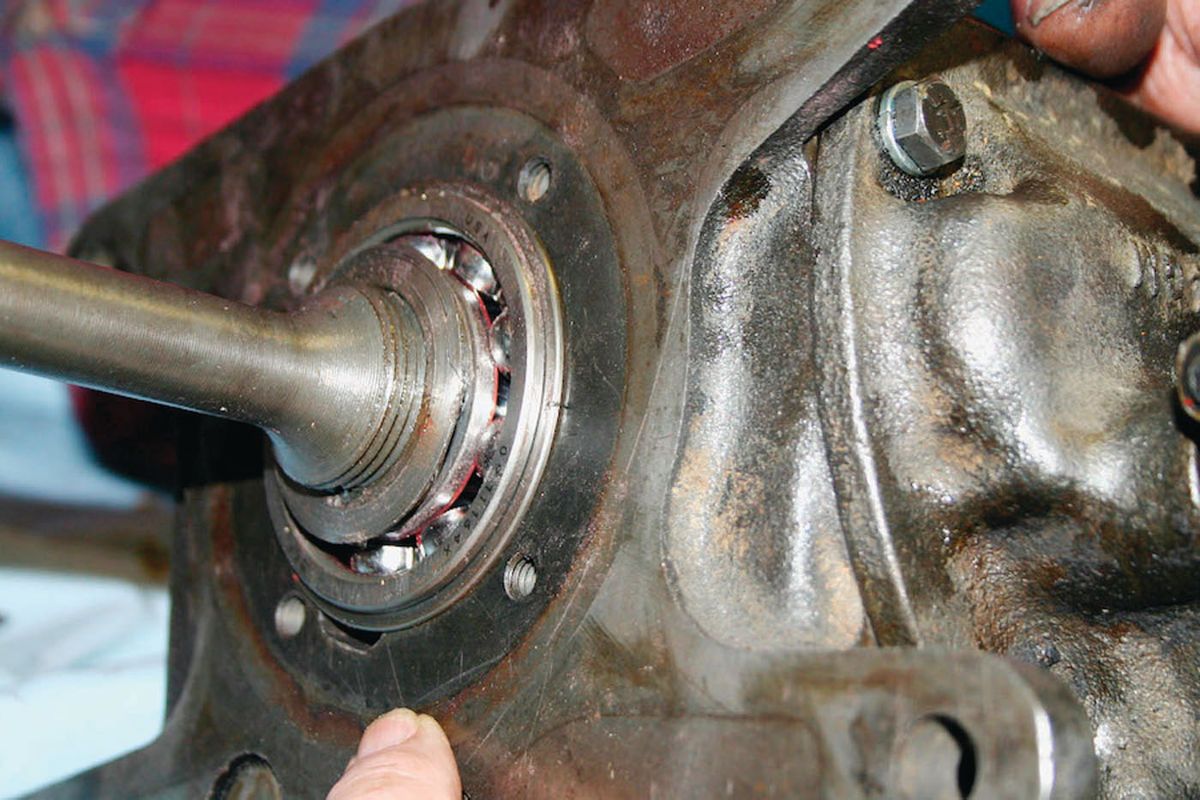
Unbolt the clutch shaft retainer from the front of the transmission and pull the clutch shaft out, being careful not to scatter and lose the little needle bearings from the main shaft pilot bearing. Store the needle bearings in small pill containers or jars so as not to lose them. Inspect the pilot shaft bearing surfaces for wear and replace any parts that are damaged.
Wash out the ball bearing on the clutch shaft. Shoot a little light oil on the bearing then turn it slowly to check for wear. If the bearing is sloppy or catches while you are rotating it or the balls are pitted or discolored, replace the bearing. You will need a hydraulic press to replace the bearing. Many auto parts suppliers can press in the bearing for you. Have your parts dealer match the bearing and order a new one. These instructions apply to the large main shaft rear bearing as well.
Next, using a hammer and brass drift, tap out the cluster gear countershaft, working from the front to the rear of the gear case. Never try to drive the countershaft out from the rear because the holes in the gear case are different sizes, so you could ruin the gear case if you do. As you drive the countershaft back, it will begin to move more easily. When it does, slide in a wooden dowel to hold the needle bearings at both ends of the cluster gear in position.
Lift it out of the case and inspect the cluster gear assembly for damage. Carefully push the dowel in at either end and store the little needle bearings, then look for worn bearing surfaces and pitted or damaged needle bearings.
Inspect the countershaft for wear or galling. If—in a pinch, you cannot find a good replacement cluster gear assembly or countershaft, and the wear on the bearing surfaces is not extensive—you can clean up the bearing surfaces with fine emery cloth, and install new bearings. But this should only be attempted if you can’t find a replacement gear assembly. On a restored vehicle that will only see light duty, these cleaned up bearing surfaces will last a long time, though they may eventually wear and allow the gears to drop out of correct mesh and become noisy. Inspect the thrust washers that held the countershaft in place and obtain new ones if the originals are worn thin.
Next, wash out the gear case with solvent and inspect the reverse idler gear. If its teeth are damaged or it fails to roll smoothly, tap the pin out holding its shaft in place and remove the cluster gear. To do that, tap the retaining pin for the reverse idler gear shaft completely into the shaft itself, and then tap out the reverse idler shaft. The shaft pin can be a bit hard to find if the gear case is painted or there is dirt in the hole where the pin goes in, but keep looking. It’s there.
Inspect the reverse idler gear bearings, shaft, and thrust washers and replace any parts that are worn or damaged. Finally inspect the second gear assembly and the speedometer gear mounted on the output shaft for wear and pitting. If you need to disassemble this unit, you will need to do so with snap ring pliers. Replace any parts that are worn.
Before you begin reassembly, make sure your bench, your components and your hands are clean. It just takes a tiny bit of grit to damage bearings. Coat the reverse idler gears and shaft with transmission oil and slip them into place along with the correct thrust washers. Slip in the idler gear shaft, making sure the slanted hole for the keeper pin is facing the right direction. If possible, use a new pin to hold the reverse idler gear shaft in place, and coat it with Permatex before driving it home. Tap it in until it is slightly below flush with the gear case.
Paste the needle bearings in place where required using wheel bearing grease or Vaseline, and then paste the thrust washers on the ends of the cluster gear assembly.
Insert the cluster gear, and then carefully tap the countershaft into place. Give the gears a coat of transmission oil. Finish this segment by checking the runout of the cluster gear assembly using a feeler gauge.
Hold the synchronizer assembly with the first and reverse slider gear installed and slip the extension case and output shaft into place, making sure to correctly orient the notches in the synchronizer dog clutch on the output shaft. Coat everything with gear oil. Now paste the clutch shaft needle bearings into place using grease, then—with a new gasket pasted into place using Permatex or silicone sealer—slide the clutch shaft home in the gear case. Install the cap screws and new lock washers, then tighten them evenly to 10-20 foot-pounds of torque. Finally, check that everything moves freely.
Make sure the gears and shifters are in the neutral position, then coat the side plate gasket with a thin film of sealer and paste it in place on the side plate. Carefully set the side plate on the gear case, then using new lock washers, install and tighten its cap screws evenly to 10-12 foot-pounds.
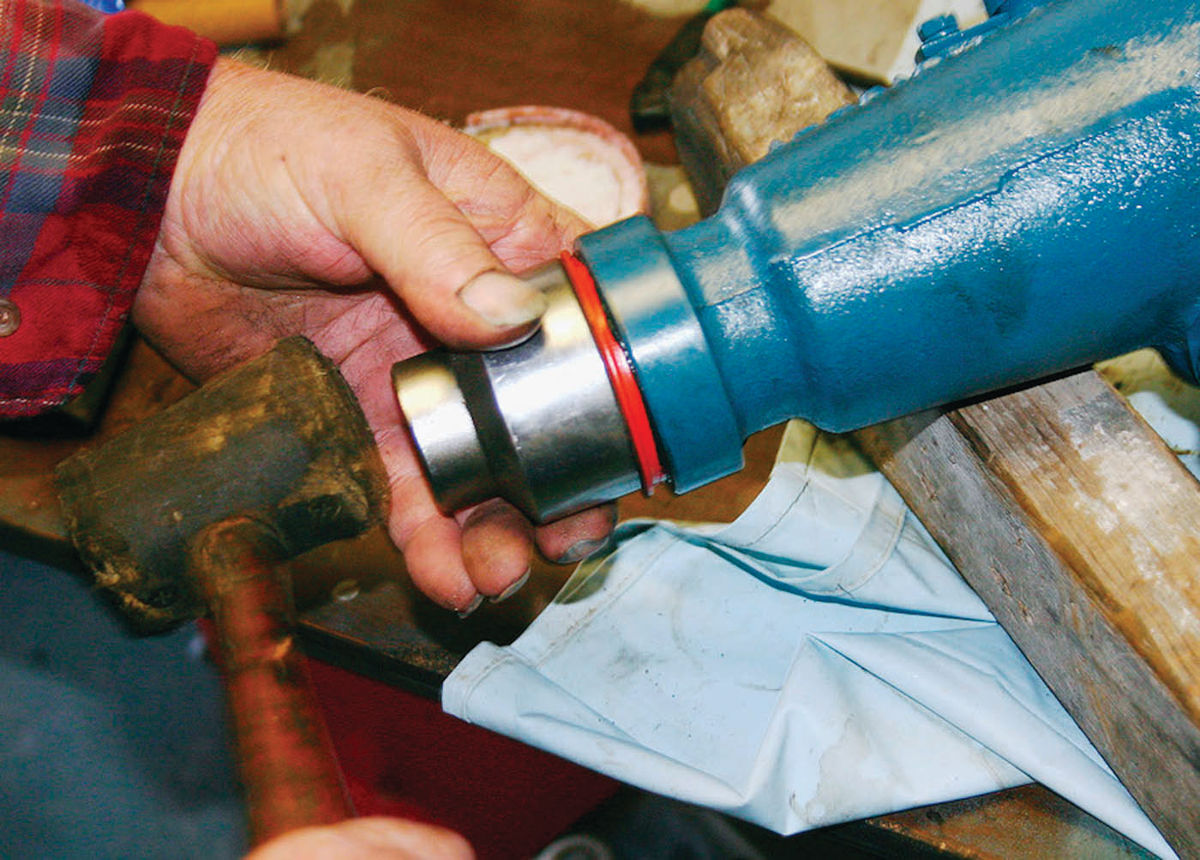
Coat its edges with sealer, then use a large socket or seal installer to drive home a new seal at the end of the output case extension. Reinstall the transmission, fill it to the side inspection hole with gear lube, and adjust its shift linkage.
Your gearbox should now shift smoothly and silently.


