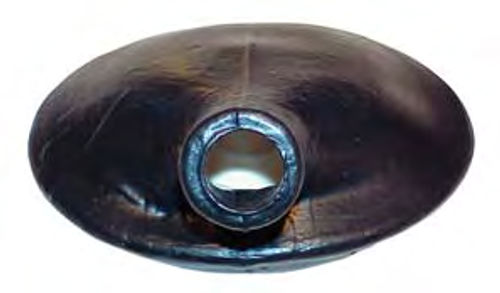
Reconditioning Rubber Parts

SINCE THE RUBBER parts on our vintage cars deteriorate over the years, replacement of these parts becomes necessary. Unfortunately, many of these parts are not re-manufactured and even good used rubber parts can be very difficult to find. (After all, the used rubber parts have been aging as well.) So, over the years, I have come up with a process that helps some old rubber parts look like new.
The major component of the process is black tool grip dip that is commonly sold in hardware stores. The dip straight out of the can is a bit thick, so pour the contents of the can into a tight-sealing glass jar. This will keep your stock of dip grip from drying out. You’ll be brushing thinned tool grip dip onto your parts, but more on that later.
Before we get into the process itself, I must first warn you that it will not work very well on parts that undergo a lot of flexing. Tool grip dip doesn’t have very good adhesive qualities; therefore the tool grip dip can separate from the part if the part flexes a lot in service. In addition, coating the part will make it thicker and less flexible, thus defeating its purpose. It all depends on how much you brush onto your part.
Furthermore, don’t use this process on any rubber parts that are directly exposed to gasoline, oil or hydraulic fluid as they’ll dissolve or soften the tool grip dip. If your “re-conditioned” part also rubs against other surfaces, the tool grip dip may tear or simply wear off.
Starting the Process
First off, the part must be immaculately clean. Scrub the part with a good degreaser like Castrol Super Clean or Simple Green. If there is ANY silicone sealant on the part, remove all of it since nothing sticks to silicone but silicone.
If the part is torn, glue the part back together the best you can with super glue. If a few small holes exist, I’ve patched the holes with either electrical tape or, better yet, super glue small sections of a latex glove to the part to make a sort of bandage over the holes.
I’ve used both of these techniques on rubber heater/ventilation flapper parts and it’s worked great.
In addition, I once had some rubber spacer parts that were dried out and severely cracked. I filled the cracks with plastic wood and then coated the parts. They look and work great even 15 years later! (As you’ll note from the photos of my parking brake boot at the top of this page, quite a bit of repairs were needed on this shredded part before the coating could be applied.)
Apply the Coating
Now that your part is clean and patched, pour some of the grip dip into a smaller jar and stir in a little bit of lacquer thinner. Using a small artist’s brush you’ll brush the grip dip onto your part. The more you thin the grip dip, the less the brush marks will show, but the longer it’ll take for you to build up the needed layers of coating. As a compromise, you can brush the first coats on thick, then brush really thin layers of grip dip over it.
Make sure each layer is dry before you add the next layers. If you can, also brush grip dip on the insides of the rubber part, (like heater ductwork) to help protect it from further ozone damage.
Be Safe
There is one last thing to keep in mind before starting a project of this type: Remember to wear protective gear—for example, gloves are a necessity—and work in a well-ventilated area.
As we all know, restoring our old relics requires the use of lots of nasty chemicals. Inhaling and coming into contact with these substances can make it a challenge to enjoy our restored vehicles on the long ride ahead.


