John’s Tool Chest, Pt. 8
In Our Latest Journey Into John’s WellStocked Collection, We’ll Consider Some Useful Sockets, Screwdrivers, Pliers and a Handy Tray to Carry Them All.
Swivel (Flex) Sockets
In this instance, I’m referring to those designed for use with a hand ratchet, not air-powered tools. These allow you to get into tighter, more-offset areas than you can reach with a universal joint. Even so, sometimes the socket will be too bulky to fit into those tight areas, so for those situations consider stepping down to a ¼” drive to get the job done.
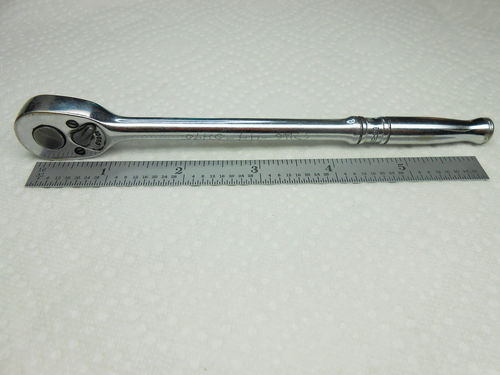
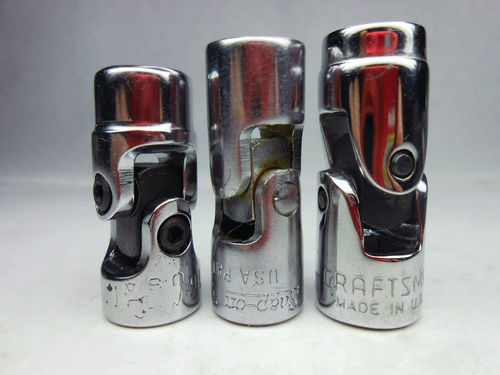
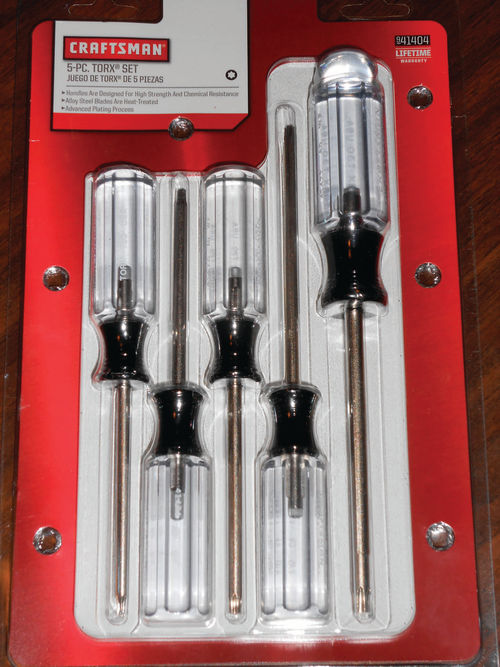
Photo 67 shows a side-by-side comparison of several common fractional sizes. The larger 3 ⁄8” drive sockets are made by Craftsman, while the small ¼” drive are made by Mac tools. These ¼” drive sockets are 5 ⁄8” shorter in overall length. This will put the swivel portion of the socket in a different location, and the smaller diameter will also help sneak into those tight locations. Some good examples are dealing with oil pan, timing cover and valve cover bolts on an engine while it’s still in the vehicle. Maybe there’s some oil seepage between the oil pan and the block and you just want to make certain the bolts are all tight. If anything is going to reach those bolts hiding between the starter and pan on a small block Chevrolet, these ¼” swivels will. They also are ideal for reaching up over the cross member to snug some of the more visible bolts that have no straight-on access.
On my 1986 Caprice I reach for the metric ¼” swivel sockets when it’s time to change the fluid and screen on the 700R4 transmission. There are a couple of pan bolts that are well-hidden by the rear transmission mount/cross member, and there is not enough room for the larger 3 ⁄8”-drive swivel socket. While these are low-torque applications, with the aid of a longer ratchet like that shown in Photo 68, you are able to tackle some of the tighter fasteners. This particular ¼”-drive ratchet is made by Snap-on (TLM 70A) and is about the length of a standard 3/8” drive ratchet. Naturally, you could also use a small “cheater.” A short section of 3 ⁄8” iron water pipe, no more than 4” or 5” long might be a good candidate.
There are limitations, of course. You will never be able to put a lengthy extension between the ratchet and socket, and then try to break loose bell housing bolts. Obviously, there would be too much flex in the extension, and it would twist like a pretzel. However, once any bell housing bolts have been broken loose, the smaller drive and extension would be perfect for reaching into tight confines and threading them out. Using the smaller ¼”-drive swivel socket with a not-toolengthy extension would work great on slightly smaller fasteners. And if you think all swivel sockets are alike, take a look at Photo 69. This is a comparison of three manufacturers’ sockets, all the same size. To the right is Craftsman, center is Snapon and Mac is to the left. While I usually lean toward Snap-on, Mac’s swivel sockets are definitely the smallest, and naturally well-made.
Torx Drive Set
While not an issue when dealing with vehicles from the 1960s…the ’80s and later is a different story. Trim screws for things like the headlight bezels, directional signal lenses, grille, and even the idle adjustment screw can require the proper Torx drive.
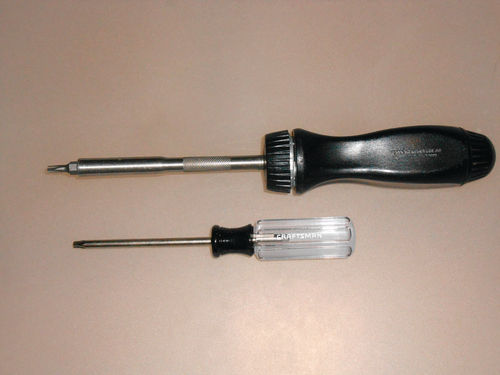
Photo 70 shows a five-piece Torx driver set (#941404) recently purchased at Sears. The regular price was $12, but as is often the case, it was on sale, this time for $9. Pretty inexpensive, and while many of today’s Craftsman tools are made in China, these are still manufactured in the US and carry a lifetime warranty. The set includes T10, T15, T20, T25 and T30 sizes. Sure, you can get by using a magnetic tip screwdriver with the various Torx drive tips, but on occasion that setup can be too bulky. Take a look at Photo 71. This is a comparison of a magnetic tip driver with a Torx T20 bit, and the Craftsman T20 driver that came in the set. The length and shaft diameter are both greater on the magnetic driver, and that can sometimes make a difference. So even if you are like me, and only find the occasional need for these tools, this is an option that won’t break the bank.
Extended Reach Needle Nose Pliers
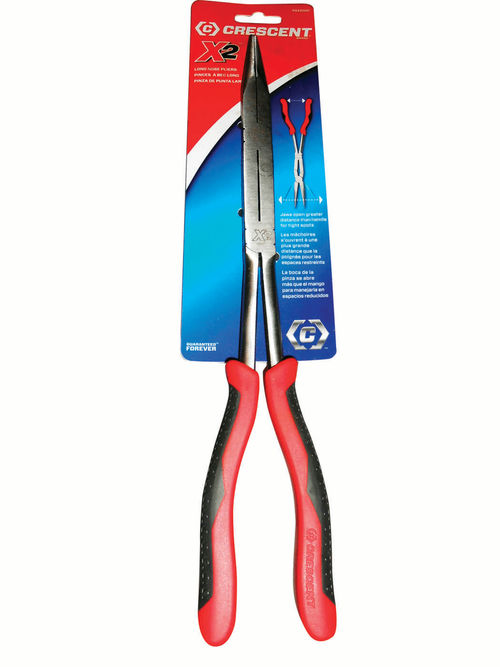
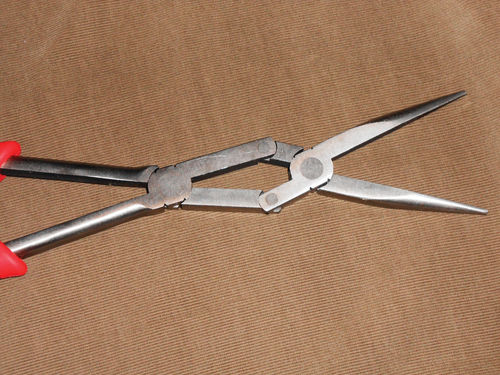
Photo 72 shows the Crescent X2 pliers (#PSX200C). I have never liked the extended length needle nose pliers with the single-joint design. The idea is good, but getting them to fit into a space where they could be useful didn’t usually work. These pliers have a double joint as you can see in Photo 73 which might just be the answer. The pliers’ packaging states “jaws open greater than handles for tight spots.” Wow, that sounds great, but unfortunately it isn’t true, and not even close for that matter. Still, they could prove to be a worthwhile addition to the tool collection. The pliers seem to be well-made, and are 13.5” in length from the tips to the end of the handles. The package says “guaranteed forever” as well as “made in China.” They were purchased at Home Depot for $15.
Plastic Tote Tray
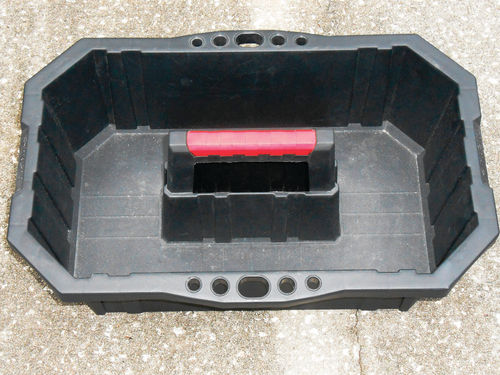
Photo 74 shows a simple plastic tote tray sold under the Husky name. It measures 17 ½”L x 10 ¼”W x 6”D and was purchased from Home Depot for $6. This was some time ago, and as I recall they had a tall stack of them out for sale, so they might have been on clearance. Even so, this type of tray is made in different sizes, sold under many different names, and shouldn’t be too difficult to locate.
If you keep your tools in one or two small toolboxes, then this may not really be an item you need. If, however, you have your tools on a “tool board,” or in a roll-around multi-drawer tool chest, it’s worth considering. All too often I find myself unable to work close to my main stash of tools. This often is due to multitasking, such as simultaneously working on projects like the lawn tractor, performing a minor task on another vehicle and helping a neighbor with issues on his boat trailer. Or my primary project at the time might be immobile and blocking the toolbox or the task is in a location the rolling toolbox could never reach anyway. The tote tray allows you to grab the needed tools, keep them all contained, and carry them to the job. I wish I could say it will automatically guarantee that you’ll bring all the tools you need the first time around, but that would be a stretch.
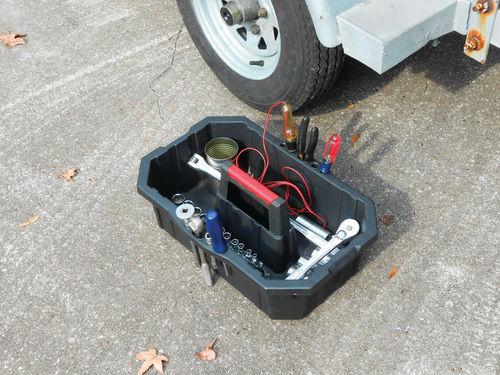
If the project carries over to the next day, you will have all the tools together and ready to resume work. It’s also likely to help you avoid losing tools. Photo 75 shows that you can hang any number of items such as screwdrivers, a test light, needle nose pliers, small ratchets and extensions in the several outer storage holes, while the large well will accommodate most other needs. In this case that includes a can to hold take-off bolts and small hardware, and even a long-handle breaker bar.


