Fitting the front end
Question:
I removed the front fenders and hood on my 1955 Chevrolet so I could restore the chassis, paint the firewall, and overhaul and restore the engine. Now I am trying to put the front sheet metal back on, and finding that it is harder than I thought. Do you have any tips or tricks that will help me do the job right? Help!
Answer:
Whether you have removed your classic’s front clip (hood and fenders) to work on its engine or to make repairs, or even do a frame-off restoration, here’s how to put it back together without drama.
Large remnants of clean carpet are great to lay parts on before assembly. Small, six-inch square pieces of carpeting are also good to help hold gaps between items without making scratches. You can pick up scraps and remnants at any carpet store.
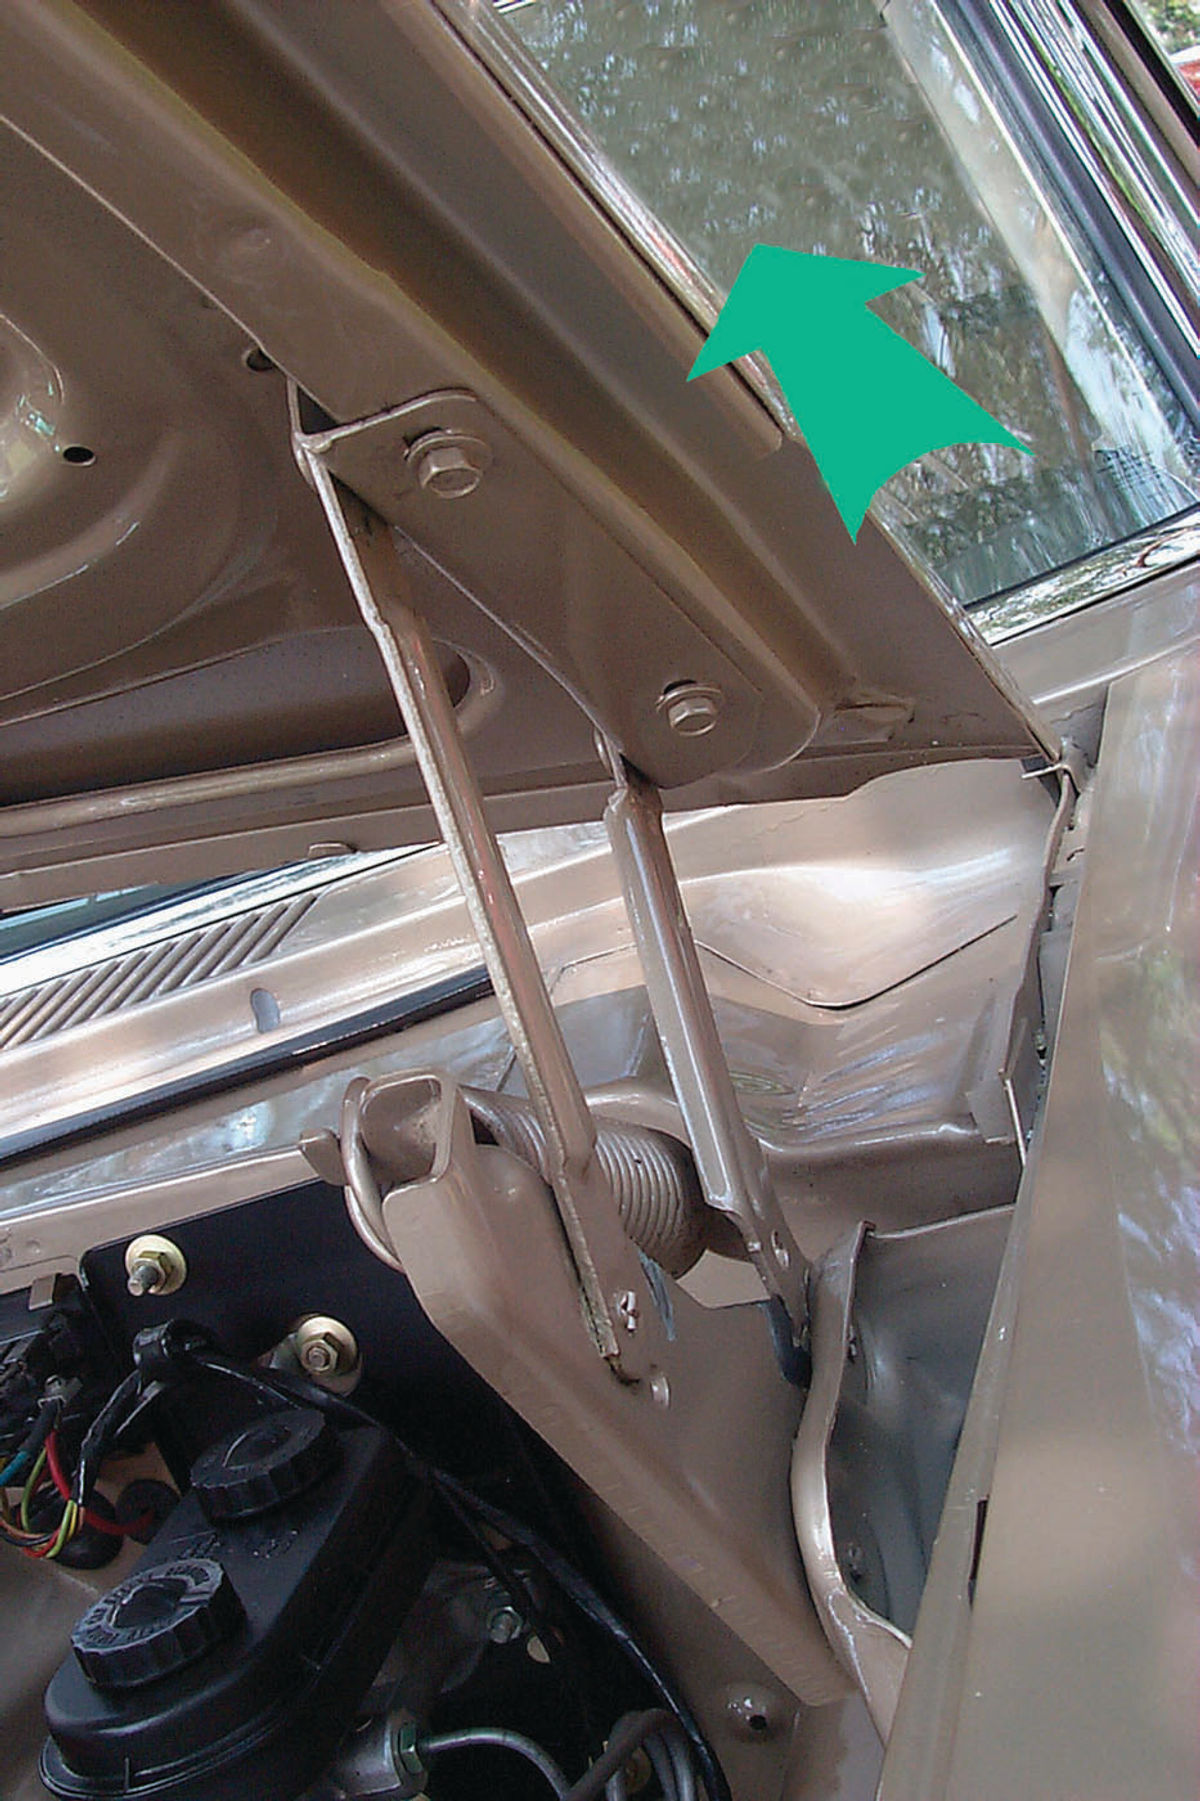
To start with, take your time and think things out. Make little moves at any one time until you get panels to fit where you want them. Be sure to grease hood hinges before installing them because if you don’t, you could end up bending your hood while trying to close it. Your ’55 Chevy should be fine, but since 1970 all cars have been made with weaker crumple zones just in front of their hood hinges to avoid the hood coming loose and going through the windshield in a collision.
Begin front clip assembly by installing the radiator cradle and bulkhead, and then attaching the inner fender panels to it. The radiator cradle and bulkhead need to be vertical, and they must be at right angles to the frame rails from left to right. If one side of the radiator cradle is a bit forward, the other will be a bit too far back and the fender on that side will jam up against the door. Once you have the radiator cradle and inner fenders aligned the best you can, use a plumb bob to check verticality, and a tape measure to get the distance from the doors right, and then just snug up their bolts.


Hang the hood before adding the fenders. That way you can line the hood up on the cowl and get it straight. The fenders are then easy to line up. When assembling car bodies, always work from fixed reference points. For example, you install the doors to line up with the rear quarter panels, because they are welded into place on cars made from the mid- ’50s on.
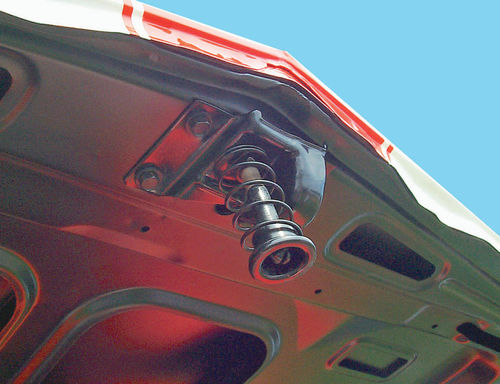
If you scribed around the hinge bolts before removing the hood, and you hung onto any shims you found, you should not have much trouble installing the hood. But if you did not, or if there was collision damage that caused the front end to be misaligned, you will have to start from the beginning. In that case, install the hinges so that their notched cams are rotated up as far as possible. In other words, rotate the hood hinges all the way back so the hood will be as straight up and down as possible.
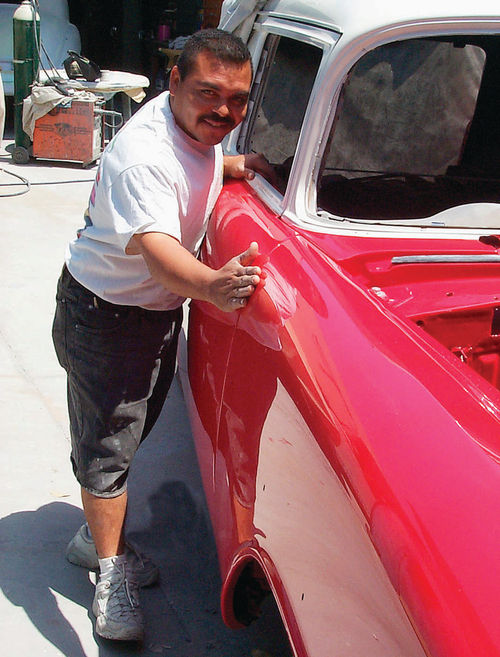
Get a friend—or better yet a couple of friends—to help you attach the hood to its hinges, because it is virtually impossible to do the job by yourself. Fasten the hood all the way forward on the slots for the hinge bolts so as to avoid denting the hood’s corners against the cowl. Close the hood slowly and carefully. If you feel any kind of binding, stop and then figure out what is causing it.
Next adjust the hood gap front to back. If it is too far forward, use pieces of rubber tubing or a couple of scraps of carpeting to get the gap right between the hood and cowl. Once the hood is lined up so it has the correct gap all around, align it as to height. If the hinges sit up so the hood is too high in back, loosen their bolts and tap the hood down a little, but make sure you go down the same distance on each side.
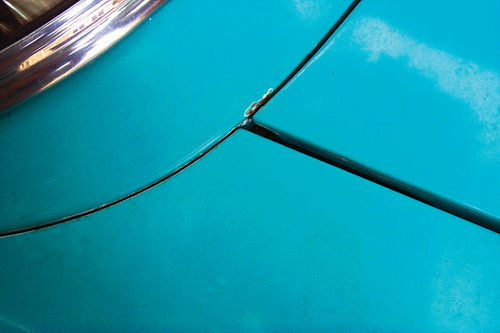
Your hood may be slightly angled off to one side or the other in relation to how the fenders will go. If the rear edge line of the hood aligns with the cowl and has a consistently correct gap of about 1/8th of an inch all the way across, the fenders may have to be shifted slightly to get the gap between them and the hood right.
If you already have the fenders installed, loosen their attaching bolts and push them gently into alignment. And then if, when you bring the hood down and the opening between the fenders is too narrow, you will have to use shims in between the fenders and the radiator cradle to open the gap. It is also quite possible to have the whole front end slightly cockeyed, so again, measure, think things out, and make small adjustments until you have fixed whatever is wrong.
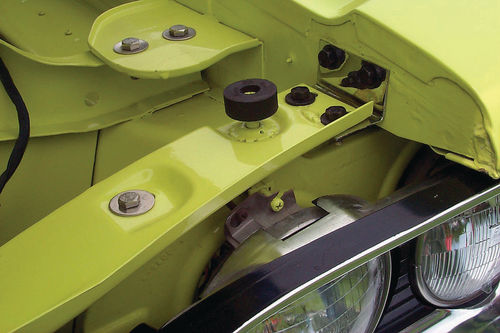
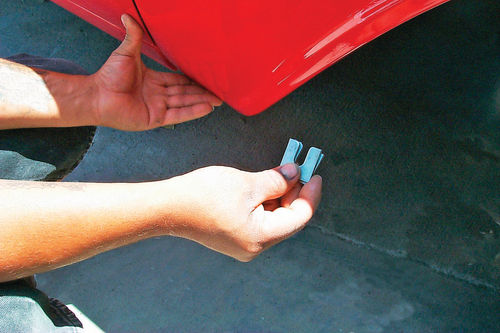
When you have the hood fitted in the rear, check out its level as it comes forward. If it is too high or too low you can adjust it by turning the little rubber buttons attached along the fenders that position the hood. Also, once the car is back on the road if you experience hood flutter or wobble, adjust these buttons to eliminate the problem.
Latches for hoods need to be adjusted too. Most of the time they can be moved in or out, up or down to accommodate one another. Smear a little white grease on one side of the latch and close it carefully until it makes contact with its other half. Initially, leave the latch on the hood a little loose so it can center itself. Note where the grease makes contact on the other half of the latch, and adjust accordingly. Hoods should close easily with a reassuring “clunk” and should not hang up at all when they are being closed.
Keep adjusting until you have everything right, with consistent gaps between panels. And don’t get frustrated and impatient. This is not particularly hard to do. Years ago a couple of people hung that same hood correctly in about one minute on an assembly line. When you are learning to do it, the process takes longer, but there is no magic to it nor does it take any fancy tools.
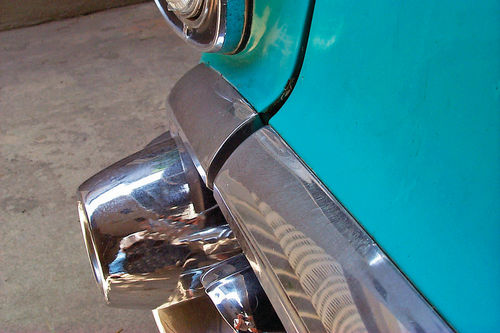
To install the front fenders, apply any caulk or fender insulation required. And then use scraps of carpeting at the door’s edge to maintain the correct gap and avoid nicks. With the fender sitting in place, make sure its gap with the door is consistent and correct before installing its bolts. Check to see that the fender isn’t pointing up or down at the front, or pushed in toward the center of the car, or pulled out away from the centerline of the car. Make necessary adjustments in small moves.
Often, to get a fender to line up you may need to loosen not only its bolts, but those of the inner fender and radiator cradle as well. Use an awl to line up the bolts at the kick panel when installing them. When everything is lined up properly, tighten all of the front end bolts evenly, checking your progress to make sure you haven’t pulled or pushed anything out of alignment in the process.


